How To Make Sauerkraut
This post may contain affiliate links. See my disclosure policy.
A comprehensive, step-by-step pictured tutorial on How to Make Sauerkraut that is incredibly healthy and delicious! Making your own fermented homemade sauerkraut is super easy, requires minimal prep work, and the rest is just a waiting game. This Sauerkraut recipe covers everything you need to know to ensure your success!
For another probiotic-packed food, be sure to check out my tutorial for How to Make Yogurt!

Sauerkraut is in my blood. Being from Germany and raised by a health-conscious mom, I ate this stuff on a regular basis. In Germany sauerkraut is eaten fresh or cooked in a wide variety of dishes; everything from casseroles and soups to salads or alongside meats and sausages. Raw fermented sauerkraut was always readily available in our local health food stores. My mom and I regularly went to our local Reformhaus and in the refrigerated section was a large vat of fresh sauerkraut where we could scoop out as little or as much as we wanted into the bags provided. We’d often nibble on some of it as we made our way through the outdoor shopping district and then take the rest home with us. This ancient skill has been making a comeback in recent years both overseas and in the U.S., with a growing number of people learning how to ferment their own foods.
I’ve been fermenting vegetables, grains, legumes, and dairy products for over a decade and it is a deeply satisfying venture. If you’ve been curious about how to make sauerkraut it’s time to make that leap. For anyone interested in trying their hand at fermentation, sauerkraut is the perfect place to start!
Why You Should Make Your Own Sauerkraut
The benefits of probiotics are well-established and the fact that you’re here reading this means you’re already aware of that. And you’re probably also aware that there is no better or easier way to access a wide spectrum of probiotics than making your own sauerkraut. With probiotic supplements you’re limited to a couple or few select strains. Research has shown homemade fermented sauerkraut to contain as many as 28 separate and distinct strains. No probiotic pill can replicate that. Not to mention that there is no way to verify how much of the bacteria is even still alive in probiotic supplements.
With homemade fermented sauerkraut you’re benefitting not only from a large variety of probiotic strains, you’re also getting a large dose of live, healthy, and robust ones.
Equipment For Making Sauerkraut
You don’t need any specialized equipment to make sauerkraut.
- A large glass or ceramic jar (I regularly use half gallon Mason jars)
- Some kind of heavy, flat-bottomed tamper for crushing the cabbage
- Something flat to weigh down the cabbage that’s relatively close in size to the diameter of the jar you’re using
- Fresh cabbage
- Salt (sea salt or kosher salt)
That’s it. You don’t need any specialized tools, gadgets, or equipment. People have been successfully making sauerkraut for many centuries using the most basic supplies and chances are you already have what you need on hand and can easily improvise if you need to.
Specialized Equipment (Optional)
Alternatively you can invest in some dedicated equipment, some of which (airlock lids) will make the process more maintenance-free:
- Airlock lids – These lids prevent mold spores/yeasts from getting into the jar so that you don’t have to monitor it as closely or remove mold as it forms. They also automatically release air pressure as the veggies ferment so you don’t have to manually open the jar on a daily basis to release the pressure.
- Sauerkraut Crocks – These come in all difference sizes depending how large of batches you’re making. Some crocks come in a kit with a tamper and weight.
- Sauerkraut Tamper/Pounder – You can find these in wood or stainless steel and they allow you to pound the cabbage to release its liquid and then use it as a tamper for stuffing the cabbing in the jars.
Additional Resources
- The Art of Fermentation by Sandor Ellix Katz – The ultimate guide to fermenting anything and everything, including sauerkraut. It’s my favorite book on the subject and the one I most highly recommend.
How Long Does Sauerkraut Keep?
Stored in a dark, cool place it will keep for many months. The cooler the storage area the longer it will keep. I keep mine stored in the fridge. Even in a cold environment like the fridge, sauerkraut will continue to ferment though at a much slower pace.
Can You Freeze Sauerkraut?
Yes, but just know that it will kill the probiotics. Cooking the sauerkraut will also kill the probiotics. So if your objective is to reap the benefits of the probiotics, eat it raw and unfrozen. If your objective is simply to enjoy it cooked as a delicious food (and delicious it is!), you will still reap the benefits of its vitamins and fiber.
How Long Does it Take to Ferment?
As long as you want it to until it reaches the desired texture and level of tanginess. Days. Weeks. Months. It will become tangier the longer it sits.
The length of the fermentation time will depend primarily on the temperature of the environment. The cooler the environment, the longer it will take to ferment. The warmer the environment the quicker it will ferment, the flavor will be inferior, and the sauerkraut is at greater risk of developing unwanted yeast and going bad. The ideal temperature for sauerkraut is 65-70 F. At that temperature we recommend letting it ferment for at least 2 weeks (preferably longer) but you can cut it shorter depending on your taste preference.
Can I Make Sauerkraut Without Salt?
While you can make sauerkraut without salt and you can find information on alternatives online, we do not recommend it. Salt is a key ingredient in fermenting foods for several reasons: 1) It creates an environment that favors the formation of lactobacillus bacteria (good bacteria) and prevents unwanted bacteria and yeast from forming, 2) It prolongs the shelf-life, 3) It helps preserve the vitamin and mineral content of the food, 4) It improves the flavor, 5) It helps keep the vegetables crisp and crunchy, and 6) It slows down the fermentation process so that the vegetables can develop a fuller, more complex flavor.
Fermented vegetables, including cabbage, do best with a salt content of 2-3%. Translated in measurements that’s 1 1/2 to 2 teaspoons of salt per pound of cabbage (9-12 grams of salt per 450 grams of cabbage).
Does Sauerkraut Go Bad?
While fermented foods are slower to go bad, they most certainly can and will in time. So how can you tell if sauerkraut is bad? See below.
There’s Mold On It: Is it Safe to Eat?
In most cases it is perfectly safe. Mold most often occurs when the cabbage isn’t submerged under the brine and comes in contact with air. When this happens it is perfectly safe to remove and discard the top layer of the sauerkraut. This is true if the mold is a greenish or grayish color. If however the mold is black, orange, or pink or if your sauerkraut has changed to an unpleasant color, slimy texture, or bad smell, then toss it.
How to Make Sauerkraut
There are number of ways you can approach making sauerkraut but the overall method and principles are the same: Chop, salt, and keep the cabbage immersed under liquid until it’s fermented. There are also a number of flavor variations you can experiment with. For example, in Germany it is not uncommon to include whole, crushed juniper berries or caraway seeds.
I’m presenting a basic sauerkraut recipe but feel free to explore and experiment with flavors. Here a summary of the basic steps and below I’ll take you through those steps in detail:
- Chop the cabbage and place it in a large flat-bottomed bowl.
- Salt the cabbage.
- Pound the cabbage to release its juices.
- Transfer the cabbage to a glass or ceramic jar or crock and use a tamper to push the cabbage down into the jar to remove any air pockets until the cabbage is completely submerged under the brine.
- Place the lid on the jar, put the jar in a cool, dark place, and wait. Remove the lid every day to release air pressure, to make sure the sauerkraut is submerged under the brine.
- Taste the sauerkraut every day after the first few days until it reaches the desired texture and level of tanginess.
- Screw the lid on tight and store your finished sauerkraut in the fridge or a cool cellar.
Prepare the Cabbage:
Remove any bruised or damaged exterior leaves from the cabbage, then cut the cabbage in half and remove the core. Slice the cabbage very thinly, approximately 1/8 inch thick. For the best texture we recommend slicing it very thinly by hand, not with a food processor. You can slice it by hand, use a mandolin, or cabbage slicer.
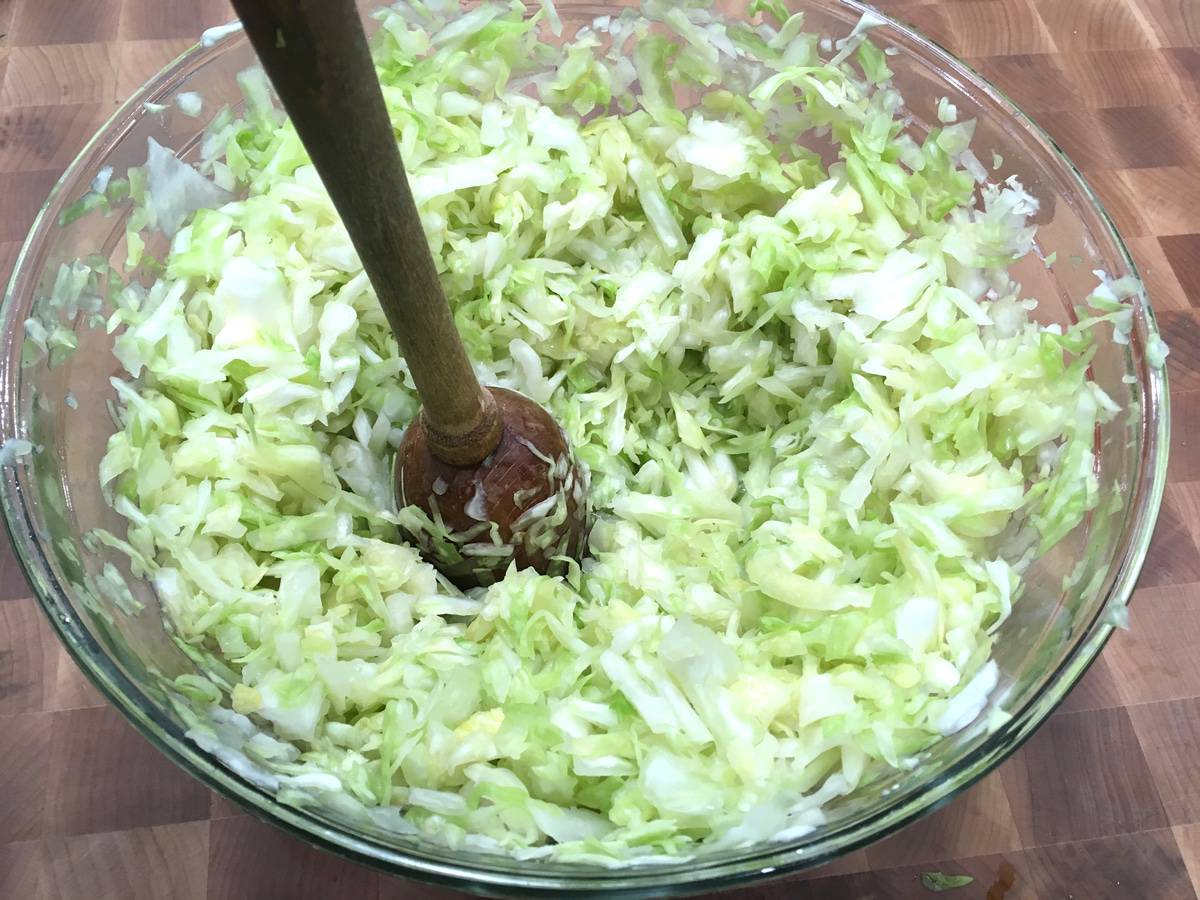
Place the sliced cabbage in a large bowl and toss in the salt. Let it sit for about 20 minutes until the cabbage has begun to wilt and releases some of its juices. Use a tamper/pounder to crush the cabbage until it is wilted and has released a lot of liquid. This will take several minutes.
Pack the Cabbage into a Jar or Crock:
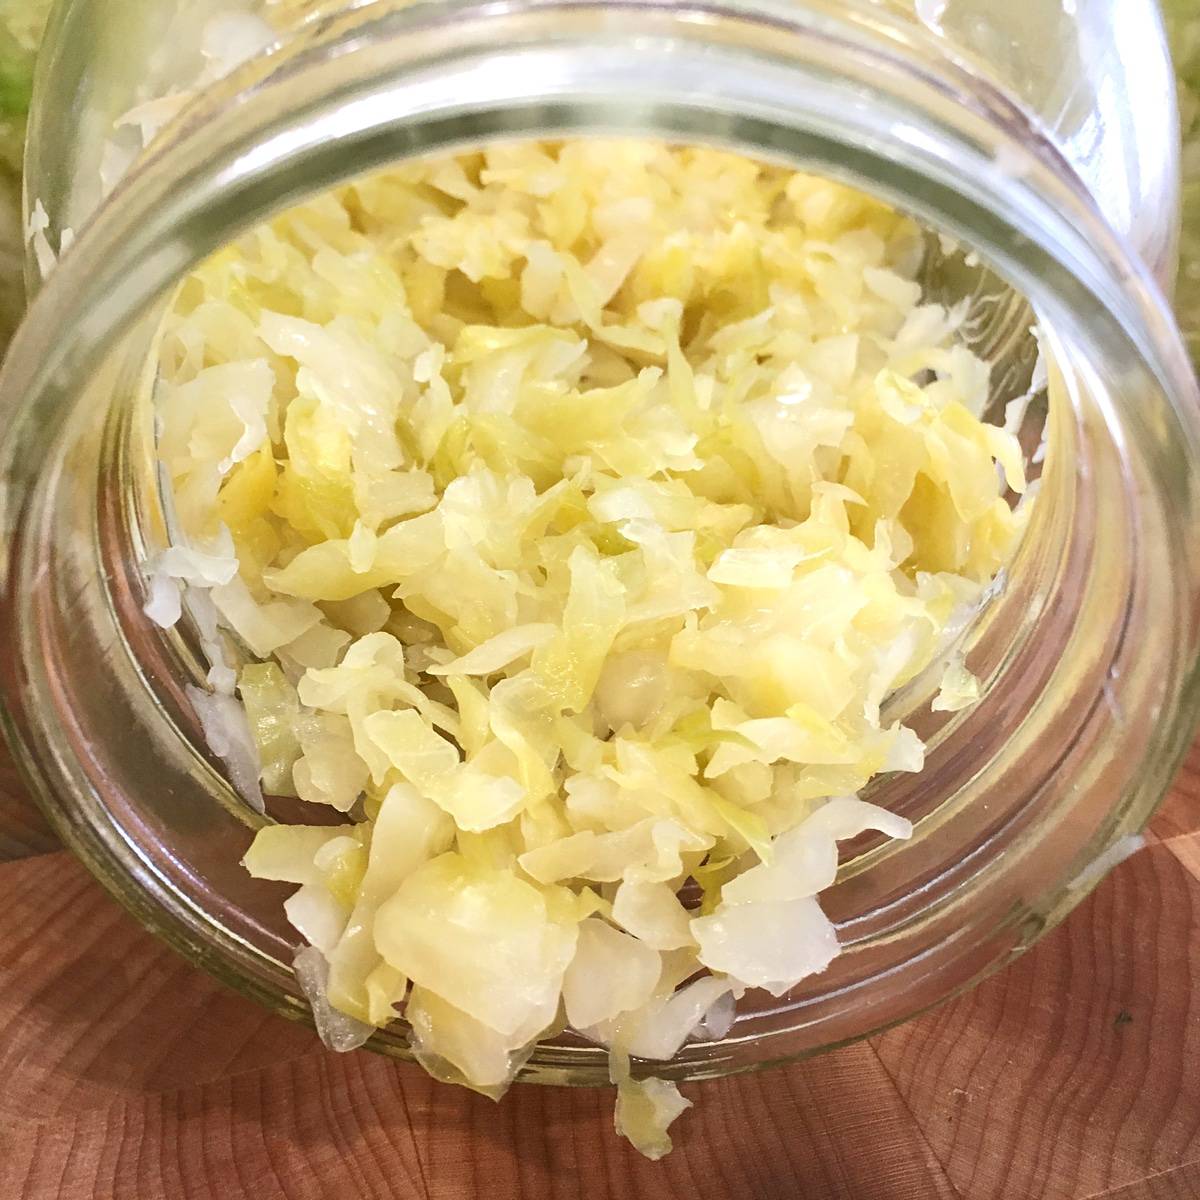
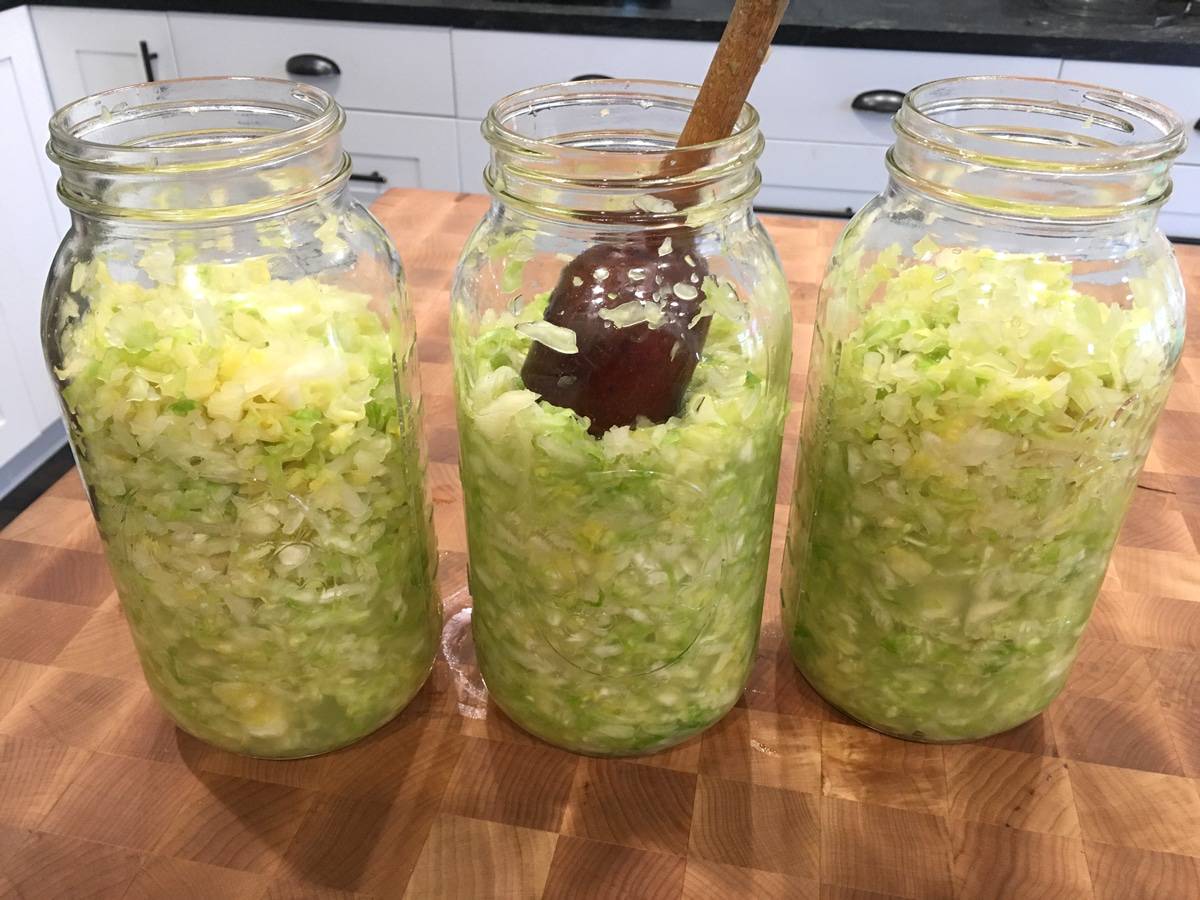
Transfer the cabbage and all the juices to a glass or ceramic jar or crock a bit at a time and mash it down with a tamper. Fill the jar to about 2/3 full (the cabbage will bubble as it ferments and could overflow if the jar is too full).
Continue to mash the cabbage with the tamper, releasing more juice, until the cabbage is completely submerged under the brine.
If you’ve mashed all you can mash and you still don’t have enough brine to cover the cabbage you’ll need to make some supplemental liquid that is consistent with the salinity of the cabbage brine: Dissolve 1 teaspoon of salt in 1 cup of water (a 2% salt water solution) and add that to the jar until the cabbage is completely submerged under the liquid.
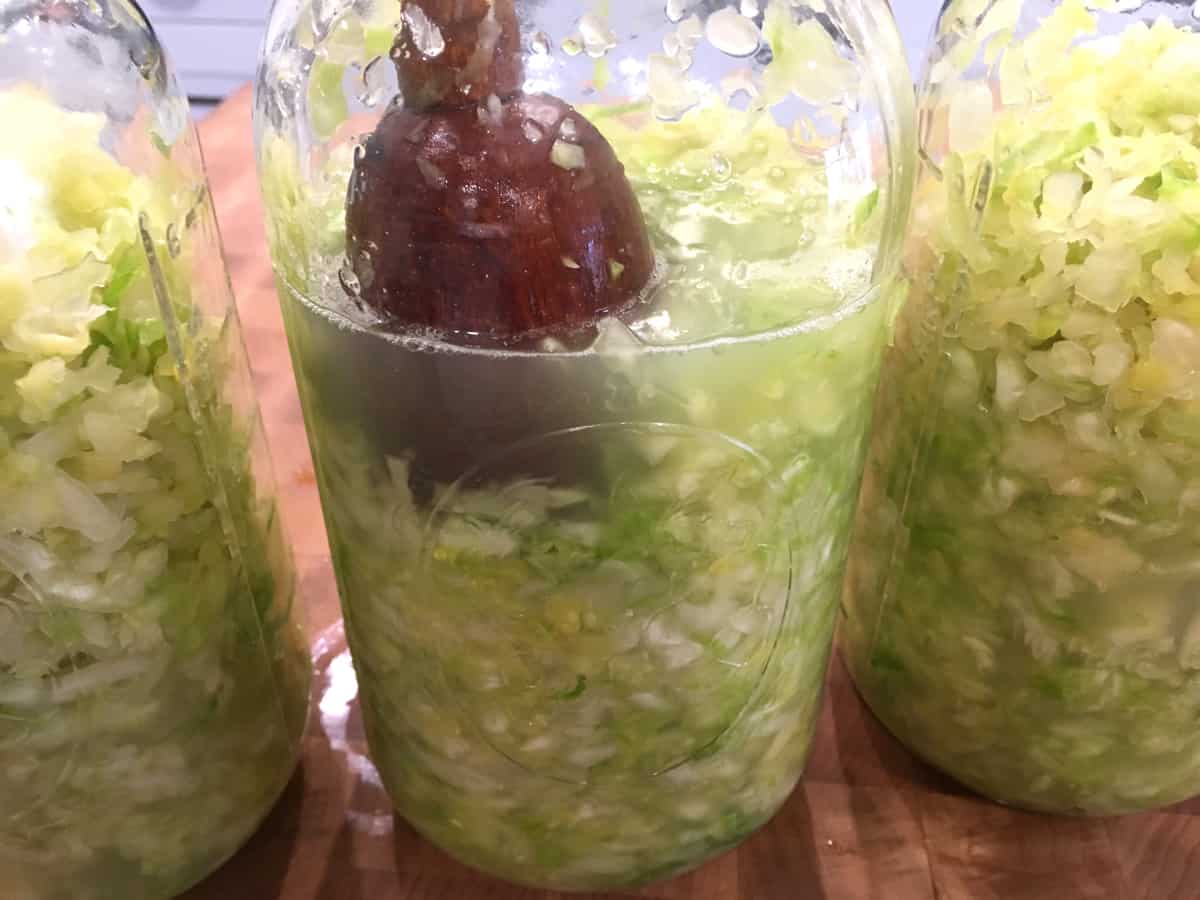
It’s also important to mash the cabbage to remove any air pockets in order to prevent mold growth.
The prep work is done.
It is imperative that the cabbage remain submerged under the brine during fermentation, otherwise mold will form (See section above “My Sauerkraut Has Mold on it: Is it Safe to Eat?”). To do this choose a heavy object whose diameter is roughly the same size to the inside of the crock you’re using. The object should be glass, ceramic, or non-reactive metal.
Note: I have made sauerkraut multiples times in large mason jars (usually 1/2 gallon size) without needing to use weights. Because of the small diameter of the jar, after a day or two of fermenting the cabbage usually remains below the liquid level. If the cabbage rises above it I just mash it back down with the tamper. If you choose to use mason jars without using something to weigh down the cabbage, just be sure to keep a close eye on it each day throughout the fermentation process.

Let the Fermentation Begin!
Screw on the lids to fingertip tightness. If using airlock lids, follow the instructions provided with your lids.
Place the jars in a dark place that is between 65-70 degrees F, the ideal temperature for fermenting. (See section above “How Long Does it Take to Ferment Sauerkraut” for information on temperature variations.)
Now it’s time to WAIT.
At a the ideal temperature range of 65-70 F we recommend fermenting the cabbage for at least 2 weeks (we recommend longer) but follow your own taste.
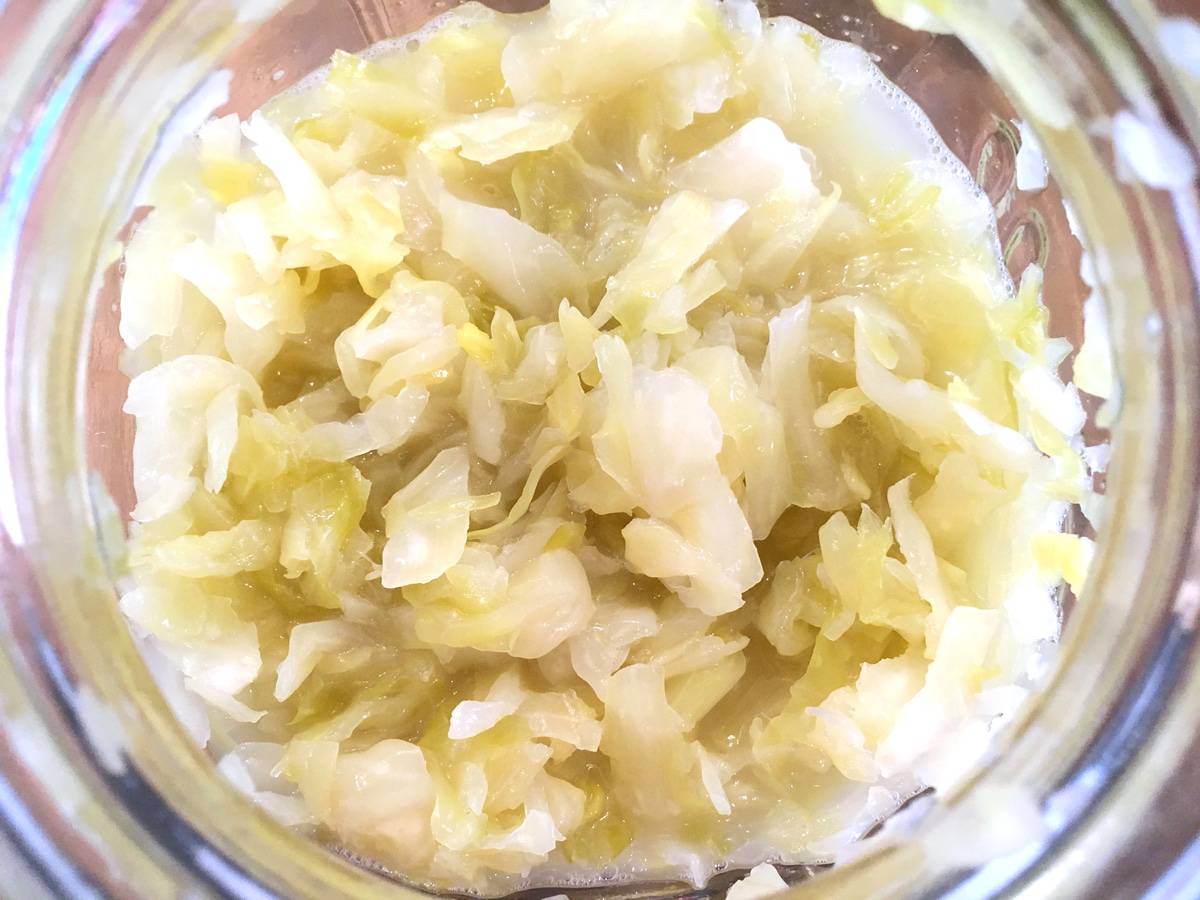
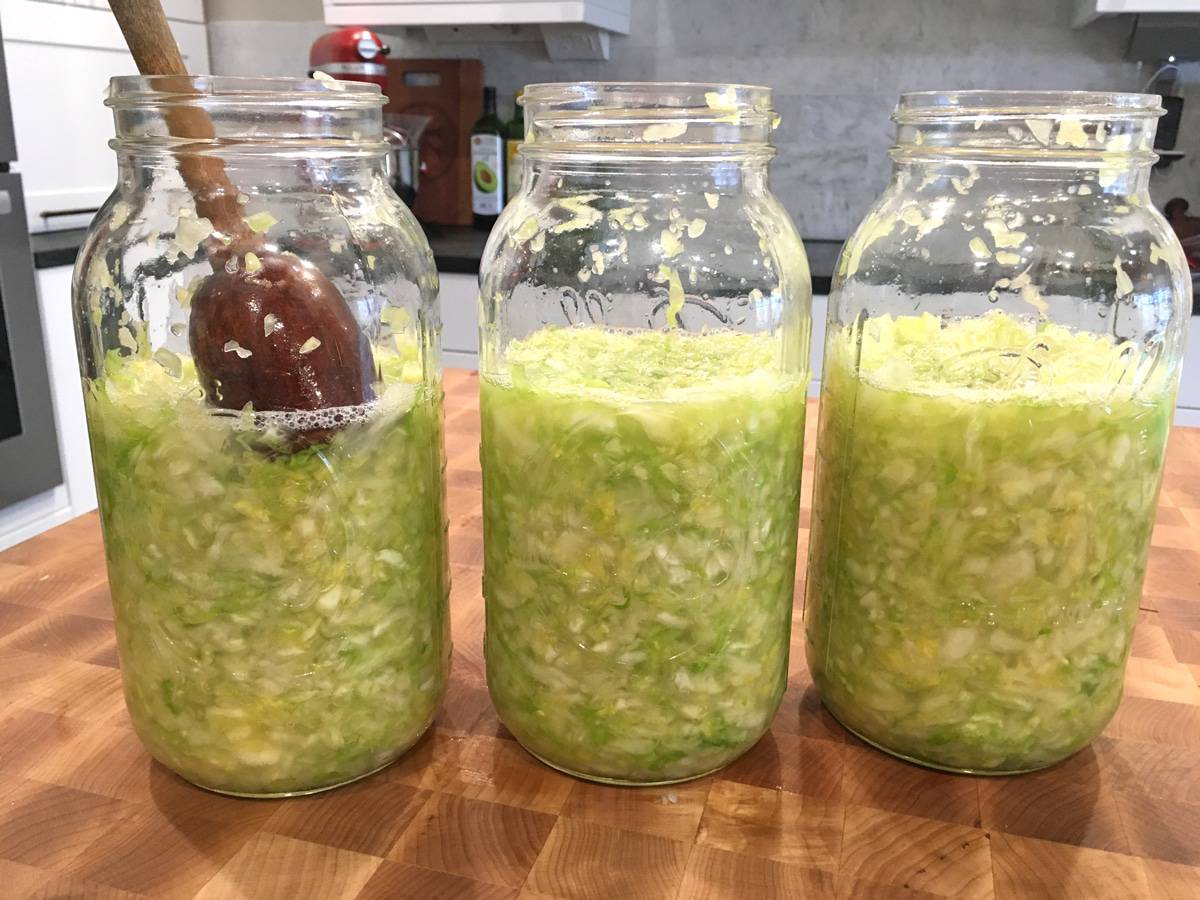
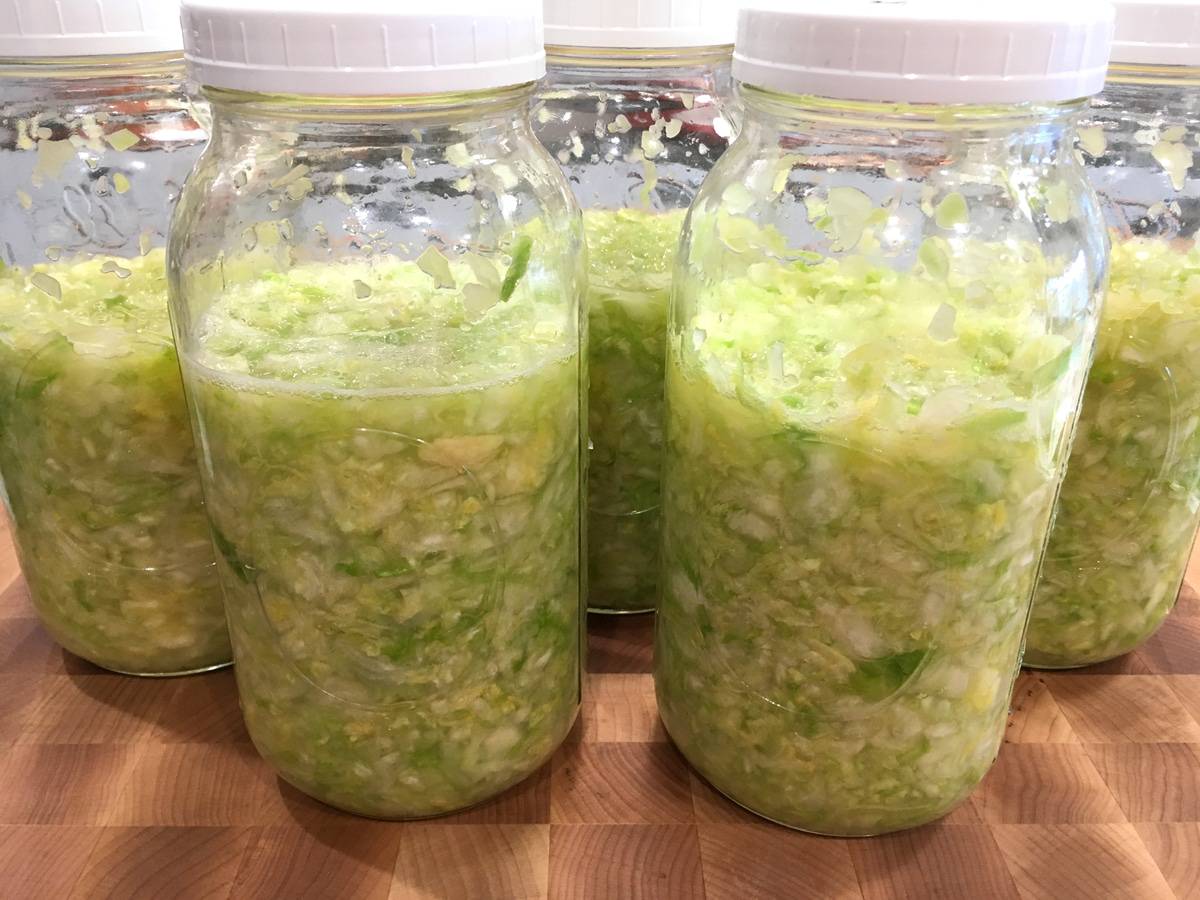
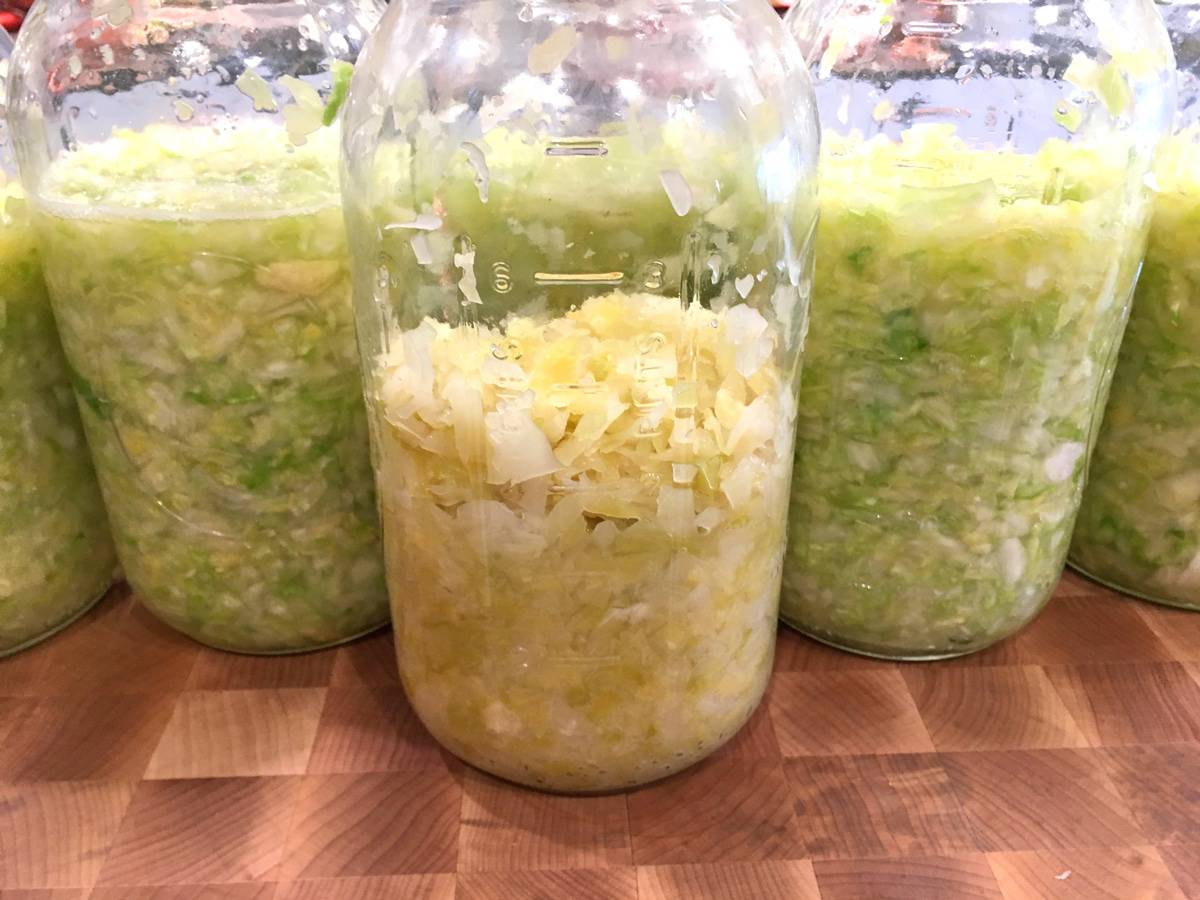
After 4 days of fermenting start tasting the cabbage daily until it reaches the desired texture and level of tanginess. Don’t be alarmed if the brine becomes fizzy, this is completely normal and a positive sign of microbial activity.
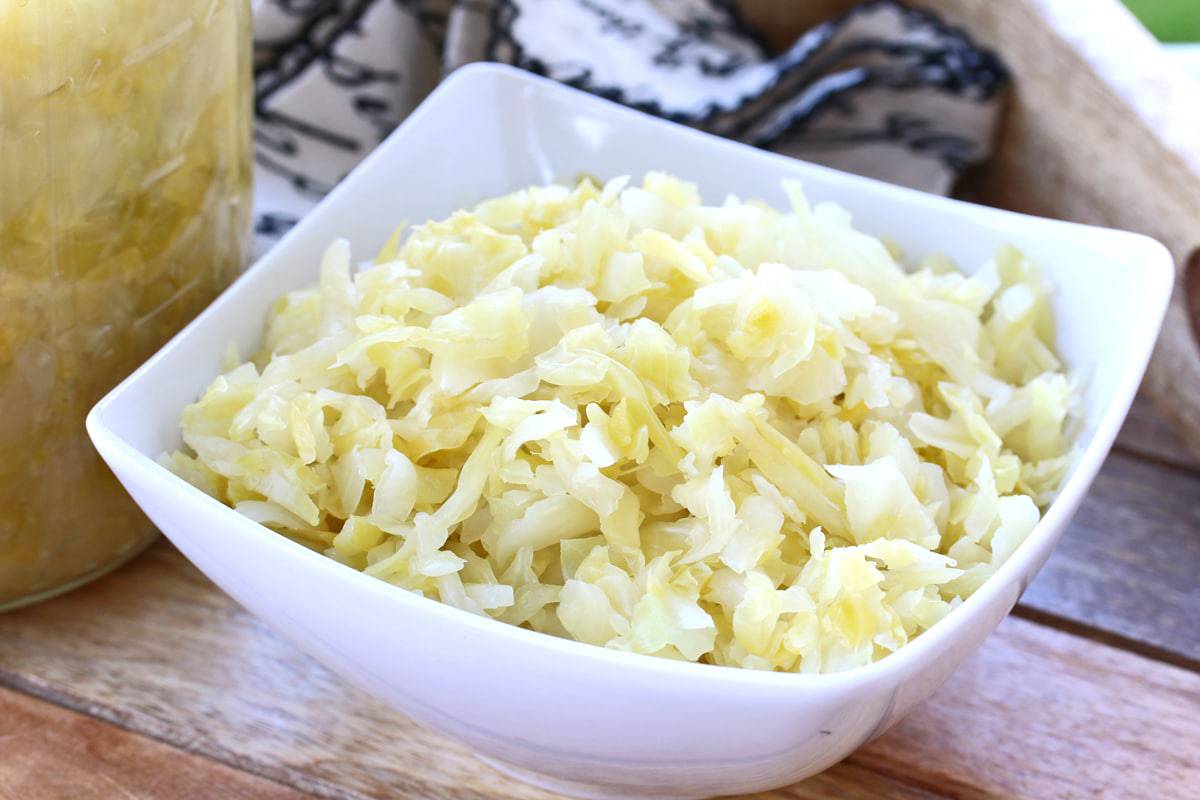
The color of the cabbage will change from green to a pale yellowish beige (in the pic below compare the green-colored cabbage in the jars, still in the early stages of fermenting, with the finished sauerkraut in the middle).
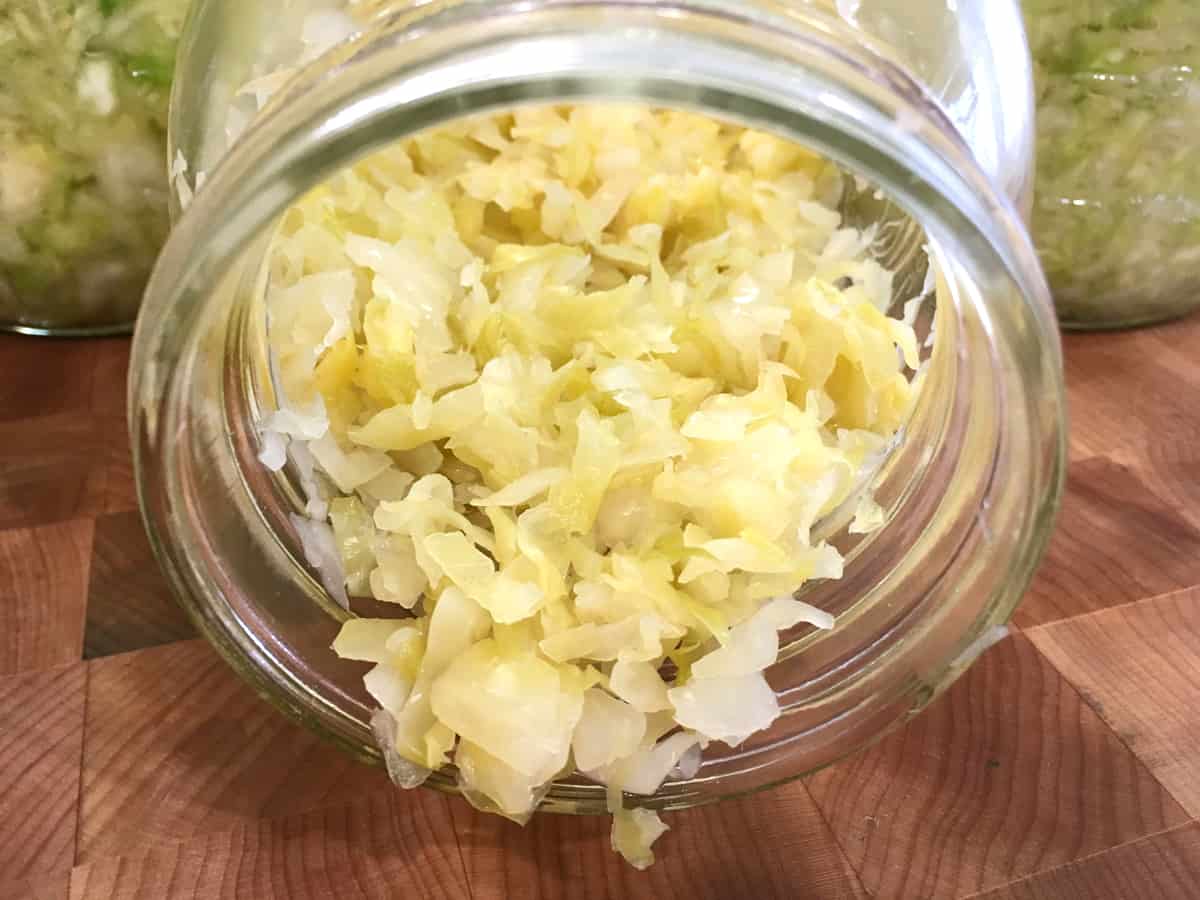
Once your sauerkraut has reached the level of tanginess that you want, it’s time to screw the lid on tight (remove the airlock lid if using and replace it with a regular lid).
Store the sauerkraut in the fridge or a cold cellar. The storage temp should be between 38-50 degrees F. Fermentation won’t stop but it will be greatly slowed down.
Stored in the fridge the sauerkraut will keep for many months. (See section above “Does Sauerkraut Go Bad?”) If your sauerkraut is too salty for your taste simply give it a rinse before eating.
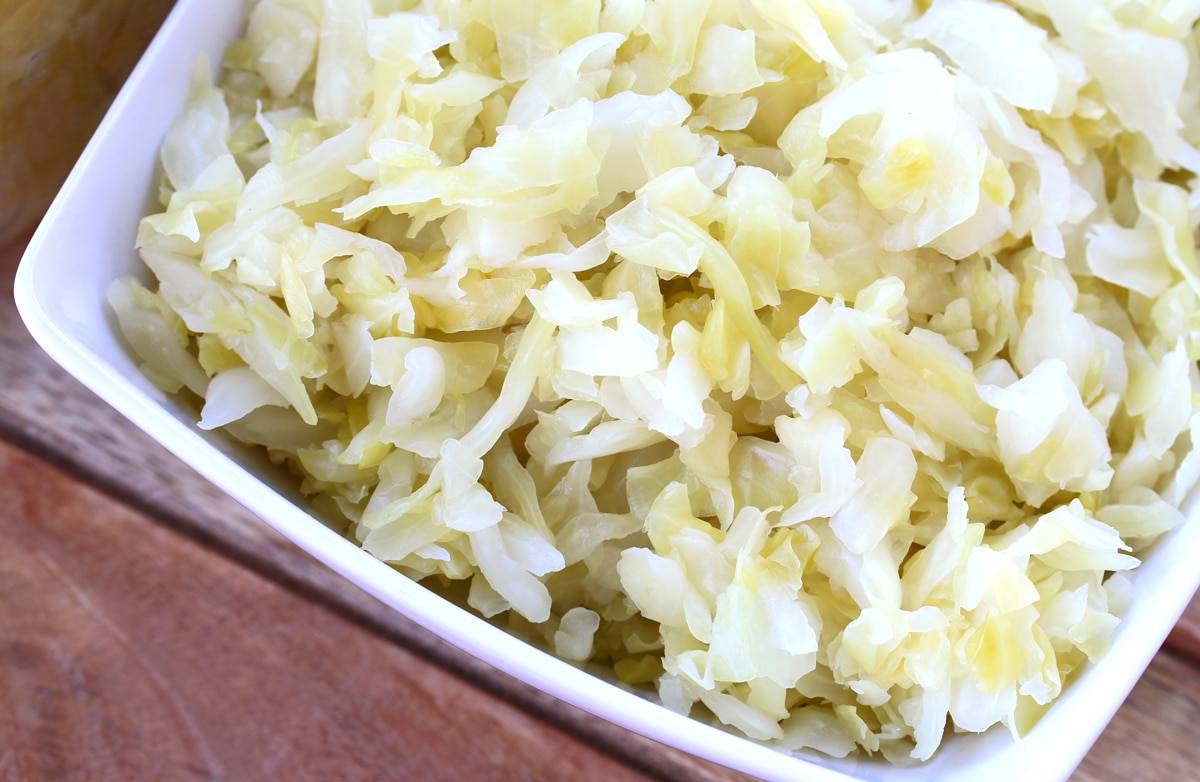
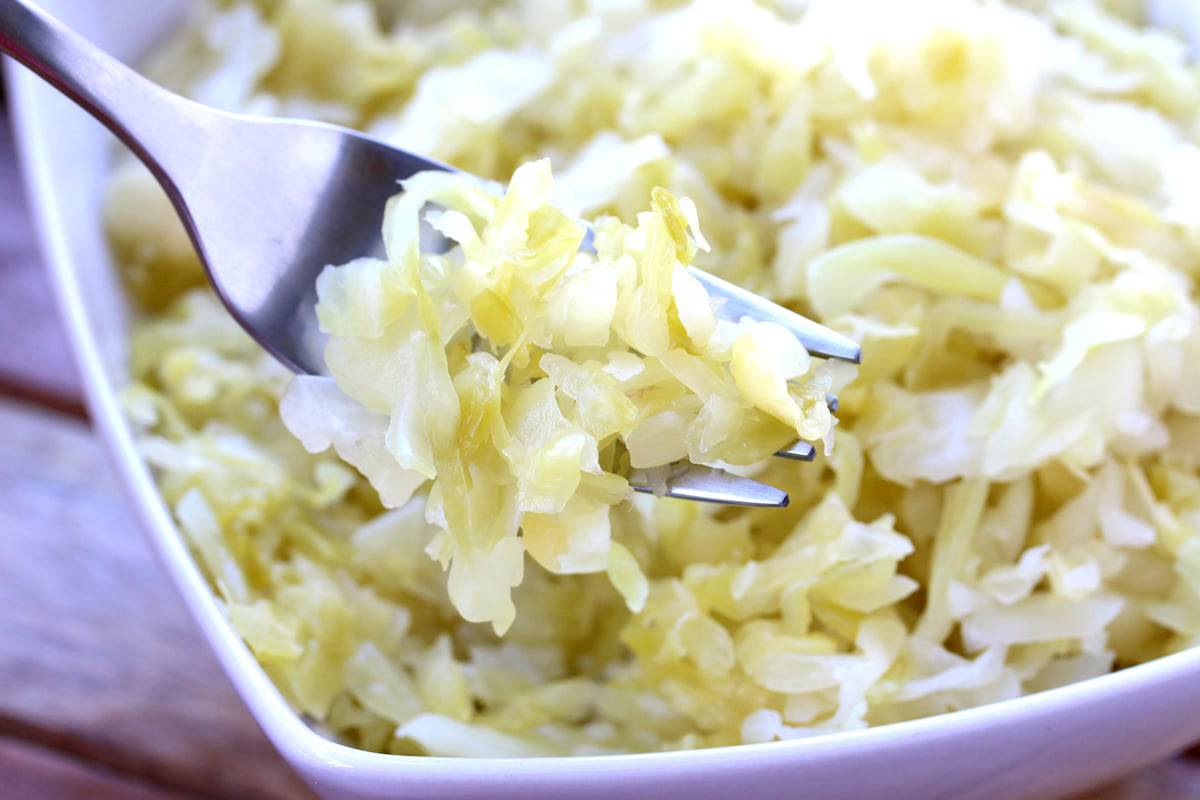
Eat your sauerkraut raw to reap the benefits of the probiotics or use it in any recipe calling for sauerkraut.
Enjoy!
For sauerkraut recipe ideas be sure to try my:
Be sure to check out my tutorials on:
Save This Recipe

How to Make Sauerkraut
Equipment
- Jars I regularly use these ones!
Ingredients
- 1 1/2-2 teaspoons salt for every pound of cabbage (9-12 grams salt per 450 grams of cabbage) (use sea salt or kosher salt – avoid iodized salt because it can inhibit fermentation and make sure that whatever salt you use contains no anti-caking ingredients)
- very fresh green cabbage (The fresher the cabbage the more juice it will have to make a sufficient amount of brine. The finished sauerkraut will also have a much better texture.)
Instructions
- Prepare the Cabbage:Remove any bruised or damaged exterior leaves from the cabbage, then cut the cabbage in half and remove the core. Slice the cabbage very thinly, approximately 1/8 inch thick. For the best texture we recommend slicing it very thinly by hand, not with a food processor. You can slice it by hand, use a mandolin, or cabbage slicer.Place the sliced cabbage in a large bowl and toss in the salt. Let it sit for about 20 minutes until the cabbage has begun to wilt and releases some of its juices. Use a tamper/pounder to crush the cabbage until it is wilted and has released a lot of liquid. This will takes several minutes.
- Pack the Cabbage in a Crock or Jar:Transfer the cabbage and all the juices to a glass or ceramic jar or crock a bit at a time and mash it down with a tamper. Fill the jar to about 2/3 full (the cabbage will bubble as it ferments and could overflow if the jar is too full).Continue to mash the cabbage with the tamper, releasing more juice, until the cabbage is completely submerged under the brine and any air pockets have been removed (important for preventing mold growth). If you've mashed all you can mash and you still don't have enough brine to cover the cabbage you'll need to make some supplemental liquid that is consistent with the salinity of the cabbage brine: Dissolve 1 teaspoon salt in 1 cup water (a 2% solution of salt water) and add that to the jar until the cabbage is completely submerged under the liquid.It is imperative that the cabbage remain submerged under the brine during fermentation, otherwise mold will form (See blog section "My Sauerkraut Has Mold on it: Is it Safe to Eat?"). To do this choose a heavy object whose diameter is roughly the same size to the inside of the crock you're using. The object should be glass, ceramic, or non-reactive metal.Note: I have made sauerkraut multiples times in large mason jars (usually 1/2 gallon size but you can use smaller jars) without needing to use a weight. Because of the small diameter of the jar, after a day or two of fermenting the cabbage usually remains below the liquid level. If the cabbage rises above it I just mash it back down with the tamper. If you choose to use mason jars without using something to weigh down the cabbage, just be sure to keep a close eye on it each day throughout the fermentation process.Screw on the lids to fingertip tightness (this is important to prevent exploding jars!). If using airlock lids, follow the instructions provided.
- Ferment Your Sauerkraut:Place the jars in a dark place that is between 65-70 degrees F, the ideal temperature for fermenting. (See blog section "How Long Does it Take to Ferment Sauerkraut" for information on temperature variations.)At a the ideal temperature range of 65-70 F we recommend fermenting the cabbage for at least 2 weeks (we recommend longer) but follow your own taste.After 4 days of fermenting start tasting the cabbage daily until it reaches the desired texture and level of tanginess. Don't be alarmed if the brine becomes fizzy, this is completely normal and a positive sign of microbial activity.Note: If you're not using an airlock lid be sure to open the lid of your jar/crock every day to release the pressure and prevent your jar from exploding. The color of the cabbage will change from green to a pale yellowish beige.
- Store Your Sauerkraut: Once your sauerkraut has reached the level of tanginess that you want, it's time to screw the lid on tight (remove the airlock lid if using and replace it with a regular lid).Store the sauerkraut in the fridge or a cold cellar (storage temperature should be between 38-50 degrees F). Fermentation won't stop but it will be greatly slowed down. Stored in the fridge the sauerkraut will keep for many months. (See blog section "Does Sauerkraut Go Bad?") If your sauerkraut is too salty for your taste simply give it a rinse before eating. Eat your sauerkraut raw to reap the benefits of the probiotics or use it in any recipe calling for sauerkraut.
Originally published on The Daring Gourmet January 2, 2021

Hi, I’m Kimberly Killebrew and welcome to Daring Gourmet where you'll find delicious originals, revitalized classics, and simply downright good eats from around the world! Originally from Germany, later raised in England, world-traveled, and now living in the U.S., from my globally-influenced kitchen I invite you to tour the world through your taste buds!


I was thinking of using my pressure cooker as a vessle any thoughts?
Hi Leslie, it’s not recommended to ferment things in metal because the acid can etch the metal over time, including stainless steel. But you especially want to avoid aluminum because it’s highly chemically reactive.
I’ve been lacto-bacterial fermenting different things now for a couple of years. Mostly successes, a few that were meh as the kids say, and a handful of unmitigated flops and one disaster!! But, all-in-all, a fun hobby.
Loved your article.
I’m using your recipe right now. I’m 6 days into my first ever batch. I do have one question, how do you can the finished product to make it shelf stable?
Hi William, fermented sauerkraut will keep for several months (I keep mine in the fridge) so there really is no need to can it. You can if you want to but it will kill all the probiotics. If you want to can the sauerkraut here’s how: https://nchfp.uga.edu/how/can_06/sauerkraut.html
Thank you!!!!! I finally found a detailed recipe that works.
You’re welcome, Charlene, I’m happy it was a success!
Thank you for you receipt!!! I made this several months ago and we thoroughly enjoyed the results. So much that I made it again. I was noting this time that the water rendered from salting the cabbage was not enough to cover it, so I used your tip for adding salted water to cover the cabbage. I used 2 teaspoons per 1/2 cup which should have been the equivalent of 2g salt per 100g of water (as the receipt states). I checked the math and it turns out that is not the case. 2 teaspoons of kosher salt weighs about 11 grams. 1/2 cup of water is 118g. So 2 teaspoons of salt per 1/2 cup of water equals 9g of salt per 100g of water not 2g per 100g. Which is correct? My concern is that I over-salted the sauerkraut. Might also consider a correction. Thanks again for posting the receipt!
I don’t have a place that cool, to ferment the cabbage.
Our house generally is 72-75…. Will it still work ???
Hi Gail, yes it will, it will just ferment much quicker and the flavor won’t be as complex, but it will still be healthy and brimming with probiotics!
When I was a kid, 12 or so I got to know the kid down the road. His dad was a big old Dutchman, really nice guy who always raised a big garden, 2 or 3 acres. He did it all, from peppers, squash, beans, taters, sweet corn, sorghum to make his own molasses a bunch of cabbage… lots!! One day I was at their house & I asked my friend what in the world his dad did with all of that cabbage. He kinda hung his head & said… Sauerkraut. He took me to the attached garage, & of course I smelled it from 100 feet away. We went in seen he had bui
Hi. I have been making Sauerkraut for years (which is the same recipe as yours) but we can ours by processing the jars for 15 minutes in boiling water. This process ensures our jars last for several years in a cool place. Do you do this or not? Thanks.
Hi Jasha, I don’t process the jars because it kills off all the probiotics. I’d also be a concerned about the pH level being safe enough for water bath canning (as opposed to using the pressure canning method).