Kitchen Basics: How To Roast Red Peppers
This post may contain affiliate links. See my disclosure policy.
Instead of paying a premium for store-bought, learn how to roast red peppers yourself! It’s easy and there are SO many delicious ways to use your roasted peppers!
Jarred roasted red peppers are one of those things I often don’t have on hand when I need them. Can you relate? It’s the same story with several other things, which is why I developed the very best recipes for items like tahini paste, marzipan, teriyaki sauce, black bean sauce and hoisin sauce. Not only can I whip them up whenever I need them, they taste about a gazillion times better than the store-bought stuff!
But back to roasted peppers. Does anything beat the flavor of fresh peppers that have been charred and blackened in the oven? Roasted peppers are one of those things that make the culinary world go round. If you’ve added them here and there to spruce up your dishes you know exactly what I mean.
How To Use Roasted Red Peppers
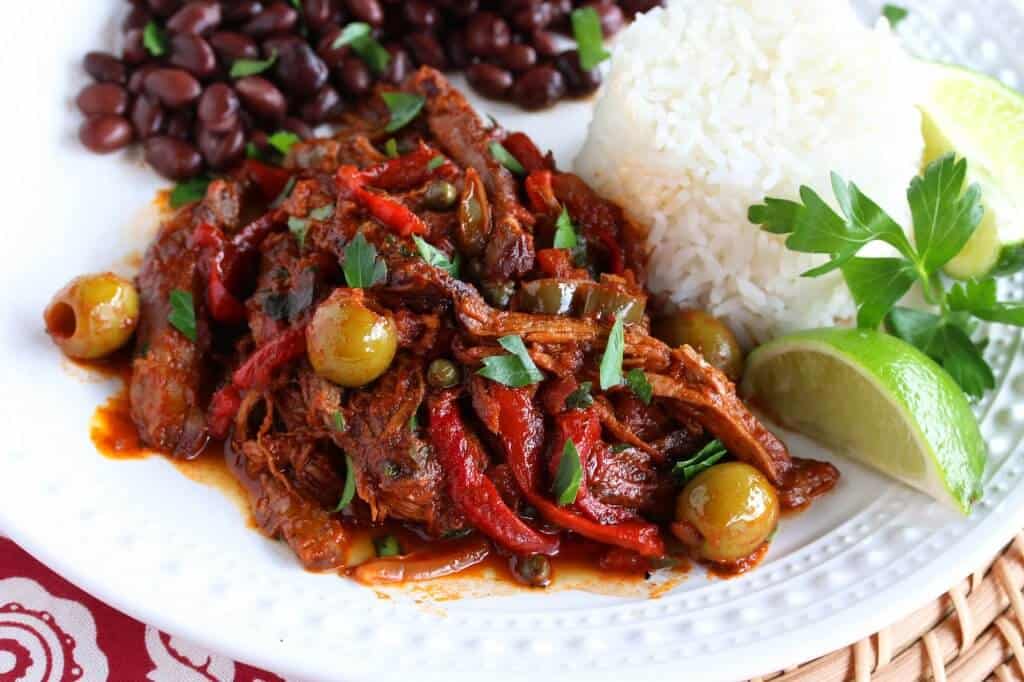
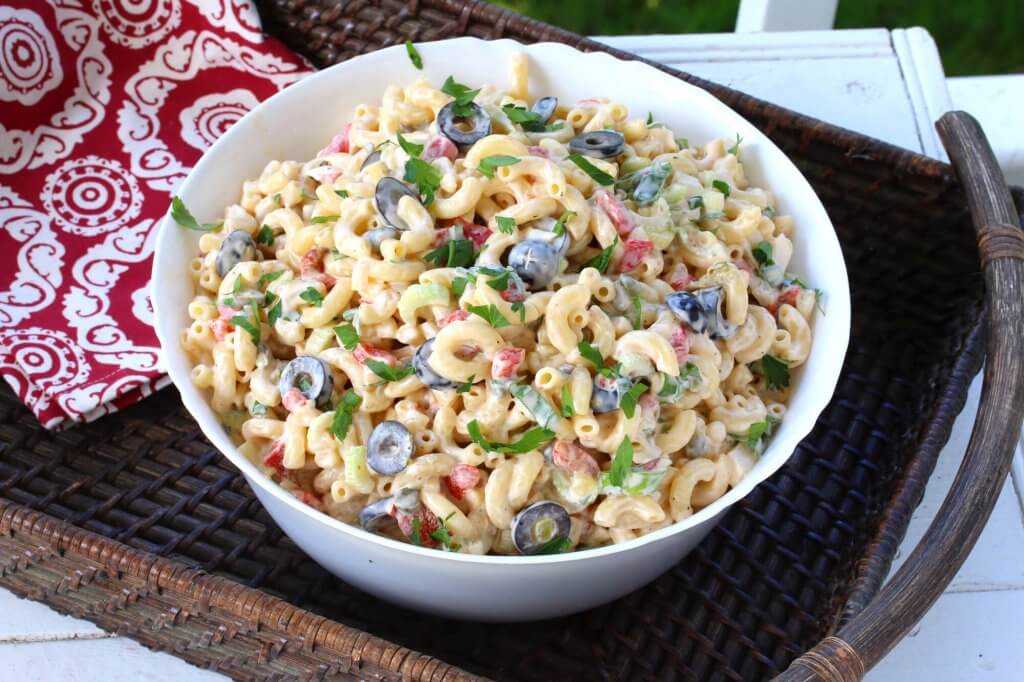
Lots of ways! Add them to your pasta salads, potato salads, tossed salads. Add them to your sandwiches, place them on bruschetta or add them to a pasta dish.. Make a roasted red pepper aioli or add them to your next batch of hummus. Make a roasted red pepper pesto with the usual ingredients (pine nuts, basil, garlic, Parmesan, etc) and enjoy it on crackers or tossed in pasta. Puree them with some almonds and cream and chicken stock for a delicious pasta sauce. Or puree them with some cream cheese for a cracker and veggie spread. Add them to a tapenade, on pizza or flatbread. Fold them into omelets or frittatas. Add them to a potato hash or your favorite chicken casserole. The sky’s the limit!
Here are just a few recipe examples featuring roasted red peppers:
Portuguese Potato Hash with Linquica, Peppers & Olives

Roasting your own peppers is the perfect way to put a bumper crop of peppers to use or to take advantage of those grocery store sales.
This method for roasting bell peppers works for most kinds of peppers. All peppers vary in their thickness of skin and flesh and so roasting times will vary, you’ll need to check on them. But other peppers that work well for roasting are Poblanos, Anaheims, Hatch-style chiles, paprika chiles, jalapenos and pimientos.
How to Roast Red Bell Peppers
Let’s get started!
Preheat the oven to 450 degrees F.
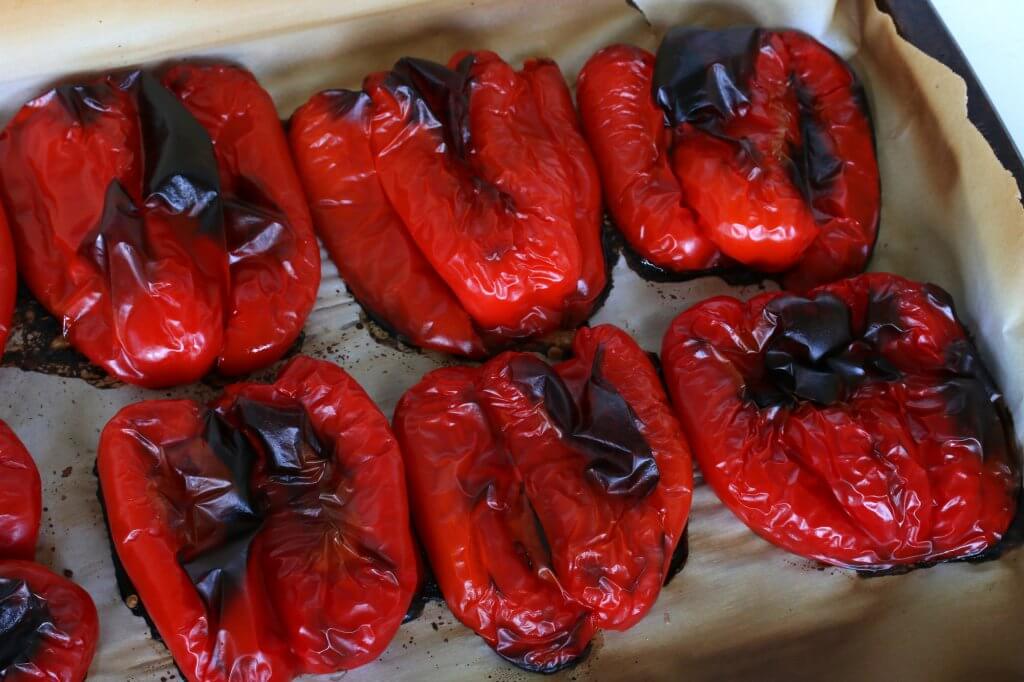
Cut the peppers in half and remove the stems, seeds and membranes.
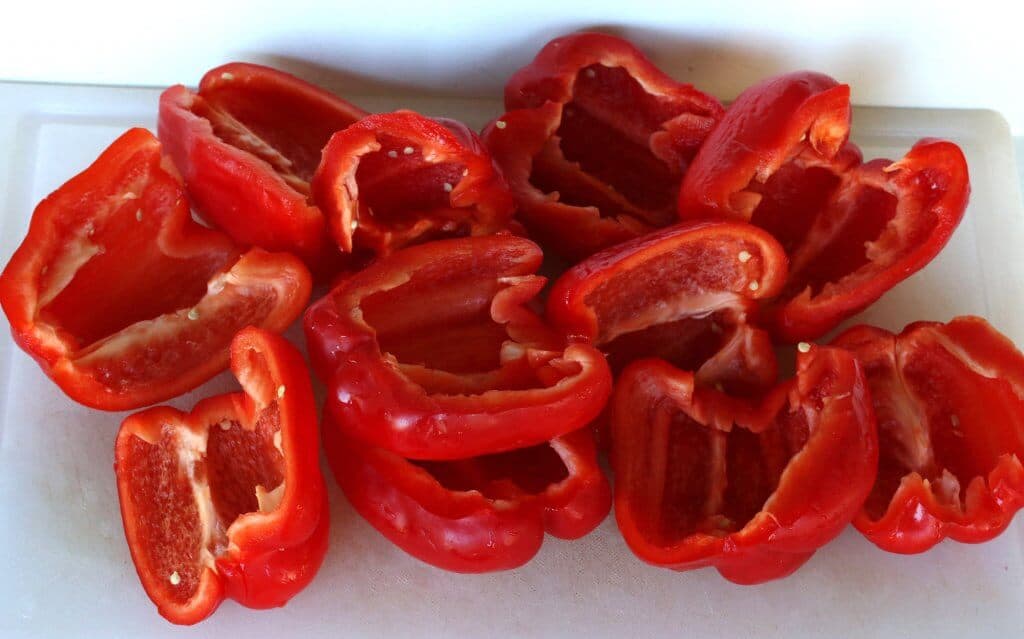
Lay the peppers on a foil-lined baking sheet, cut side down. Parchment paper is considered safe up to 400 degrees without the risk of scorching, but I often push the limits to 450 degrees. If you want to remove all risk, use foil.
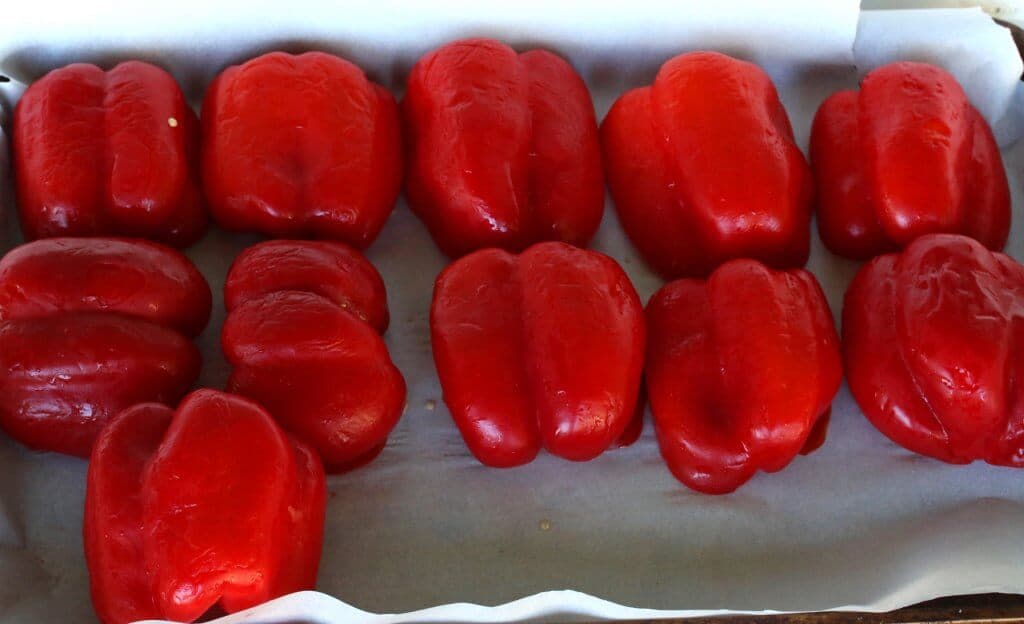
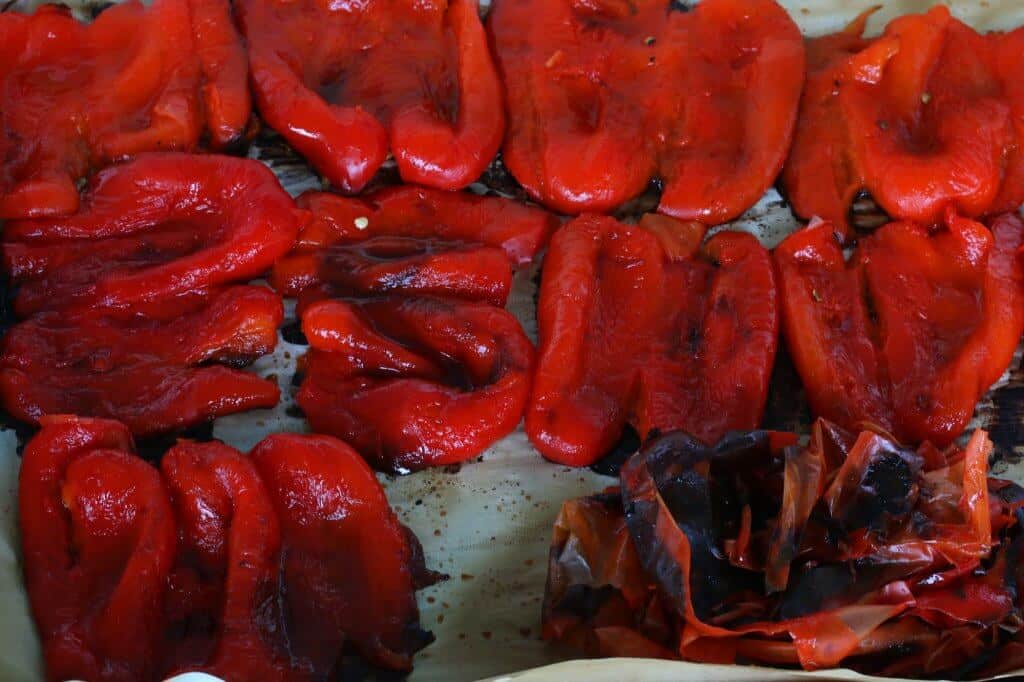
Roast the red peppers for 15-20 minutes or until the skins are very dark and have collapsed.
There’s no need to rotate or turn the peppers.
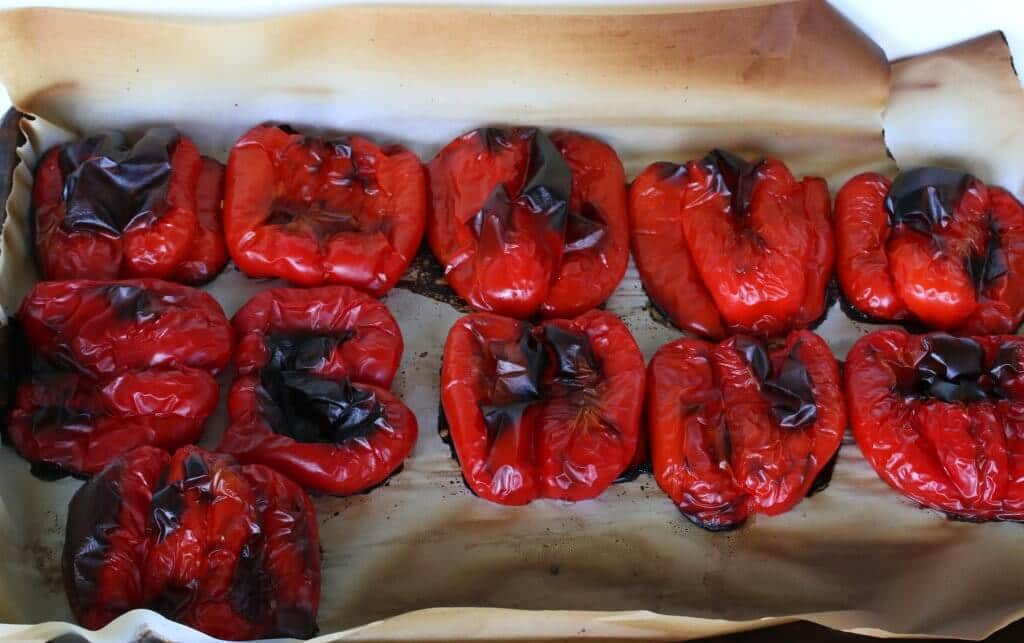
Once the skins are blackened remove the peppers from the oven.
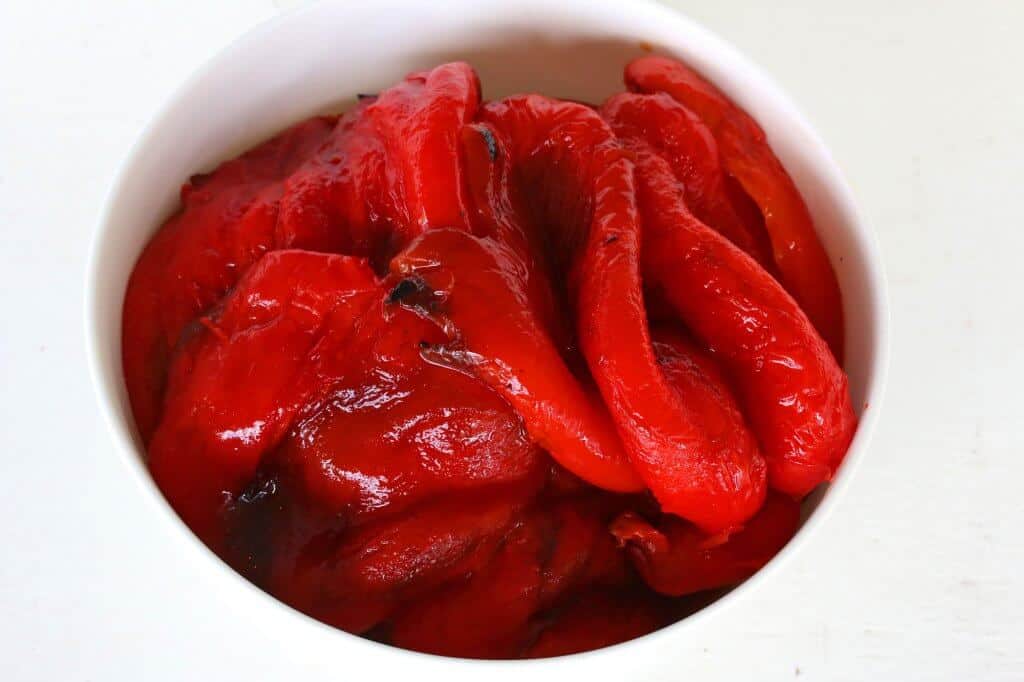
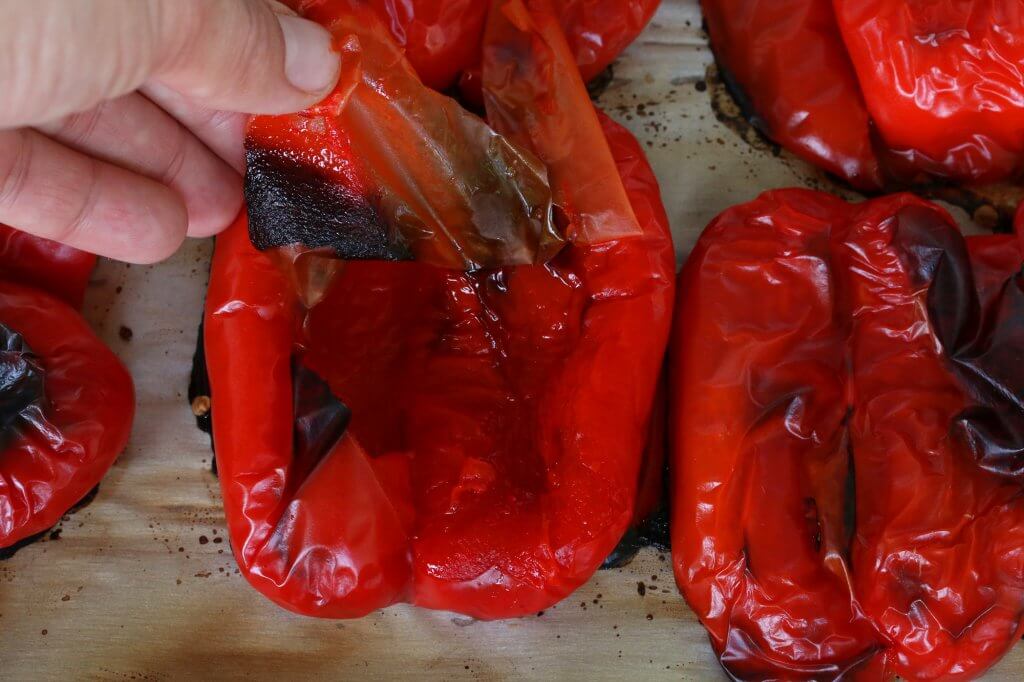
At this point most people recommend placing the roasted peppers in a paper bag to steam for about 10 minutes to help loosen the skin. I’ve never found that to be necessary, but I guess it depends on how stubborn your particular peppers are. Simply let the peppers cool for a few minutes until comfortable enough to handle and then peel the skins off and discard them. They’ll slip off easily.
You can slice or dice the peppers in advance or store them in halves. Stored in the fridge in an airtight container they’ll keep for up to about a week. If you store them covered in oil in the fridge they’ll keep for at least 2 weeks. For longer storage you can freeze them in ziplock bags.
Enjoy your freshly roasted red peppers!
Save This Recipe

How To Roast Red Peppers
Ingredients
- Bell peppers or other peppers of your choice (see note in description box above)
- A foil-lined baking sheet
Instructions
- Preheat the oven to 450 degrees F.
- Cut the peppers in half and remove the stems, seeds and membranes. Lay the peppers on a foil-lined baking sheet, cut side down. Roast the red peppers for 15-20 minutes or until the skins are very dark and have collapsed. (There is no need to rotate or turn the peppers.) Once the skins are blackened remove the peppers from the oven.
- At this point most people recommend placing the roasted peppers in a paper bag to steam for about 10 minutes to help loosen the skin. I've never found that to be necessary, but I guess it depends on how stubborn your particular peppers are! Simply let the peppers cool for a few minutes until comfortable enough to handle and then peel the skins off and discard them.
- You can slice or dice the peppers in advance or store them in halves. Stored in the fridge in an airtight container they'll keep for up to about a week. If you store them covered in oil in the fridge they'll keep for at least 2 weeks. For longer storage you can freeze them in ziplock bags.

Hi, I’m Kimberly Killebrew and welcome to Daring Gourmet where you'll find delicious originals, revitalized classics, and simply downright good eats from around the world! Originally from Germany, later raised in England, world-traveled, and now living in the U.S., from my globally-influenced kitchen I invite you to tour the world through your taste buds!


I have my peppers in the oven as I type this. Thanks for the great tips, I almost roasted mine whole instead of chopping & seeding beforehand. I’m glad I looked through your tutorial first!
Awesome, Kaycee, enjoy your roasted peppers!
I make them on the grill. Quarter them, spray them both sides with olive oil Pam, place then cut side down on the grill for 15 mins or until the edges get burnt. then flip them over for 3 to 5 mins until skins get a little singed.
remote from grill and serve hot or cold skin and all.
great on burgers, hot dogs or as a side.
That sounds fabulous, Corey. I’ve also put them in my smoker with some wood chips and they’re amazing that way, though more limited application than roasting or grilling because of the smokey flavor profile.
These peppers are great! Smoky taste.. fresh & versatile!
These are much better than canned ones! They have a great roasted flavor! Very versatile!!!
Fantastic, Robin, thank you!
I always made Roasted Peppers, however I used to make them whole and then peel them and take the stem off and the seeds. I remember one time that I made them everything was done and I put them into jars, I made about four jars and I put oil, garlic and little bit of oregano and closed the jars. I gave two jars away and the following day the jars boiled over, I told them throw away the peppers, I didn’t want them to take a chance of getting sick, I never had this problem before, I always used the same procedure and everything would be fine. I take the hot peppers put them into room temperature mason jars and seal them and keep them into the refrigerator and I wouldn’t have a problem but this time I did, I’m wondering why this happened now and it never did before, What did I do wrong? I like your procedure and I’m going to freeze them from now on unless I need them right away!!
I’m just as stumped as you are, Lorraine! I’m not sure why that would have happened, so strange. Bottling them does make beautiful gifts but freezing them is super convenient just for own use.
Thanks Kimberly for answering me, I have one thing to ask you, when you bottled them , did you do the regular canning procedure boiling the bottles to pressurized them?
Hi Lorraine, I haven’t canned these, only bottled them in olive oil for quicker use (no more than two weeks). In order to can them for long-term storage they have to be processed in a pressure canner (about 35 minutes I believe) because their acidity level is too low for the water bath method.
That’s what I thought, I never used a pressure cooker, not after my Mother told me a story, she was making Tomato Sauce (Which us Italians call it Gravy)when she went to open the cooker open she forgot to take the pressure down and as son as that pressure was released all the Gravy went up in the air to the ceiling and all over and she never used another pressure cooker so I guess I have the same fear about it. I can do it the old fashion way if I ever do can them, I thank you very much for replying to me and you helped me out with My Roasted Peppers!!!
You’re welcome, Lorraine, and my goodness, what a nightmare of a story!! I can imagine much time your mother spent cleaning tomato sauce off the walls, floors and ceiling!
OMG. I just did the same thing with my Creole Sauce. Don’t know why it happened. I was in a cardiac ward for a few weeks, my friends picked my tomatoes & froze them. So when I got out I had almost 5 gallons to deal with. The vent released on the canner and I thought it was okay to open it. Went to open it and the whole lid blew off. That almost sent me back to the cardiac ward. What a mess. Just glad my cat wasn’t there watching me. Now what am I going to do with these peppers?
Because they are so easy…just do as Many as will keep in oil for two weeks and perhaps freeze some. I guess some people are roasting ones harvested from their gardens,but if not…it’s an easy process to just roast and store for two weeks🌟
What a great tutorial! I’ve always wanted to try this myself.
SO much better than what you buy in the jar! Time to whip up a batch :)
This is great! I need to try this out!