Canning Baked Beans or Pork and Beans
This post may contain affiliate links. See my disclosure policy.
Canning baked beans gives you the convenience of being able to enjoy homemade right off the shelf! Just open the jar, heat it up, and enjoy! And unlike store-bought canned baked beans, this doesn’t have any of the junk ingredients. Canned in a pressure canner, your baked beans or pork and beans will keep for up to a year.
Be sure to also try our Homemade Canned Chili Con Carne!
Pressure canning can definitely be an intimidating thing for anyone who has never tried it, but once you get the hang of it there’s really nothing to it. And a large canner holds quite a bit, so I like to make a large batch so that I can have multiple jars of these homemade canned baked beans on hand. Canning baked beans is easy and is a satisfying accomplishment!
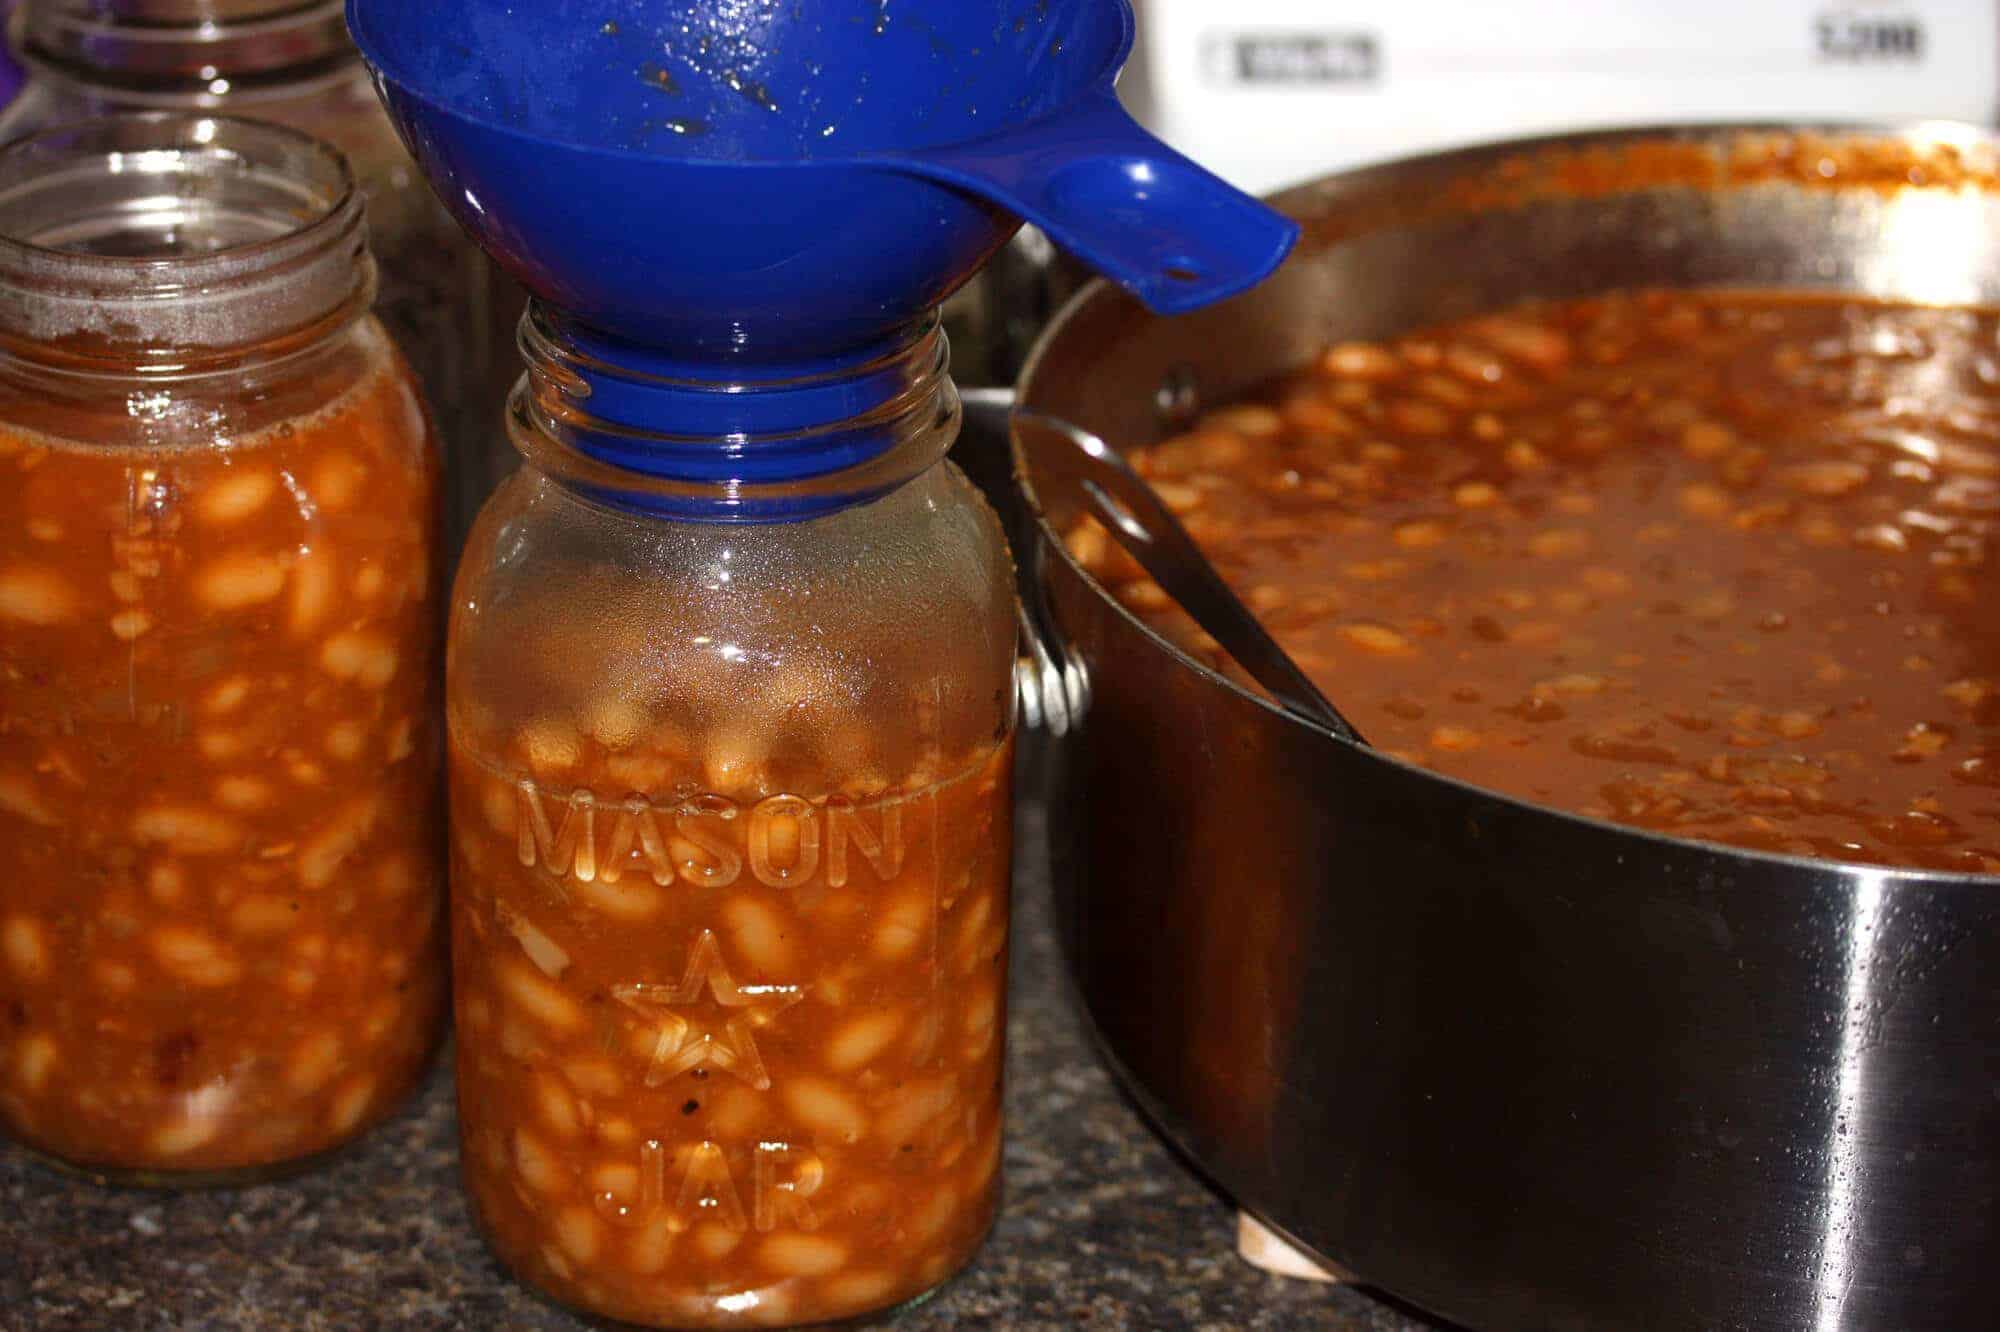
Don’t worry if the consistency of your baked beans is soupy after cooking them, the beans will continue to absorb the liquid after going through the pressure canning process and sitting in the jars for a few days.
If you prefer canning Pork and Beans” instead, which very similar but with a little less sugar and generally no molasses, simply reduce the amount of brown sugar to a 1/4-1/3 cup and either eliminate or only add a little molasses. You still have the option of cooking the beans on the stove or baking in the oven.
Canning Baked Beans Recipe
Let’s get started!
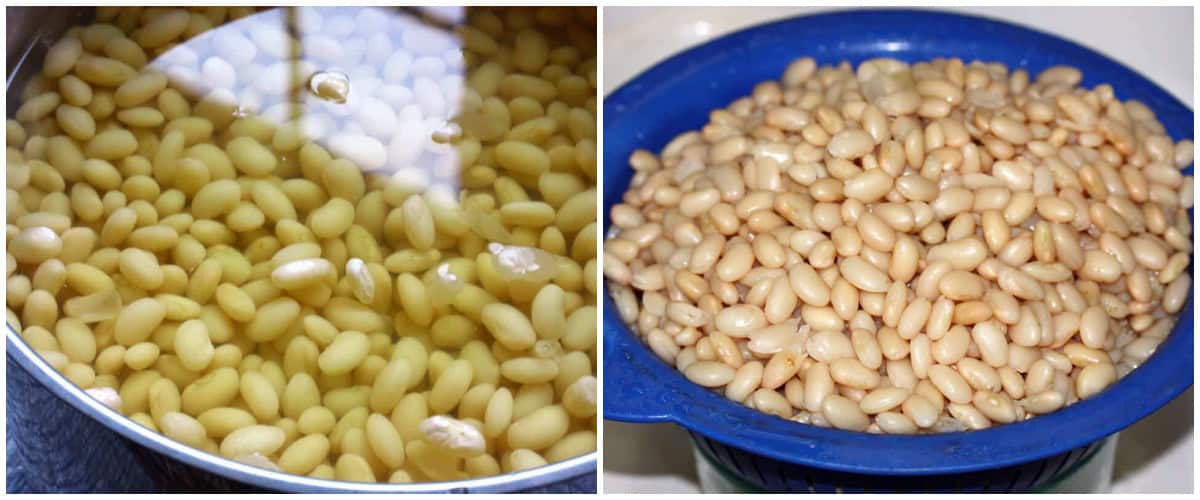
Rinse the beans and rapidly boil them in unsalted water for 2 minutes. Then turn off the heat, cover and let soak for 1 hour. Drain and discard the liquid. Return the beans to the pot with 6.75 quarts of water and bring to a boil, the immediately drain again – this time reserving the liquid. Set aside the beans and liquid.
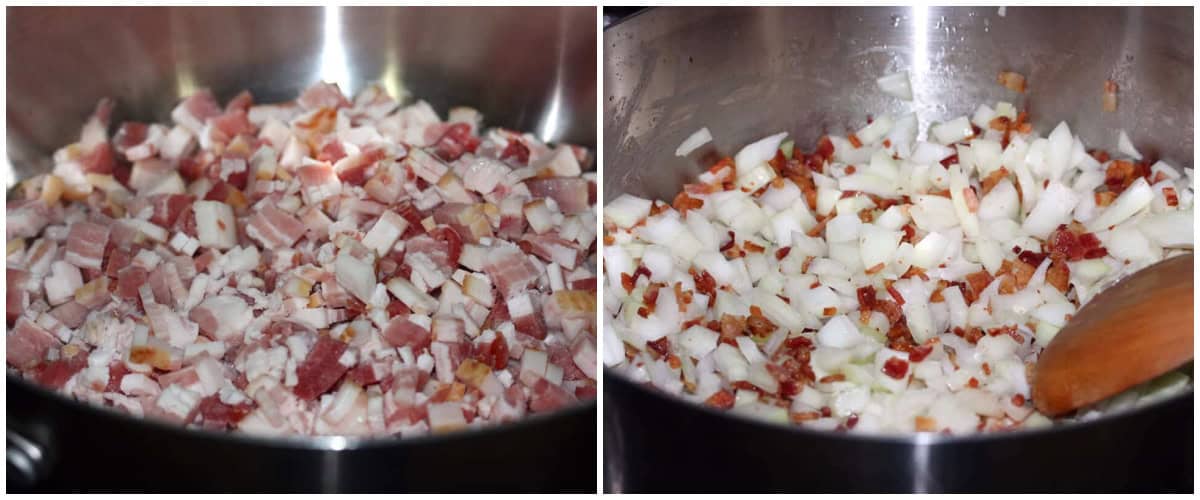
In a very large stock pot (at least a 10-quart pot) fry the bacon until crispy then drain the fat. Draining the fat is essential for the bottles to seal when you pressure can them.
Add the onions and cook until soft and translucent. Add the garlic and cook for another couple of minutes.
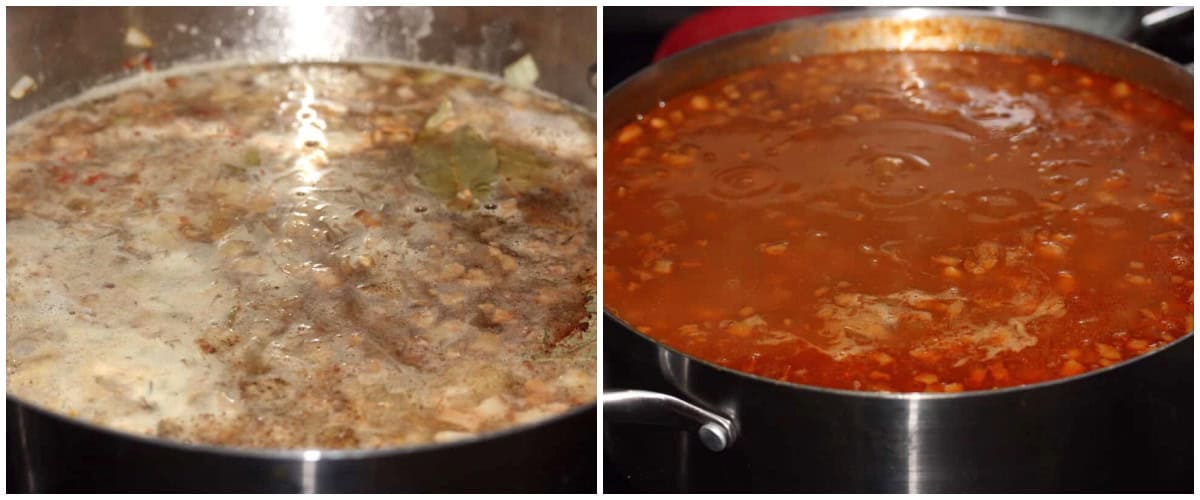
Add all remaining ingredients, including the beans and their liquid.
You have two options for cooking the beans: 1) Cover and bake at 350 degrees F for 3-4 hours, stirring once or twice. If needed, add a little water while cooking to keep the beans “soupy”. (Be sure to use an oven-safe lid or cover tightly with foil), or 2) Cover and simmer on low-medium on the stovetop for 60-90 minutes or until the beans are soft (depending on how old the beans are they may require longer). Keep in mind though that the beans will continue to cook in the pressure canner so don’t let them get mushy.
I recommend at least a 10 quart stock pot. Mine was 8 quarts and as you can see it’s nearly filled to the brim!
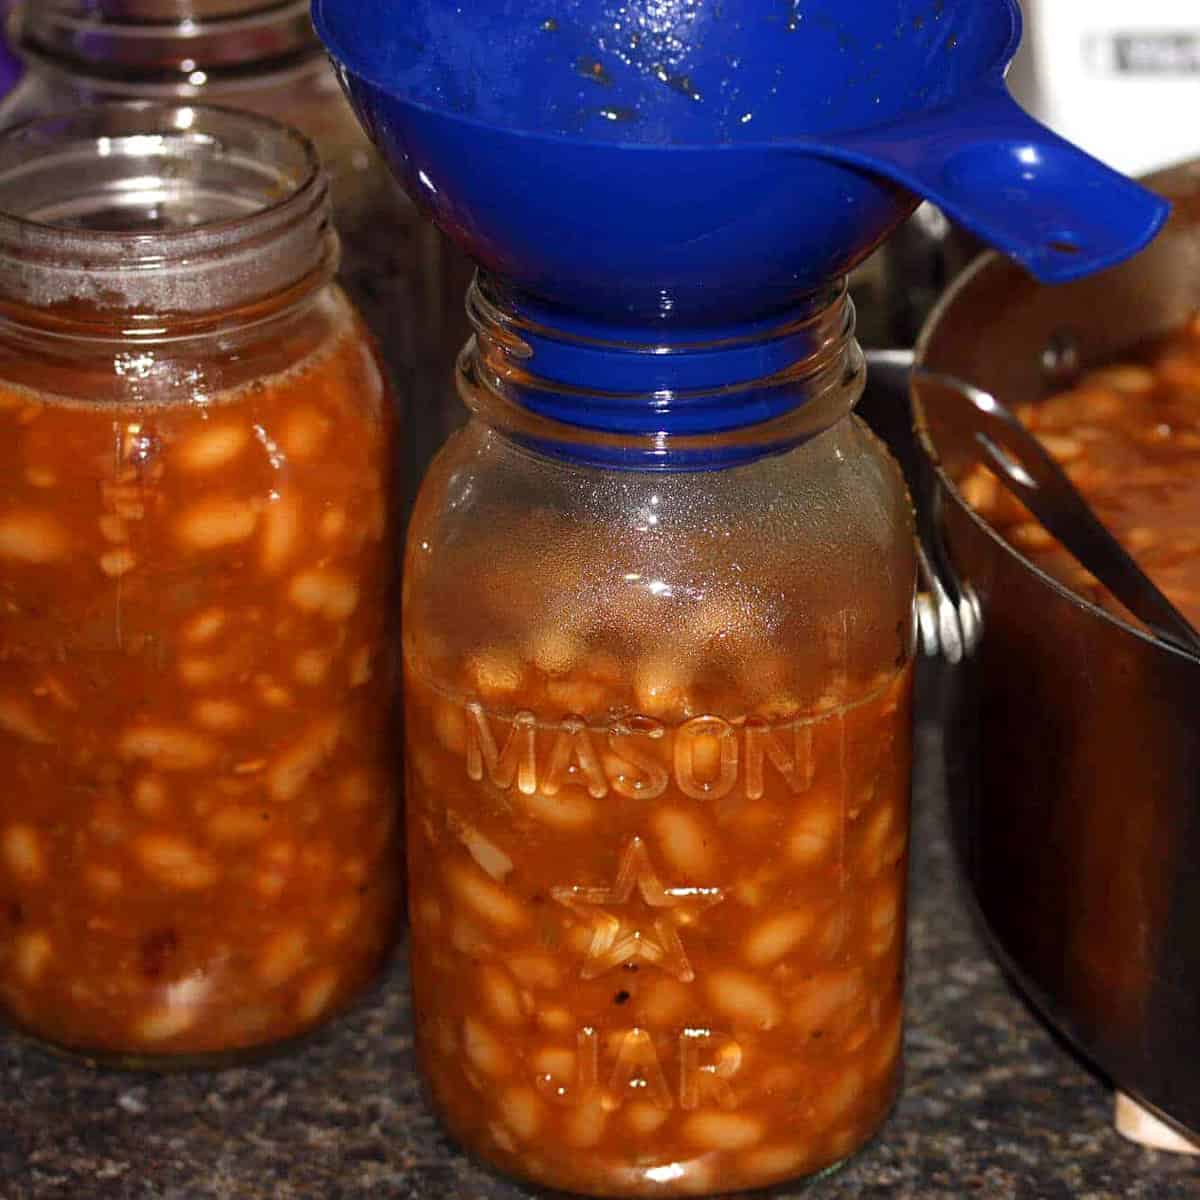
Pack into hot, sterilized canning jars leaving 1 inch of head space and cover jars with seals and rims. Follow your canner’s instructions and process at 10 lbs pressure: Quart jars for 75 minutes, pint jars for 65 minutes. (Adjust for altitude as needed.) I’m using my Presto 23-quart Pressure Canner and Cookerwhich is still going strong after several years.


Per your canner’s instructions, remove pressure canner from heat and allow the pressure to release on its own. Remove jars and place them on a kitchen towel on the counter top and let them sit undisturbed for 24 hours. Jars are sealed when the jar lids are depressed.
For best storage, store in a dark and relatively cool place (though room temperature is fine). Shelf life is at least 1 year.
Save This Recipe

Canning Baked Beans or Pork and Beans
Ingredients
- 3 pounds dried navy or white beans
- 3/4 cup molasses
- 1/4 cup apple cider vinegar
- 3 tablespoons kosher salt
- 2 tablespoons ground dry mustard
- 1/2 cup ketchup
- 1 cup brown sugar
- 3 large yellow onions , chopped
- 2 tablespoons Worcestershire sauce
- 1 teaspoon black pepper
- 1 1/2 pounds bacon , diced
- 3 bay leaves
- 5 cloves garlic , minced
- 1/2 teaspoon ground cloves
Instructions
- Rinse the beans and rapidly boil them in unsalted water for 2 minutes. Then turn off the heat, cover and let soak for 1 hour. Drain and discard the liquid. Return the beans to the pot with 6.75 quarts of water and bring to a boil, then immediately drain again - this time reserving the liquid. Set aside the beans and liquid.
- In a very large stock pot (at least a 10-quart pot) fry the bacon until crispy then drain the fat. Draining the fat is essential for the bottles to seal when you pressure can them. Add the onions and cook until soft and translucent. Add the garlic and cook for another couple of minutes. Add all remaining ingredients, including the beans and their liquid.
- You have two options for cooking the beans: 1) Cover and bake at 350 degrees F for 3-4 hours, stirring once or twice. If needed, add a little water while cooking to keep the beans "soupy". (Be sure to use an oven-safe lid or cover tightly with foil), or 2) Cover and simmer on low-medium on the stovetop for 60-90 minutes or until the beans are soft (depending on how old the beans are they may require longer). Keep in mind though that the beans will continue to cook in the pressure canner so don't let them get mushy.
- Pack into hot, sterilized canning jars leaving 1 inch of head space and cover jars with seals and rims. Follow your pressure canner's instructions and process at 10 lbs pressure: Quart jars for 75 minutes, pint jars for 65 minutes. (Adjust for altitude as needed.)Per your canner's instructions, remove pressure canner from heat and allow the pressure to release on its own. Remove jars and place them on a kitchen towel on the counter top and let them sit undisturbed for 24 hours. Jars are sealed when the jar lids are depressed.Note: the consistency may be soupy initially but the beans will continue to soak up liquid as they sit.
- For best storage, store in a dark and relatively cool place (though room temperature is fine). Shelf life is at least 1 year.Makes about 7 1/2 quarts or 15 pints.
Notes
Nutrition

Hi, I’m Kimberly Killebrew and welcome to Daring Gourmet where you'll find delicious originals, revitalized classics, and simply downright good eats from around the world! Originally from Germany, later raised in England, world-traveled, and now living in the U.S., from my globally-influenced kitchen I invite you to tour the world through your taste buds!


I soaked my navy beans overnight, then cooked the next morning. I had a lot of bean skin shredding in my pot which made my beans undesireable. I tried to remove as many as I could but I was disappointed in my first try of canning them. I’ve cooked and canned pintos without any problem but this is the first time cooking navy to make baked beans. I went ahead and finished seasoning and cooking them. Getting ready to can them. I will finish my batch, but the next time I need advice on how to keep the skins from shedding.
I canned up five different recipes for beans to find the best one. My son said this one is a hit. He actually came back to eat a jar of it as soon as it came out of the canner. This is my go to baked bean recipe from now on. Thanks so much. Actually my family likes a lot of your recipes.
Thank you so much for the compliment, Tina, and I’m thrilled that you guys enjoyed this! <3
How many does this feed? I have to catering for 45 people. This is one of my side dishes.