The Micro-Dwelling Project Part 5: Flooring
This post may contain affiliate links. See my disclosure policy.
Welcome to Part 5 of The Micro-dwelling Project where we single-handedly completely remodel a tiny guesthouse on our historic property!
We are so close to being done I can almost taste it!!
We’ve been so excited for this next step: The floors! Such a key element in any living space, great floors make all the difference.
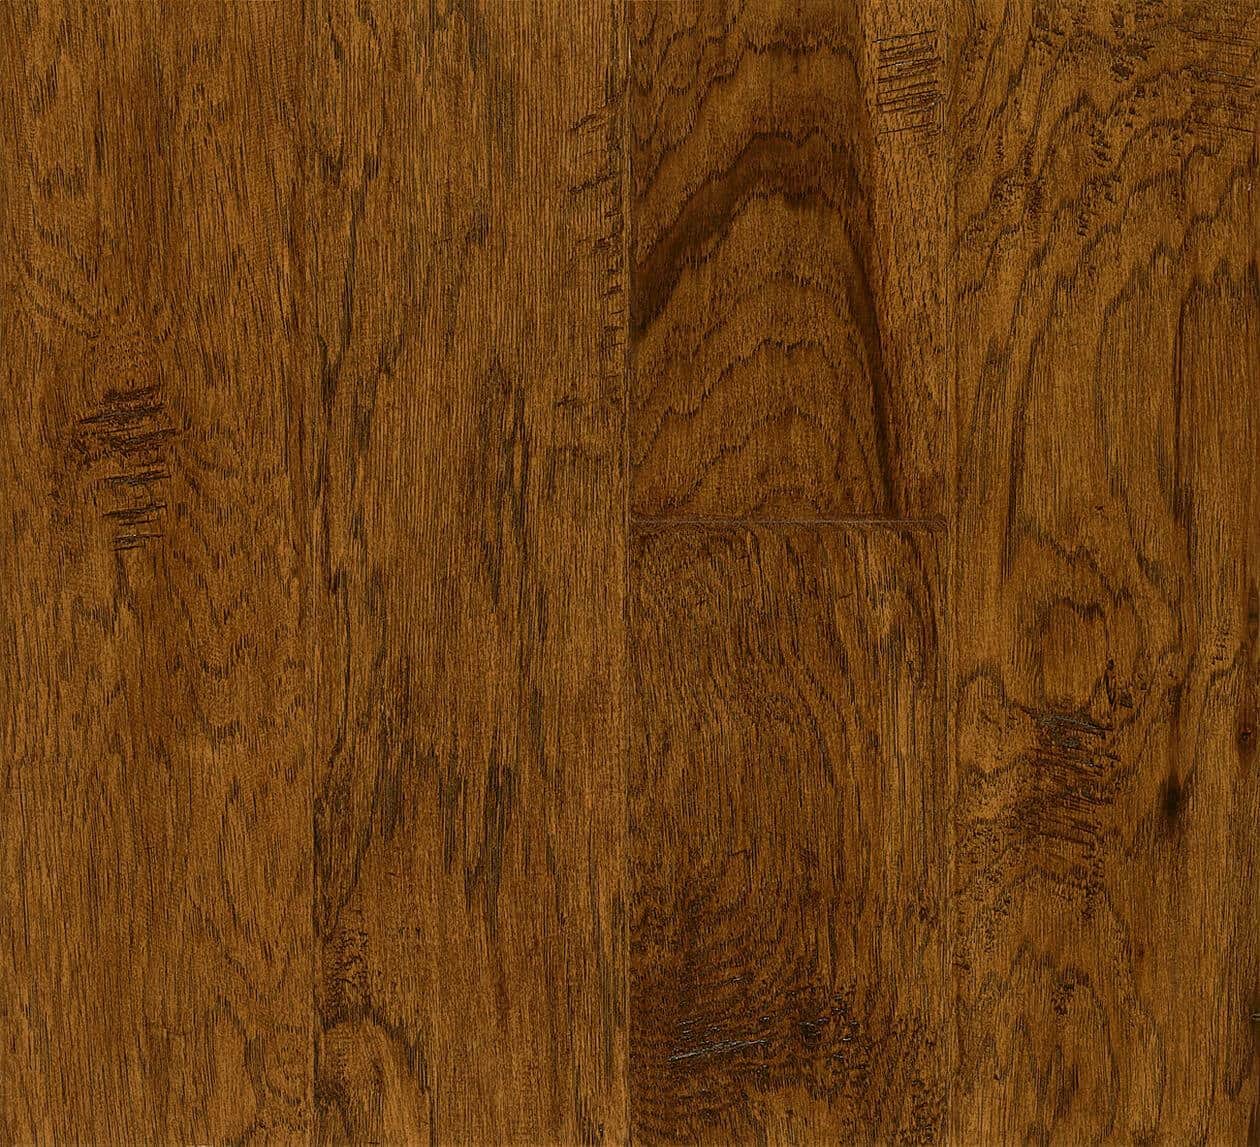
Can anything beat the look and feel of hardwood floors? We spent a lot of time searching through dozens of options and found one we really loved from Armstrong Flooring.
Armstrong has so many great options and it was difficult to narrow it down, but we went with engineered hardwood. It’s comparable in price to solid hardwood, although sometimes it can be a little less expensive. The advantage though of engineered hardwood is that it’s more resistant to warping from humidity fluctuations. There also tends to be a larger selection of styles for engineered hardwood. The other advantage of the choice we went with is that it comes with a 50-year warranty and that alone makes it a great choice. Specifically, we chose Armstrong’s Fall Canyon Hickory engineered hardwood. Besides looking beautiful, hickory is more durable than most other wood species, being more resistant to scratches and dents. We wanted a shade of wood that was dark enough to provide good contrast with all the white accents and white kitchen cabinets we’re installing but light enough to contrast with dark furniture. We’re very happy with Fall Canyon – it’s gorgeous!
Let me take you through the installation steps and then you can see the final outcome.

The first step was to make sure the floors were as flat as possible. Meaning, there shouldn’t be more than a 1/4 inch variation over a 10 foot span. There shouldn’t be any humps or dips in the floor because that will affect both the integrity and aesthetics of the final installation. As old as this structure is, we definitely had a lot of humps and dips!
There are different ways you can even out a floor surface. Because we had some pretty major variations throughout our floor, asphalt roofing shingles were the best choice. Roofing felt is also commonly used but these shingles provided a way to easily build up thickness in areas where the floor was too low. We placed the shingles across most of the floor and in some spots doubled and even tripled them to even out the surface.


We used the Empire 78-inch Level as a guide to judge where the low and high spots were. By laying it across the floor you can look for gaps under the level and place more shingles accordingly. This level was indispensable for working on the floor but has come in handy for a variety of other things, such as framing the walls, installing the doors and, most of all, as a straight edge.
You can staple the shingles down but that’s really not a necessary step as long as you carefully lay the plywood down over it (the next step).

The next step was laying down 7/16 inch OSB sub-flooring. It wasn’t needed for structural support but we used them to create a nice smooth surface on which to lay the hardwood flooring.

We secured the sub-flooring with construction screws. It’s generally recommended to space the screws every 8 inches in a grid pattern.
For all the screw-driving work we’ve done on this remodel we’ve used the Rigid Impact Driver and it has served us well. It beats using a regular drill/driver for driving screws and it’s a great tool for the price.
The sub-flooring is done. That’s all that was needed to get the floor prepped for laying down the hardwood. Really pretty straightforward.

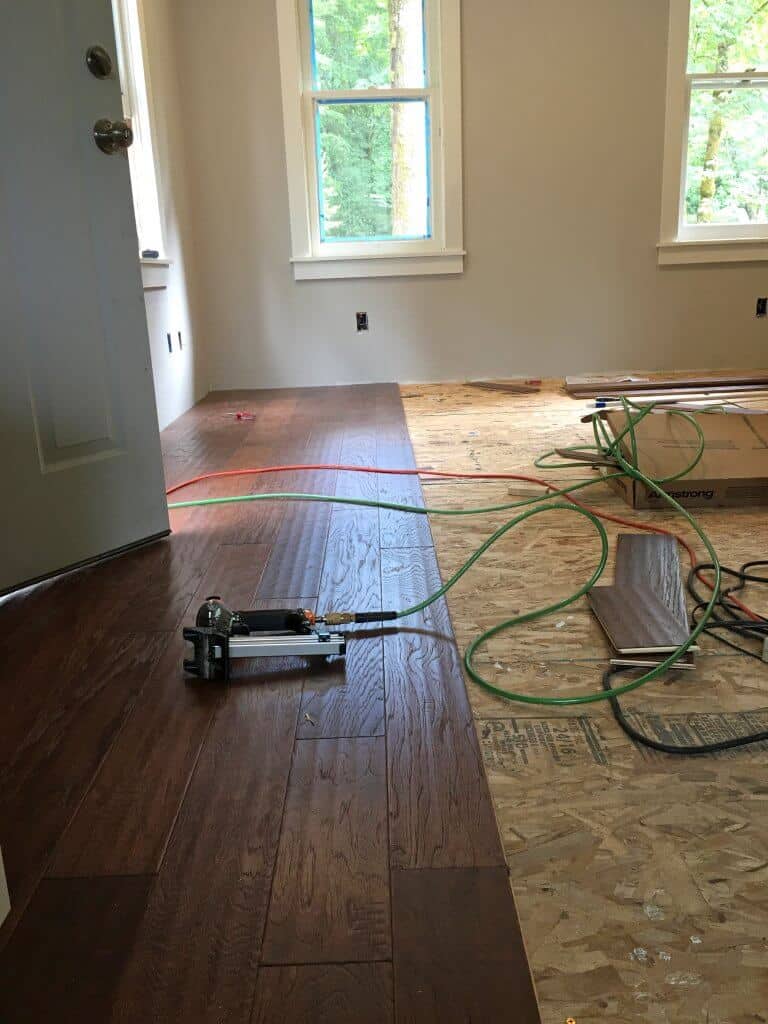
Next it was time to lay down the hardwood flooring.
It’s recommended to use wood panels from several cartons at once just in case there are color variations from carton to carton. By mixing panels from multiple cartons you ensure an even blend. So we opened up a few boxes and took out some wood panels from each one to get started.


We initially laid the flooring pieces out in a straight line across the room just to gauge how much trimming may or may not have been necessary along the length of the planks to achieve a perfect fit.
It just so happened that the length of the room was exactly the right length so as not to require any trimming. After all we’ve been through with this project it was such a relief to have something go perfectly smoothly! Thank you Floor Gods!

Laying down the sub-flooring was fine. But honestly the thought of installing hardwood floors seemed extremely intimidating. We were pretty nervous going in to the project. What if we screwed it up? If one panel anywhere on the floor gets messed up you have to redo the whole thing. Ugh.
But the instructions that came with the Armstrong flooring were comprehensive and really pretty easy to follow. We followed each step as written and were totally amazed that we were able to get the entire floor installed in one day! Us. By ourselves. With no prior experience.
In other words, you can do this too!

The first step was to install the first row of flooring along the longest wall. It’s crucial to get the first row even and straight because the rest of the floor will be affected by it.

The nails in the first row have to be face-nailed down as close to the wall as possible so that the baseboards will cover the nails.
First you have to pre-drill holes before hammering in the nails in order to prevent splitting the wood. That was one of our fears.
But for all the drilling work we’ve had to do on this remodel, including pre-drilling the floor holes, we used the Rigid 18V Compact Drill/Driver and have been very happy with it. It drilled very precisely and cleanly through the wood.
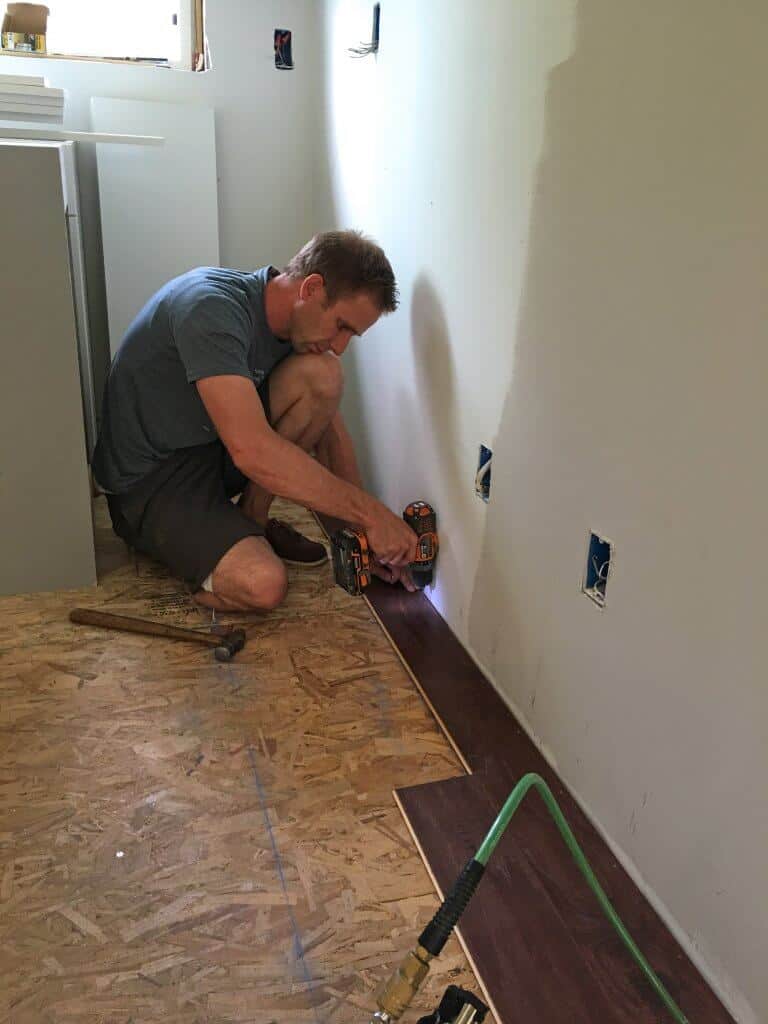
Then you simply hammer the nails into the pre-drilled holes.
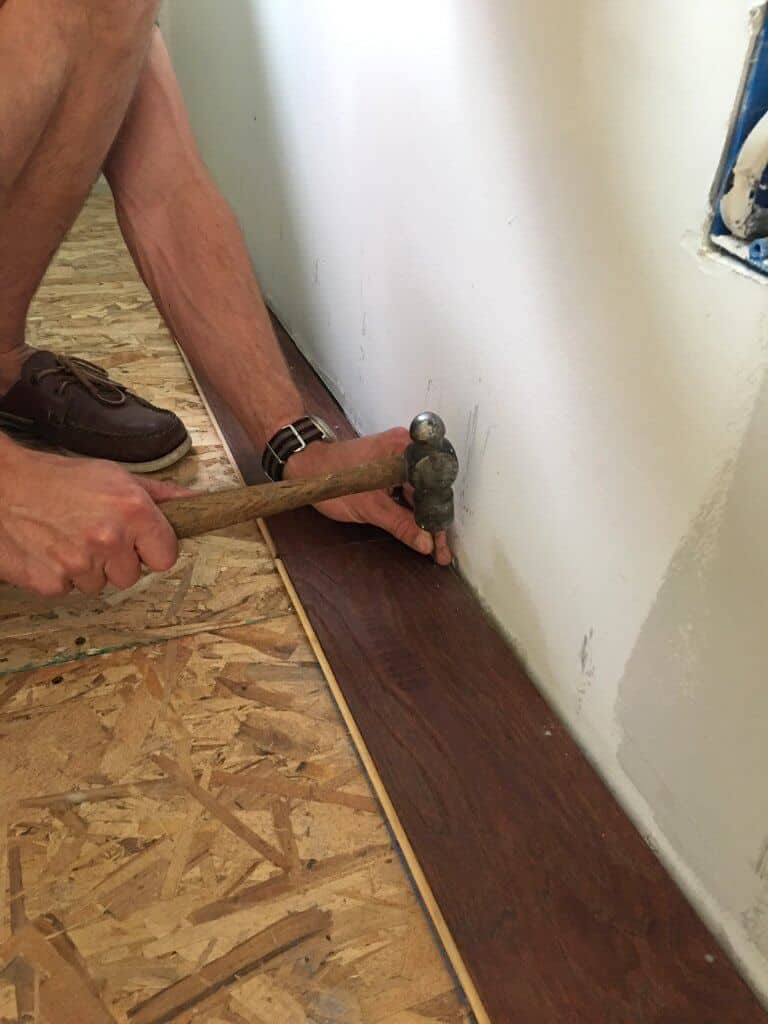
Once the first row is installed, the rest of the flooring can be secured using an air stapler. You staple it every 4-6 inches along the floorboard and also within 2 inches of the ends of the floorboard.
The air stapler that we had was relatively compact so it allowed us to start stapling on the second row whereas with most staplers (that are much larger) you’d have to drill holes at a 45 degree angle into the tongue of the flooring and then hand-nail them. We had to do that on the first row but on all subsequent rows up until the last row we were able to simply air staple them. The air stapler comes with an attachment that ensures a perfect 45 degree angle for every staple. Our air stapler was indispensable and made the work much easier and a whole lot quicker. We highly recommend the Freeman 18 Gauge Mini Flooring Nailer/Stapler.
Just to point out again, the great thing about tongue-and-groove flooring like this is that you attach the flooring by stapling through the tongue and then when you slide the floor panel into the groove of the next panel it hides the staples. It made the installation process very easy.

It’s especially important to make sure that every flooring piece is very tightly locked together so there are no gaps, otherwise it will throw off any subsequent pieces that lock into it. While it’s possible to install the flooring with one person, a second set of hands and eyes ensure that the pieces stay together tightly while being stapled.
As for the pattern of the flooring, the floor panels come in a mixture of different lengths. That’s deliberate to help you avoid any obvious patterns. The goal is to make them look as randomly placed as possible because that is the most visually appealing. The mixture of lengths (short, medium, long) also helps minimize the amount of cutting to length needed.
Likewise the panels, being real wood, come in a variety of subtly different shades, so you just want to make sure that you don’t have obvious groupings of light panels and dark panels. When you mix them up and place them randomly it gives a nice variation to the finished floor.

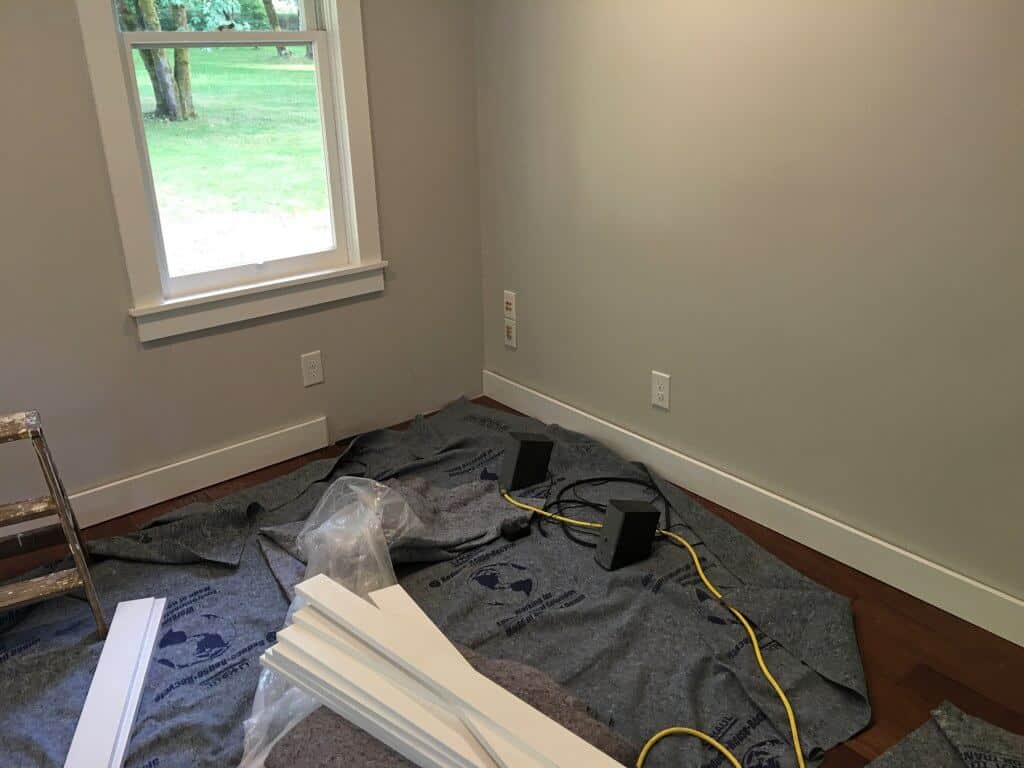
Our final step was installing the baseboards. We wanted to have a contemporary yet classic look so we went with fairly tall, 5-inch baseboards which nicely complement the window and door trim which are 3 1/2 inches. It’s generally recommended that baseboards be a little wider than the window and door trims for a more balanced look – it gives more of a sense of weight towards the flooring. In a way it anchors everything.
We painted them white to brighten up the small living space and provide contrast with the flooring. They make such a huge difference in the final appearance.


Isn’t it gorgeous?!
Strangely, even though the flooring is on the darker side it has made this tiny room feel bigger. Perhaps its the contrast in light-to-dark shades that create the optical illusion of a larger space.
We were really floored (no pun intended) by how easy the installation process was. And yes, we gloated over how much money we saved by doing it ourselves!


I just love this wood.
Look at the shading variations and the ripply texture.


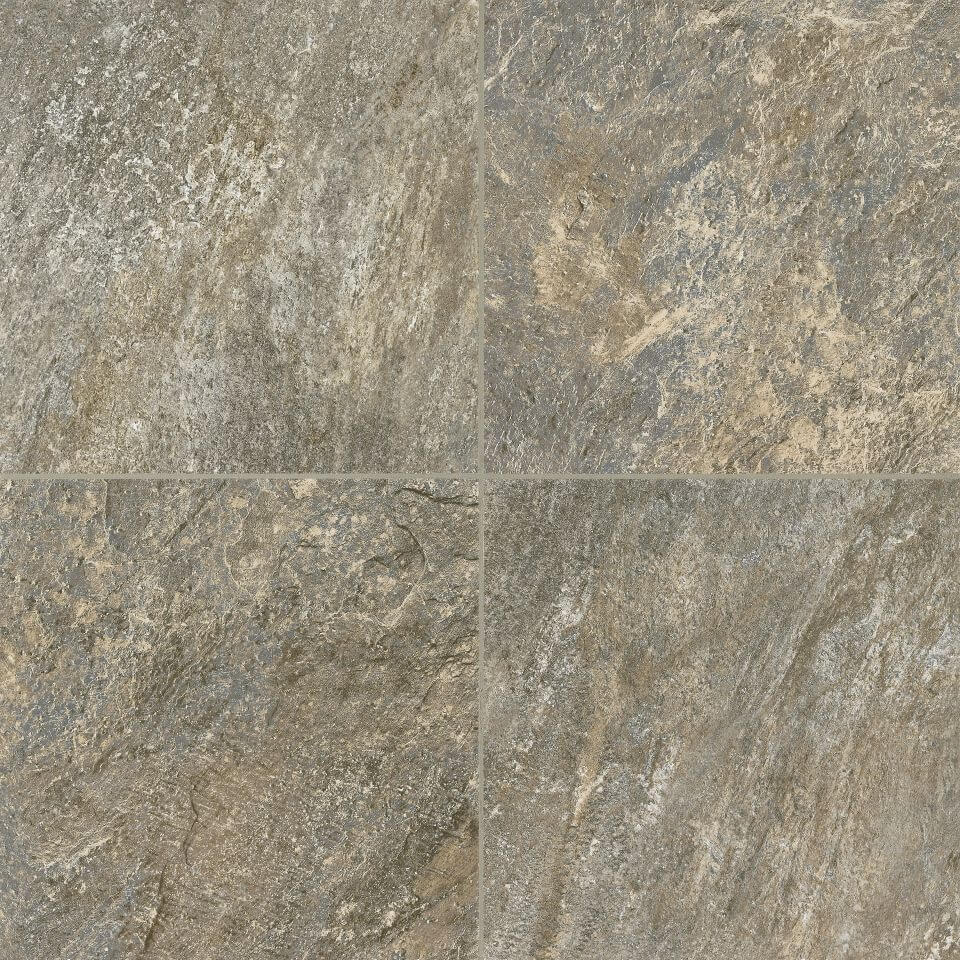
For the bathroom flooring we wanted to avoid traditional tile floors and go with something easier to install (mostly we didn’t want to have to deal with the cutting) – but we also wanted to avoid vinyl. Armstrong has the perfect solution: A special “luxury vinyl” that is actually a composite of limestone and vinyl so you get both the look and feel of real tile but with much easier installation (I cannot overemphasize “much”). We chose Armstrong’s Cuarzo – Iron Blue from their Alterna line. We love it!
The same rules apply for installing tile: The floor must be completely flat with no dips or humps that fall outside the acceptable range (1/4 inch per 10 feet or 1/8 inch per 6 feet). We laid down some asphalt roofing shingles again and placed plywood sub-flooring over it.
This time a different kind of plywood flooring was required in order to install tile: We used 7/16 inch exposure 1-rated fir plywood rather than OSB flooring we used for the hardwood because it’s rated specifically for moisture exposure whereas OSB is not. Keep in mind, it’s not meant to get really wet, but it handles moisture better than other options that might be used for sub-flooring.

As with the instructions that came with the hardwood flooring, Armstrong’s instructions for installing the tile were comprehensive and easy to follow.
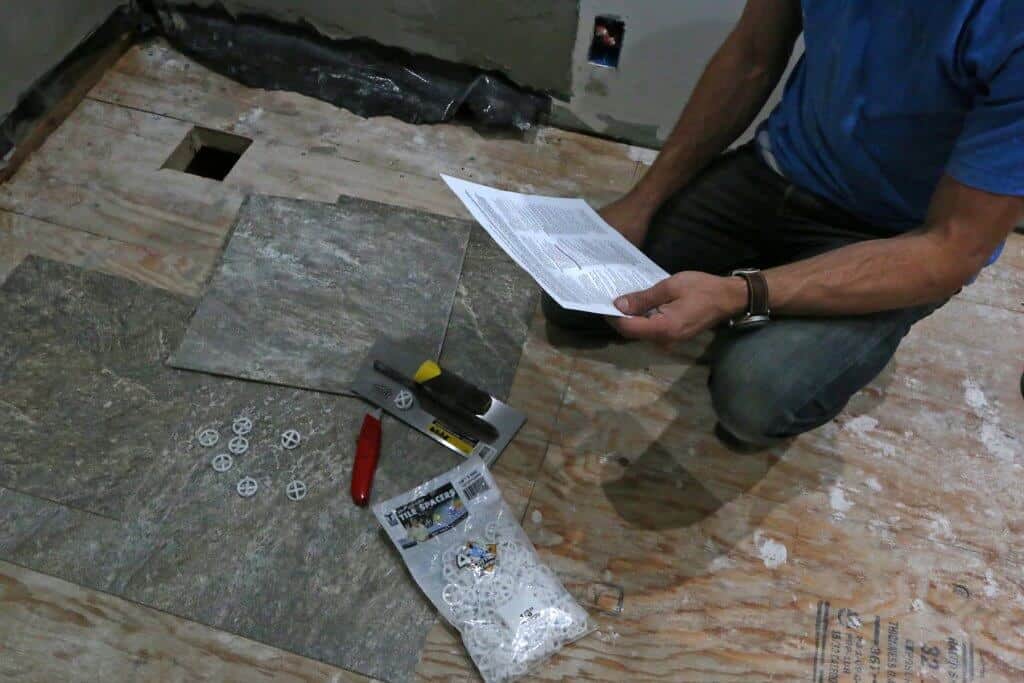
We marked the center point of the room because tile is laid from the center out.

Before we applied any adhesive we wanted to get everything laid out and cut first to make sure it all fit properly.
These tiles are extremely easy to work with and cut. A simple scoring with a boxcutter allows you to bend and snap the tile for a very clean cut. For round cuts to fit around the base of the shower and toilet flange we used a jigsaw and for complete circular cuts (for plumbing pipes to pass through) we used a hole saw. Compared to ceramic or porcelain tile, it’s very quick and easy to cut this tile and it doesn’t require all the tools you would normally need to cut traditional tile.
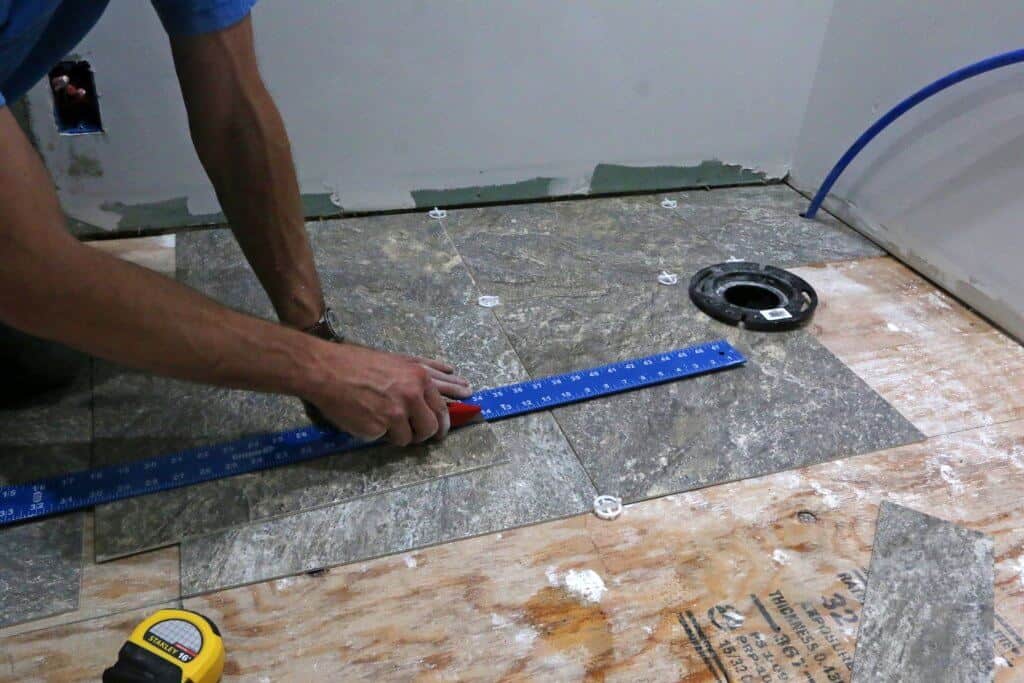
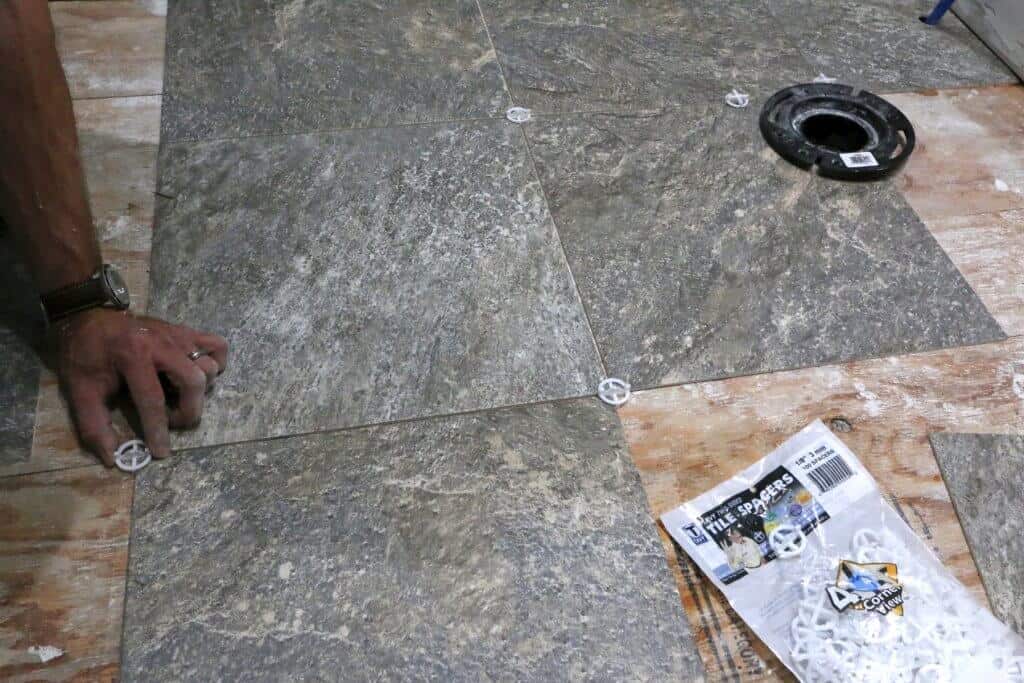
For spacing the tile grout lines we used 1/8 inch Tavy Double-Sided Tile Spacers. These are an absolute must for keeping the tiles uniformly positioned while the adhesive is drying. Then you can remove them and apply the grout.
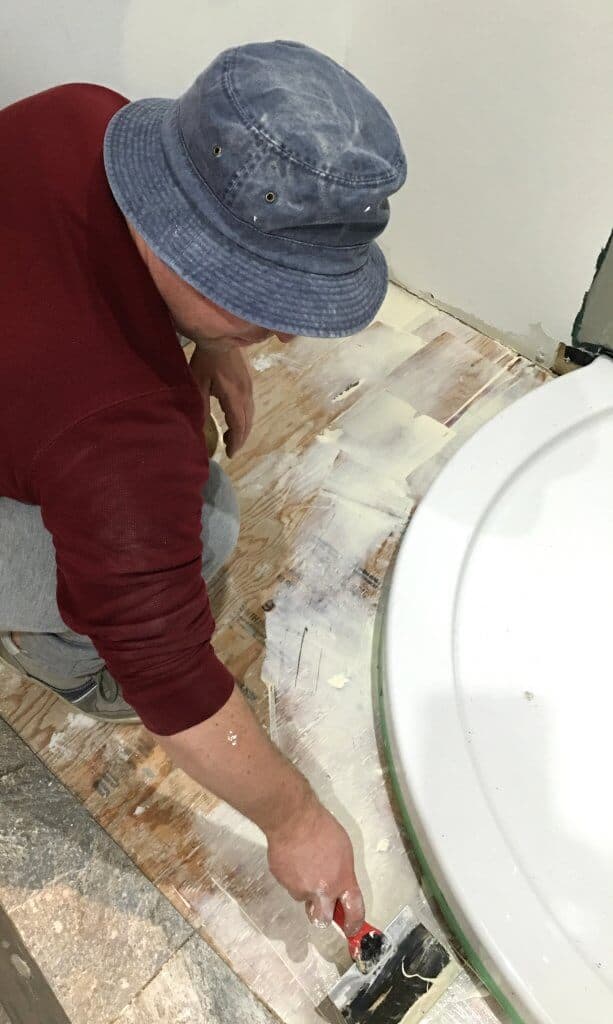
Armstrong makes the S-288 Flooring Adhesive that is specially formulated for this unique tile blend of is limestone and vinyl. You can’t use mortar like you would with traditional tile or the standard vinyl adhesive.
The adhesive is applied with a notched trowel per Armstrong’s instructions. It only requires a very thin layer of adhesive to be spread over the area. The instructions recommended applying the adhesive to one quarter of the room at a time before moving on to the next quarter to prevent it from drying out. When we measured the center point of the room we divided the room into 4 quadrants.

Having already laid everything out in advance to ensure everything fit properly, the installation went very quickly.
Again, the Alterna tile is very easy to work with.


Armstrong makes a special grout (S-693 Pre-mixed Grout) that is acrylic based and is resistant to staining or discoloration like traditional grouts. Their grout comes in a variety of colors and shades that you can match to the tile you’re using. We chose “Mist” which is slightly lighter than the tiles to provide a subtle contrast.
The grout is very simple to apply. The grout came with instructions and were easy to follow. Again, it’s best to work in sections so that you’re not stepping over fresh grout. Simply scoop the grout out with a grout float a little bit at a time and smear it diagonally across the grout lines until you’ve filled them all in and scrape off the excess with the grout float.

There will be a fair amount of fresh grout smeared over the tiles. Before it dries you simply wipe it off with a large damp sponge. It comes off very easily. We used two buckets of water so that we weren’t re-applying “grouty” water to the floor.
After you’ve finished with that there will still be a hazy film smeared across the tiles. That’s normal, just let it dry and then wipe it down with a damp sponge and it will come off easily.


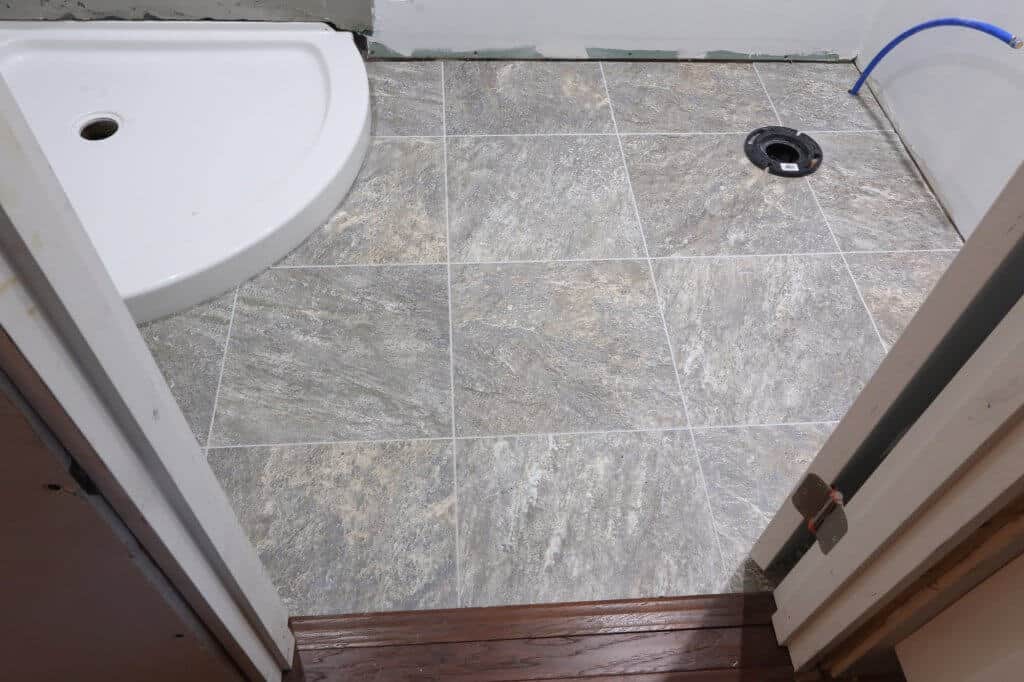
We were absolutely amazed at how easy this was and how quickly we were able to get it done. From start to finish we laid down the tile flooring in less than 3 hours, including the grouting!
It looks awesome!

The final touch was to install a hardwood reducer strip from Armstrong to place in the doorway for a nice, clean transition from wood to tile.
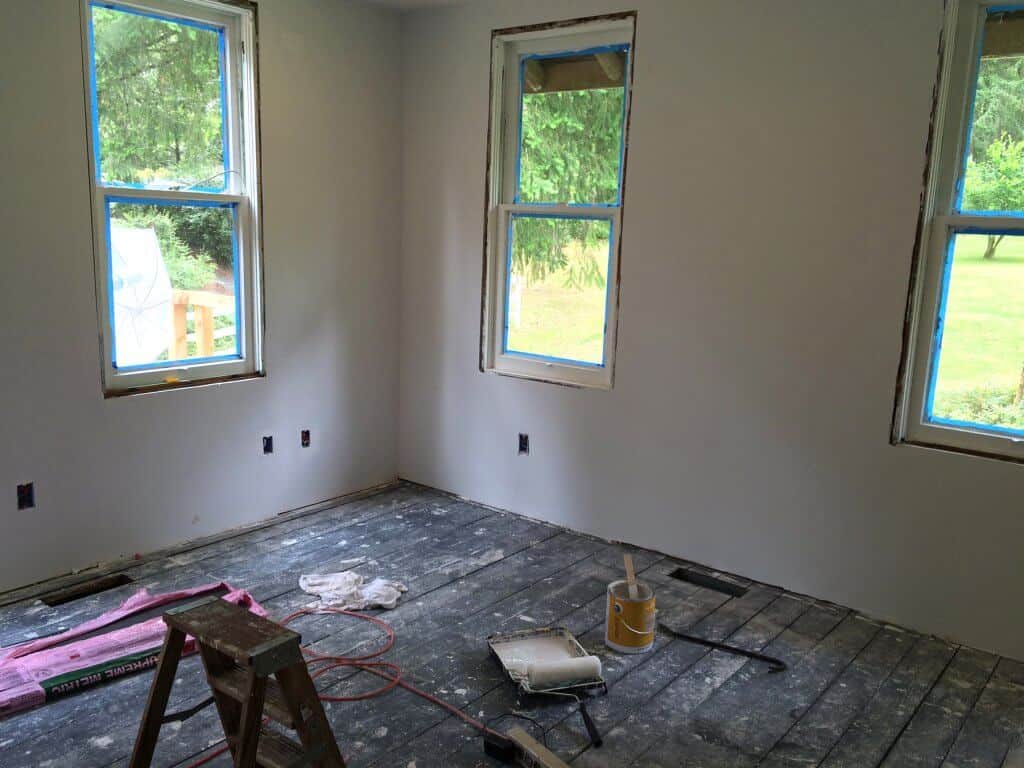
Getting the floors done has given us a real sense of accomplishment, especially when we recall what the place looked like before.
To refresh your memory and provide some perspective, let me show you the before and after pics.

Let’s start with the bathroom.


And then the main living area:

That’s quite the transformation, isn’t it?
While the place was already starting to take shape once we finished the drywall and painted everything, it wasn’t until we laid down the flooring that the real magic happened. We love our Armstrong floors!
In upcoming posts as the entire place is completed you’ll get an even more complete view of how beautiful these floors are.

The installation of the hardwood flooring and bathroom tile went smoothly and the results couldn’t be more perfect. Had we hired a professional they honestly couldn’t have done a better job. Doing it ourselves saved us a ton of money and bolstered our confidence for tackling other flooring projects in the future. So if you’re in need of new flooring, don’t let yourself feel too intimidated to do it. If you have even the most basic DIY skills you can handle this!
Whew. It feels like it’s taken us forever to get this point. But when we look back on the pictures of what this place looked like before, you can only imagine our sense of accomplishment and elation.
*Happy Dance* *Happy Dance* *Happy Dance* *Happy Dance* *Happy Dance* *Happy Dance* *Happy Dance*
Just give me a moment to catch my breath….
![]()
March 2018 Update: We’ve not completed the DIY remodel of our main home’s kitchen and chose Armstrong Flooring again. Check out this stunning hardwood in our new kitchen!

A special thank you to Armstrong for partnering with us on this project and thank you to our readers for supporting the brands that make The Daring Gourmet possible!


Hi, I’m Kimberly Killebrew and welcome to Daring Gourmet where you'll find delicious originals, revitalized classics, and simply downright good eats from around the world! Originally from Germany, later raised in England, world-traveled, and now living in the U.S., from my globally-influenced kitchen I invite you to tour the world through your taste buds!


I love the luxury vinyl tile. I am considering using this in my kitchen and would like to know how it’s held up. I would prefer to do a wood floor but have determined that my 1960s home is one of the lucky ones that has sheet vinyl that was installed with an asbestos mastic.
While I could do a floating wood floor having a senior dog and a floating wood floor seems like a recipe for disaster. So LVT it is.
Thanks for any info you can provide.
It’s held up great and looks as good now as when we installed it!
These floors look fantastic!!Great job!!
So you should be – it looks fabulous!
Kimberley, not your usual subject matter, but I have really enjoyed this series. It appeals to my home-making instincts and it shows that a lot of jobs can be done with a little research and application without having to call in expensive professionals. I’m impressed – a lot of these jobs I wouldn’t normally have the confidence to tackle myself. Looking forward to the kitchen episode.
Thank you, Phil. The project became far more involved and challenging than we had originally thought, but it’s been a tremendous learning experience. And we’re very happy with how things have been progressing.
What a wonderful job. I have such fond memories of all the projects like this my husband and I did over the many years of our marriage. It’s so much work but so much fun as well. Congratulations to you both. Looking forward to seeing the final product!
Like You Kimberly, we too have installed floors of every description, & are now using Carrera Marble to tile our newly constructed en- suite bathroom walls. In my humble opinion, anyone who can read & comprehend can now do so many of the jobs that tradesmen were once required to do & by taking a class now & then at HD/Lowe’s ones confidence is built. Armstrong instructions are very easily followed with stunning results.
I love your reconstruction & commend you on having the courage/confidence to accomplish this beautiful endeavor. Onward & upward. Kudos to your “helpers!!”
This post gives me hope that when we finally get to redoing our kitchen flooring (which was ruined by a burst pipe only two weeks after installation) it will be a simple process. My husband has excellent DIY skills, and I still have a few left, so I’m now thinking that we should be able to do it ourselves. Thank you for that.
Kimberly, you guys make this look so easy! My husband and I have been talking about replacing our floors for the past two years. He wants to try and install them himself and I’ve been too nervous at the thought so it’s just kind of been at a standstill. This is encouraging! I know if I show this to my husband he’s going to be like “see!” :) I agree, doing it yourself saves a ton of money and makes installing quality hardwood floors more affordable. Thank you for sharing this, I think I may be ready to give my husband the green light :) He’s actually really handy and good at DIY projects so if it’s even half as easy as you say it is I’m sure he’ll do a great job. I LOVE the flooring you chose from Armstrong, including the bathroom tile (I agree, I wouldn’t even think about trying to install ceramic tiles myself!), they both look fantastic. Thanks again for the tips, the flooring recommendations and the encouragement! -Cori