Olive Rosemary Focaccia
This post may contain affiliate links. See my disclosure policy.
A thoroughly authentic Italian Olive Rosemary Focaccia recipe with all the tips and tricks you need for achieving that incredible texture Italian focaccia is renowned for – those fluffy air pockets, chew interior, and perfectly crispy exterior. We’re adding rosemary and olives but feel free to omit either or both or add toppings of your choice!
Few things smell better than the sweet aroma of yeast bread baking in the oven. Add to that the fragrance of rosemary and it’s pretty much the closest thing to heaven.
Focaccia. Rustic and romantic, this prized bread from northwestern Italy is the most perfect combination of crispy, fluffy, chewy and moist that I can think of. But achieving that perfection requires several key steps. And I’m going to share those with you today throughout the step-by-step pictures so be sure to follow those for all the special tips and tricks.
Where Did Focaccia Originate?
Focaccia has been enjoyed since the time of ancient Rome but more recently it is associated with Ligurian cuisine – the northwest region of Italy that includes Genoa and the Italian Riviera.
The word focaccia comes from the Latin word focus which translates as “hearth” or “place for baking.” I like that. Because the kitchen today – our place for baking – is very much the focus and heart of the home. And what speaks the love language of “homemade” more than a fresh baked loaf of bread?

What is the Difference Between Focaccia and Pizza?
The more contemporary offspring of focaccia is pizza and while they share some similarities, there are several distinct differences. The biggest difference is that focaccia uses more yeast which increases its capacity to absorb large amounts of olive oil. And using plenty of oil is key to achieving the right consistency. Indeed, focaccia is also known as “olive oil bread” for that reason. Authentic focaccia is not a thick, dry, fluffy bread. It’s crispy-chewy with a generous amount of olive oil soaked into it.
One of focaccia’s visual hallmarks are its dimples. But aside from their aesthetic appeal, these dimples also serve a functional purpose: The dimples provide a divot in which the olive oil can pool and absorb into the bread as it’s baking.
Another difference is its shape: While pizza traditionally is round, focaccia is traditionally square or rectangular. Focaccia also uses more salt than pizza since it relies on fewer toppings.
Which leads us to our final distinction: Whereas it’s acceptable in Italy to use more than one topping on a pizza, traditional focaccia is limited to one and that’s commonly paired with an herb as with today’s recipe, Olive & Rosemary Focaccia. But if you’ve ever tried the real thing in Italy, you know that these limits are perfectly fair because it is the bread that is the star. And this crispy-chewy, olive oil-drenched bread is a star indeed.
There are regional variations of focaccia throughout Italy, including sweet variations like focaccia dolce that uses raisins and honey. Today we’re making the original focaccia, focaccia alla Genovese, which is savory.
I’m going to make this focaccia using olives and rosemary for a phenomenal Olive Rosemary Focaccia but you can use any toppings of your choice.

Olive Rosemary Focaccia Recipe
Let’s get started!
First we’re going to prepare the yeast dough.
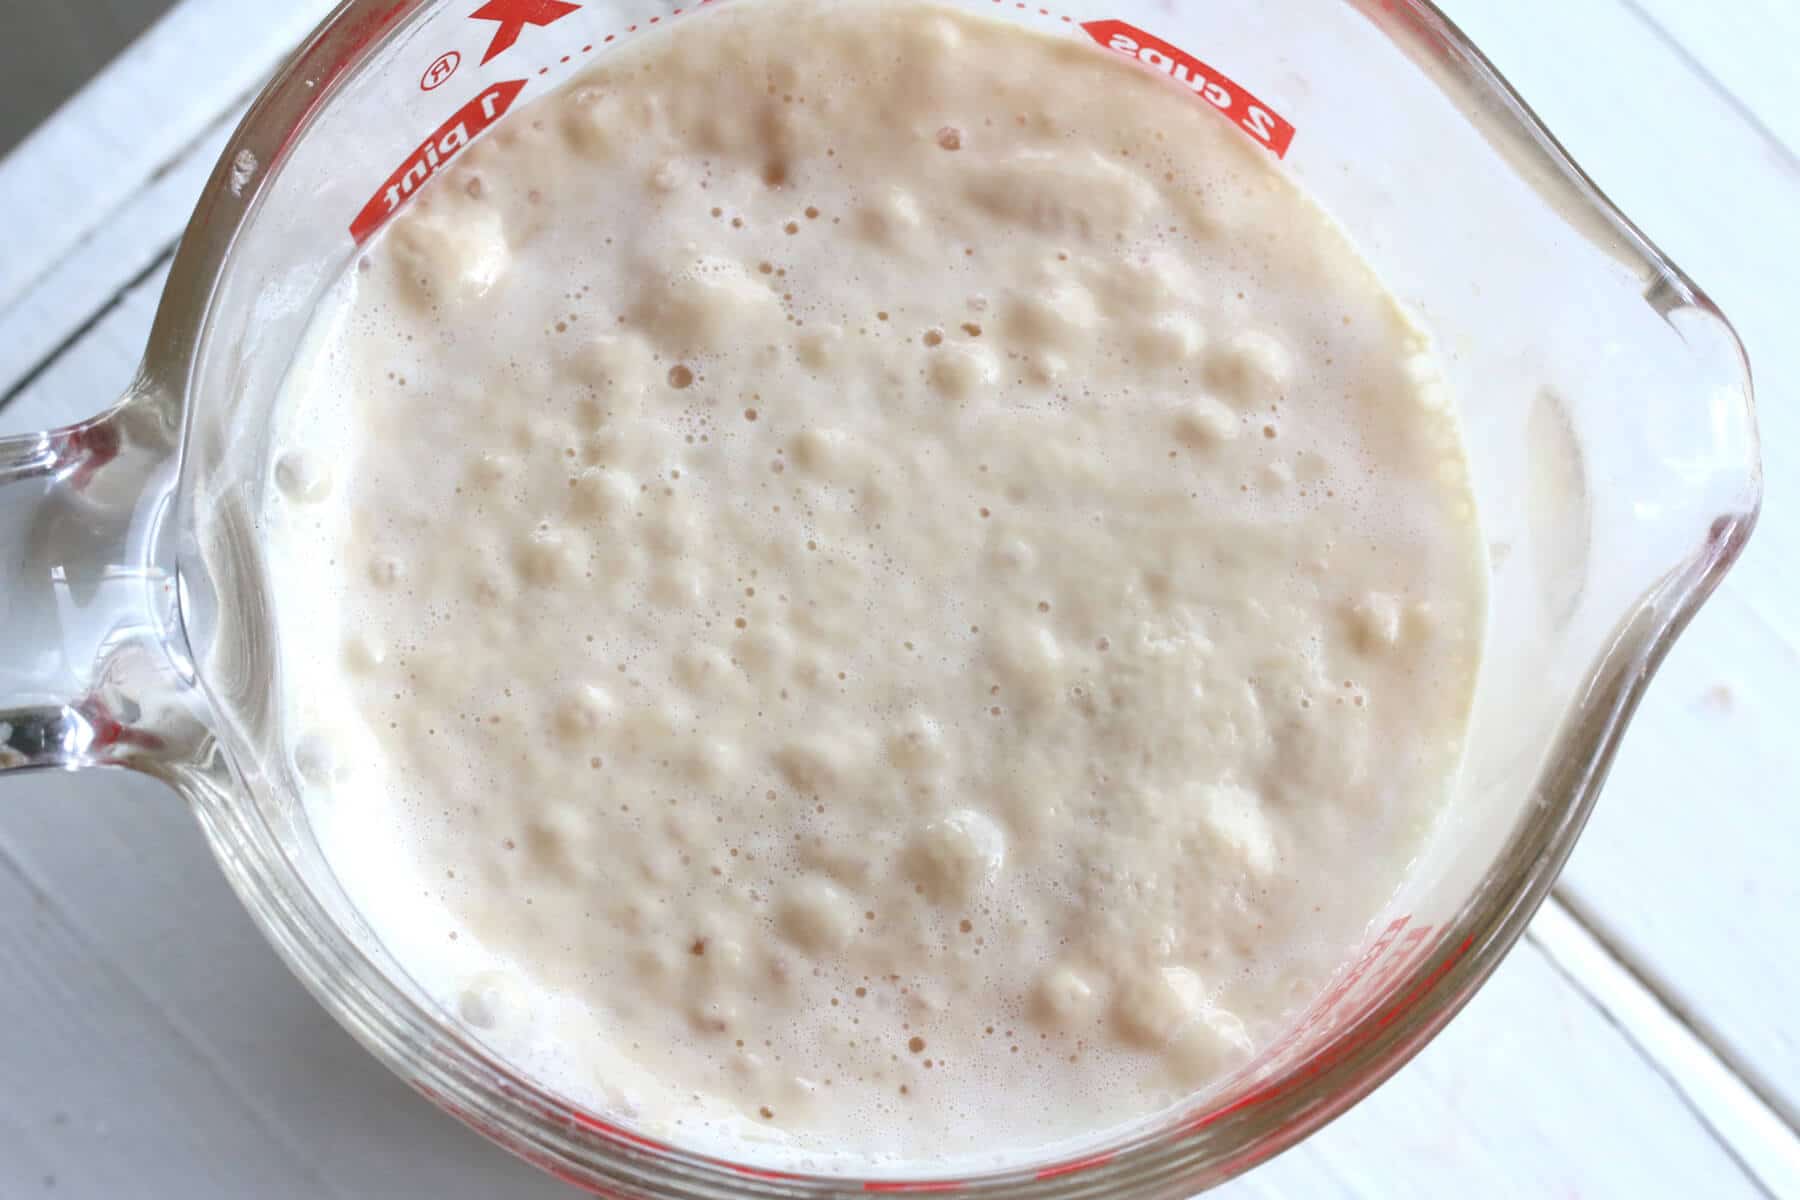
Combine the yeast, water and sugar in a bowl and let it sit in a warm place for about 15 minutes until frothy.
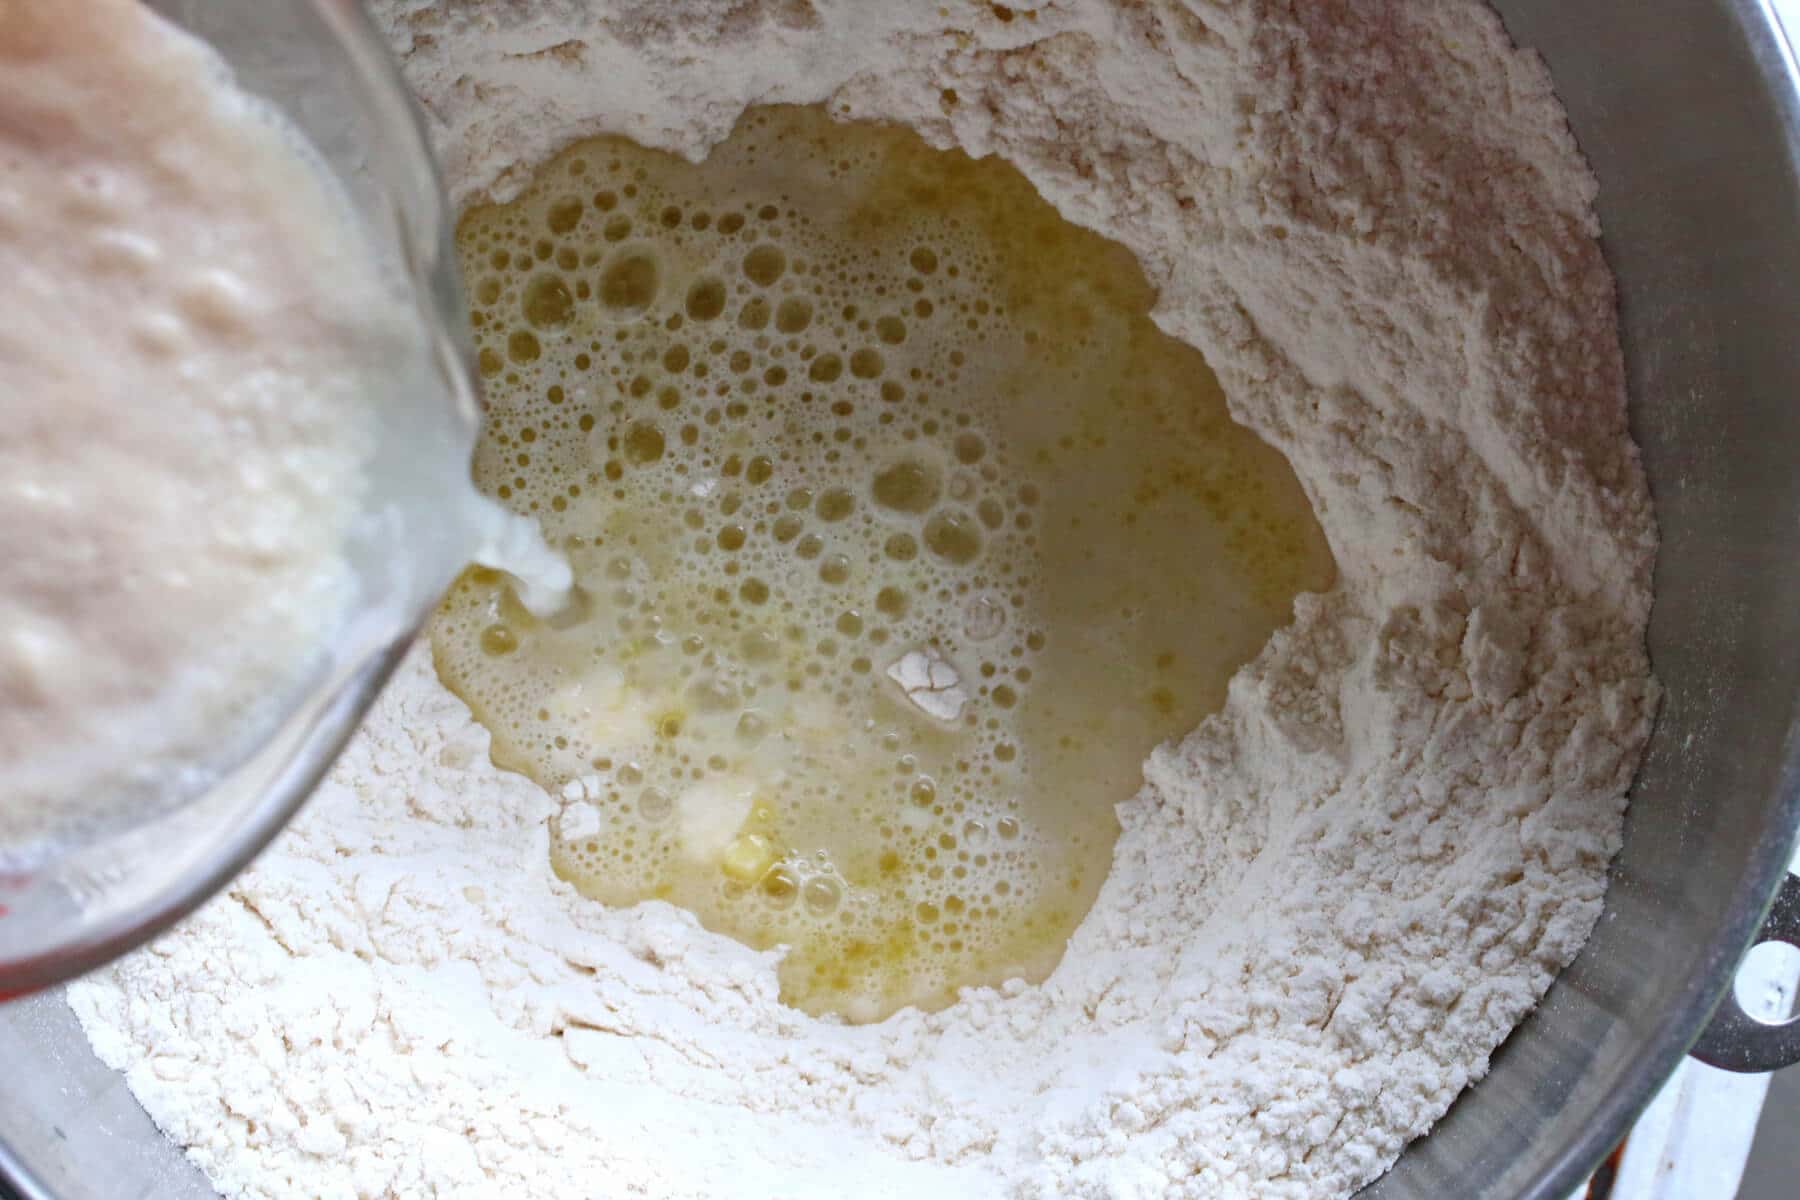
Traditionally of course the dough would be kneaded by hand, but we’re going to take advantage of modern conveniences. In the bowl of a stand mixer, add the flour combine the flour, salt, olive oil and yeast mixture.
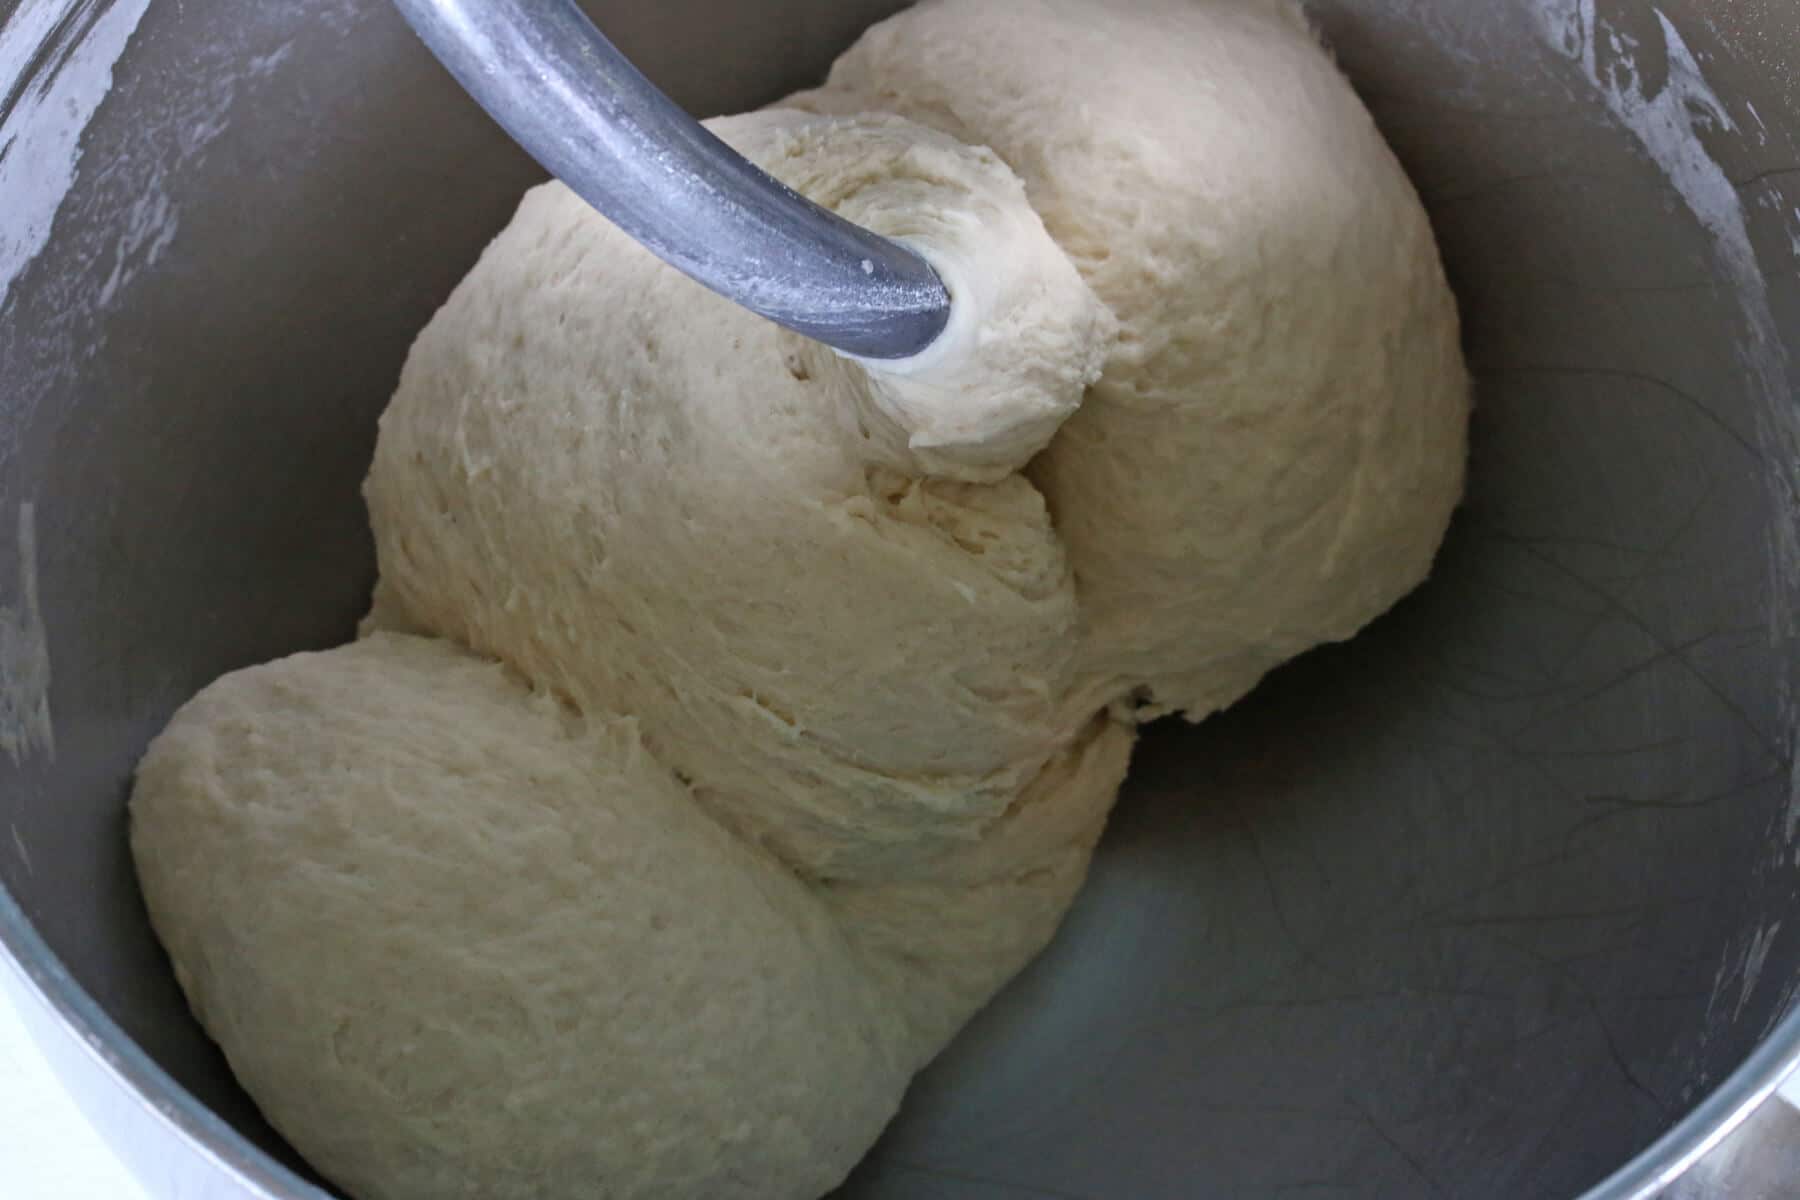
Fit the stand mixer with a dough hook and knead the dough on low speed until the dough comes together, then increase to medium speed and continue to knead for another 5-7 minutes until the texture becomes smooth and soft. If the dough is too sticky add a little more flour.
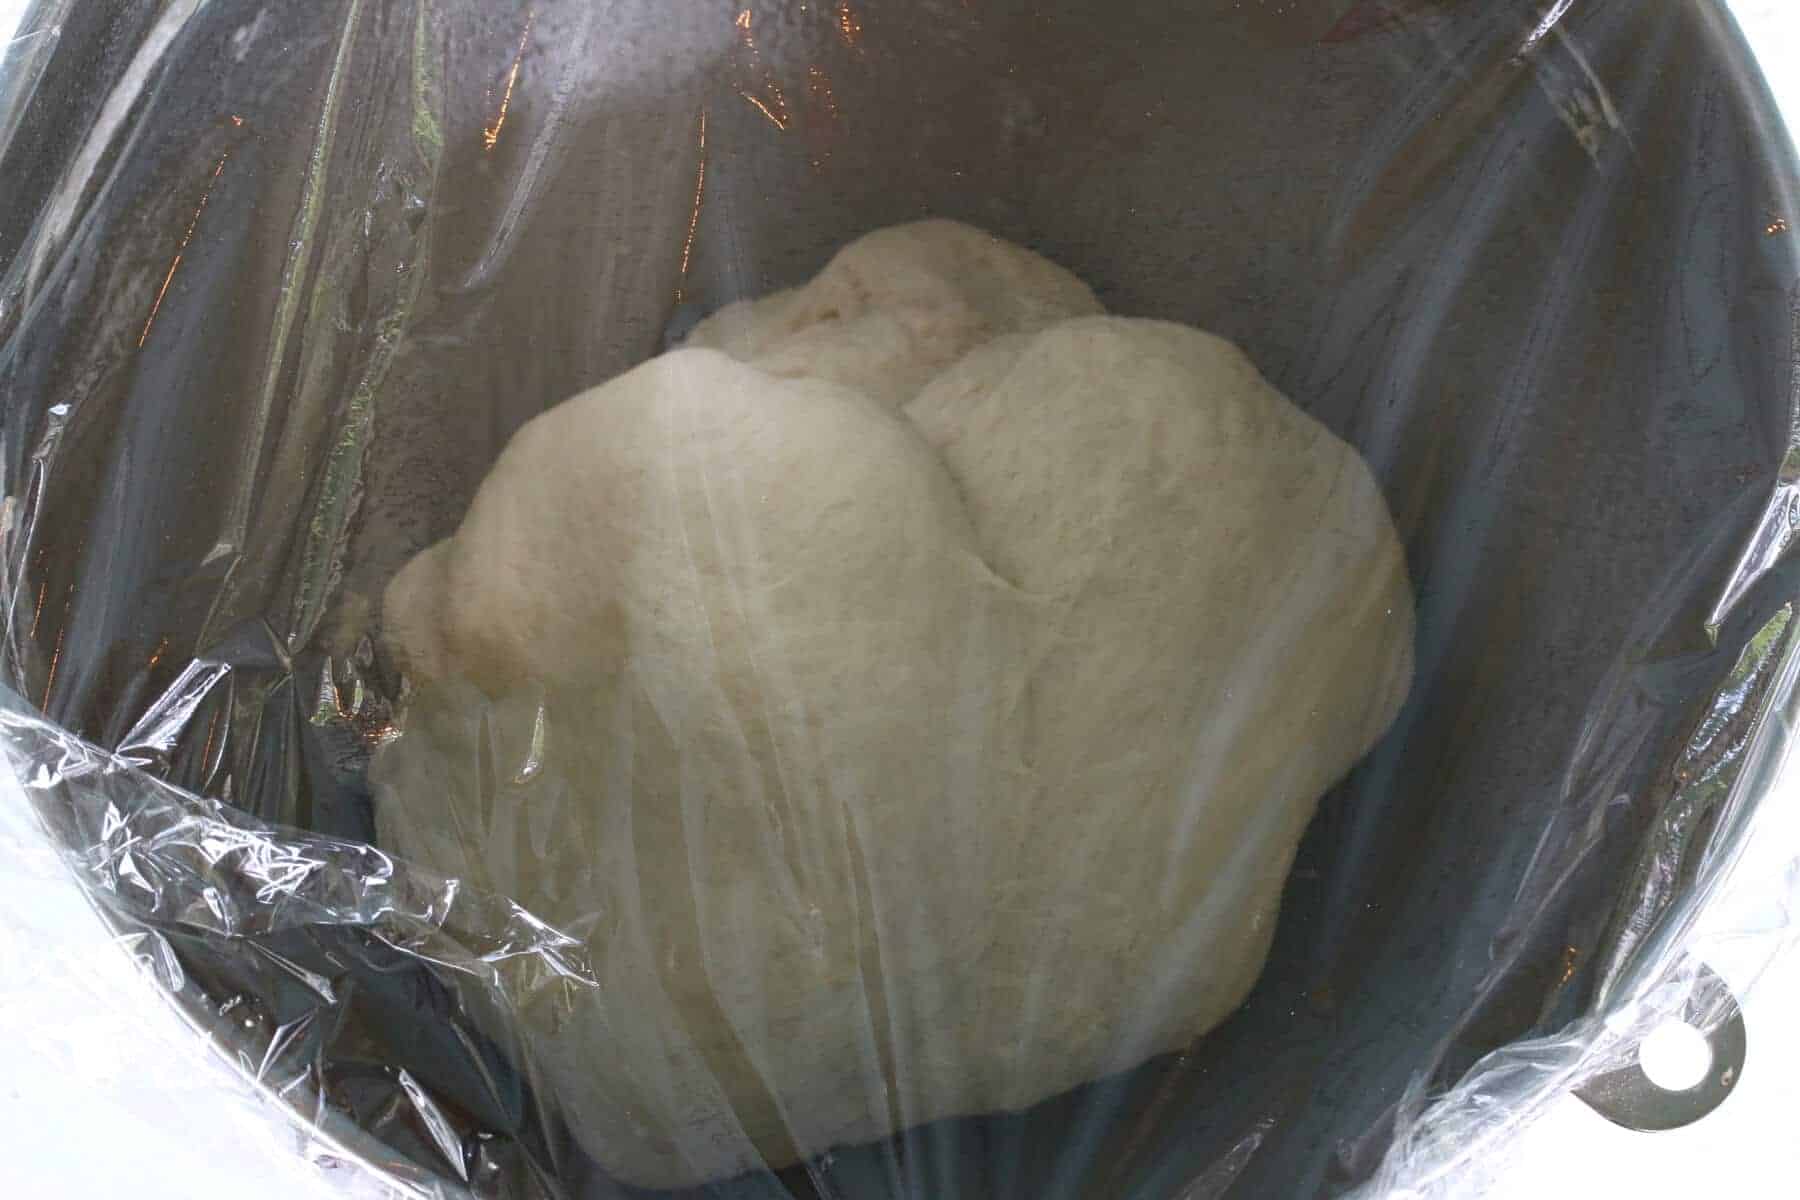
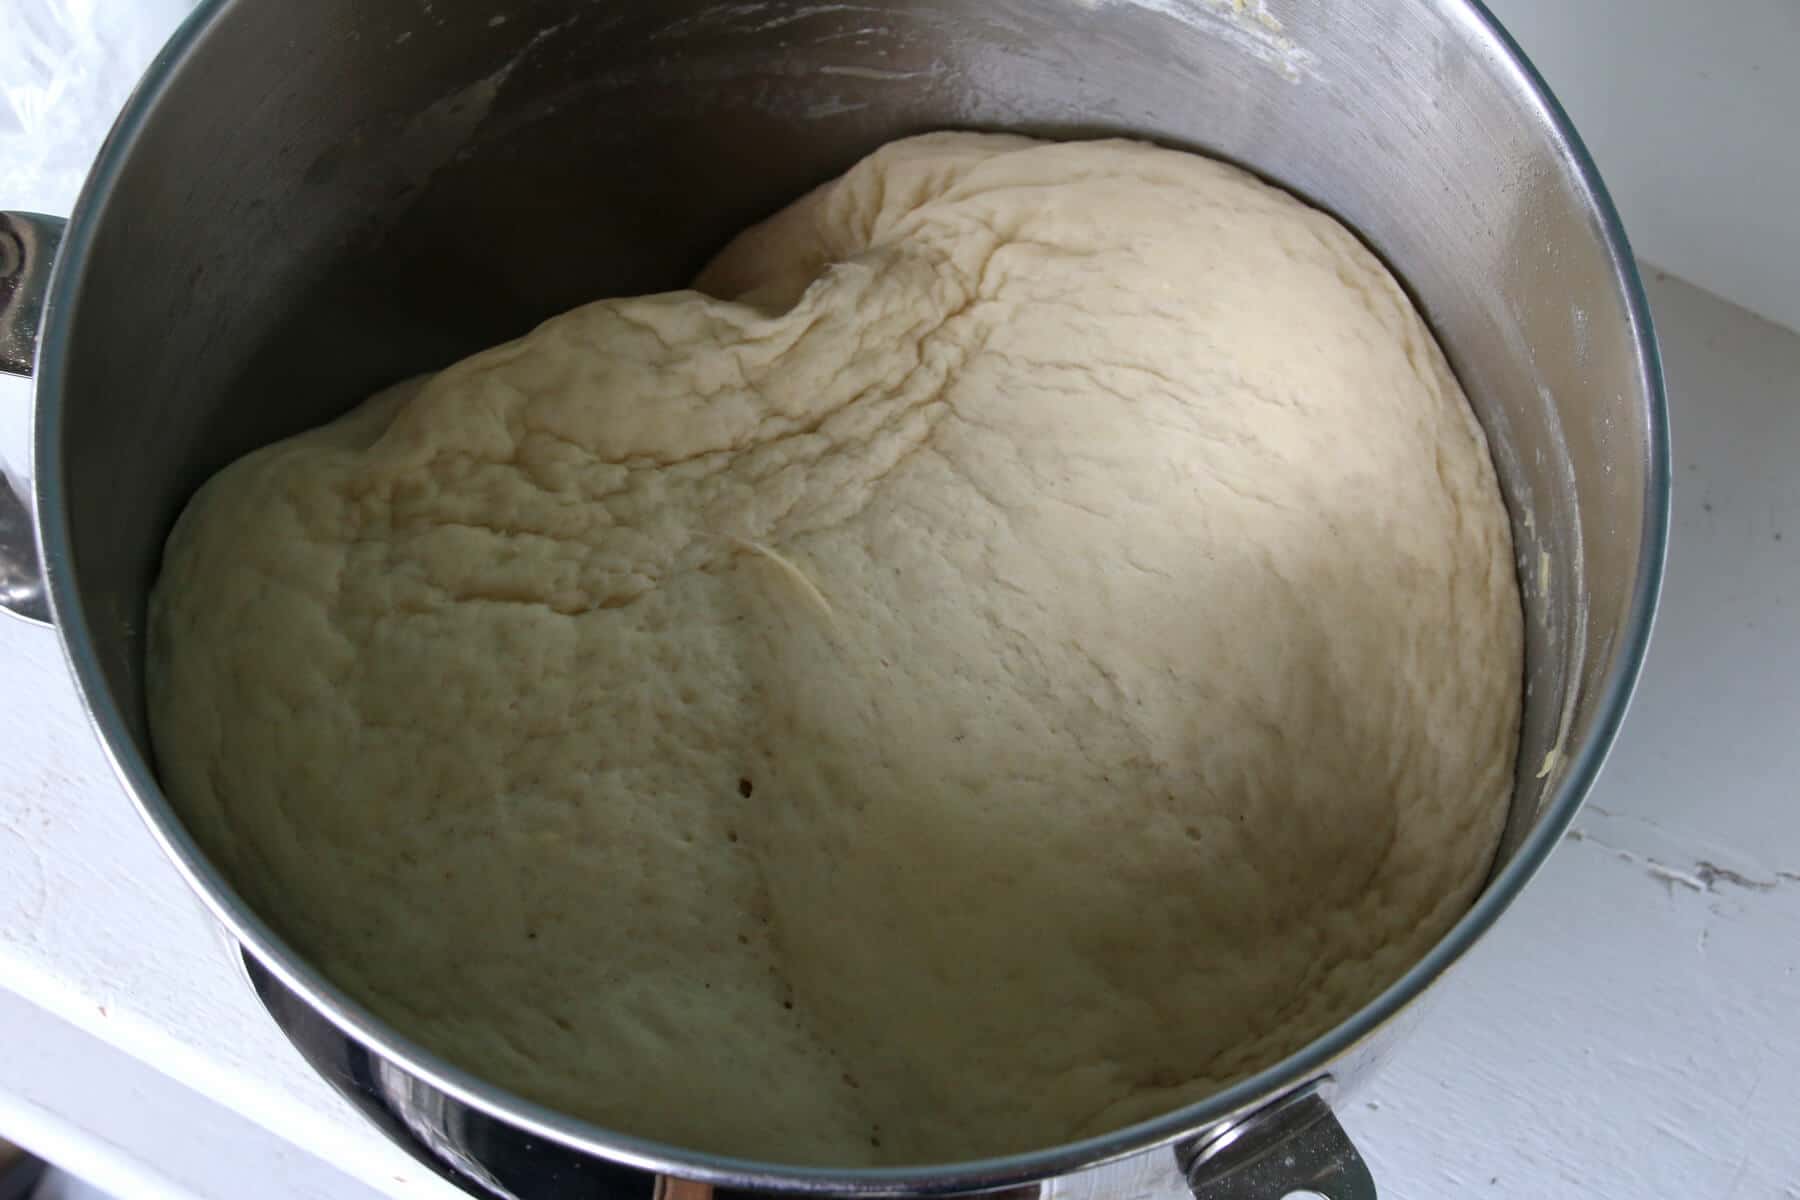
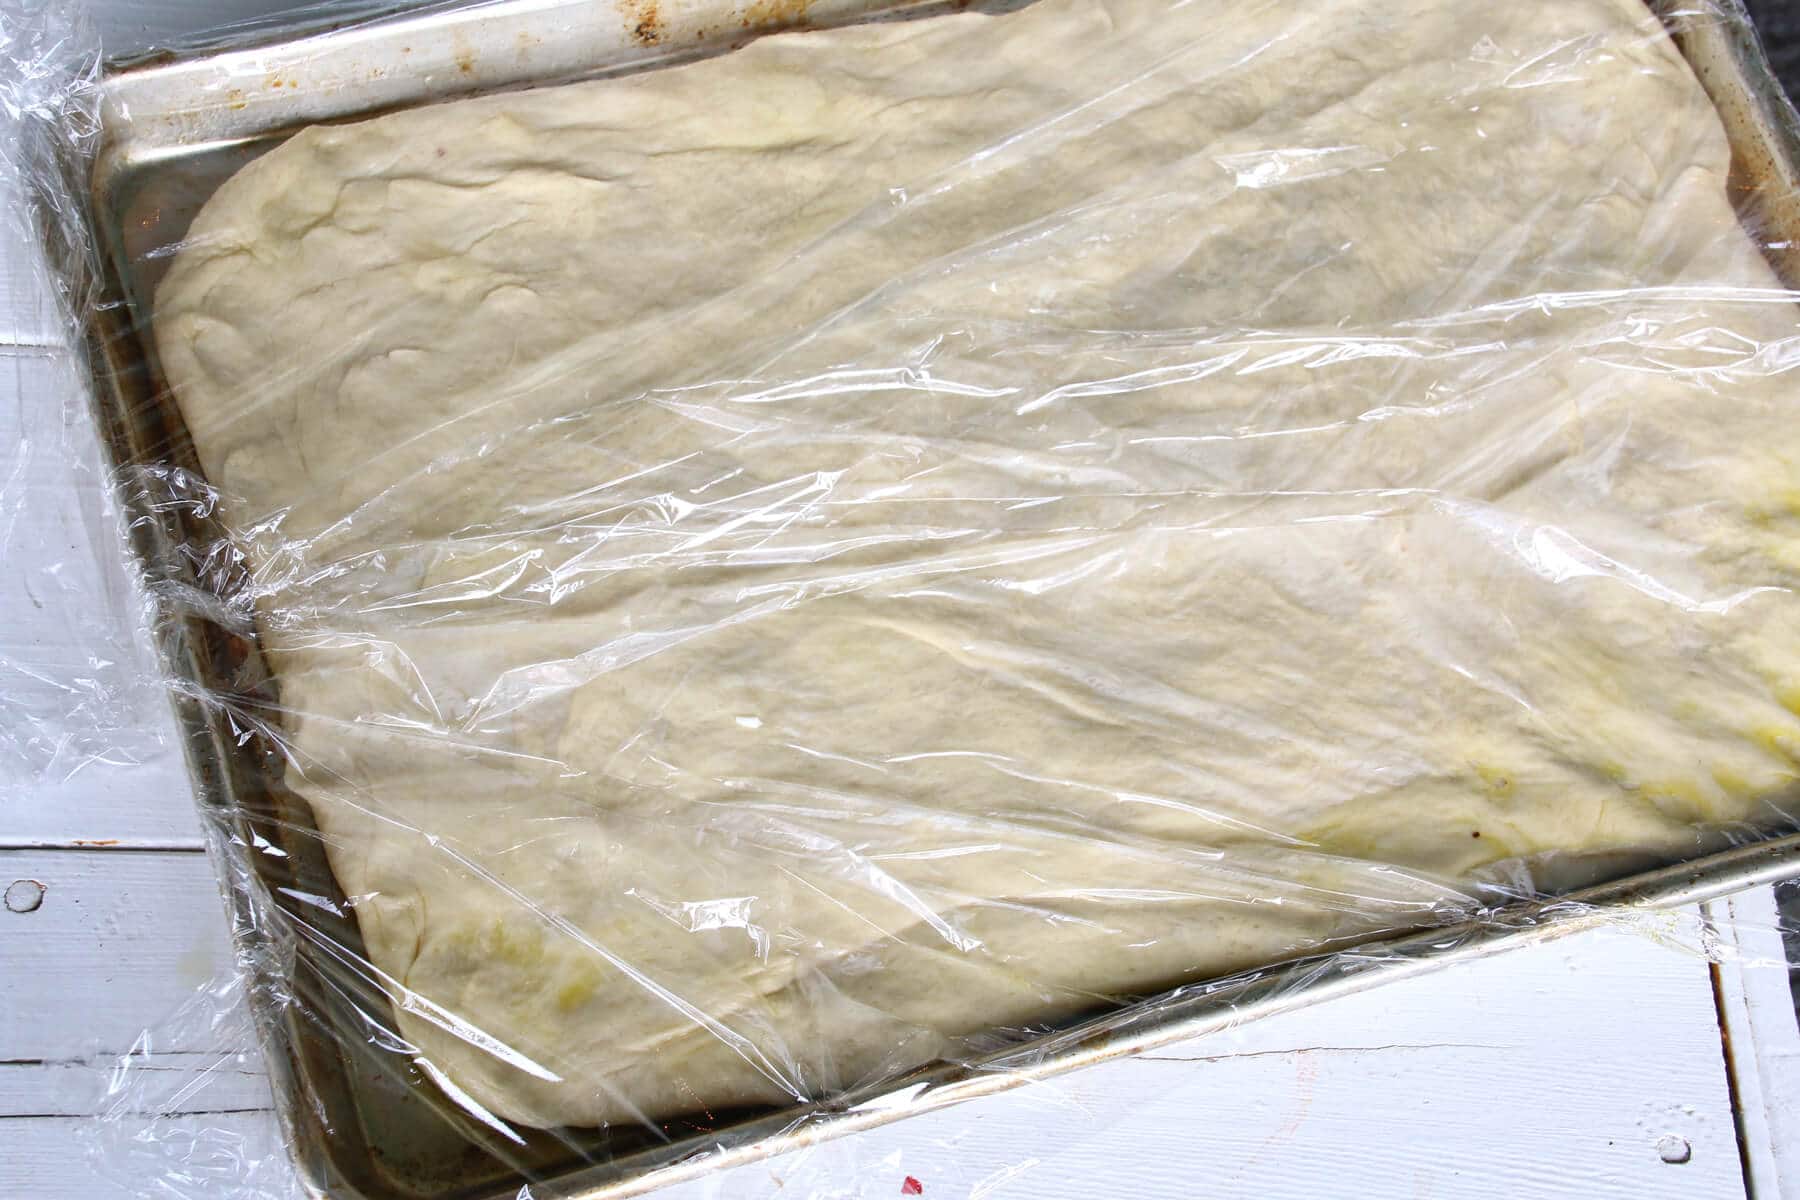
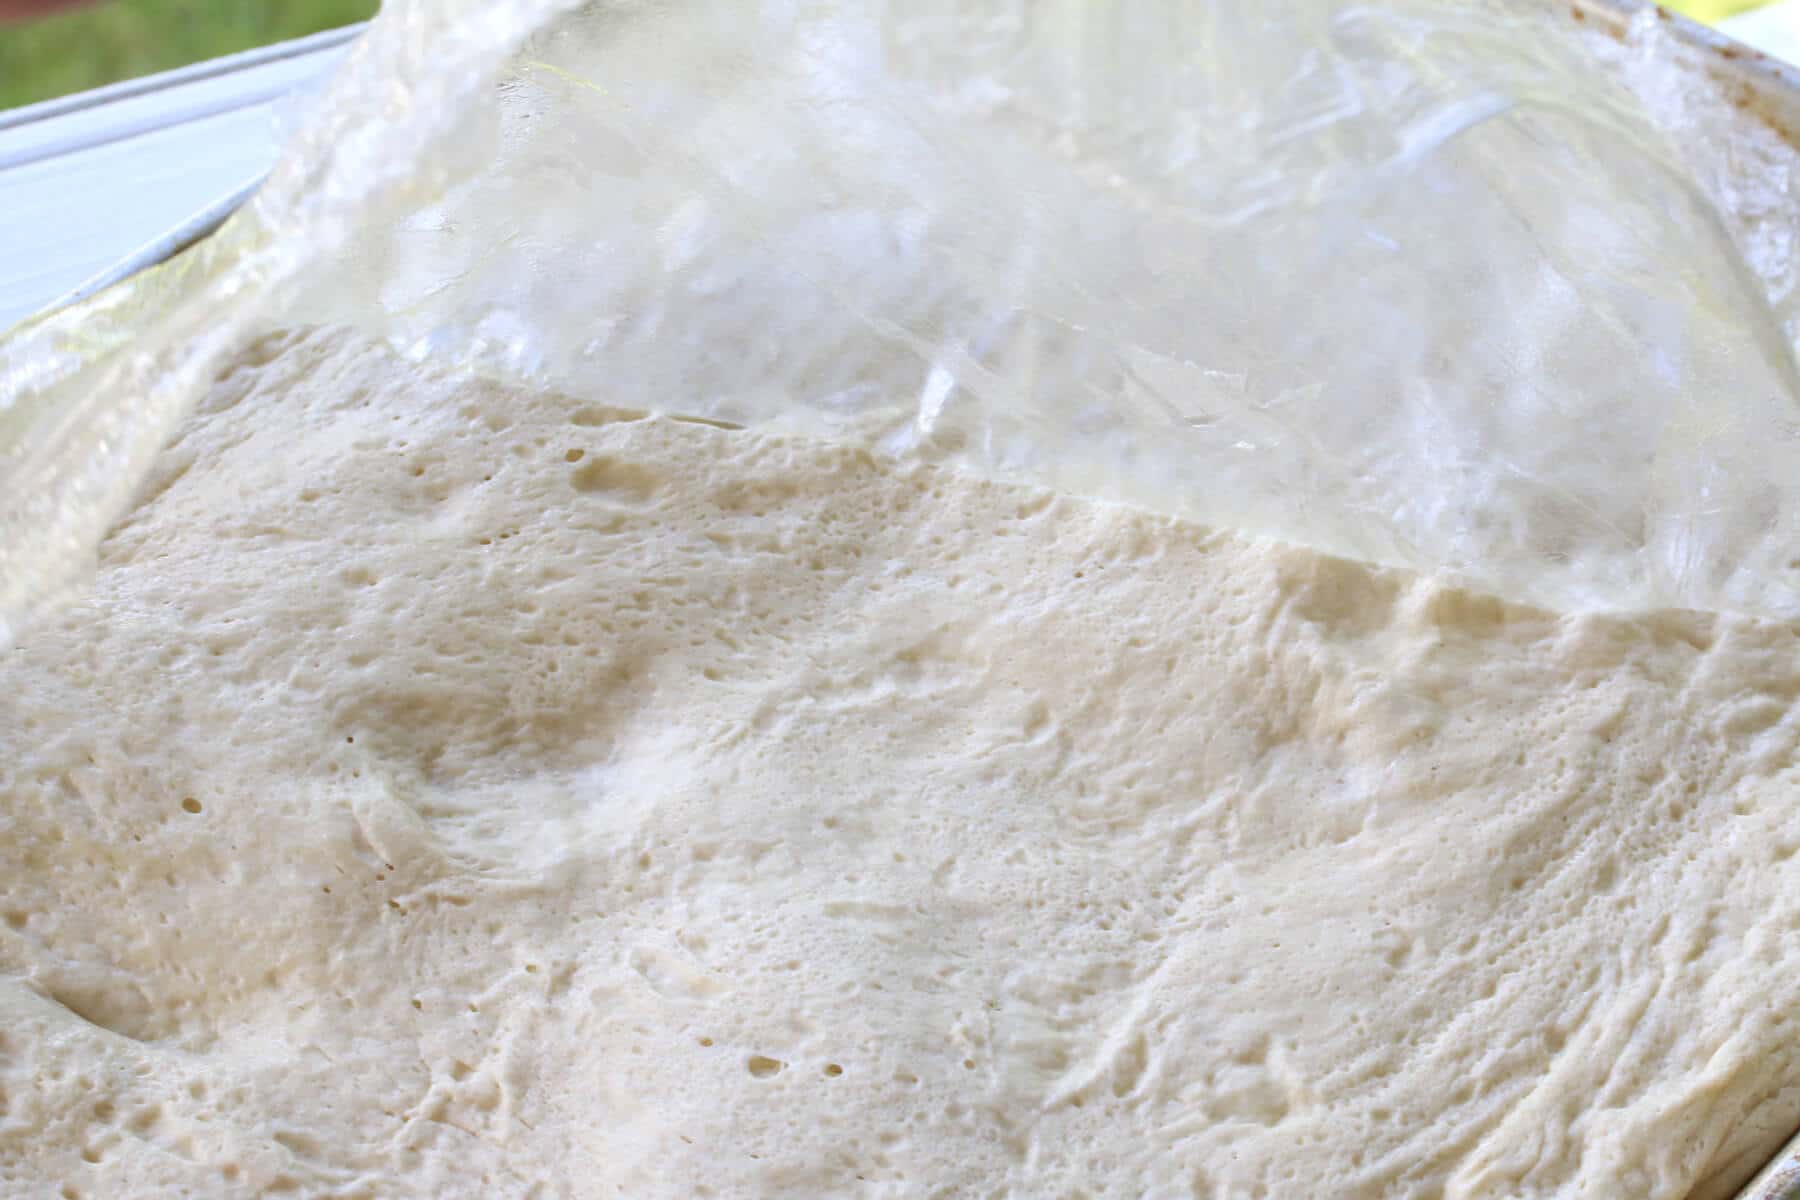
Remove the dough, spray the mixer bowl with olive oil, return the dough, cover the bowl loosely with plastic wrap and put it in a warm, draft-free place to rise for at least 1 hour or until doubled in size.

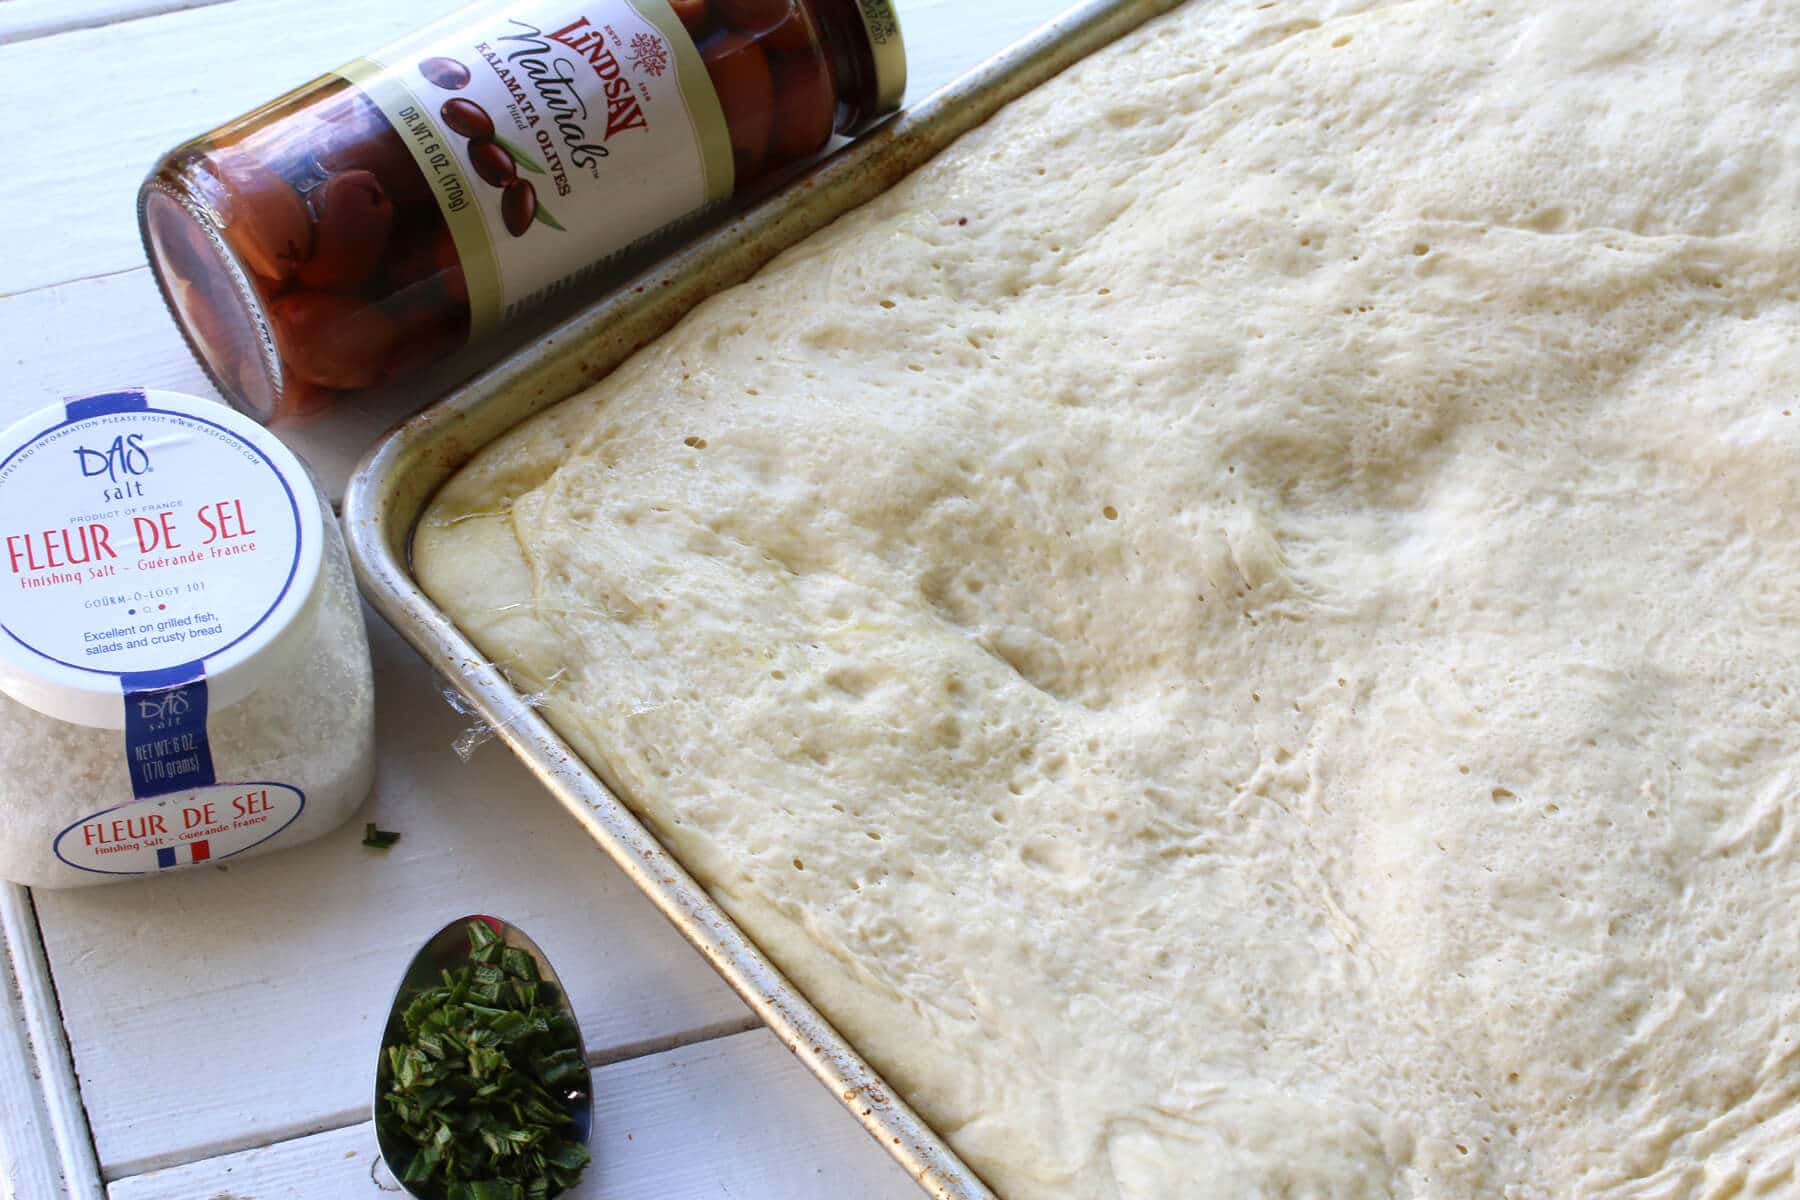
Coat a standard 15 1/2 x 10 ½-inch rimmed sheet pan with the 1/4 cup of olive oil.
Don’t skimp on the oil. That’s going to not only enable some olive oil to absorb up into the focaccia from the bottom, it’s going to produce that perfect lightly crispy bottom crust!
So don’t hold back and drizzle that olive oil onto the baking sheet!

Place the dough on the oiled sheet pan, pulling and pressing it with your hands it to spread it across to fit the size of the pan.
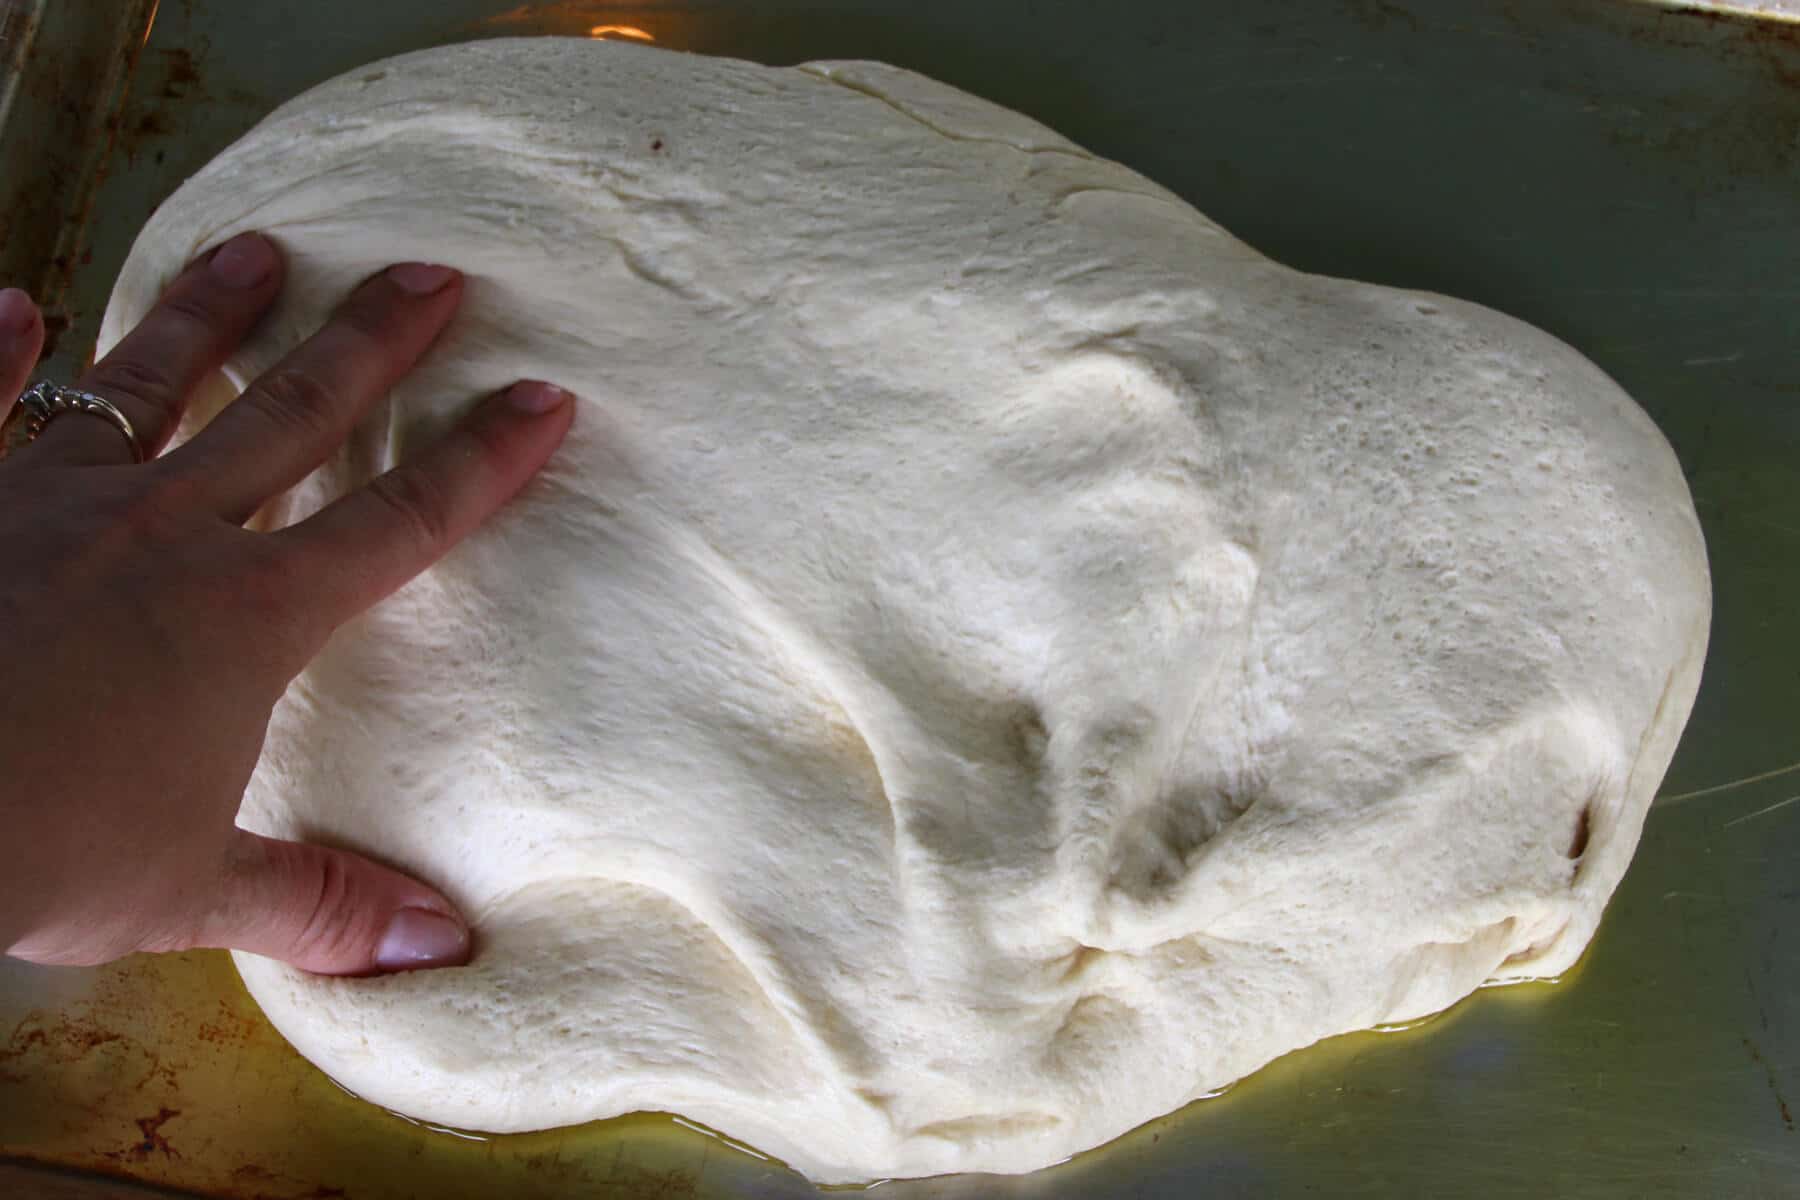
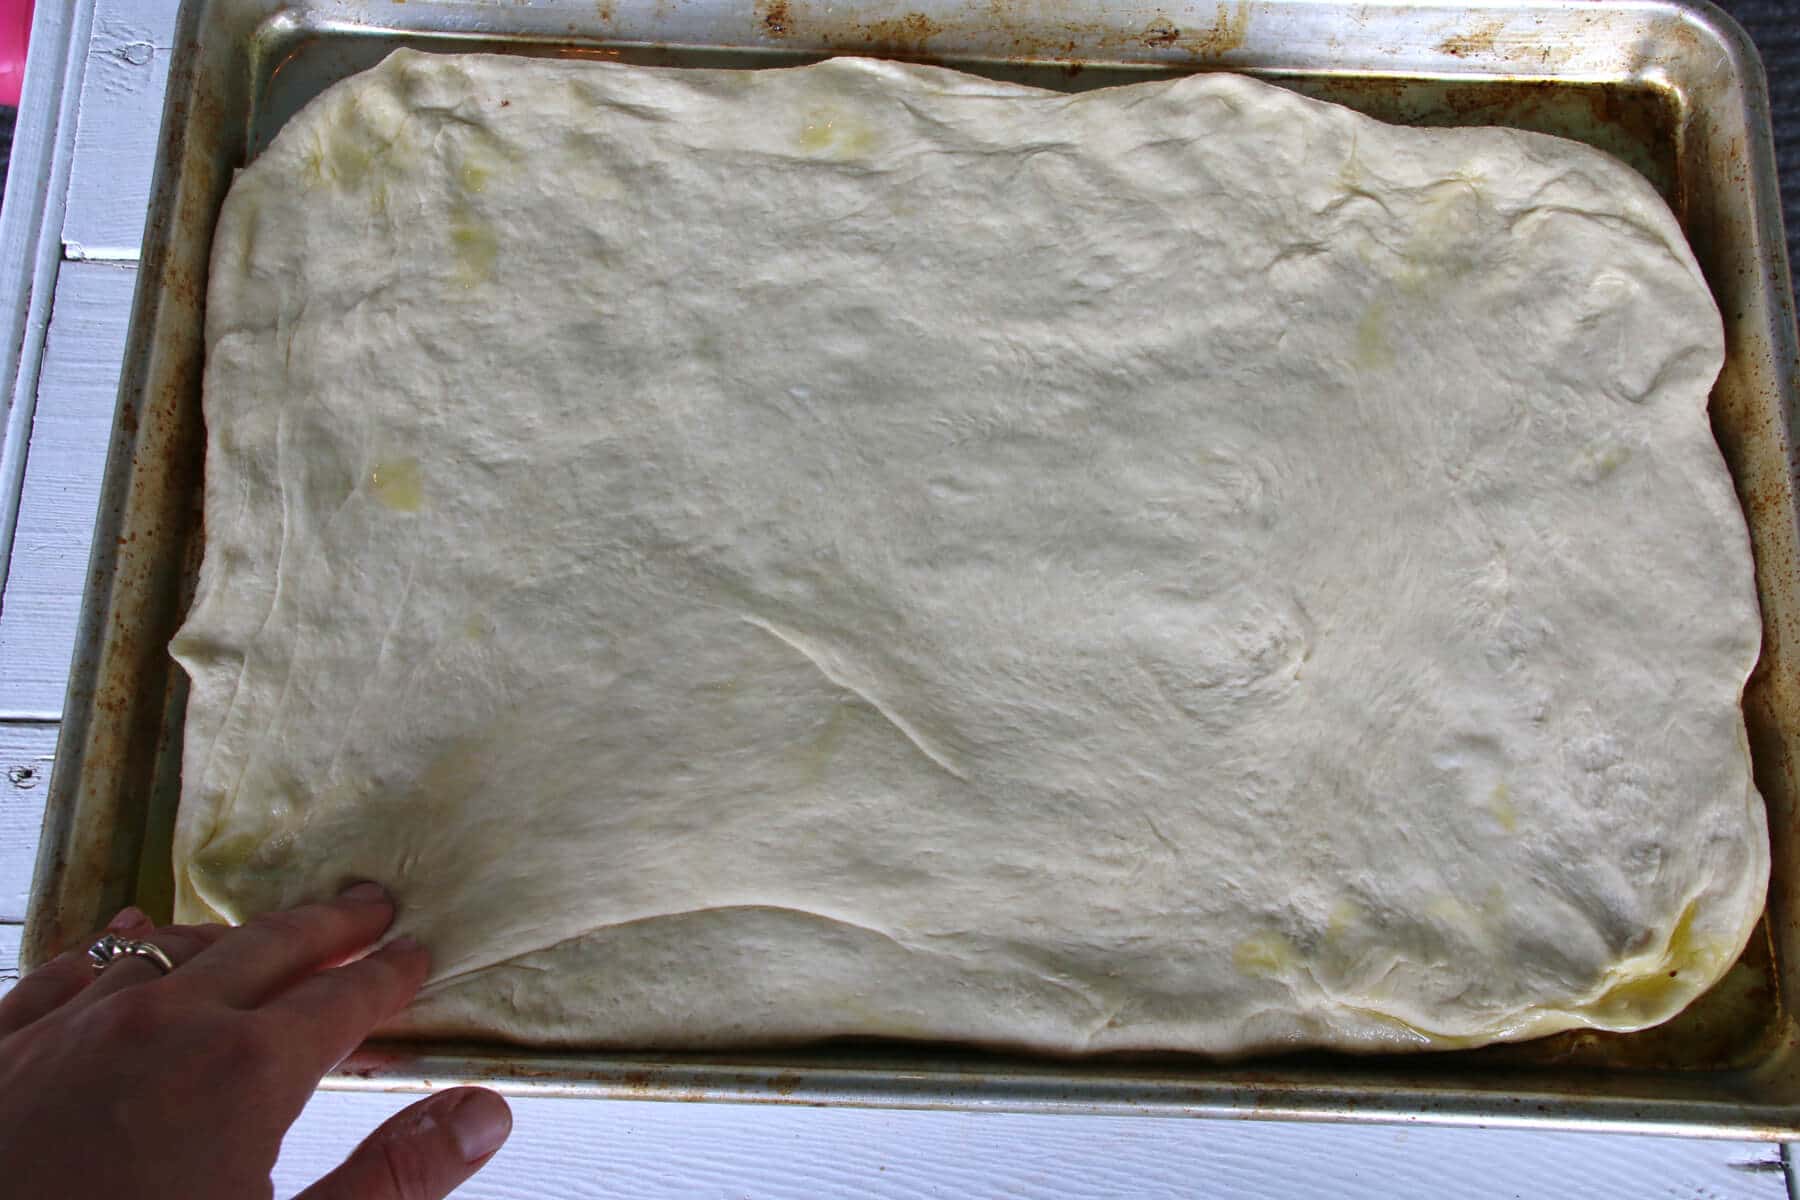
Cover loosely with plastic wrap and let the dough rise for another 60 minutes or until doubled in size. Towards the end, preheat the oven to 425 degrees F.
We’re almost ready for the toppings.
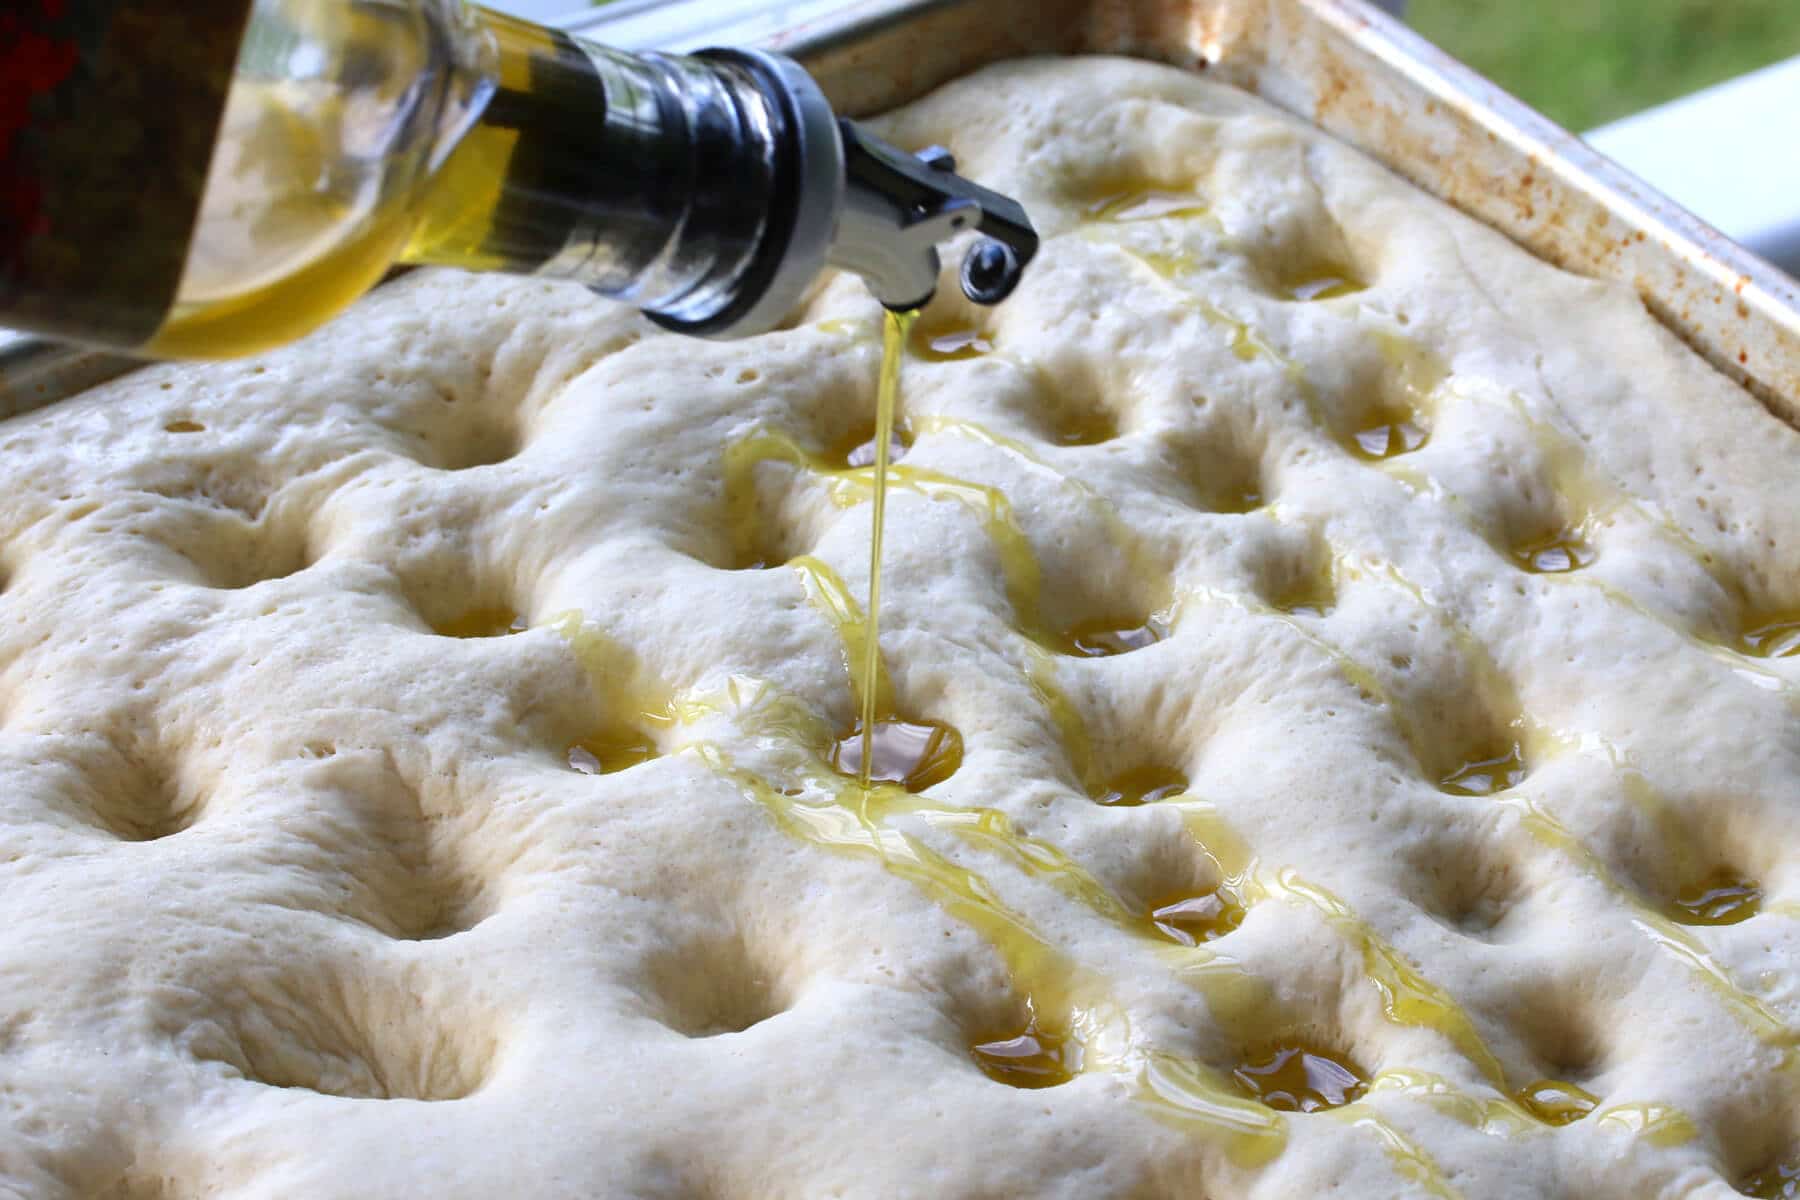
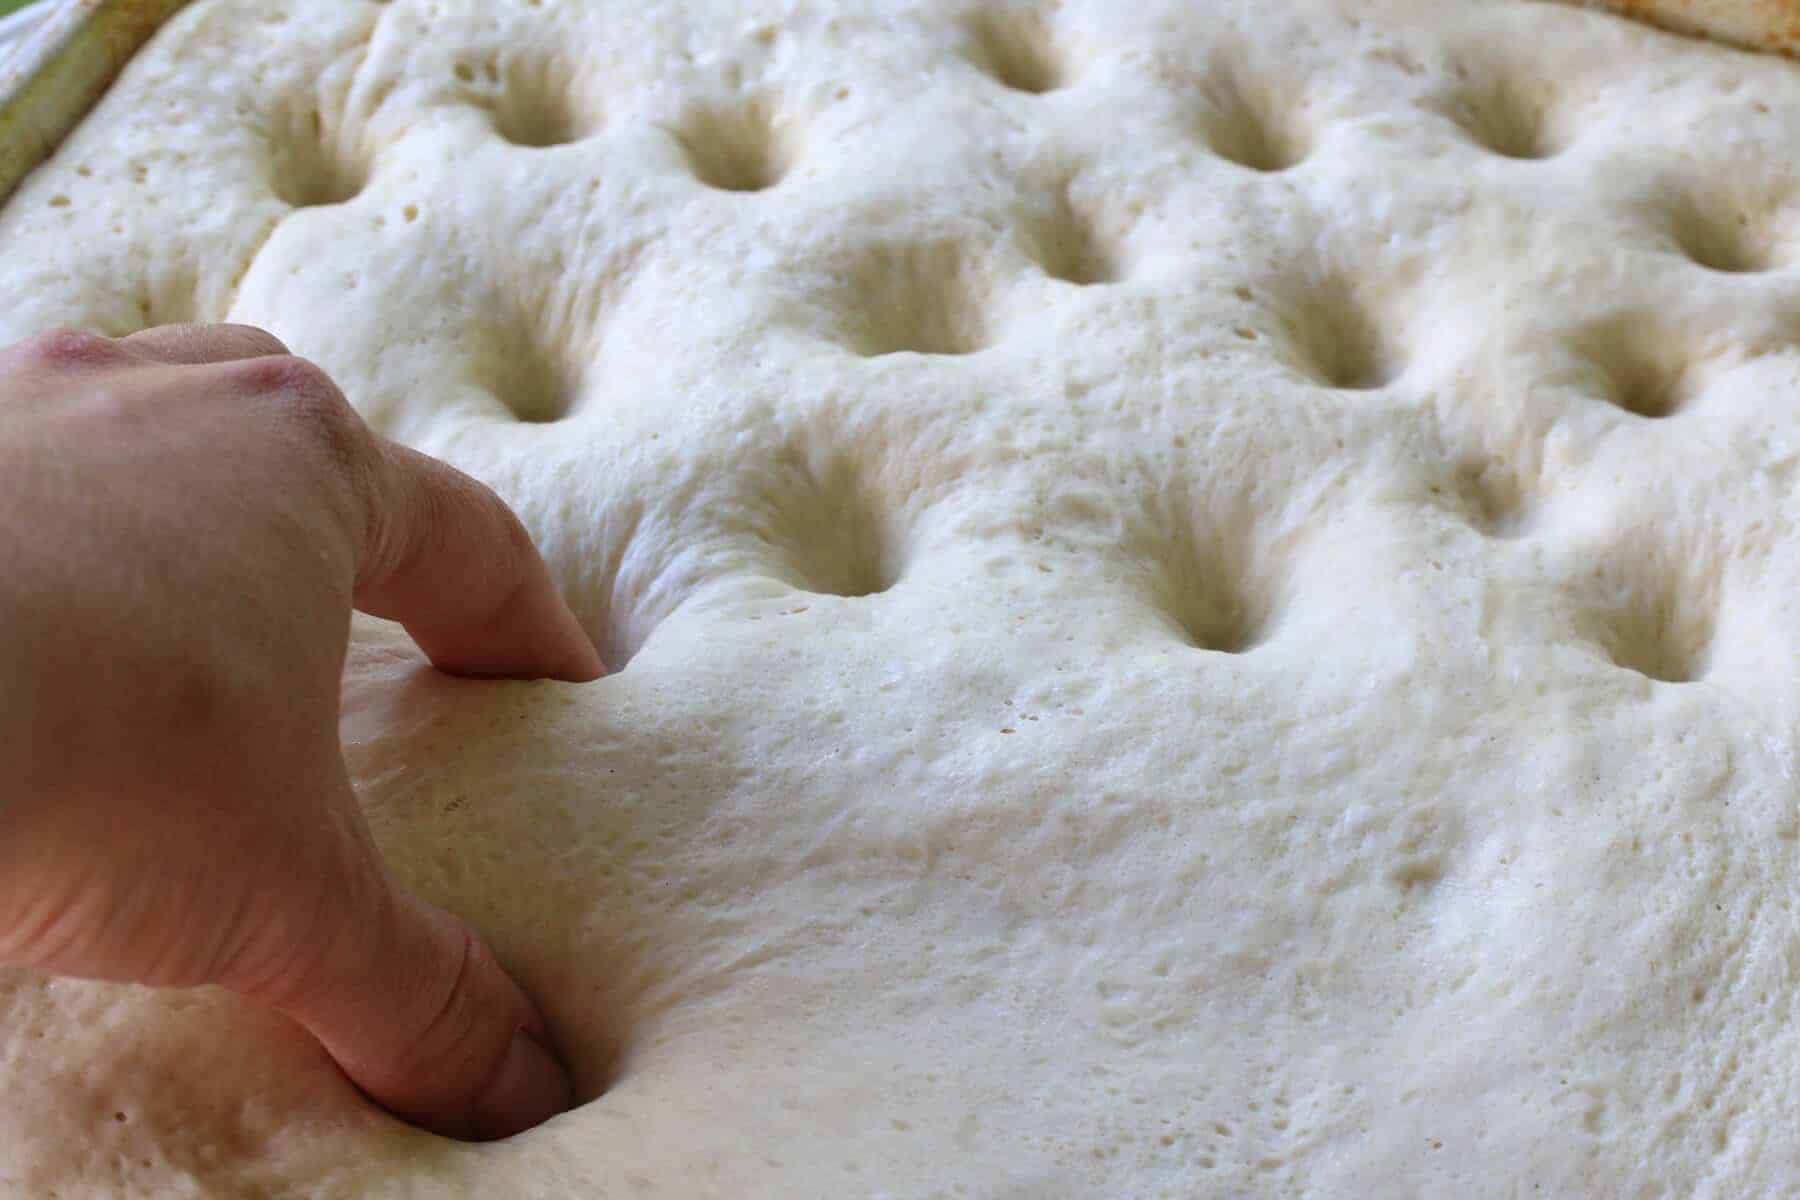
First we’re going to make some deep depressions in the dough to enable to olive oil to absorb into the bread while baking. Those dimples will also provide a convenient divot in which to place the olives.
The dimples in the dough enable to olive oil to pool inside the divots and absorb into the bread while baking.
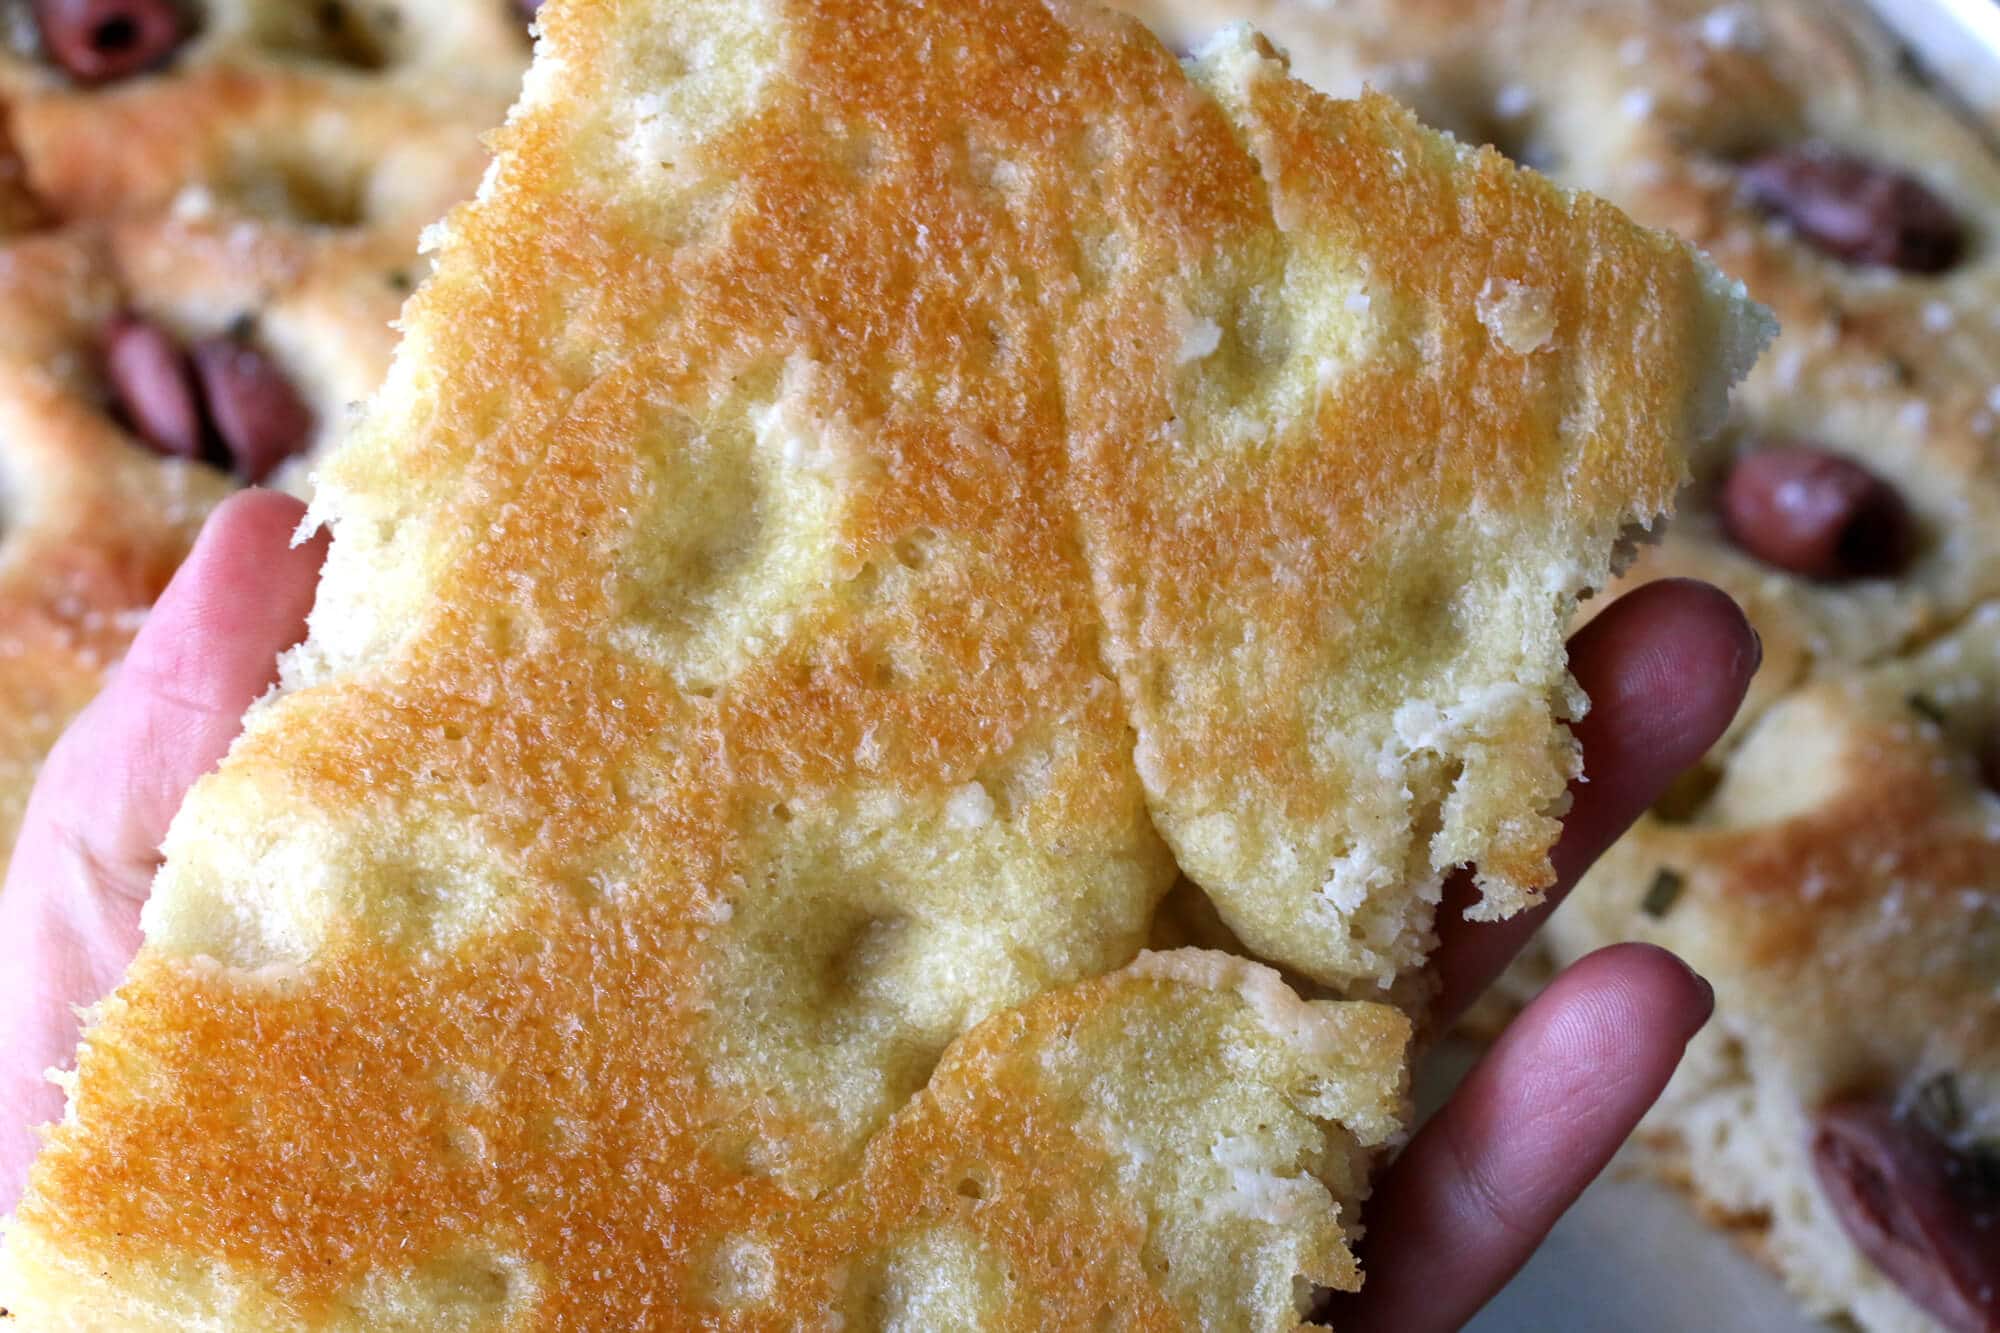
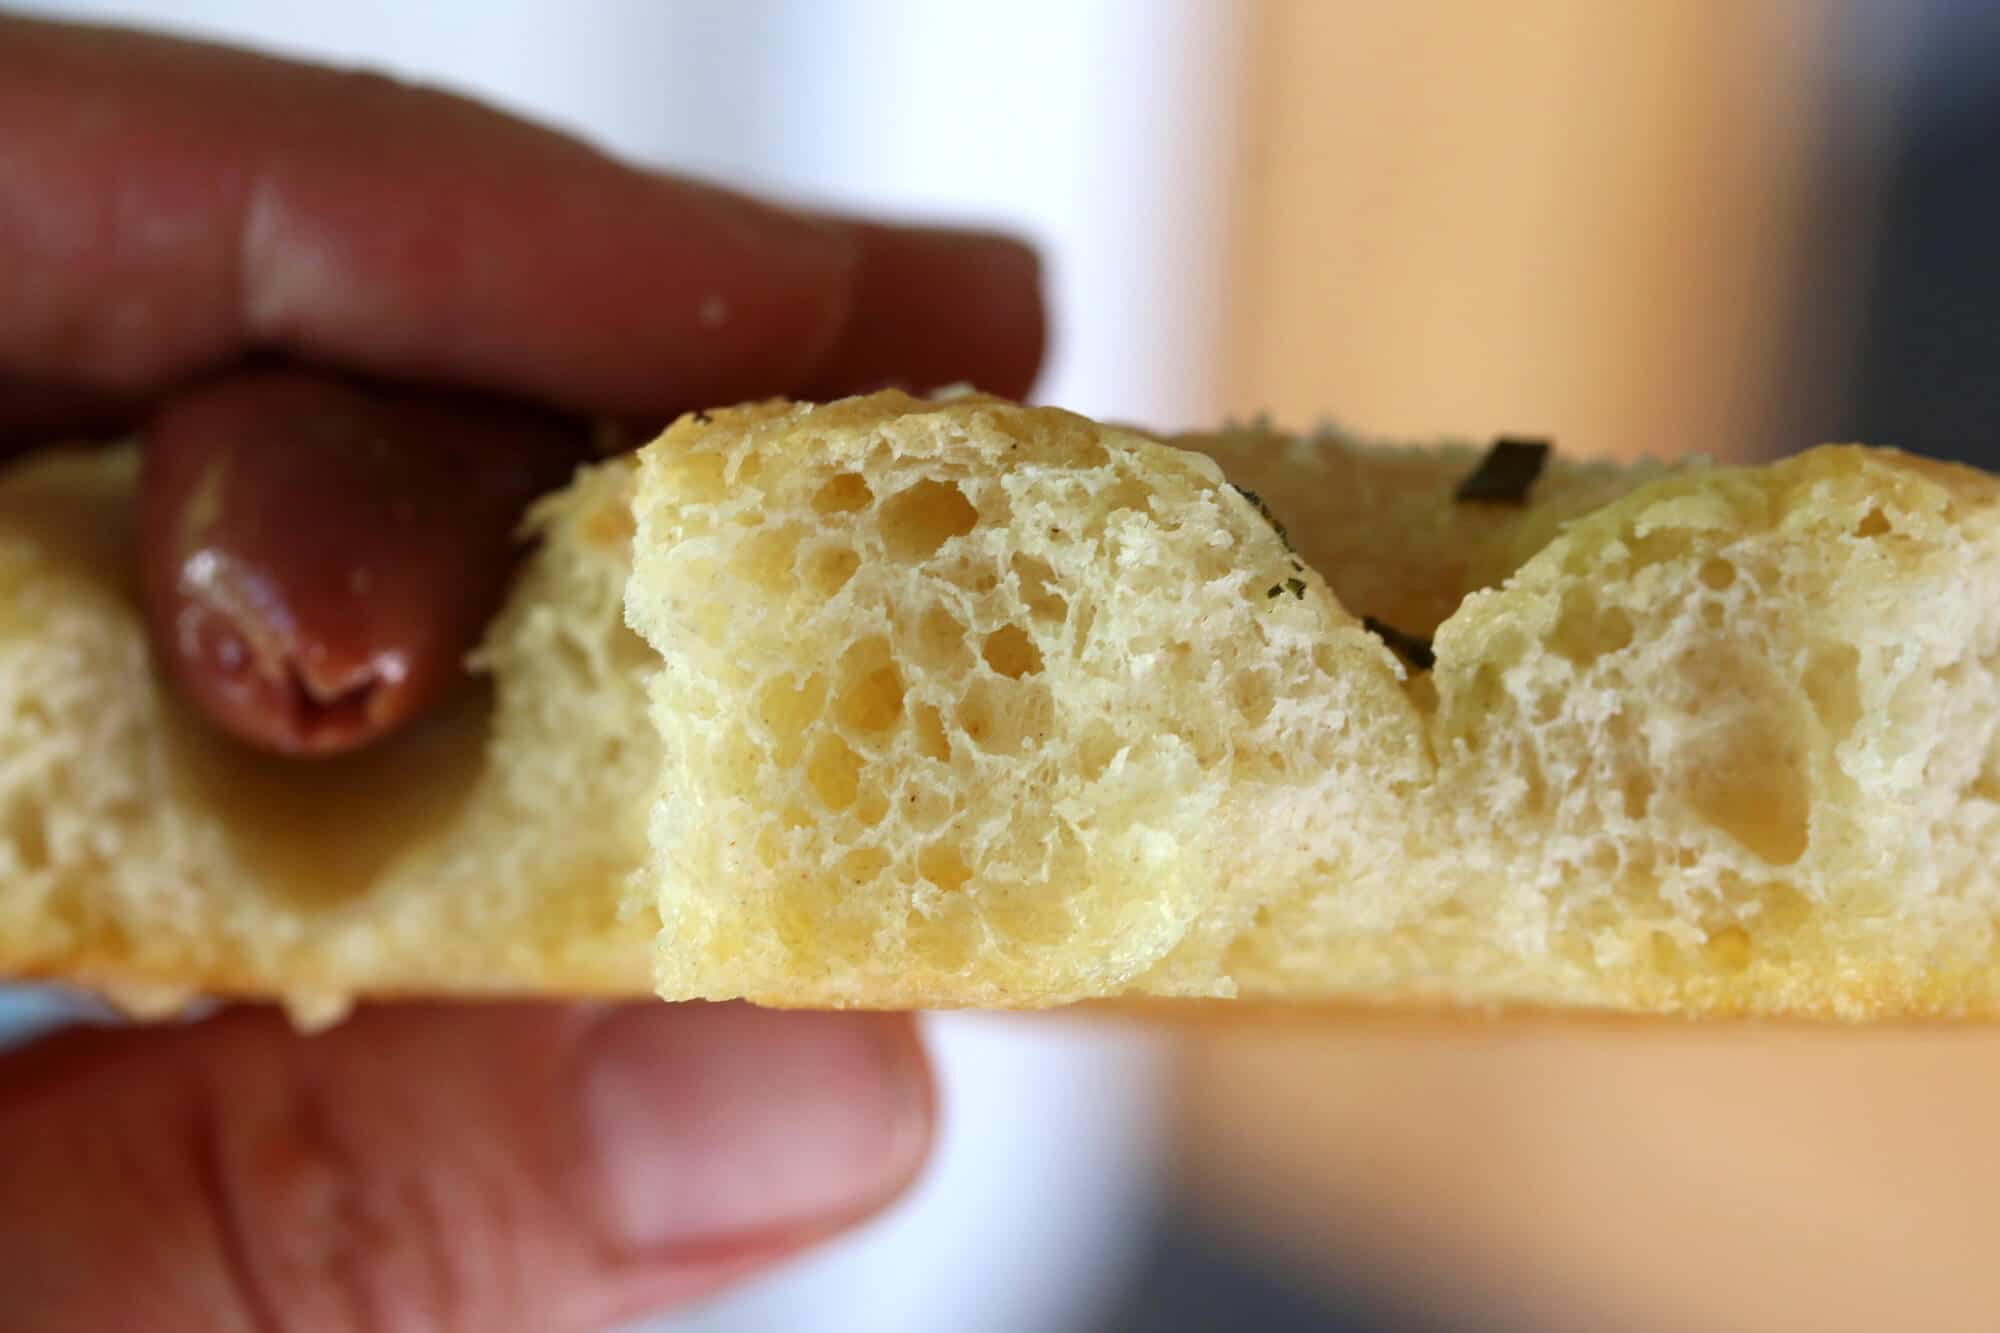
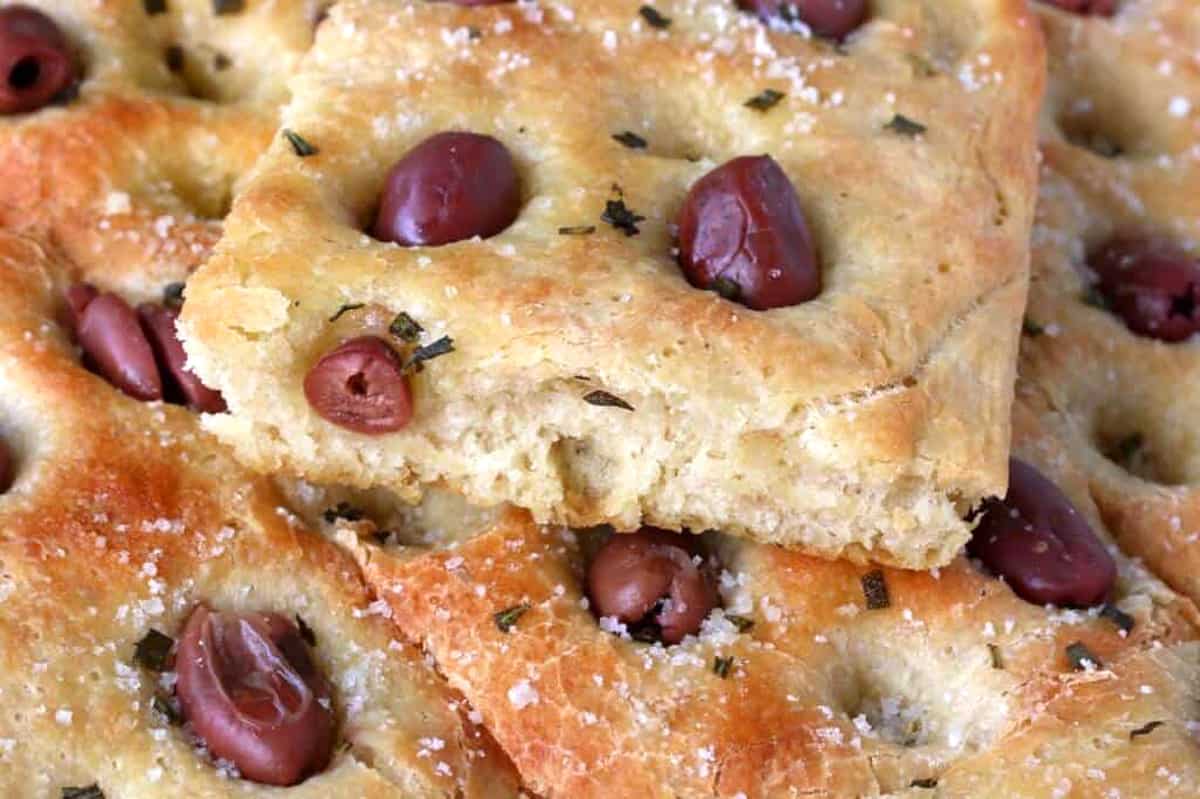
See the air pockets throughout the interior of the bread? The end result is a focaccia with a crispy exterior and a lightly moist and chewy interior. It’s pure heaven!
Use your fingertips to press lots of deep dimples into the dough without breaking through the bottom surface of the dough.
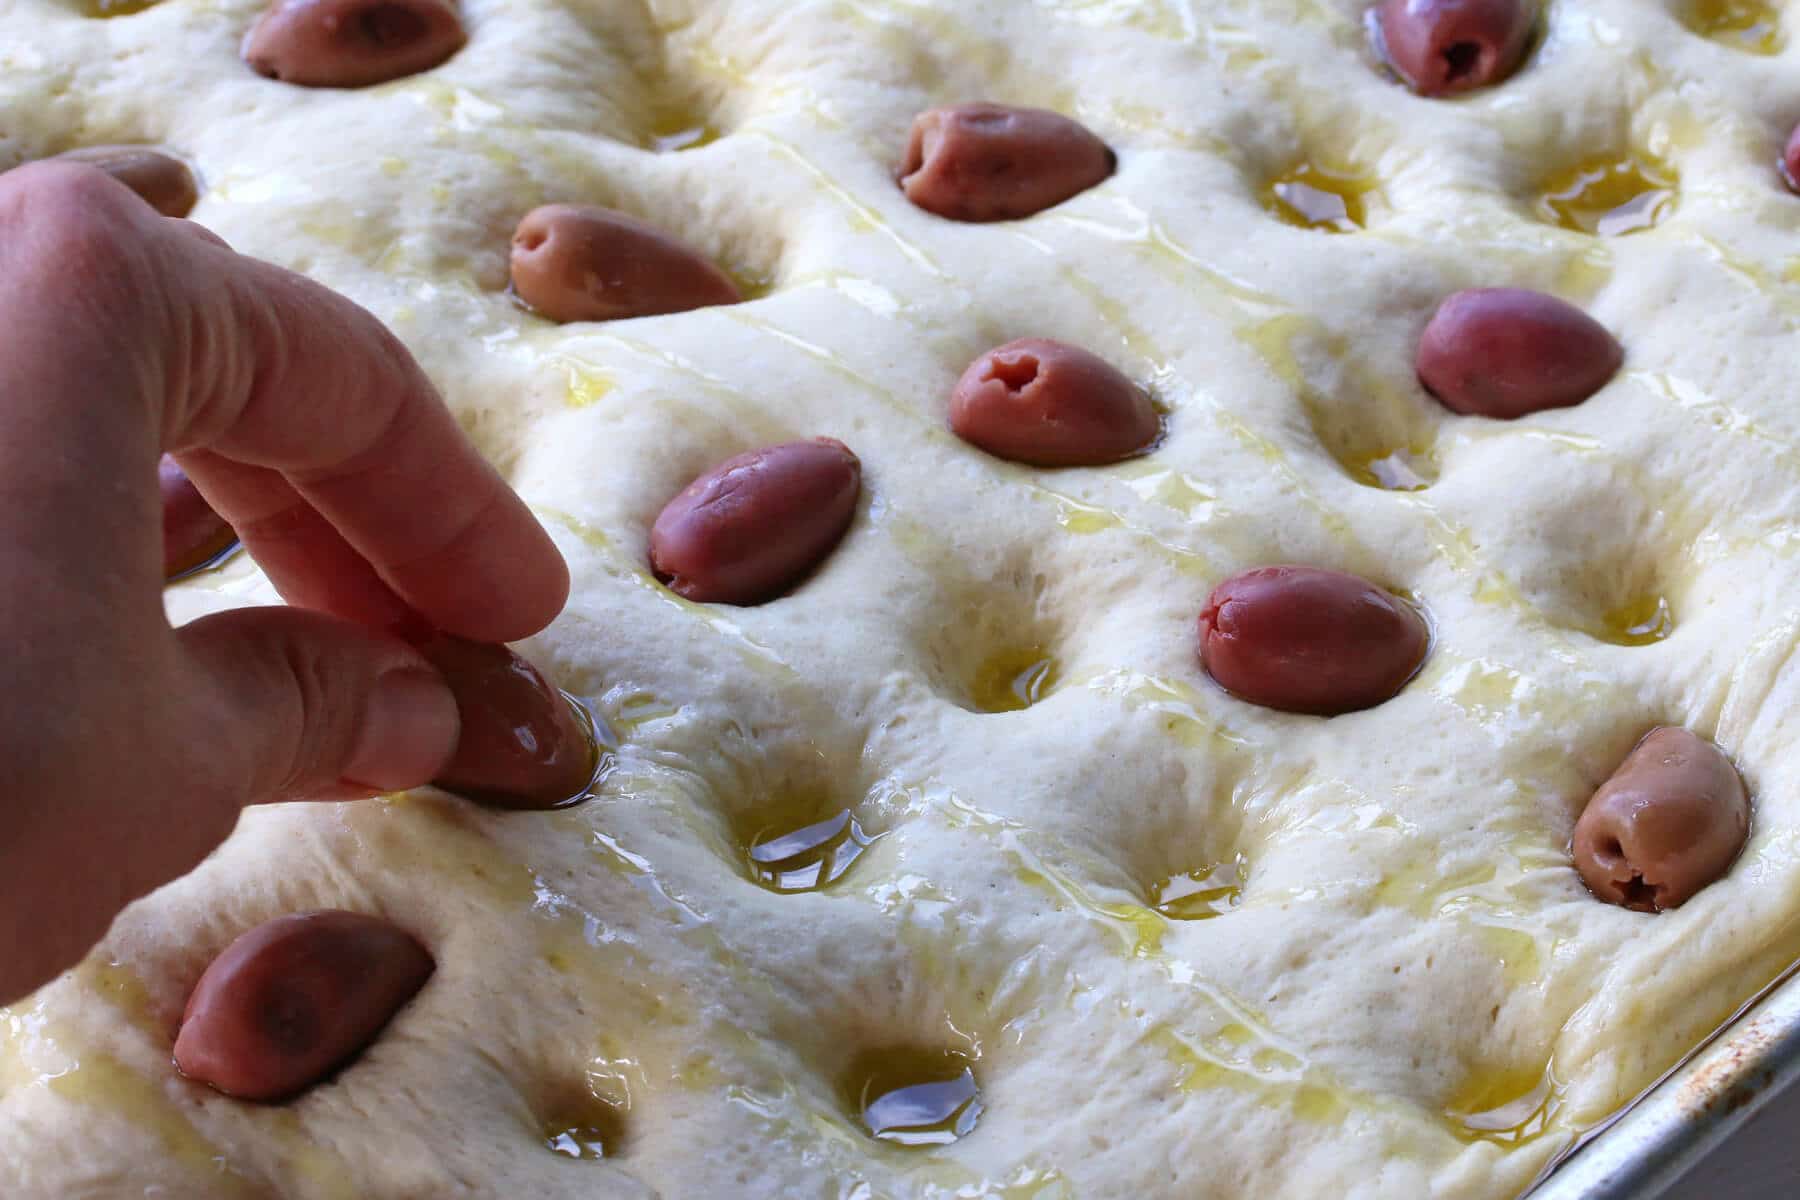
Drizzle with olive oil.
Be generous. Remember, focaccia is also known as “olive oil bread” and that is key to achieving the right texture and consistency.
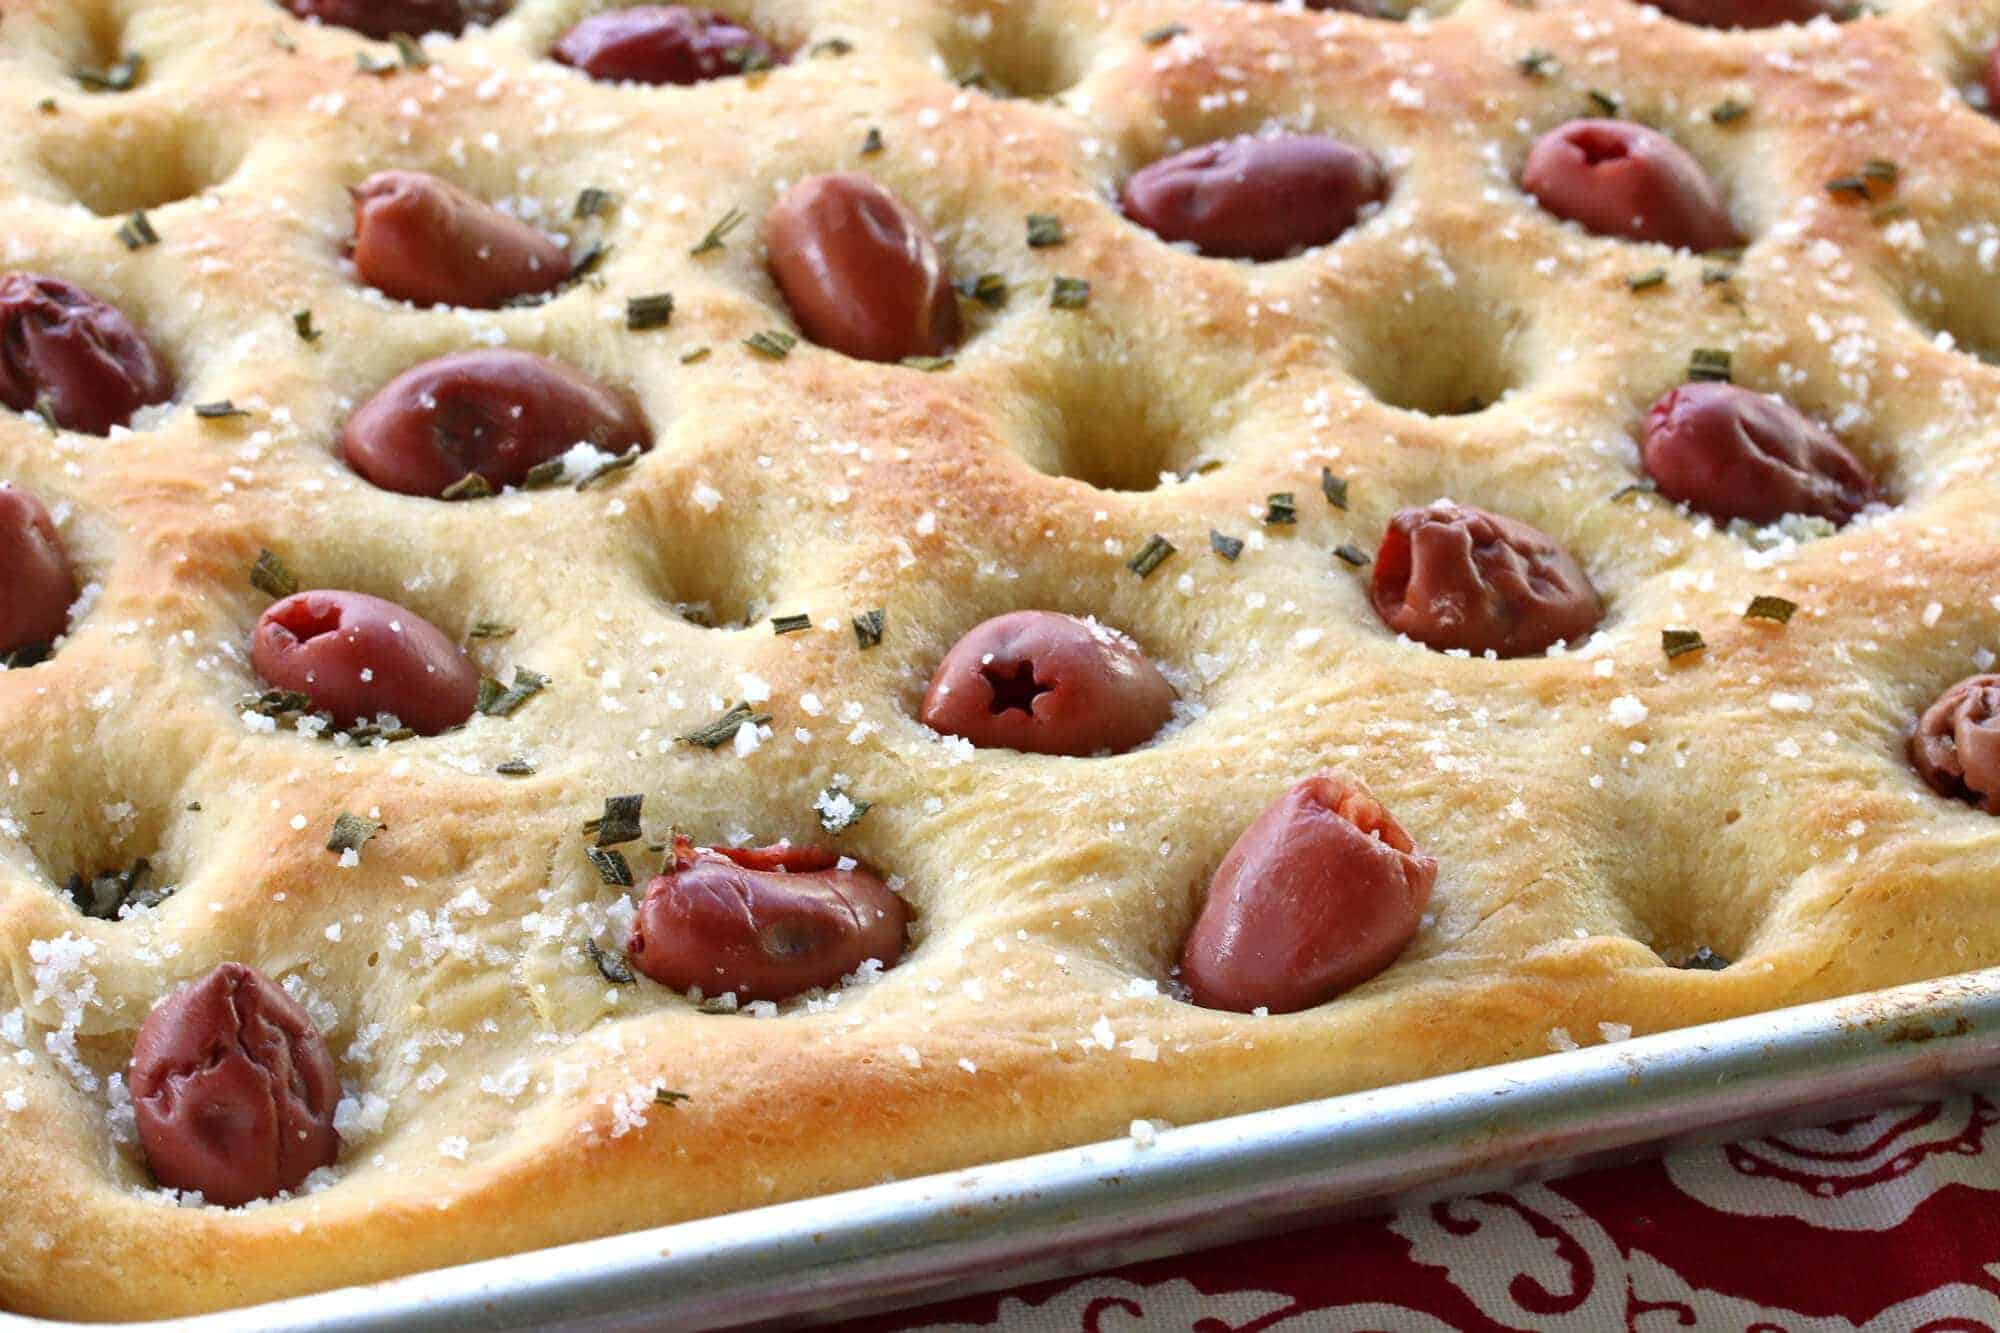
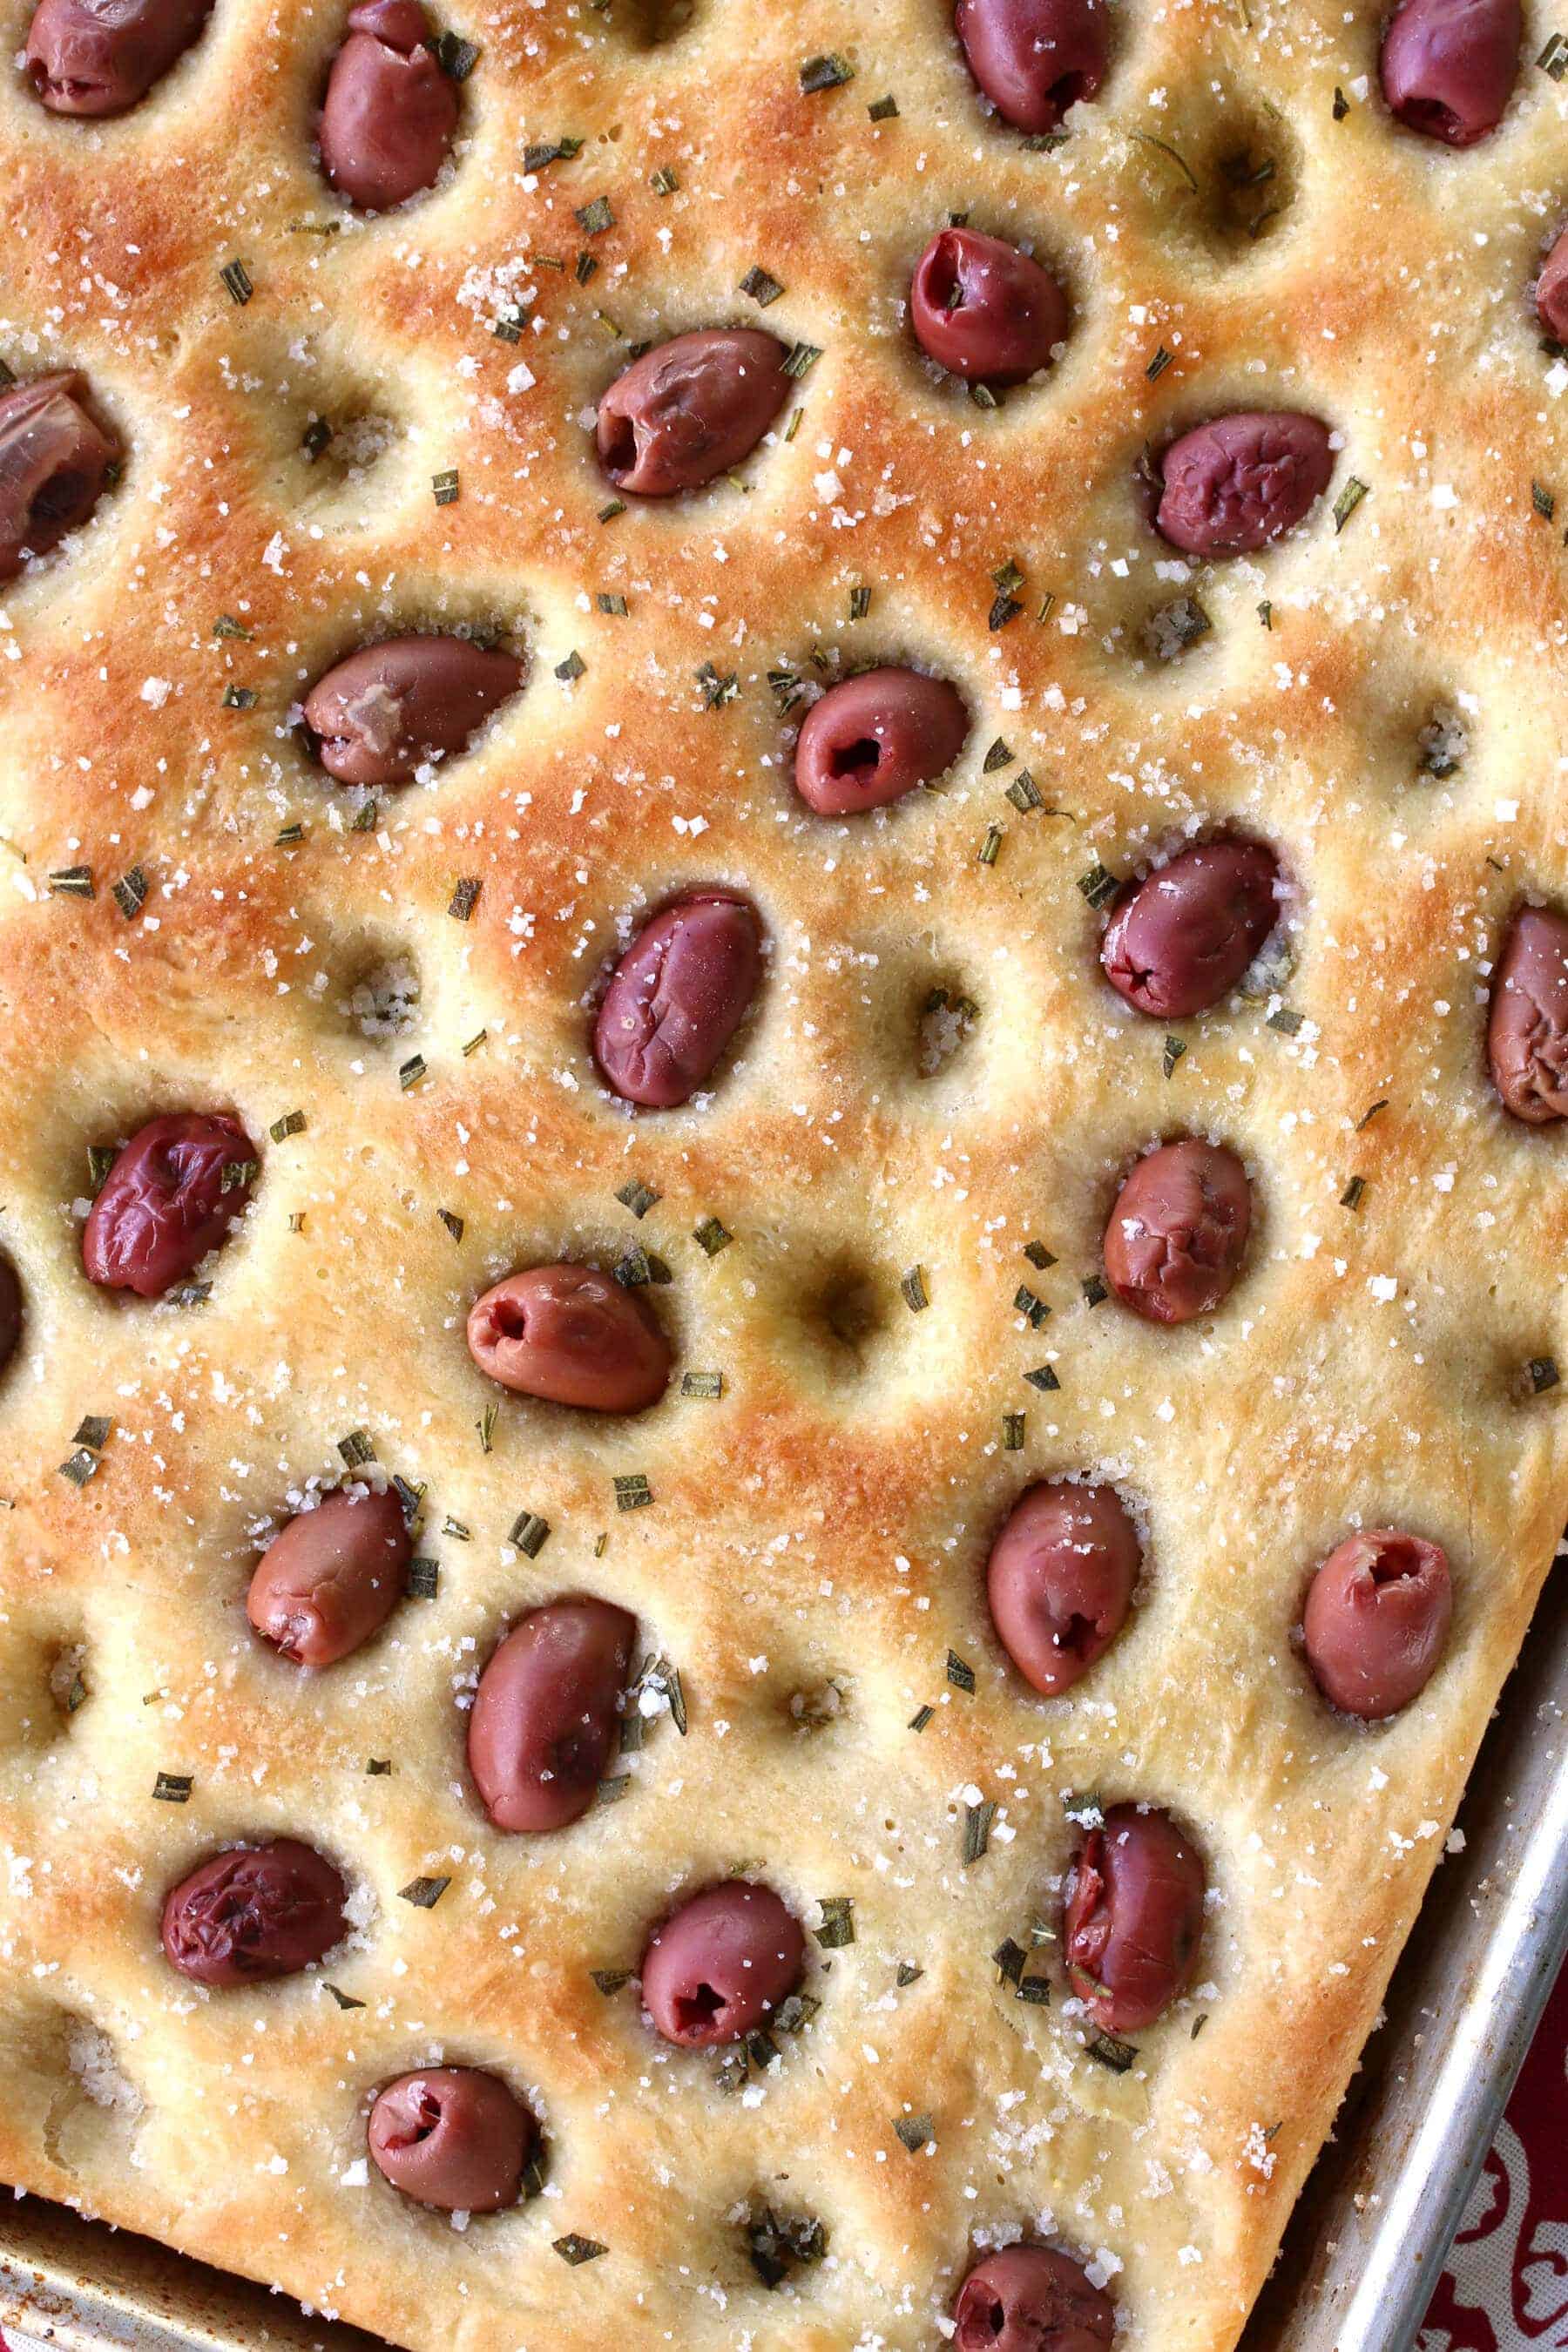
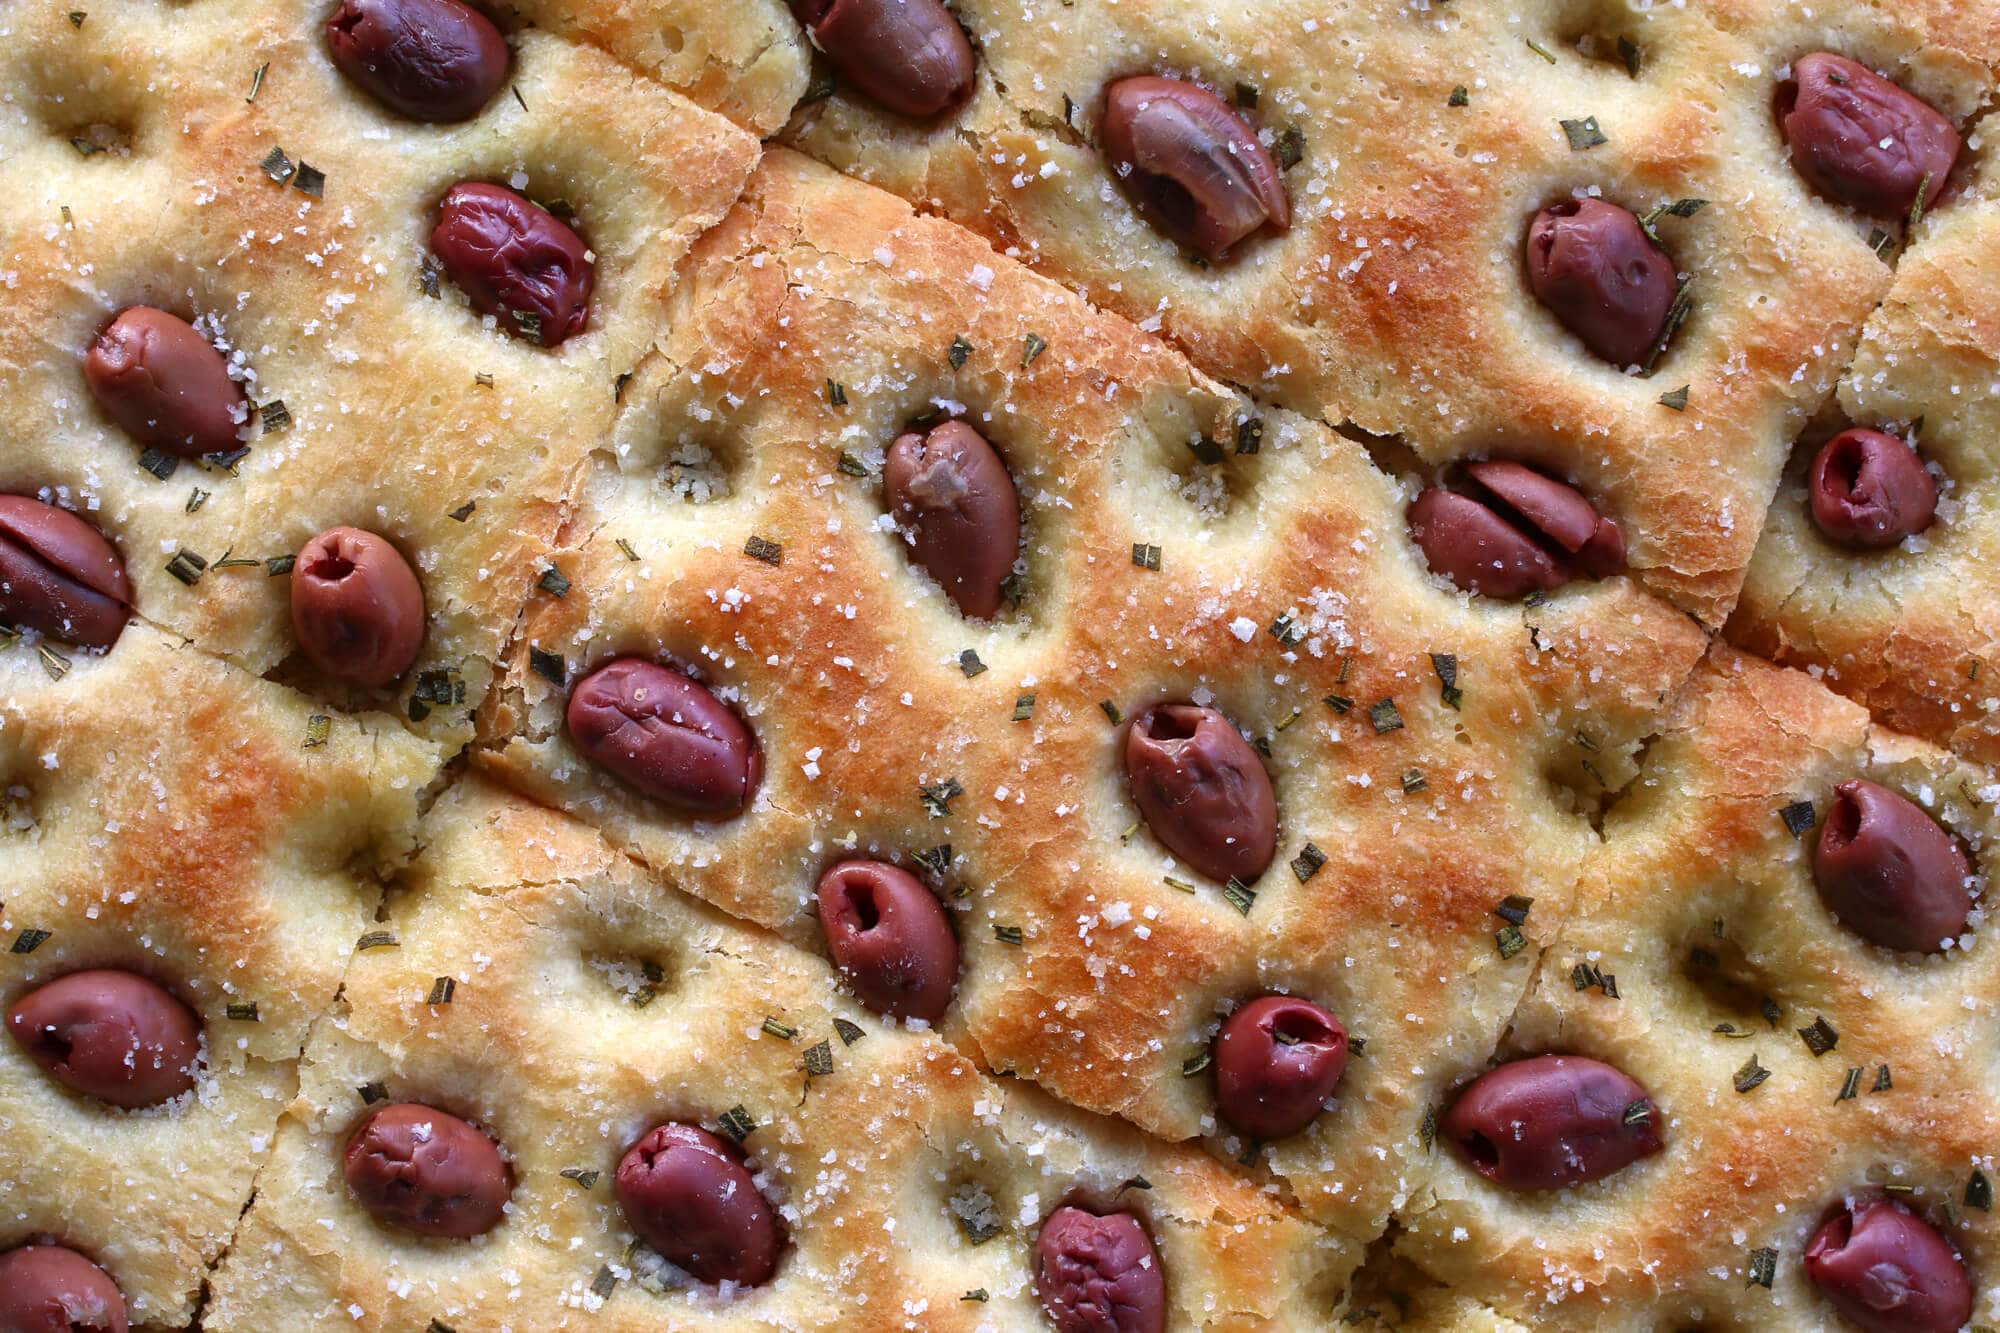
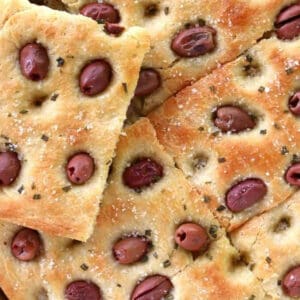
Place the olives throughout some of the dimples. There is no right or wrong as to how many olives you use. I space them about an inch or so apart across the whole sheet pan.
Use can use any olive of your choice. If you prefer a mild olive, black olives are a great choice. For this focaccia I’m using Kalamata olives because their bold flavor really pairs great with bread. Their deep dark purplish tone also adds a lot of visual appeal to the focaccia and they have a wonderfully rich and intensely fruity flavor.
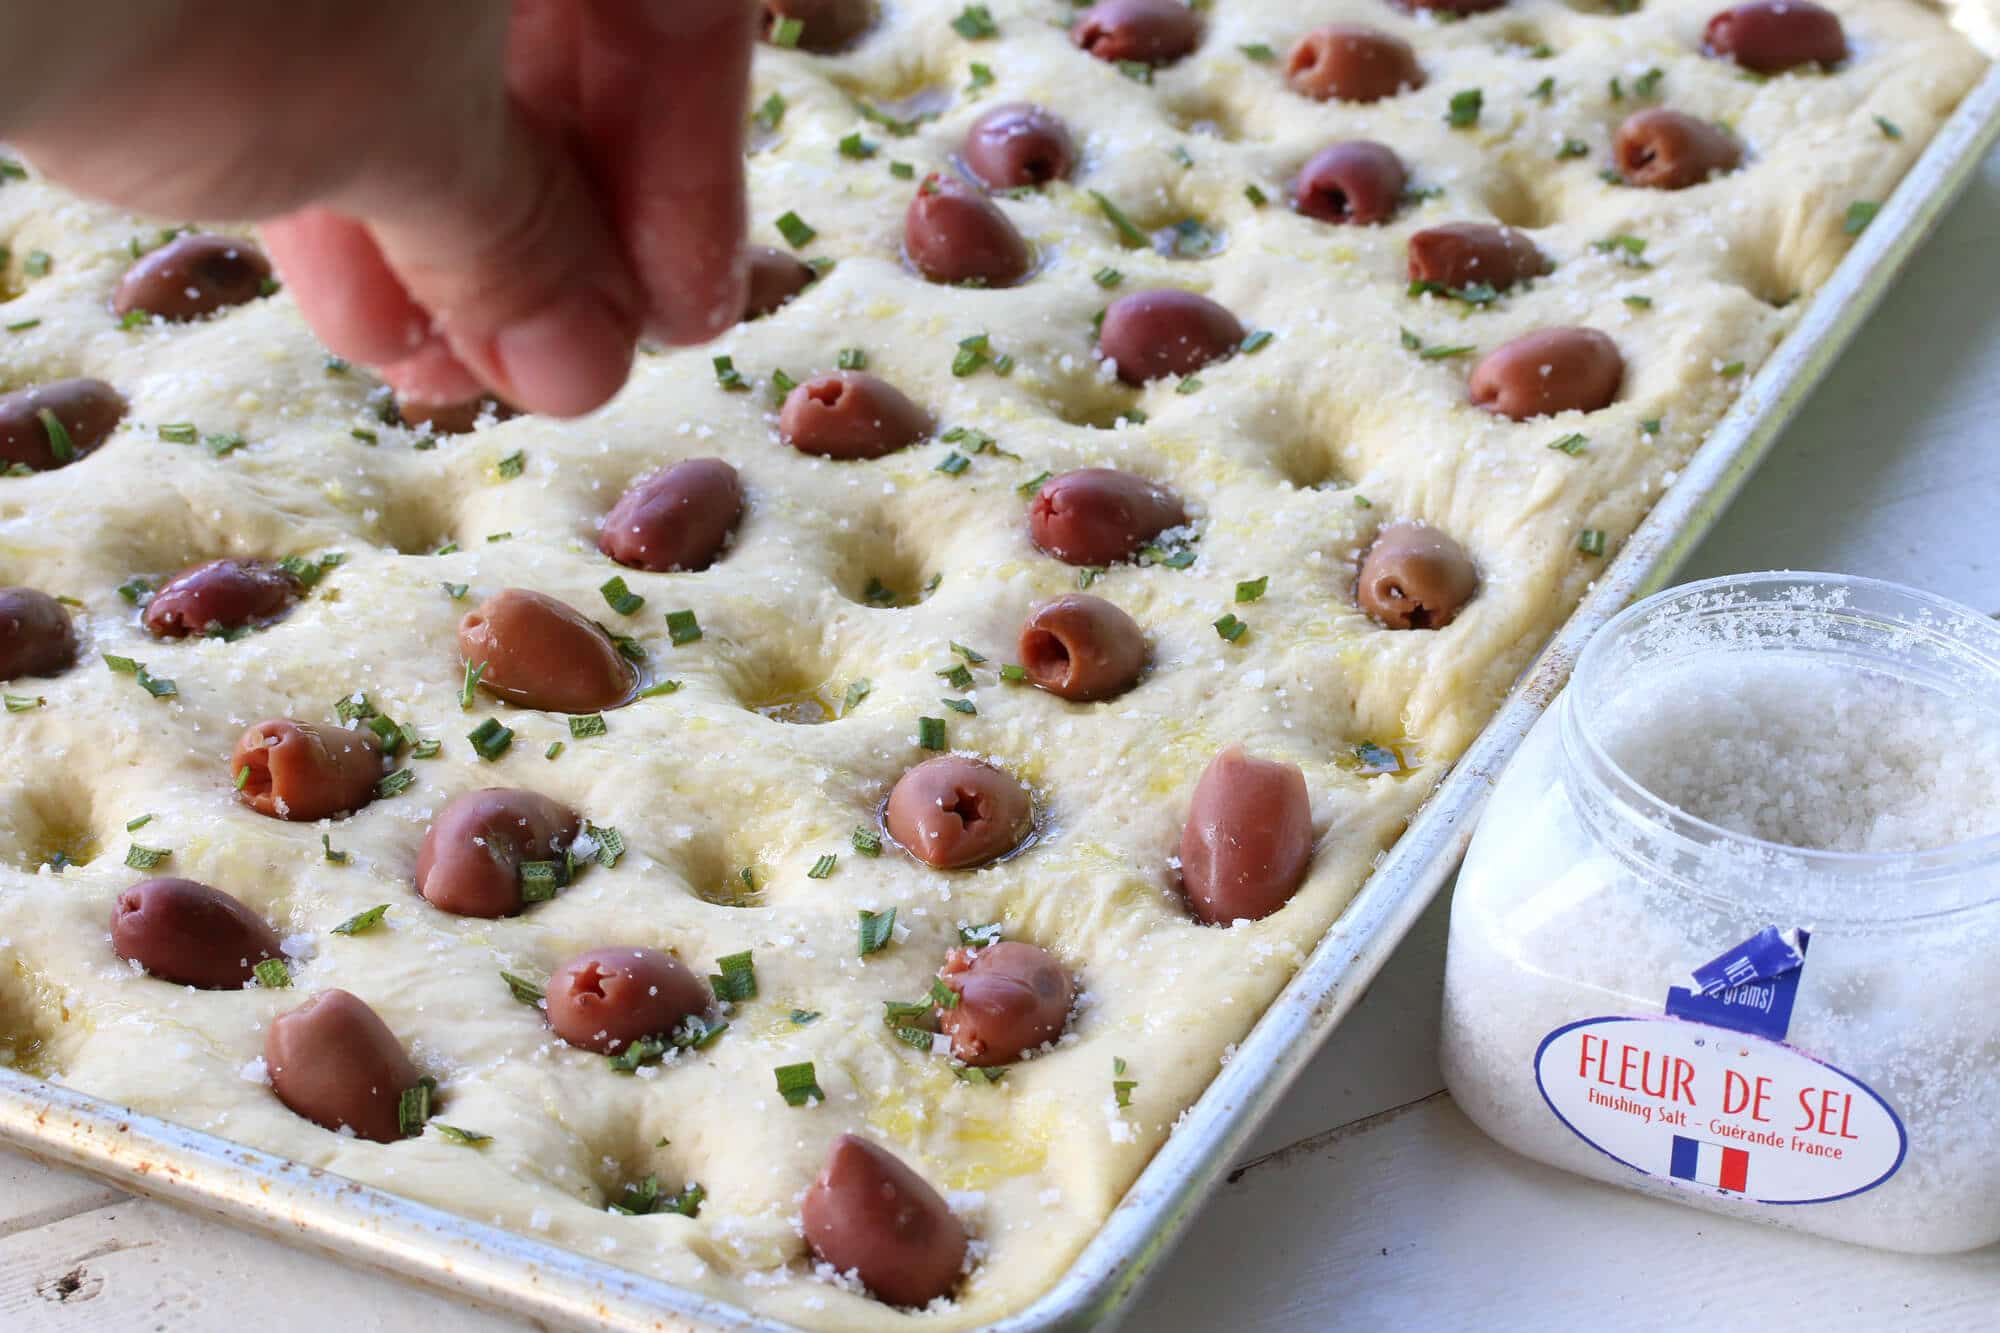
Sprinkle generously with fresh rosemary. I usually use far more rosemary than what is pictured below, I just ran out of it in my garden. I also like to stick in the tips of 2-3 sprigs just to make it even prettier.
Using fresh rosemary is an absolute, unequivocal must! Do not substitute dried. Just don’t.

Sprinkle fairly generously with coarse salt, fleur de sel, or Maldon sea salt.
Fleur de sel is more delicate with a melt-in-your-mouth texture. Maldon salt has a bit more “crunch” to it which I absolutely love on focaccia. You can’t go wrong with either.
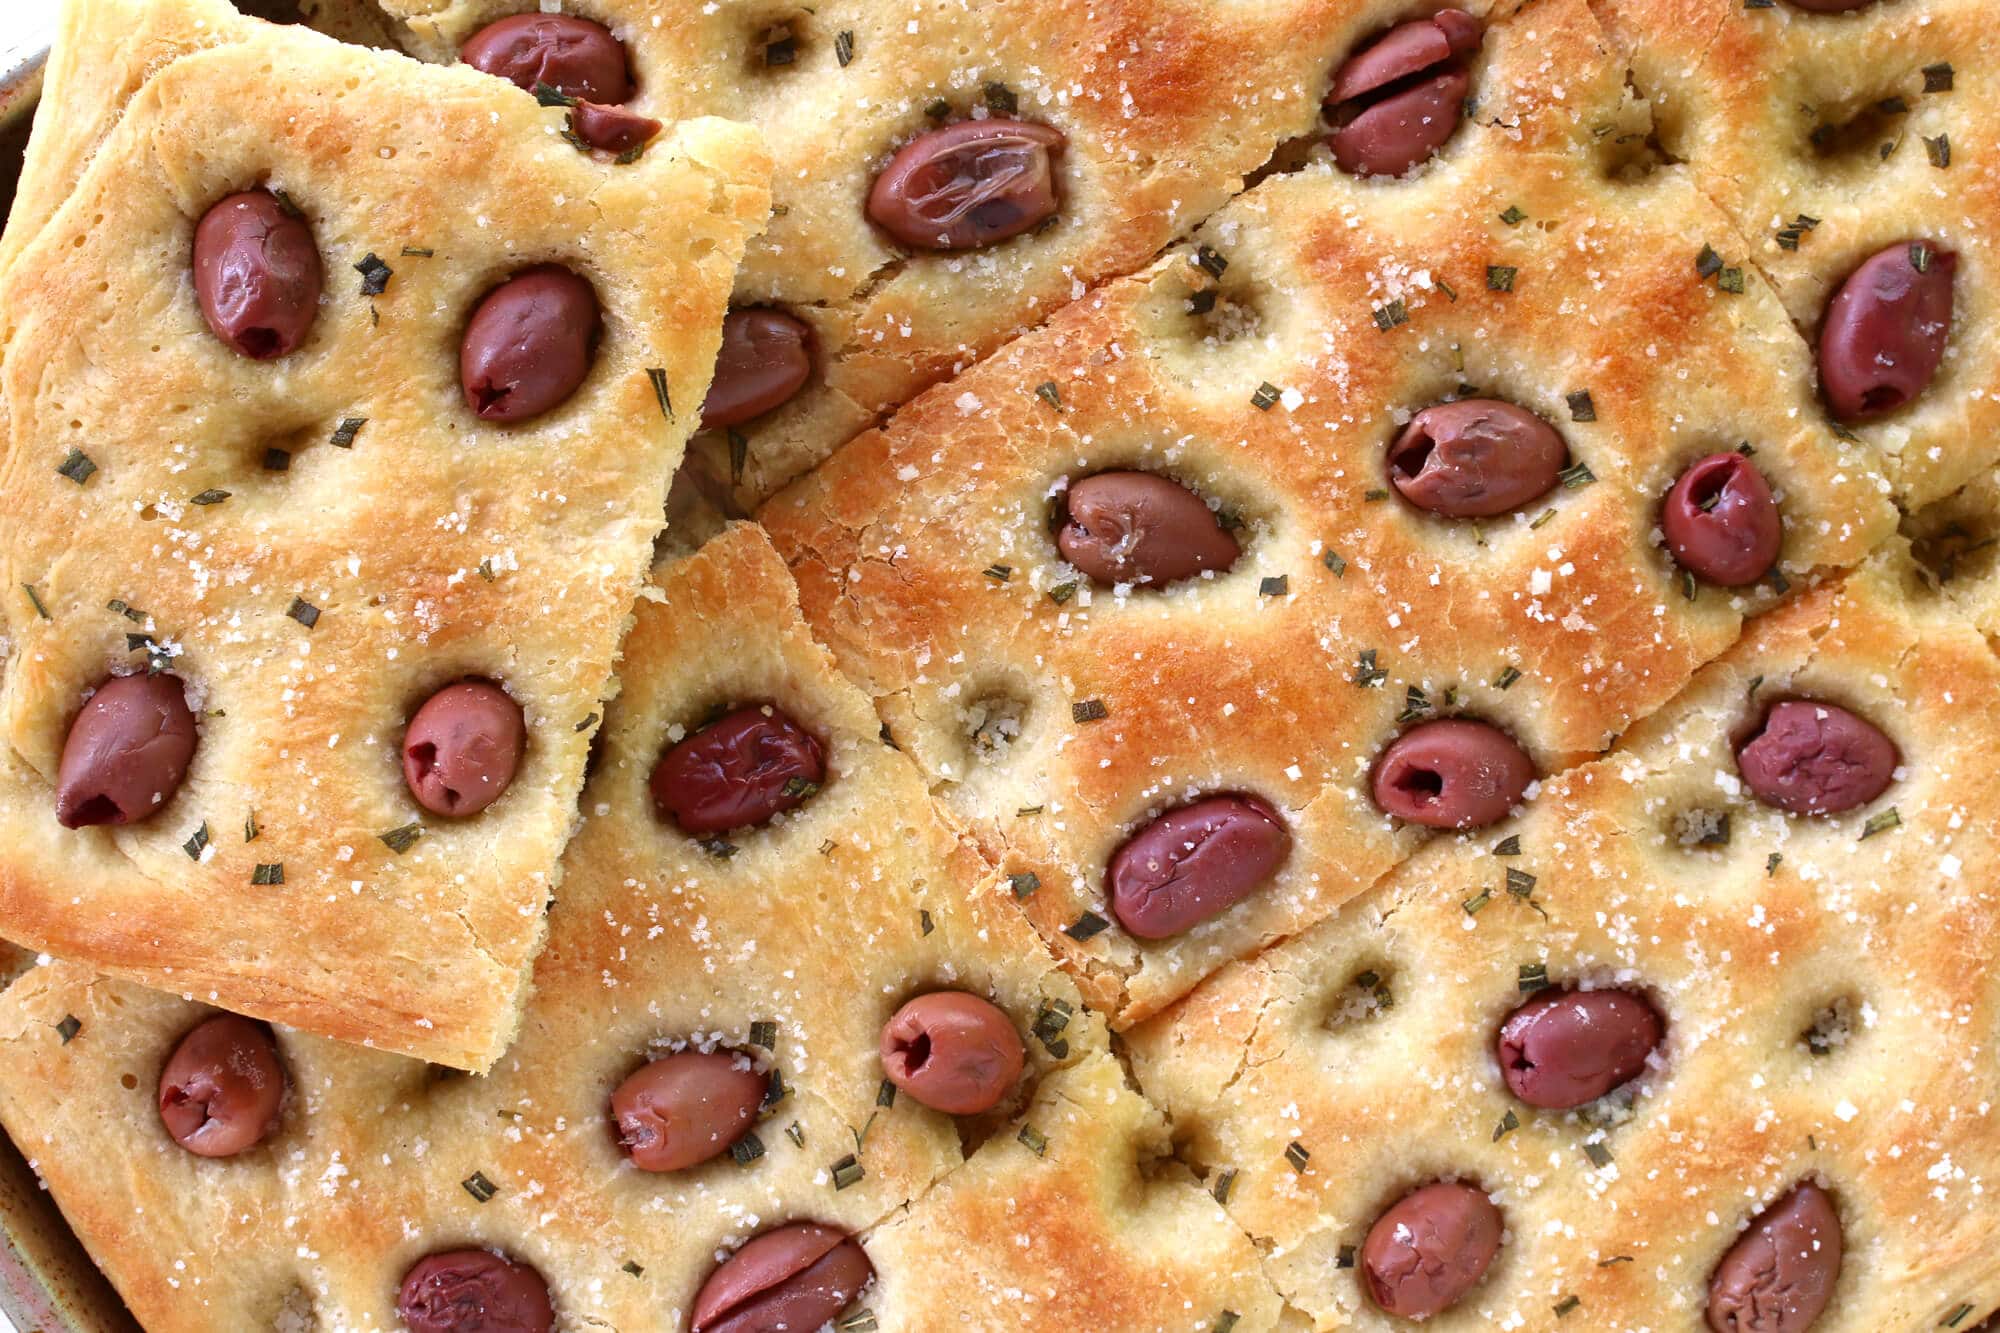
Bake on the middle shelf for 15-20 minutes or until the top is light golden brown.
Let it cool for a couple of minutes before slicing into squares. It’s best served immediately while the crust is still warm and crispy.
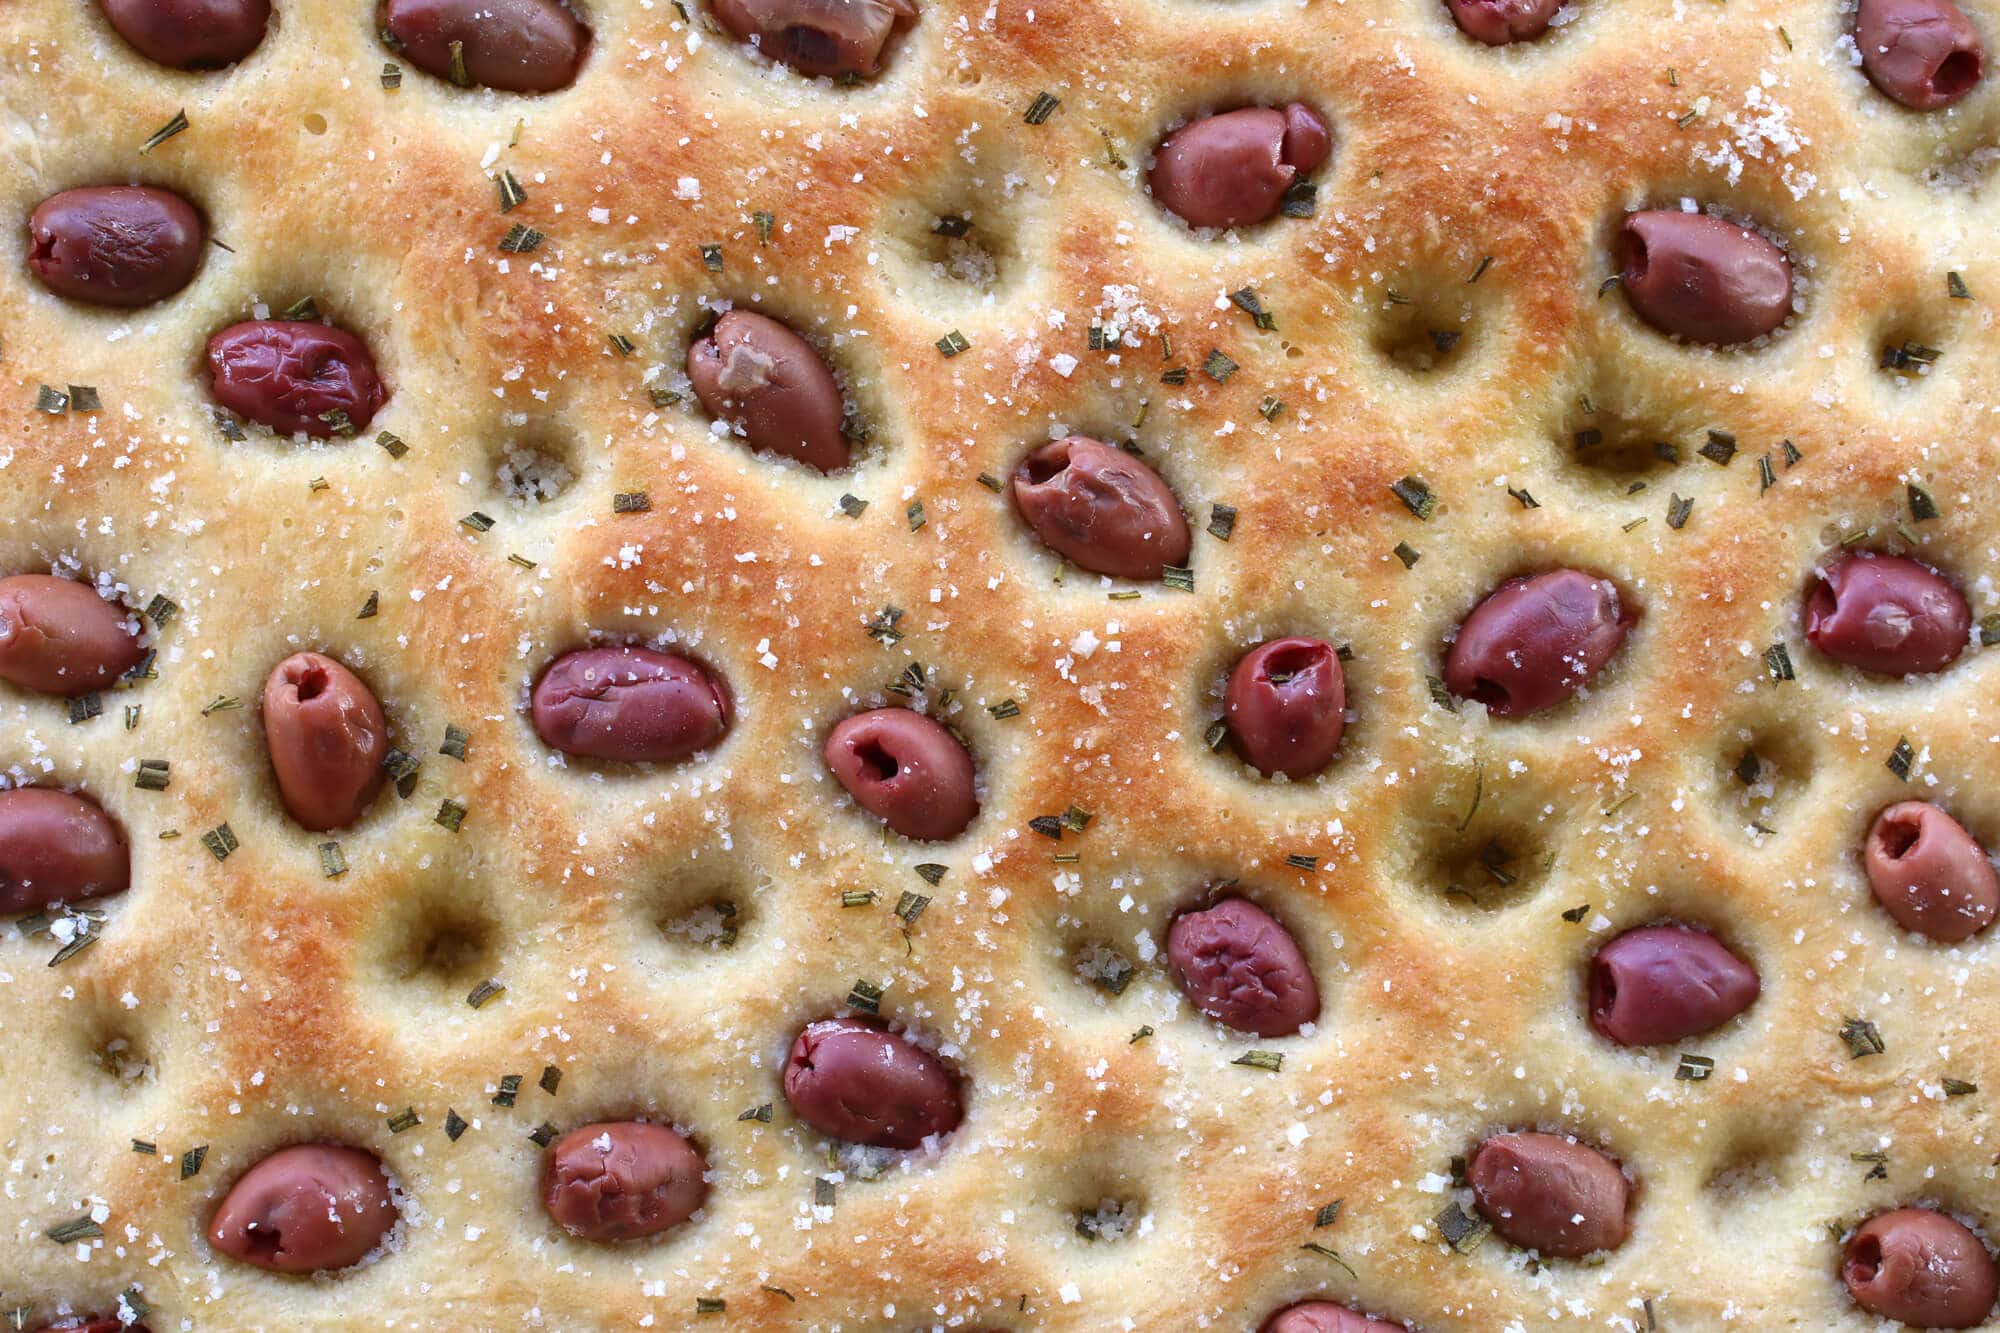
Let’s take a closer look at the focaccia.
See how the top is a little crackly? That’s the kind of crispiness we’re after. And when you sink you’re teeth into it you get that lightly moist and chewy olive-oil interior.
Focaccia will keep, wrapped well, for up to 2 days but it is absolutely vastly better fresh out of the oven while it’s still nice and crispy.
Enjoy!
For more bread recipes from around the world try my:
- Lavash
- Lefse
- Tomato Bread
- Rosemary Sourdough Bread
- Crumpets
- Irish Soda Bread
- German Bread (Vollkornbrot)
- Danish Rye Bread
- Injera
- Dosa
- Naan Bread
- Sourdough Naan
- Paleo Bread
- Skillet Cornbread
Save This Recipe
Olive Rosemary Focaccia
Ingredients
- 2 1/2 teaspoons active dried yeast
- 1 3/4 cup warm water
- 2 teaspoons sugar
- 5 cups all-purpose flour
- 1 tablespoon kosher salt
- 2 tablespoons quality extra virgin olive oil
- 1 cup pitted Kalamata olives or black olives , rinsed and drained
- 1/4 cup quality extra virgin olive oil plus more for drizzling
- Fresh coarsely chopped rosemary leaves for topping
- A few tips of rosemary sprigs for topping garnish
- Coarse sea salt , for topping (I recommend Maldon or fleur de sel)
Instructions
- Combine the yeast, water and sugar in a bowl and let it sit in a warm place for about 15 minutes until frothy.
- In a stand mixer fitted with a dough hook, combine the flour, salt, olive oil and yeast mixture on low speed until the dough comes together, then increase to medium speed and continue to knead for another 5-7 minutes until the texture becomes smooth and soft. If the dough is too sticky add a little more flour.
- Remove the dough, spray the mixer bowl with olive oil, return the dough, cover the bowl loosely with plastic wrap and put it in a warm, draft-free place to rise for at least 1 hour or until doubled in size.
- Coat a standard 15 1/2 x 10 ½-inch rimmed sheet pan with the 1/4 cup of olive oil. Place the dough on the sheet pan, pulling and pressing it with your hands it to spread it across to fit the size of the pan. Cover loosely with plastic wrap and let the dough rise for another 60 minutes or until doubled in size. Towards the end, preheat the oven to 425 degrees F.
- Use your fingertips to press lots of deep dimples into the dough then drizzle generously with olive oil, letting the oil pool in the dimples. Place the olives throughout some of the dimples, sprinkle generously with rosemary leaves and a few rosemary sprig tips and some coarse salt.
- Bake on the middle shelf for 15-20 minutes or until the top is light golden brown. Let it cool for a couple of minutes before slicing into squares. Best served immediately while the crust warm and crispy.
Nutrition
Originally published on The Daring Gourmet October 26, 2016

Hi, I’m Kimberly Killebrew and welcome to Daring Gourmet where you'll find delicious originals, revitalized classics, and simply downright good eats from around the world! Originally from Germany, later raised in England, world-traveled, and now living in the U.S., from my globally-influenced kitchen I invite you to tour the world through your taste buds!


Can this be made with gluten free flour?
I’m sure it can but I haven’t tried it!
This recipe is awesome. I am not a bread maker, but with this recipe… I could be selling this focaccia on the street for $$. The total time to make is 3 hours, but you’re only working on it for 45 minutes, and cooking it for 20 minutes. I always forget it takes a while, and the time frame on the recipe is misleading.