Perfect White Sandwich Bread
This post may contain affiliate links. See my disclosure policy.
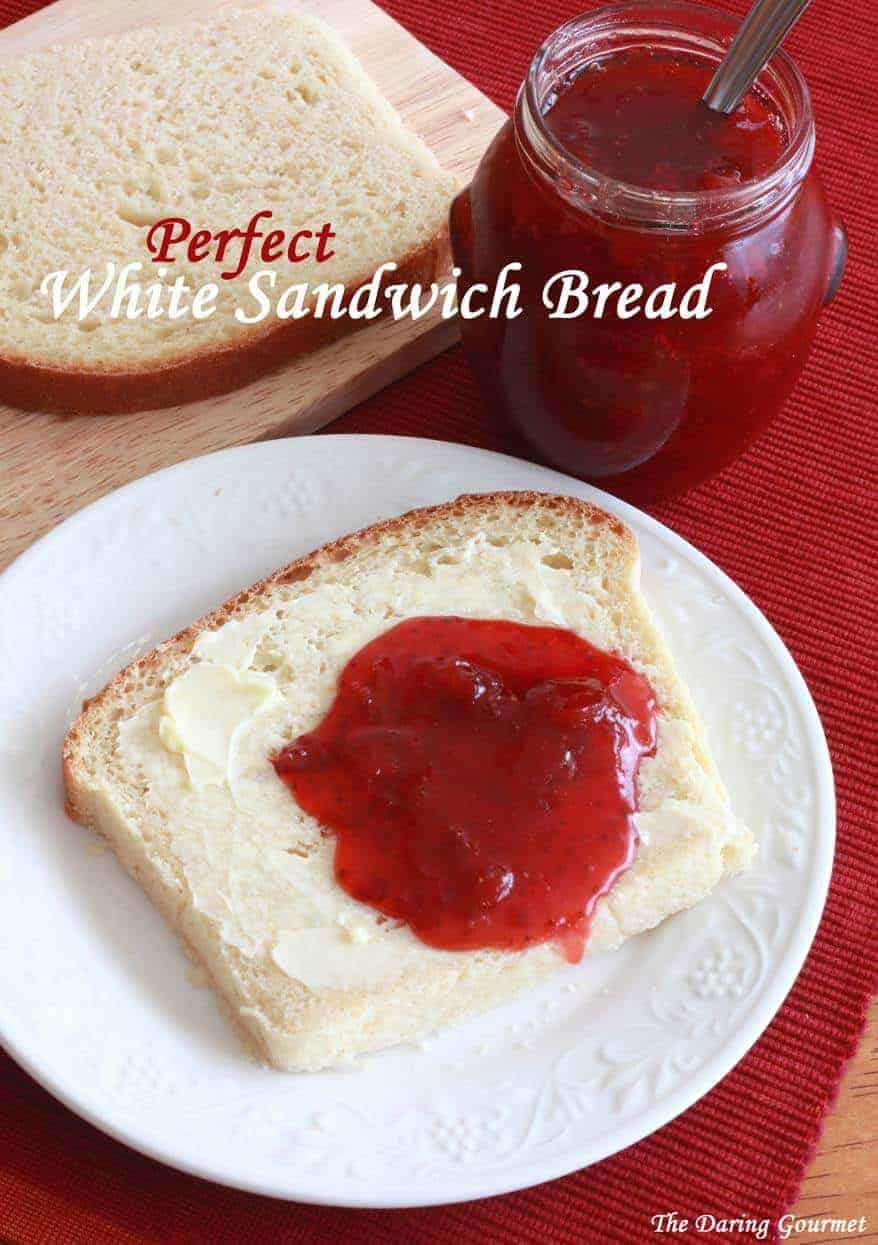
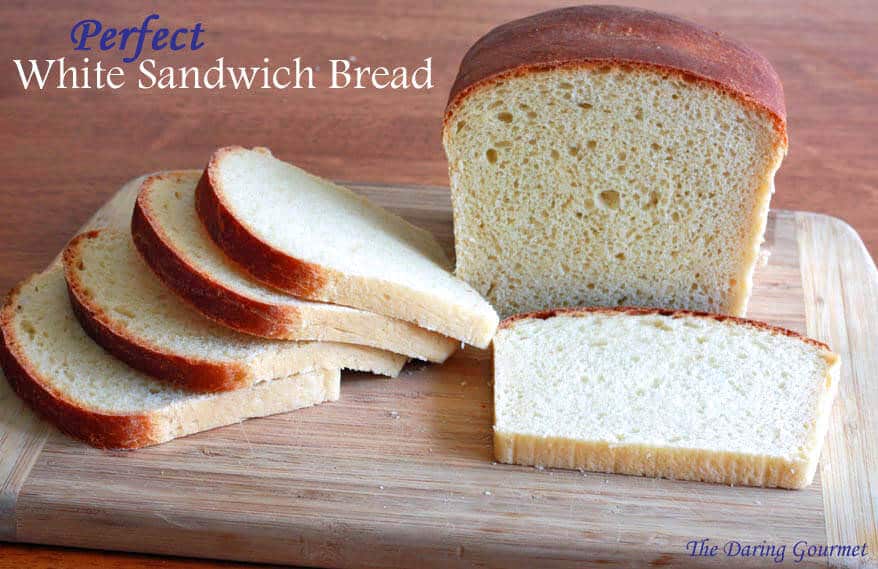
If you’re looking for a white sandwich bread recipe that is easy to make and produces the best slice-able bread with a great texture and flavor, this is it!
I don’t think there’s anything quite as comforting as homemade bread. From the time the aroma starts filling the kitchen to the time you sit down to sink your teeth into the soft, chewy texture of the the still warm bread, homemade yeast bread is heaven on earth. And it’s sad that many people don’t bother making it. Probably the main reason, it’s more convenient to just buy it. But that’s not the point, is it? We can buy most anything pre-made and pre-packaged at the store. And by only eating store-bought bread we’re sacrificing that wonderful homemade taste that’s simply unbeatable.
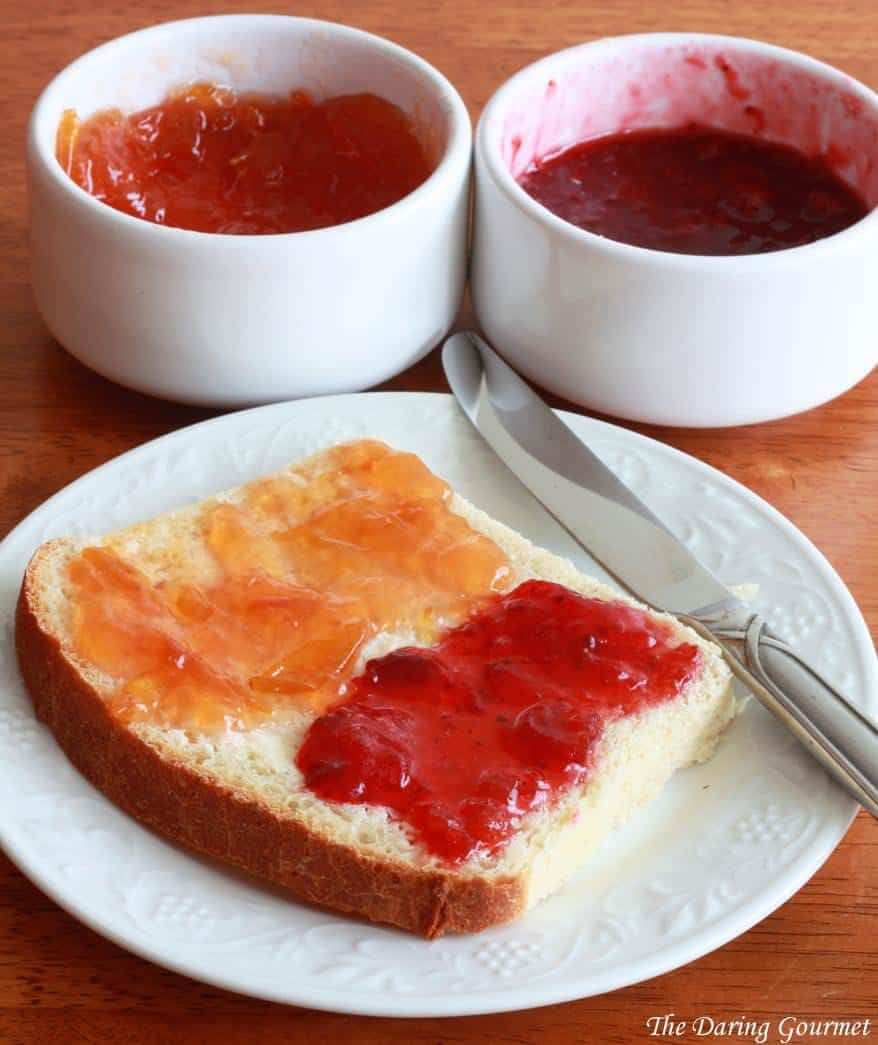
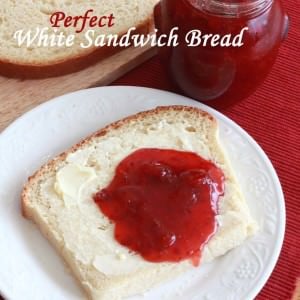
So while you may not have the time to make homemade bread every couple of days to keep your kitchen stocked (I know I don’t), the satisfaction you experience by making and eating homemade bread on occasion is beyond worth it. Every loaf you make bumps you up a notch or two on the quality-of-life ladder. So go on – treat yourself and your family. You all deserve it. And if you want to experience a slice of heaven, slather it down with butter and homemade jam! I sampled my homemade strawberry-rhubarb and apricot jams.
White Sandwich Bread Recipe
Let’s get started!
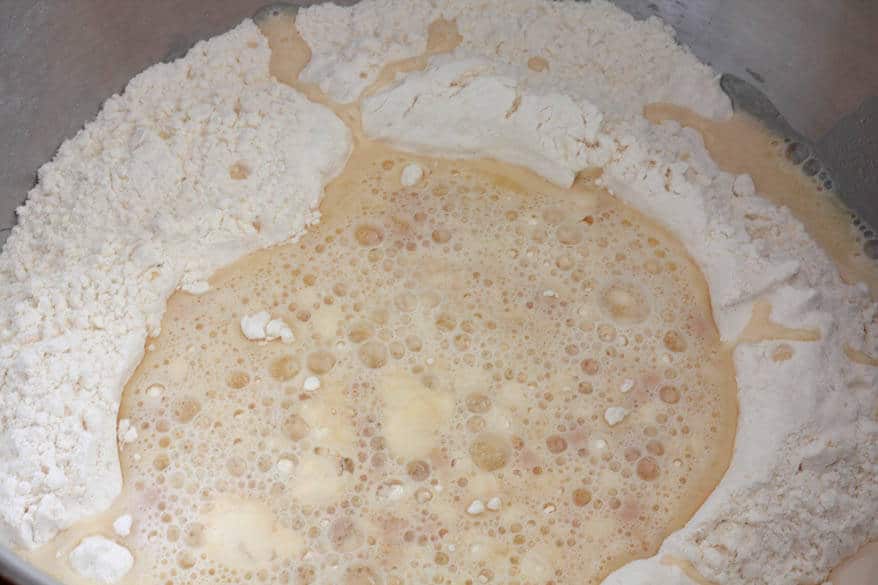
Place the oven rack on the lowest rung and preheat the oven to 200 degrees F. Leave the oven on at 200 F for 10 minutes and then turn off the oven (do not open the door). While the oven is warming up… In a bowl, combine the warm milk, water, butter, honey and yeast. Be sure the liquids aren’t too hot or they will kill the yeast.
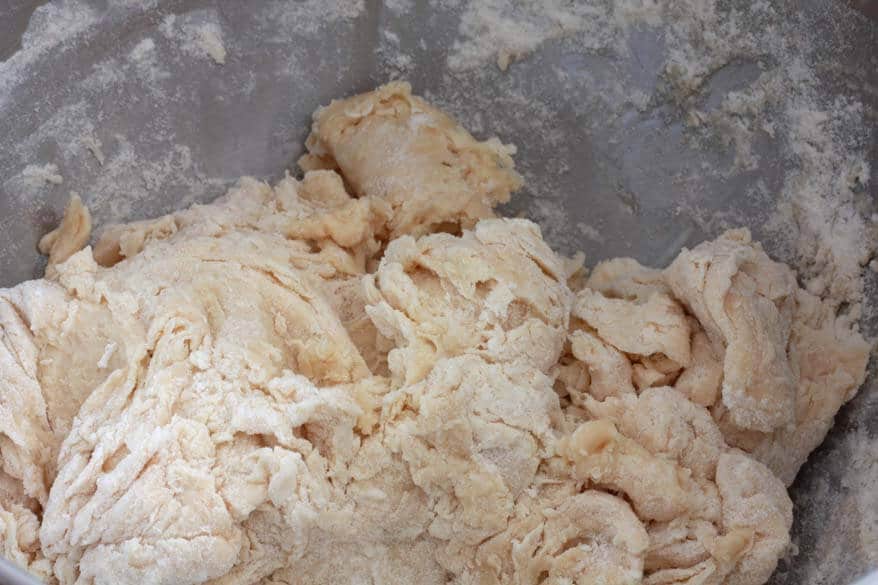
Place 3 1/2 cups flour and the salt in a standing mixer fitted with a dough hook and stir to combine.

Turn the standing mixer on the “low” setting and slowly add the liquid yeast mixture.
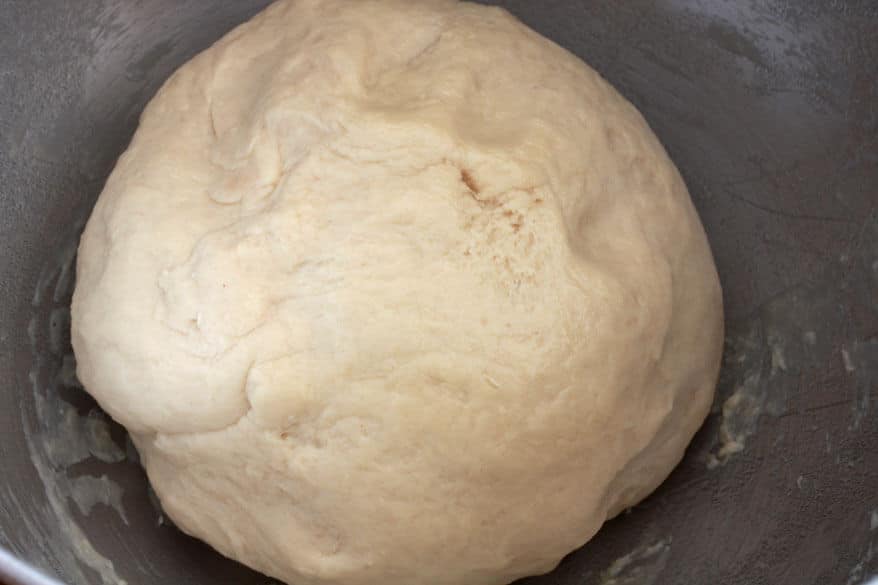
Once the dough has come together, increase the speed to “medium” (bread setting). Mix the dough for about 10 minutes until it is smooth and satiny. If after 5 minutes of kneading the dough is still sticking to the sides of the bowl, add more flour, 1 tablespoon at a time until it’s no longer sticking.
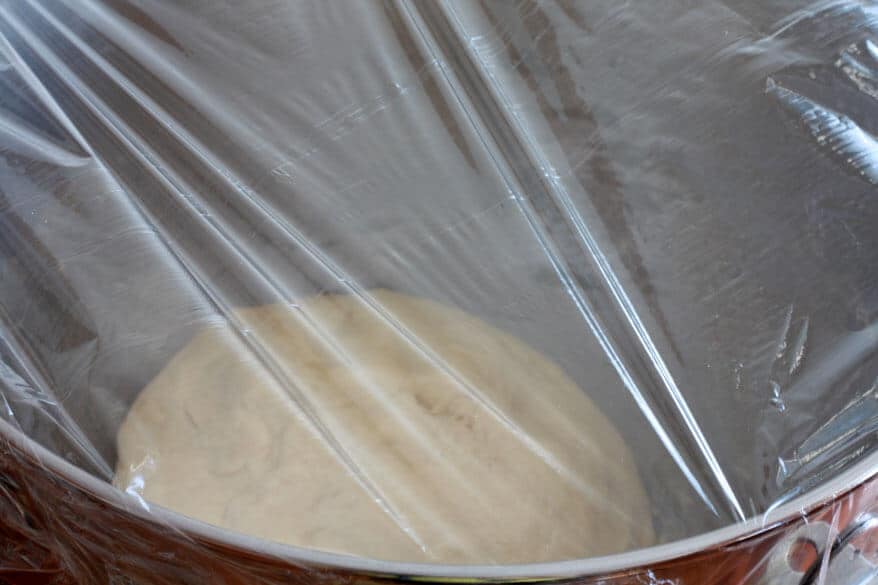
Turn the dough onto a lightly floured work surface and knead it to form a round ball. Place the dough in a very lightly oiled large bowl, rolling the ball of dough around in the bowl to coat lightly.
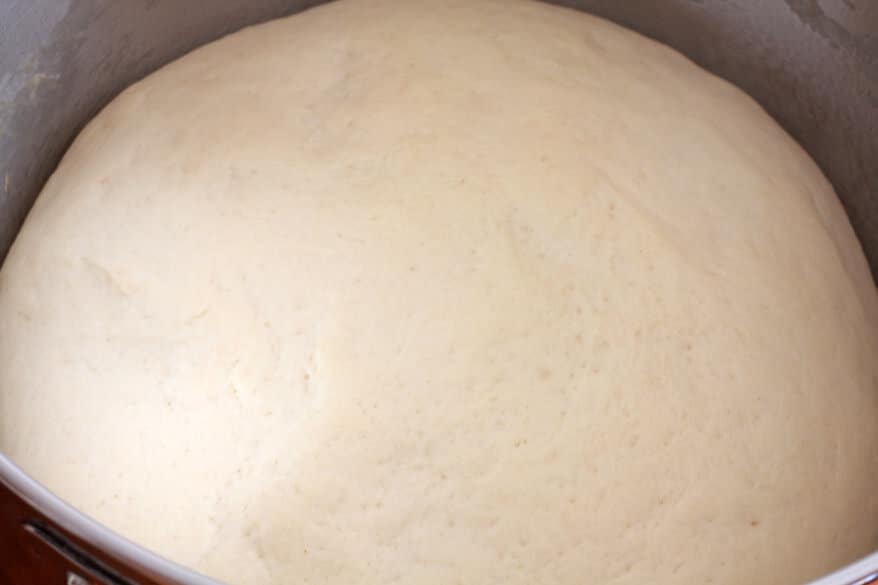
Loosely cover the bowl with plastic wrap and place it in the warmed oven for about 50 minutes, or until the dough has doubled in size.
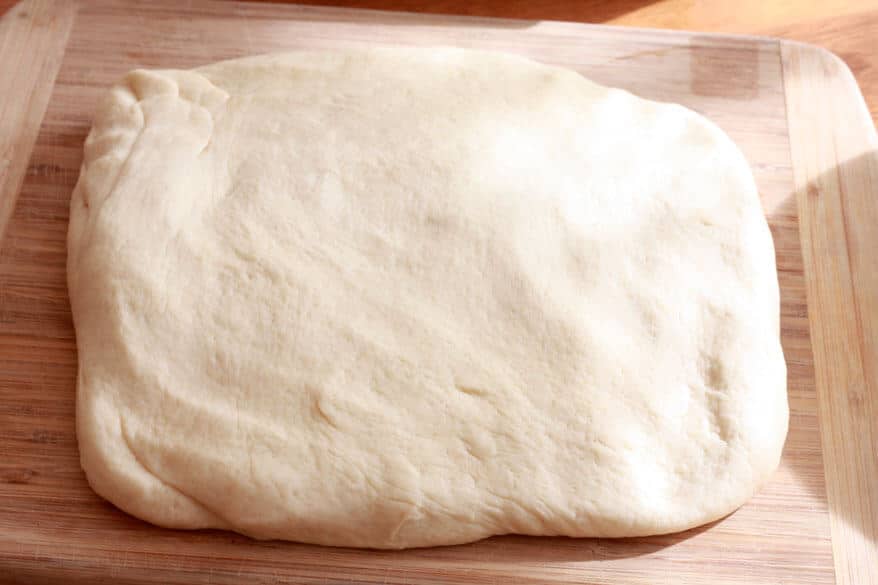
Remove the dough and gently press into an 8-inch square that is 1 inch thick.
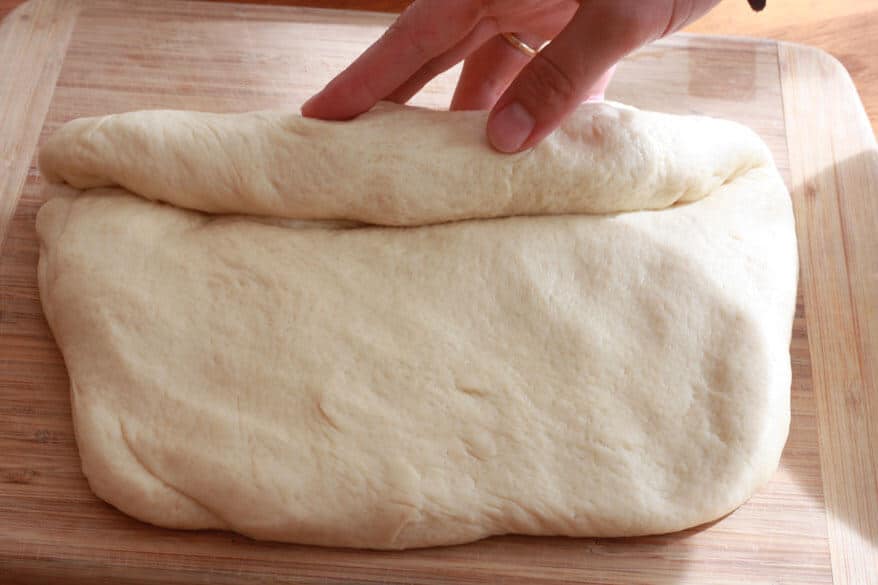
Starting with the side furthest away from you, roll the dough towards you in a firm cylinder, pressing it with your fingers so the dough sticks to itself.
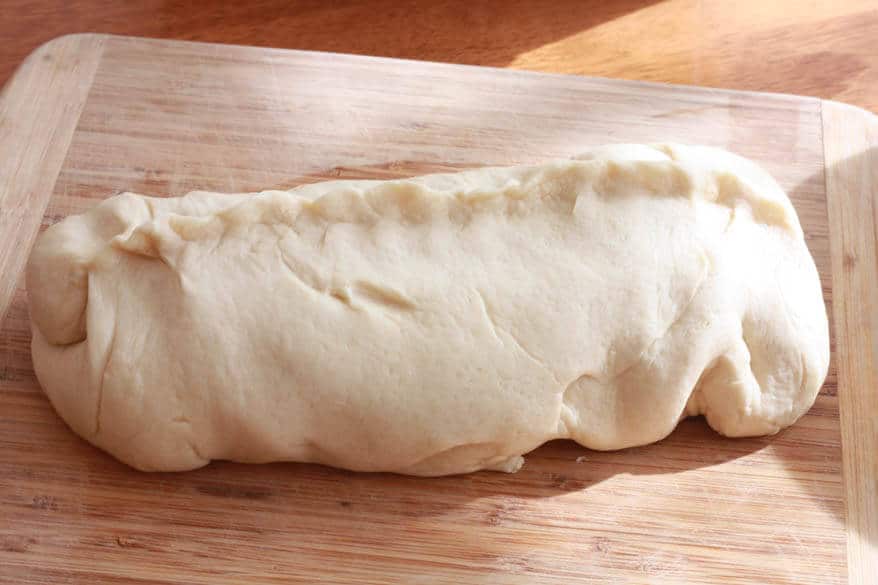
Turn the dough seam-side up and pinch the seam closed with your fingers.
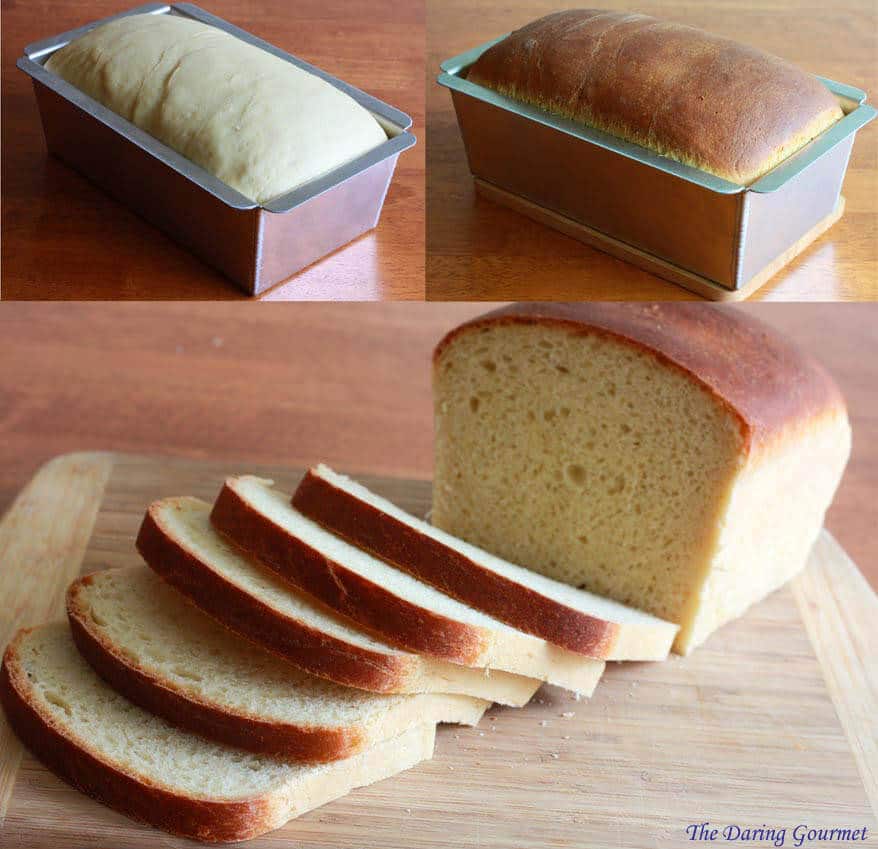
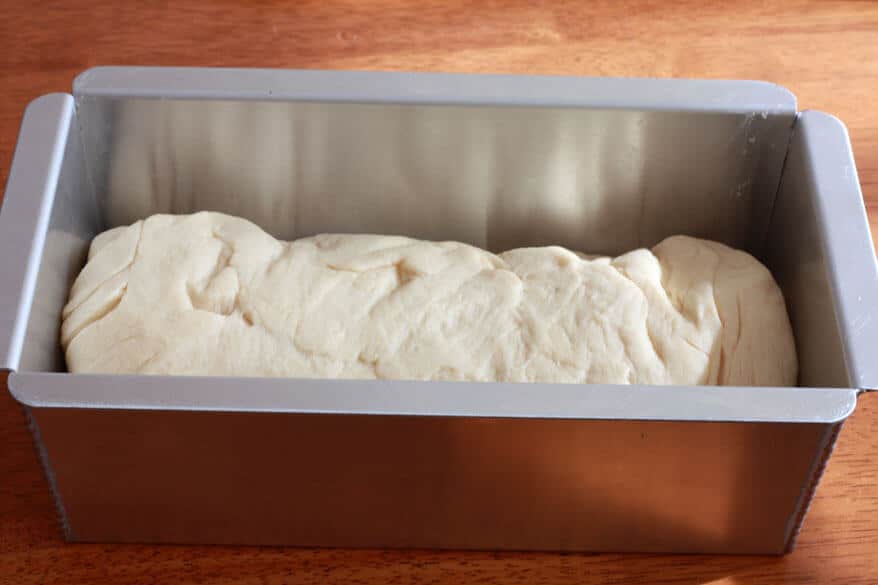
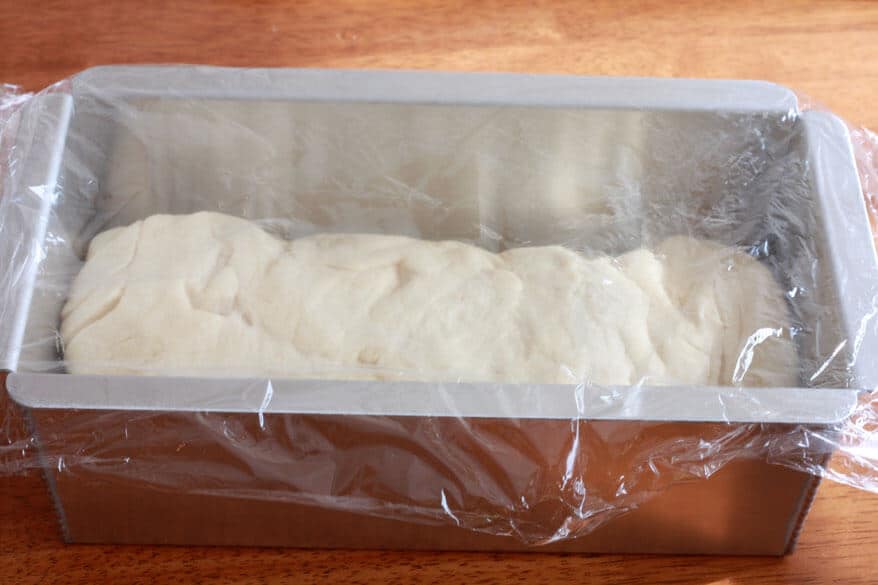
Place the dough seam-side down in a greased 9×5 inch loaf pan and press it gently so it touches all four sides of the pan.
Cover it with plastic wrap and let it rise in a warm spot for another 30 minutes, or until the dough has almost doubled.
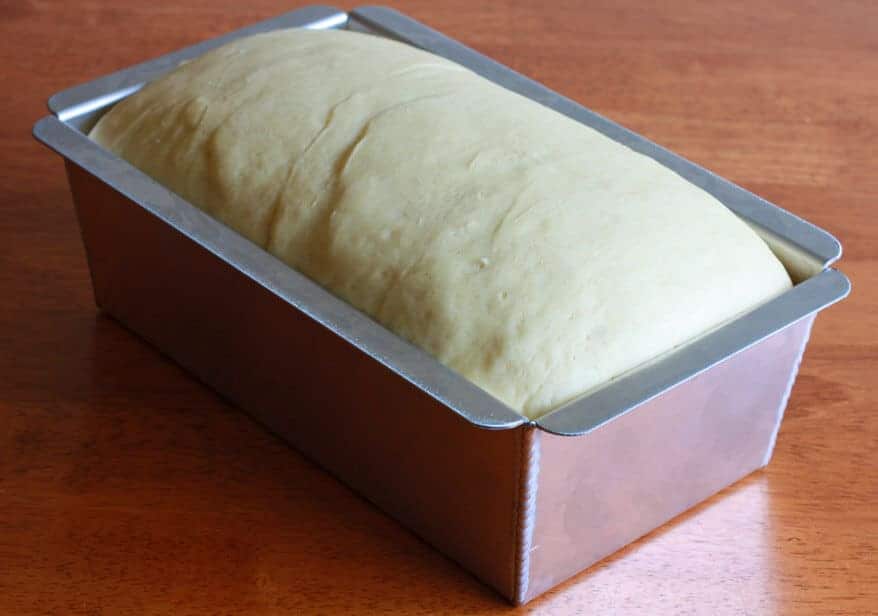
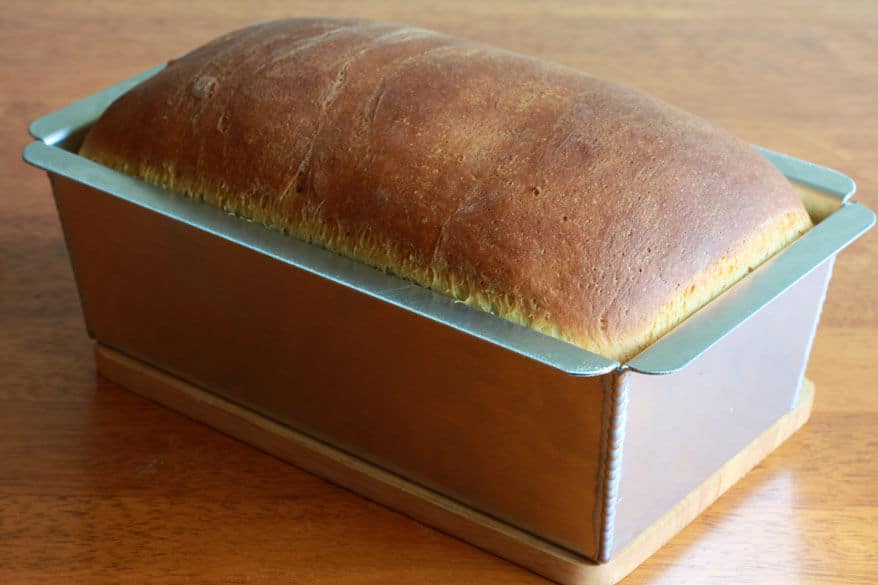
Preheat the oven to 350 degrees F. Boil 2 cups of water, pour into a baking dish, and place the dish on the bottom oven rack. For best results, place the loaf pan on the rack just above the water. If your oven is too small, place the loaf pan next to the pan of water. Bake for 40-50 minutes until the top of the bread is golden brown.
When you remove the pan, turn the loaf upside down and knock on it with your knuckles. If it’s done is should sound hollow. If you have an instant-read thermometer, you can test doneness by inserting it at an angle from the short end of the loaf just above the pan rim into the center of the loaf; it should read 195 degrees F.
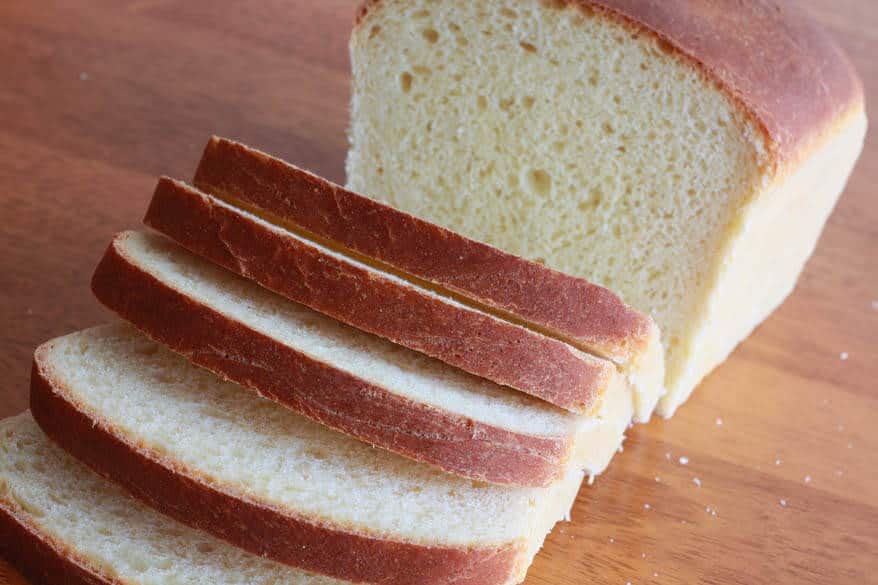
Remove the bread from the pan, transfer to a wire rack, and cool to room temperature. Slice and serve.
For more bread recipes try my:
- Tomato Herb Bread
- German Bread (Vollkornbrot)
- Danish Rye Bread
- Lavash
- Lefse
- Injera
- Dosa
- Naan Bread
- Sourdough Naan
- Sourdough English Muffins
- Crumpets
- Olive Rosemary Focaccia
- Skillet Cornbread
Save This Recipe
Perfect White Sandwich Bread
Ingredients
- 3 1/2 cups all-purpose flour , plus more as needed
- 2 teaspoons salt
- 1 cup lukewarm whole milk
- 1/3 cup lukewarm water
- 2 tablespoons unsalted butter , melted
- 3 tablespoons honey
- 2 1/4 teaspoons instant yeast
Instructions
- Grease a 9×5 inch loaf pan. Place the oven rack on the lowest rung and preheat the oven to 200 degrees F. Leave the oven on at 200 F for 10 minutes and then turn off the oven (do not open the door).
- While the oven is warming up, place 3 1/2 cups flour and the salt in a standing mixer fitted with a dough hook and stir to combine.In a bowl, combine the warm milk, water, butter, honey and yeast. Be sure the liquids aren't too hot or they will kill the yeast. Turn the standing mixer on the "low" setting and slowly add the liquid mixture. Once the dough has come together, increase the speed to "medium" (bread setting). Mix the dough for about 10 minutes until it is smooth and satiny. If after 5 minutes of kneading the dough is still sticking to the sides of the bowl, add more flour, 1 tablespoon at a time until it's no longer sticking. Turn the dough onto a lightly floured work surface and knead it to form a round ball.Place the dough in a very lightly oiled large bowl, rolling the ball of dough around in the bowl to coat lightly. Loosely cover the bowl with plastic wrap and place it in the warmed oven for about 50 minutes, or until the dough has doubled in size.
- Remove the dough and gently press into an 8-inch square that is 1 inch thick. Starting with the side furthest away from you, roll the dough towards you in a firm cylinder, pressing it with your fingers so the dough sticks to itself. Turn the dough seam-side up and pinch the seam closed with your fingers. Place the dough seam-side down in a the prepared loaf pan and press it gently so it touches all four sides of the pan. Cover it with plastic wrap and let it rise in a warm spot for another 30 minutes, or until the dough has almost doubled.
- Preheat the oven to 350 degrees F. Boil 2 cups of water, pour into a baking dish, and place the dish on the bottom oven rack. For best results, place the loaf pan on the rack just above the water. If your oven is too small, place the loaf pan next to the pan of water.Bake for 40-50 minutes until the top of the bread is golden brown. When you remove the pan, turn the loaf upside down and knock on it with your knuckles. If it's done is should sound hollow. If you have an instant-read thermometer, you can test doneness by inserting it at an angle from the short end of the loaf just above the pan rim into the center of the loaf; it should read 195 degrees F. Remove the bread from the pan, transfer to a wire rack, and cool to room temperature. Slice and serve.
Nutrition
Originally published on The Daring Gourmet May 19, 2014. Adapted from Cook’s Illustrated.

Hi, I’m Kimberly Killebrew and welcome to Daring Gourmet where you'll find delicious originals, revitalized classics, and simply downright good eats from around the world! Originally from Germany, later raised in England, world-traveled, and now living in the U.S., from my globally-influenced kitchen I invite you to tour the world through your taste buds!


can i sub the melted butter with oil, if so can i please have the quantity . could i also please have the recipe in grams ?
Hi Lindsey, yes you can and it will be the same quantity. I’ve just added the metric measurements, if you look to the right of the list of ingredients you’ll see the “Metric” button that you can click on. Happy baking!
I really needed an easy sandwich bread since I had some terrific meatloaf leftovers and that is a pair! I have a Peter Reinhart sandwich bread I often make, but his recipe is going to replace that one as my “go to” sandwich bread……..thank you for another winner! Easy to make, I do have the mixer that does the hard work. Terrific rise, I do have my proofing box from K.A. Flour since all my kitchens have been cold! The aroma from the kitchen was spot on! The timing for the bake was right to the minute as well, temped at 205, could have had two more minutes perhaps. Very tasty and perfect crumb……..this recipe goes into the front of my bread file to get made again next week! Thanks, Kimberly — I use so many of your recipes!