The Micro-Dwelling Project: Part 1
This post may contain affiliate links. See my disclosure policy.
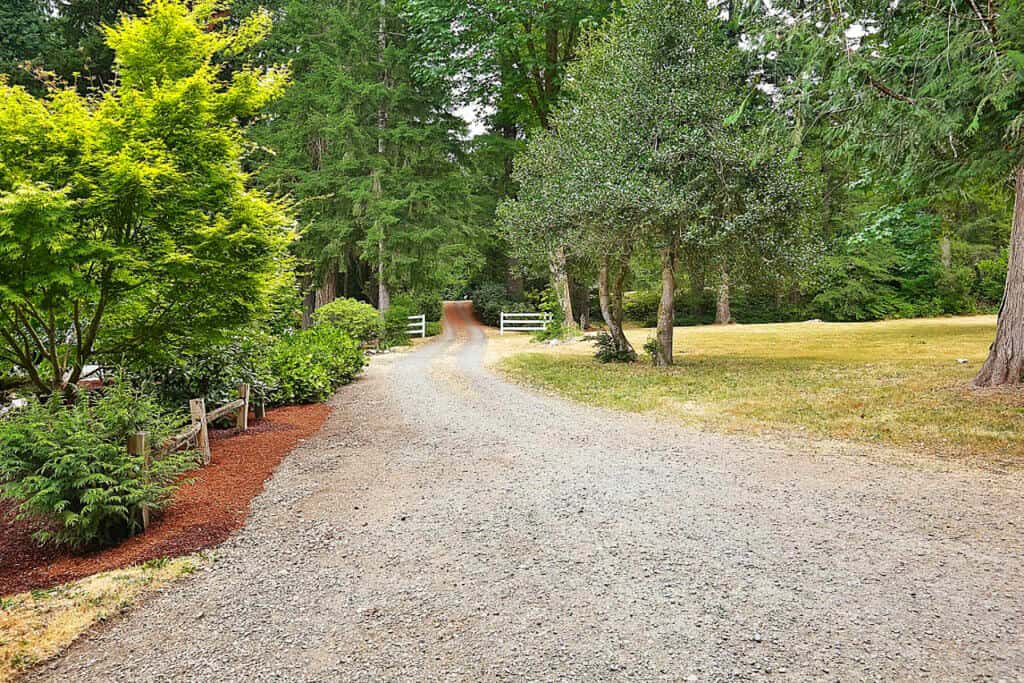
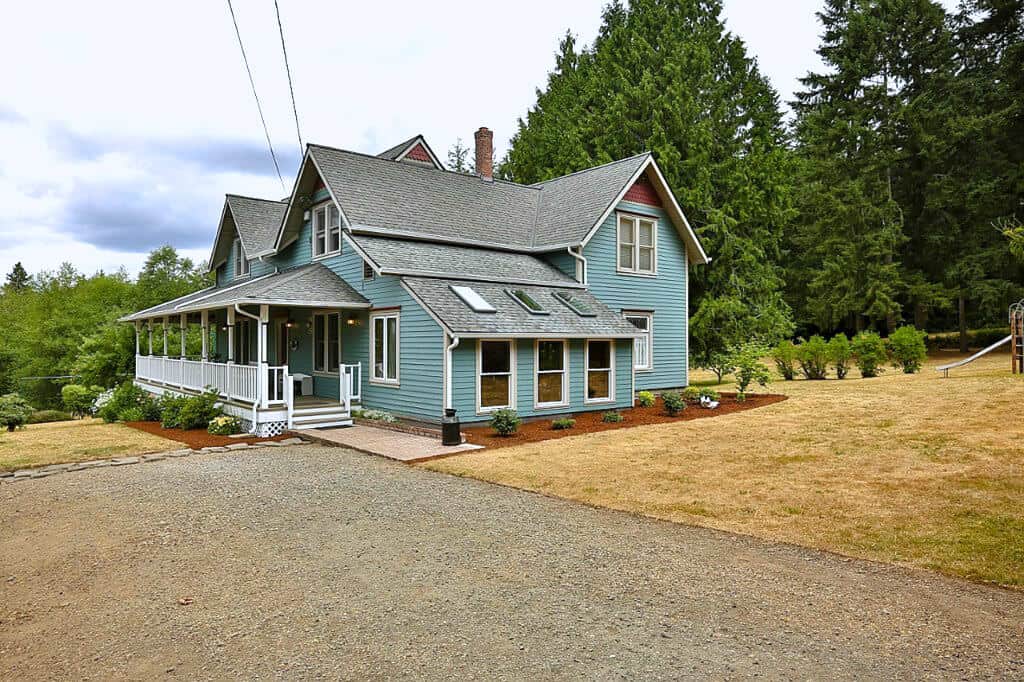
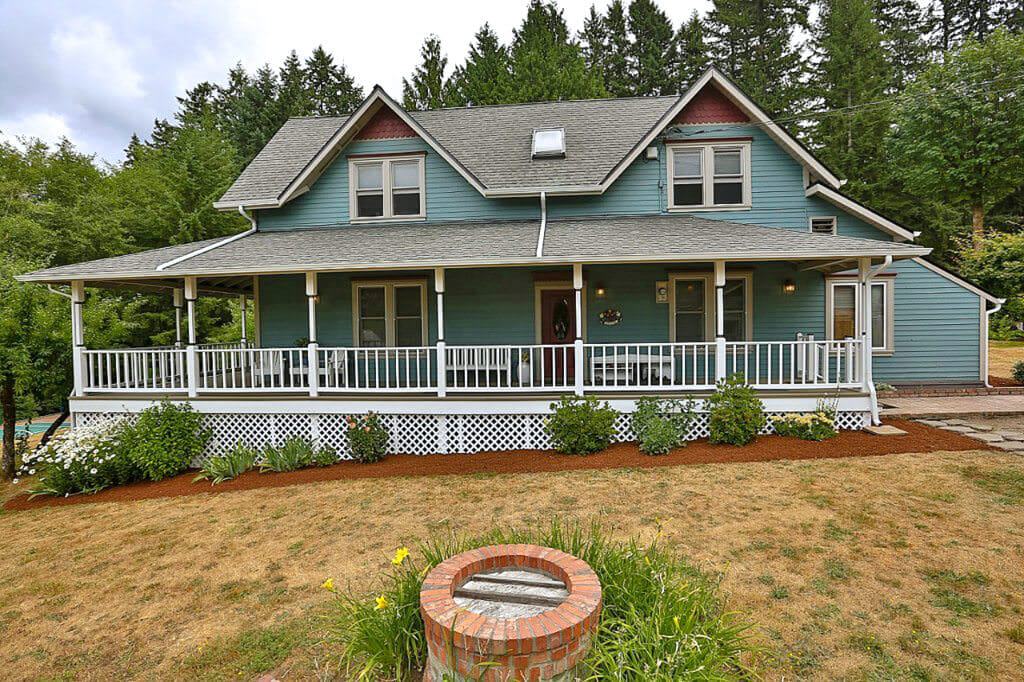
I recently introduced you to our “new” 104 year old home that we moved into 4 weeks ago. We’re still in the process of getting settled and it’s going to take some time yet.
But even before we’ve settled, we’re already starting a new project.
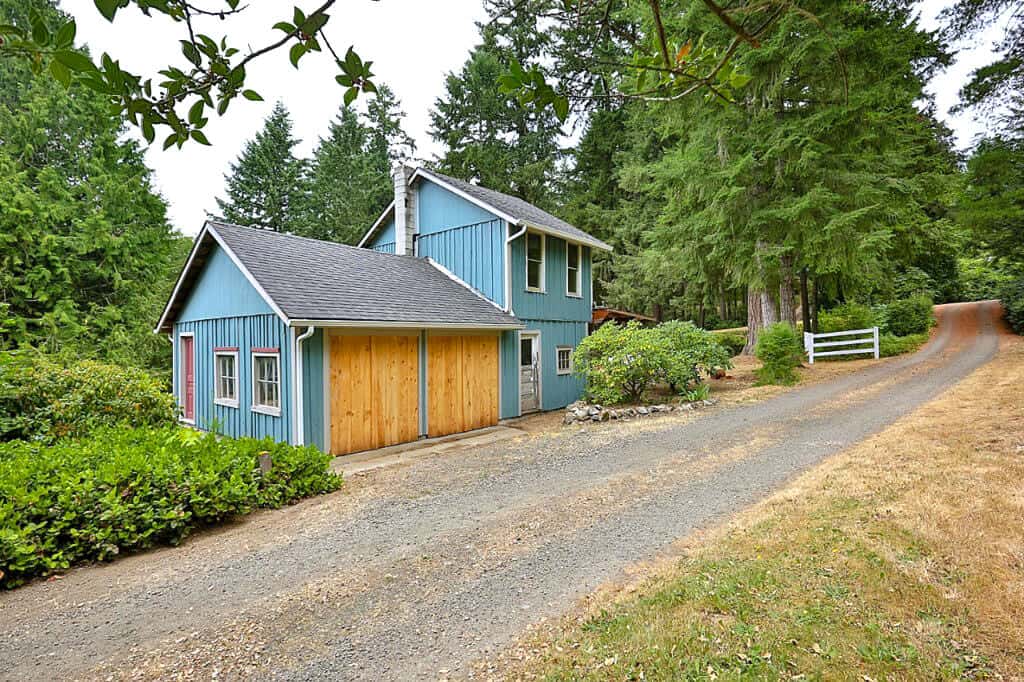
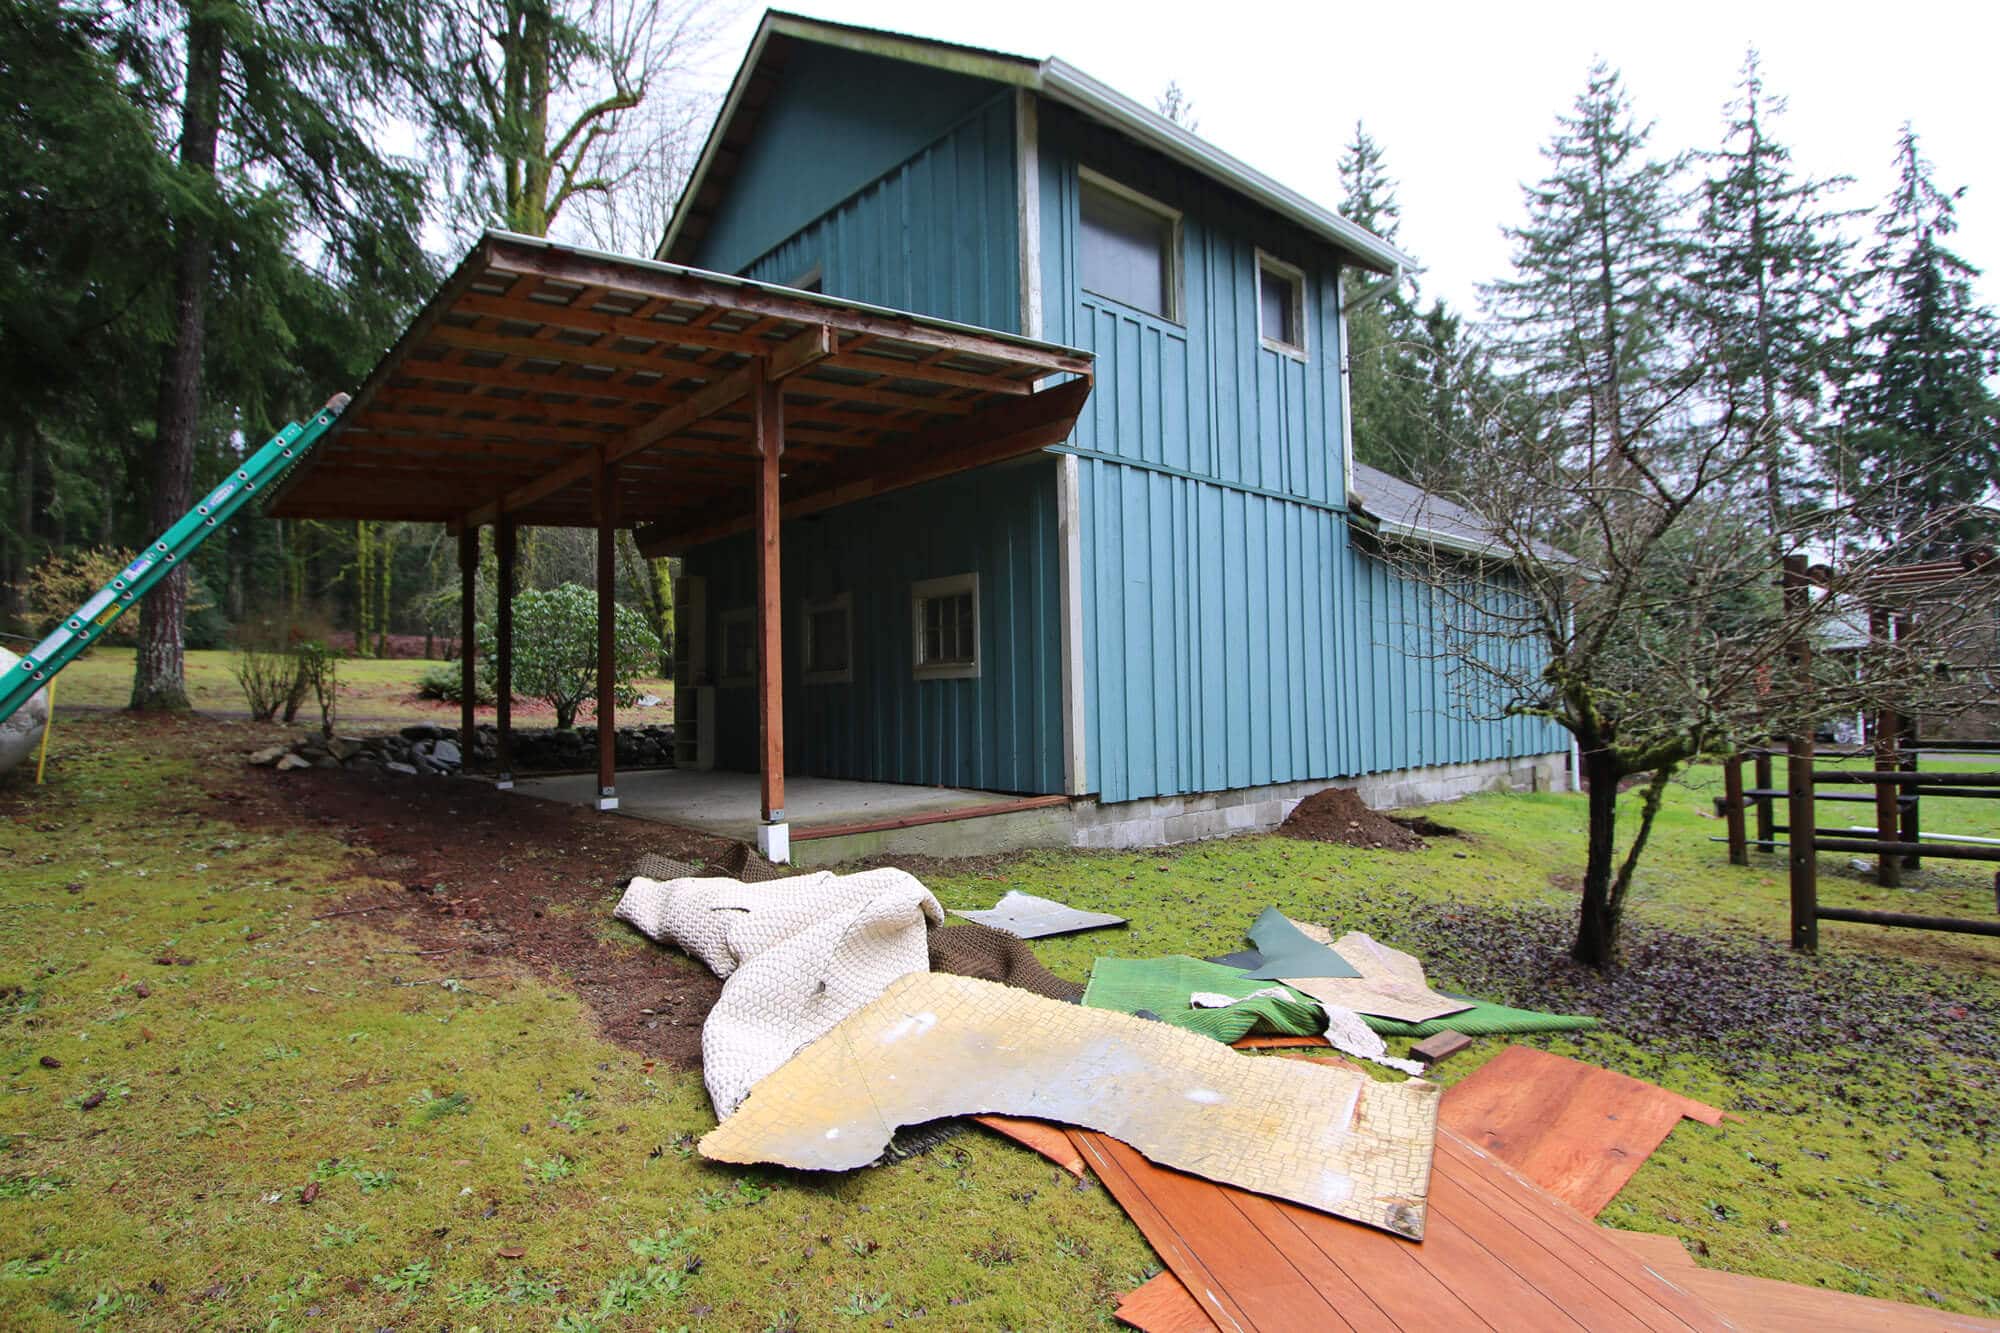
We have several outbuildings on our 8 acre property, all of which were built from trees on this very property. Even our 1912 home was built out of wood milled from this property. More specifically, before the main house was built an huge barn had been built. It was the oldest barn in the county. When that became dilapidated the wood from that barn was used to build the outbuildings. Pretty neat, huh? The outbuildings are sturdily built with “historic wood” and we already have ideas for putting them each to good use, so we want to restore and preserve them.
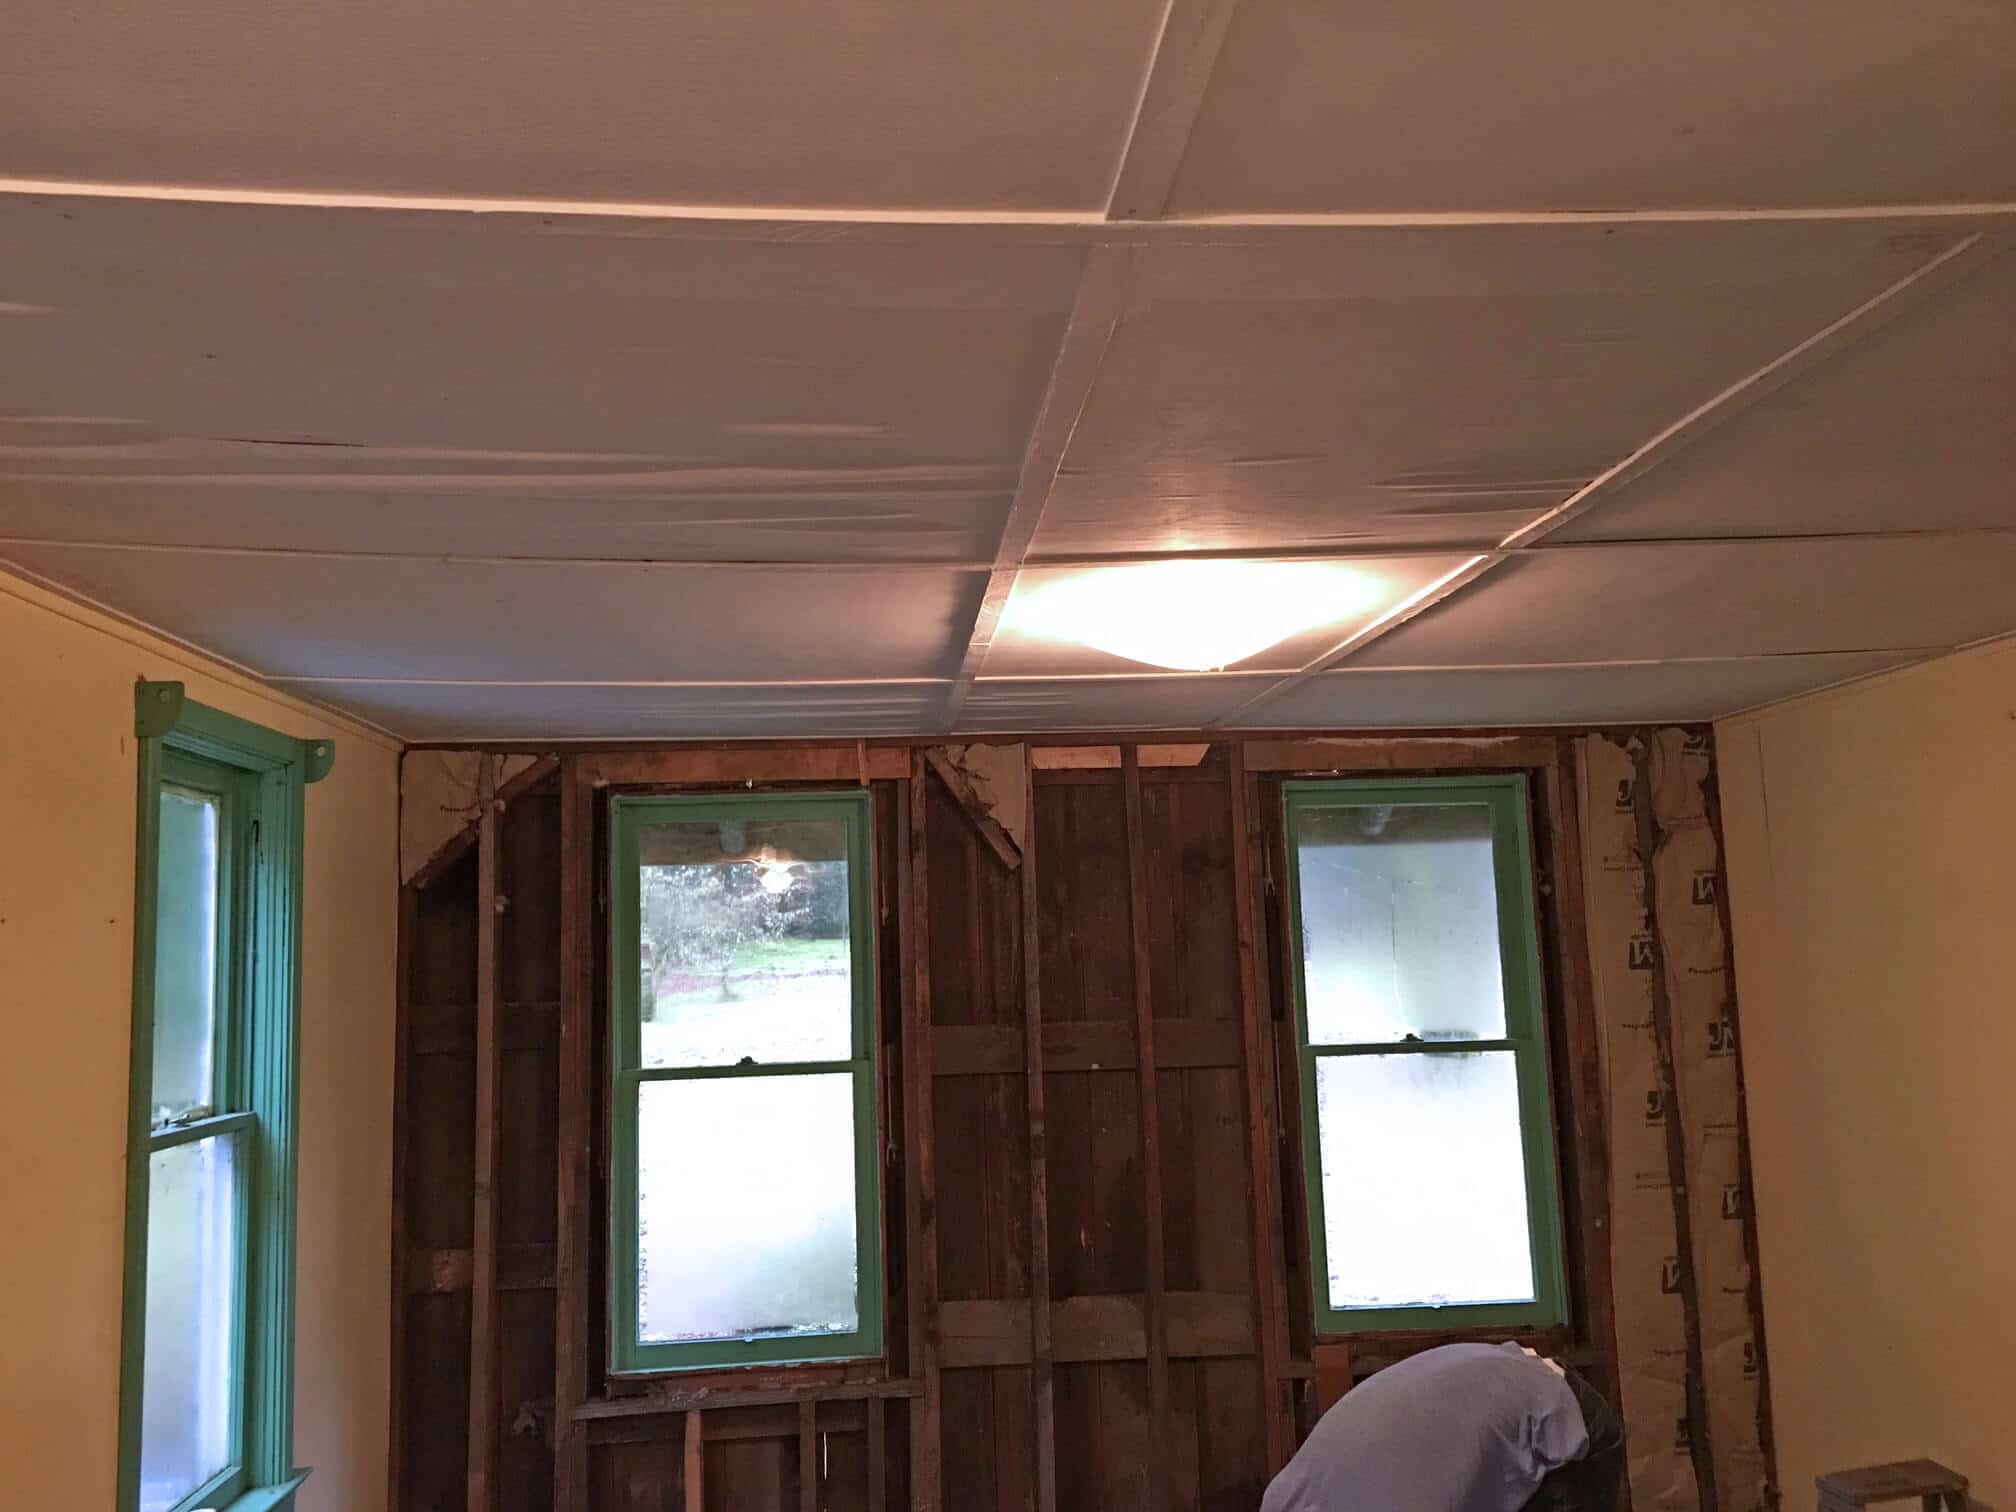
One of the outbuildings has a small 250 square foot living unit on top that hasn’t been in use since the 70’s. And it’s only even been accessed a couple of times since then because the original staircase rotted off long ago.
We’re converting it into a micro-dwelling.
So here’s the thing: Neither of us have any experience with remodeling. But we’re both tenacious and determined and we’re going to see this project through with our own sweat and elbow grease until it shines.
With the original staircase having rotted off, the only way to access it right now is by ladder.
So we grabbed one and headed up to check it out.
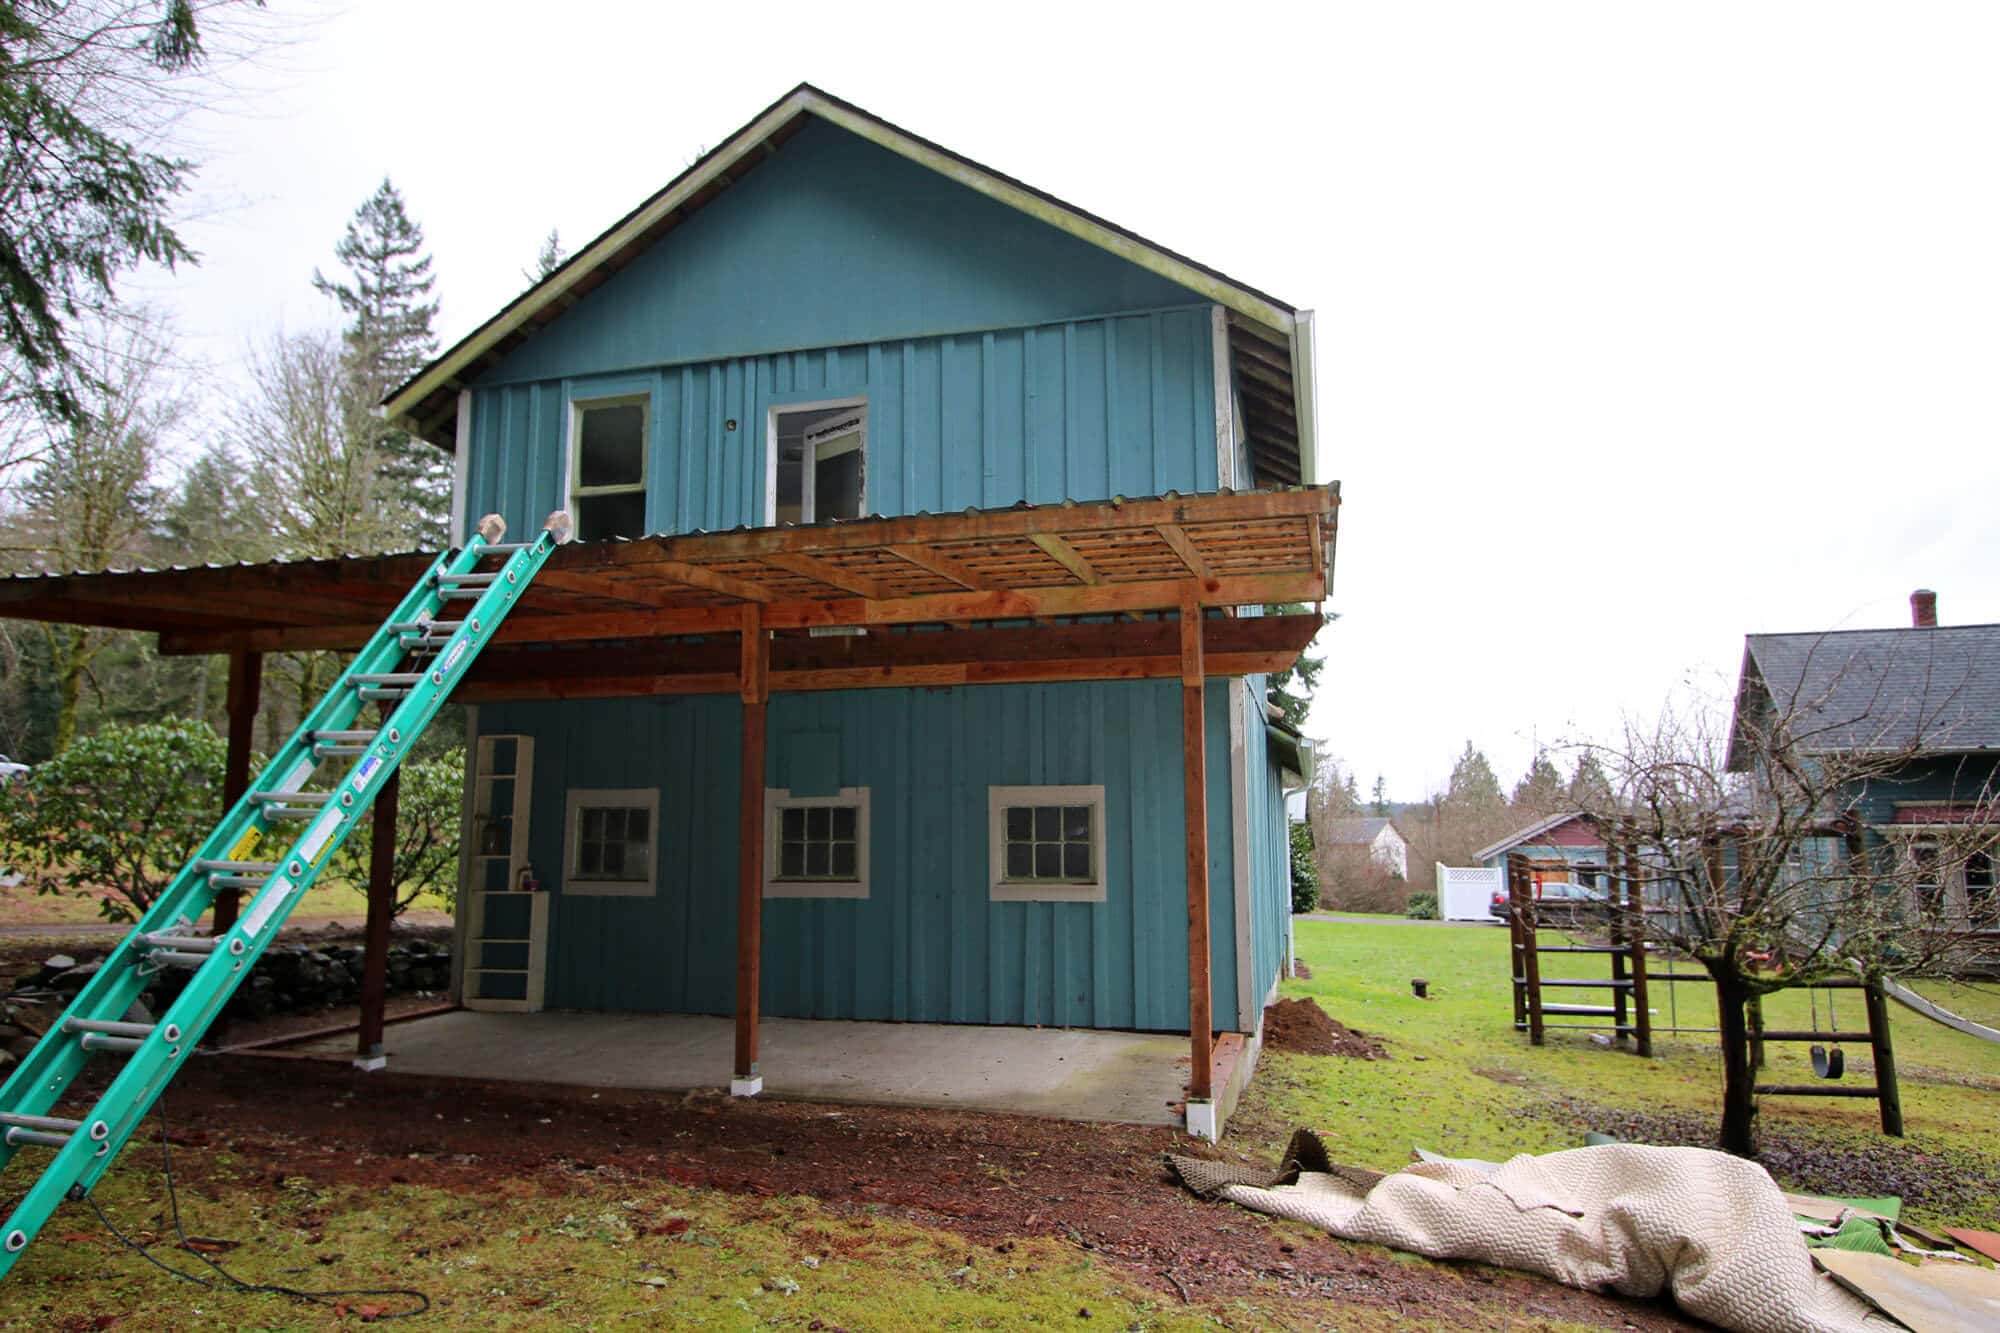

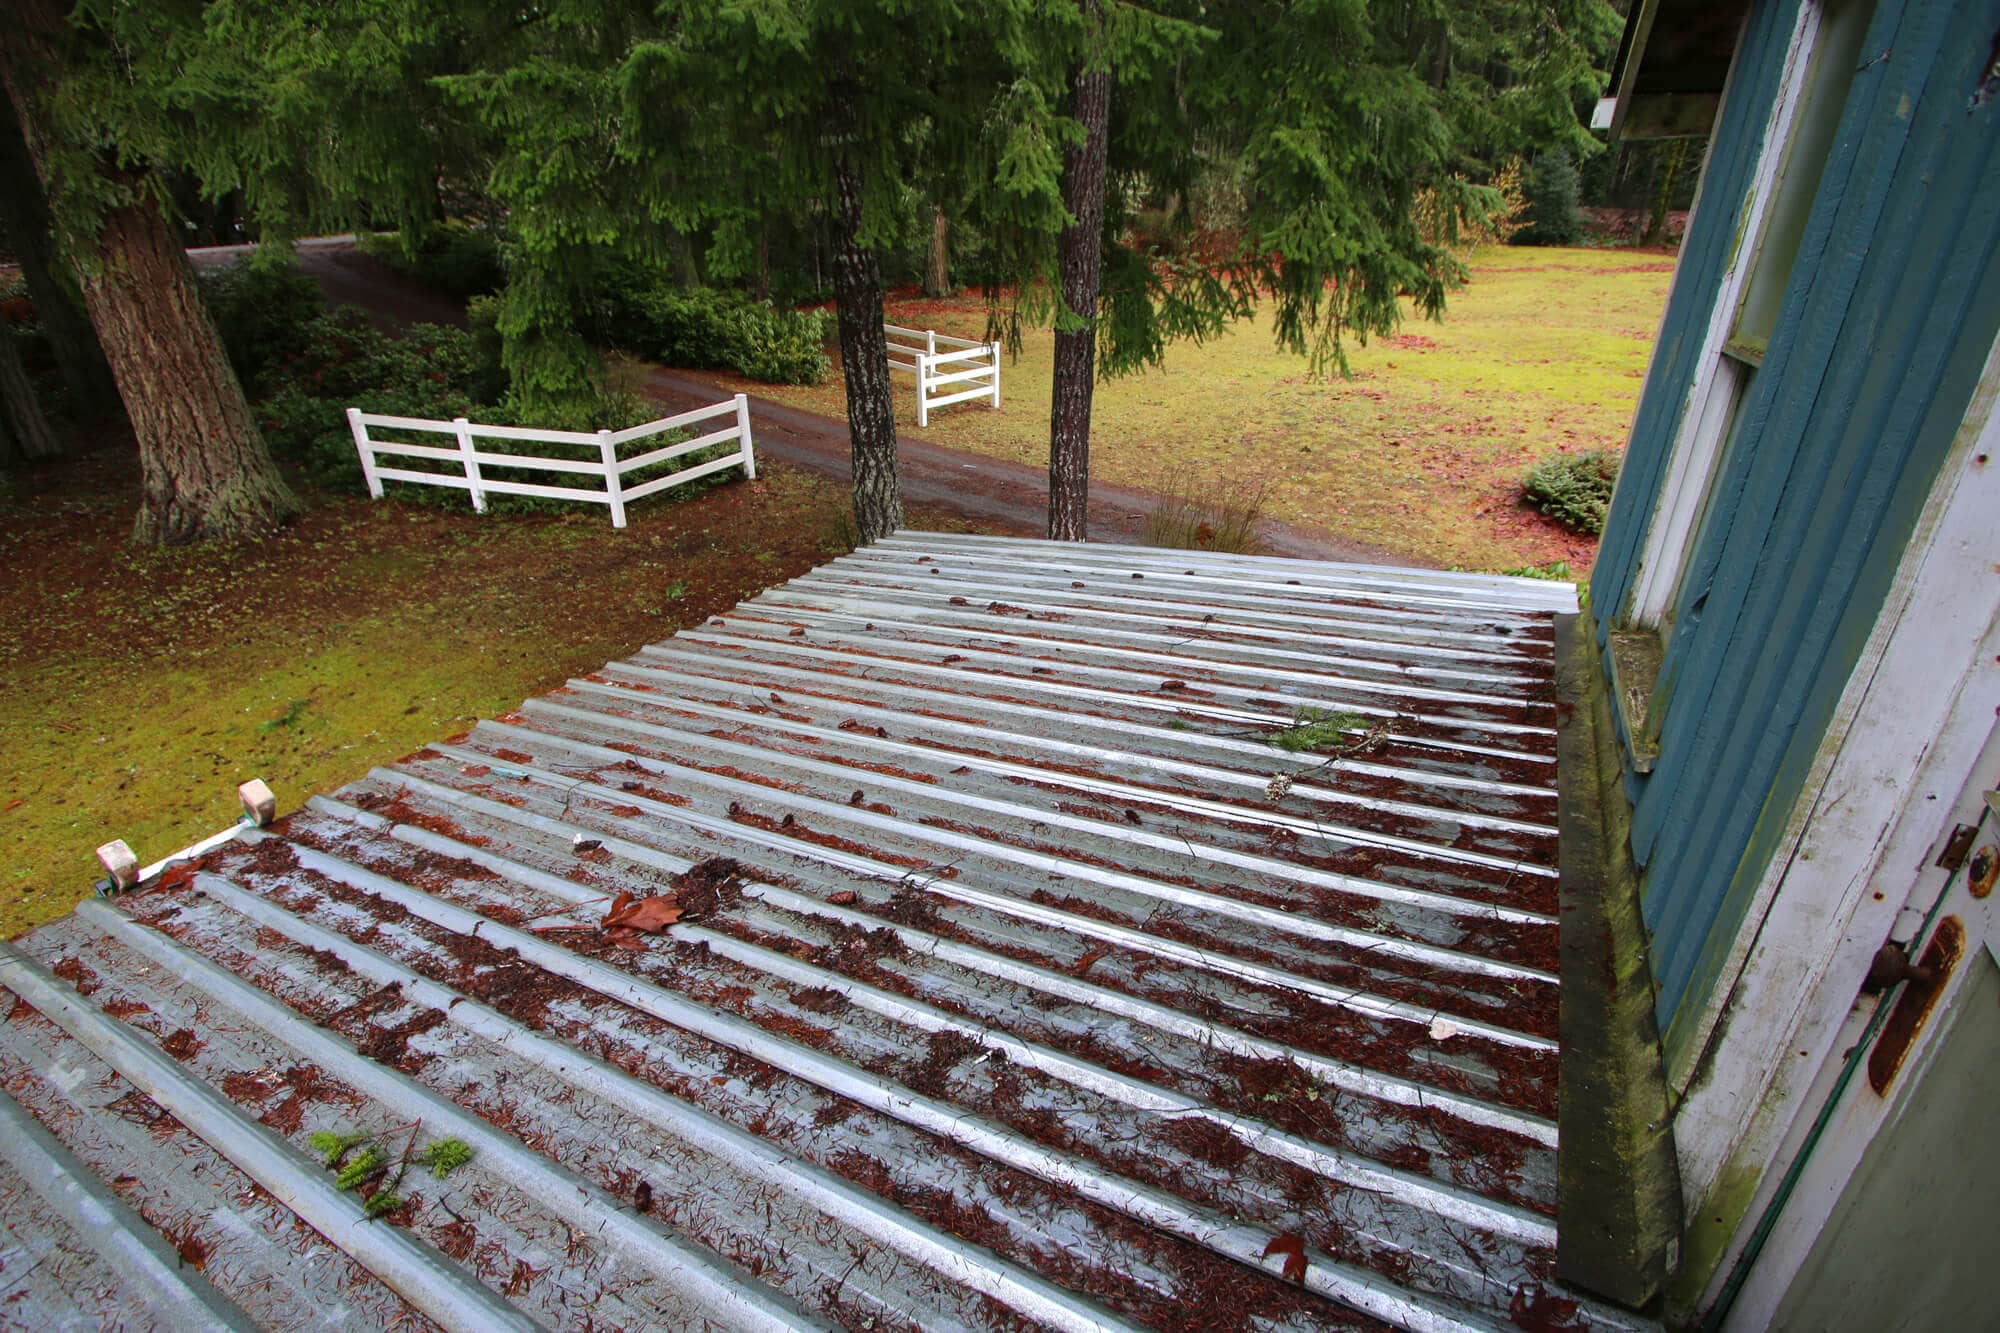
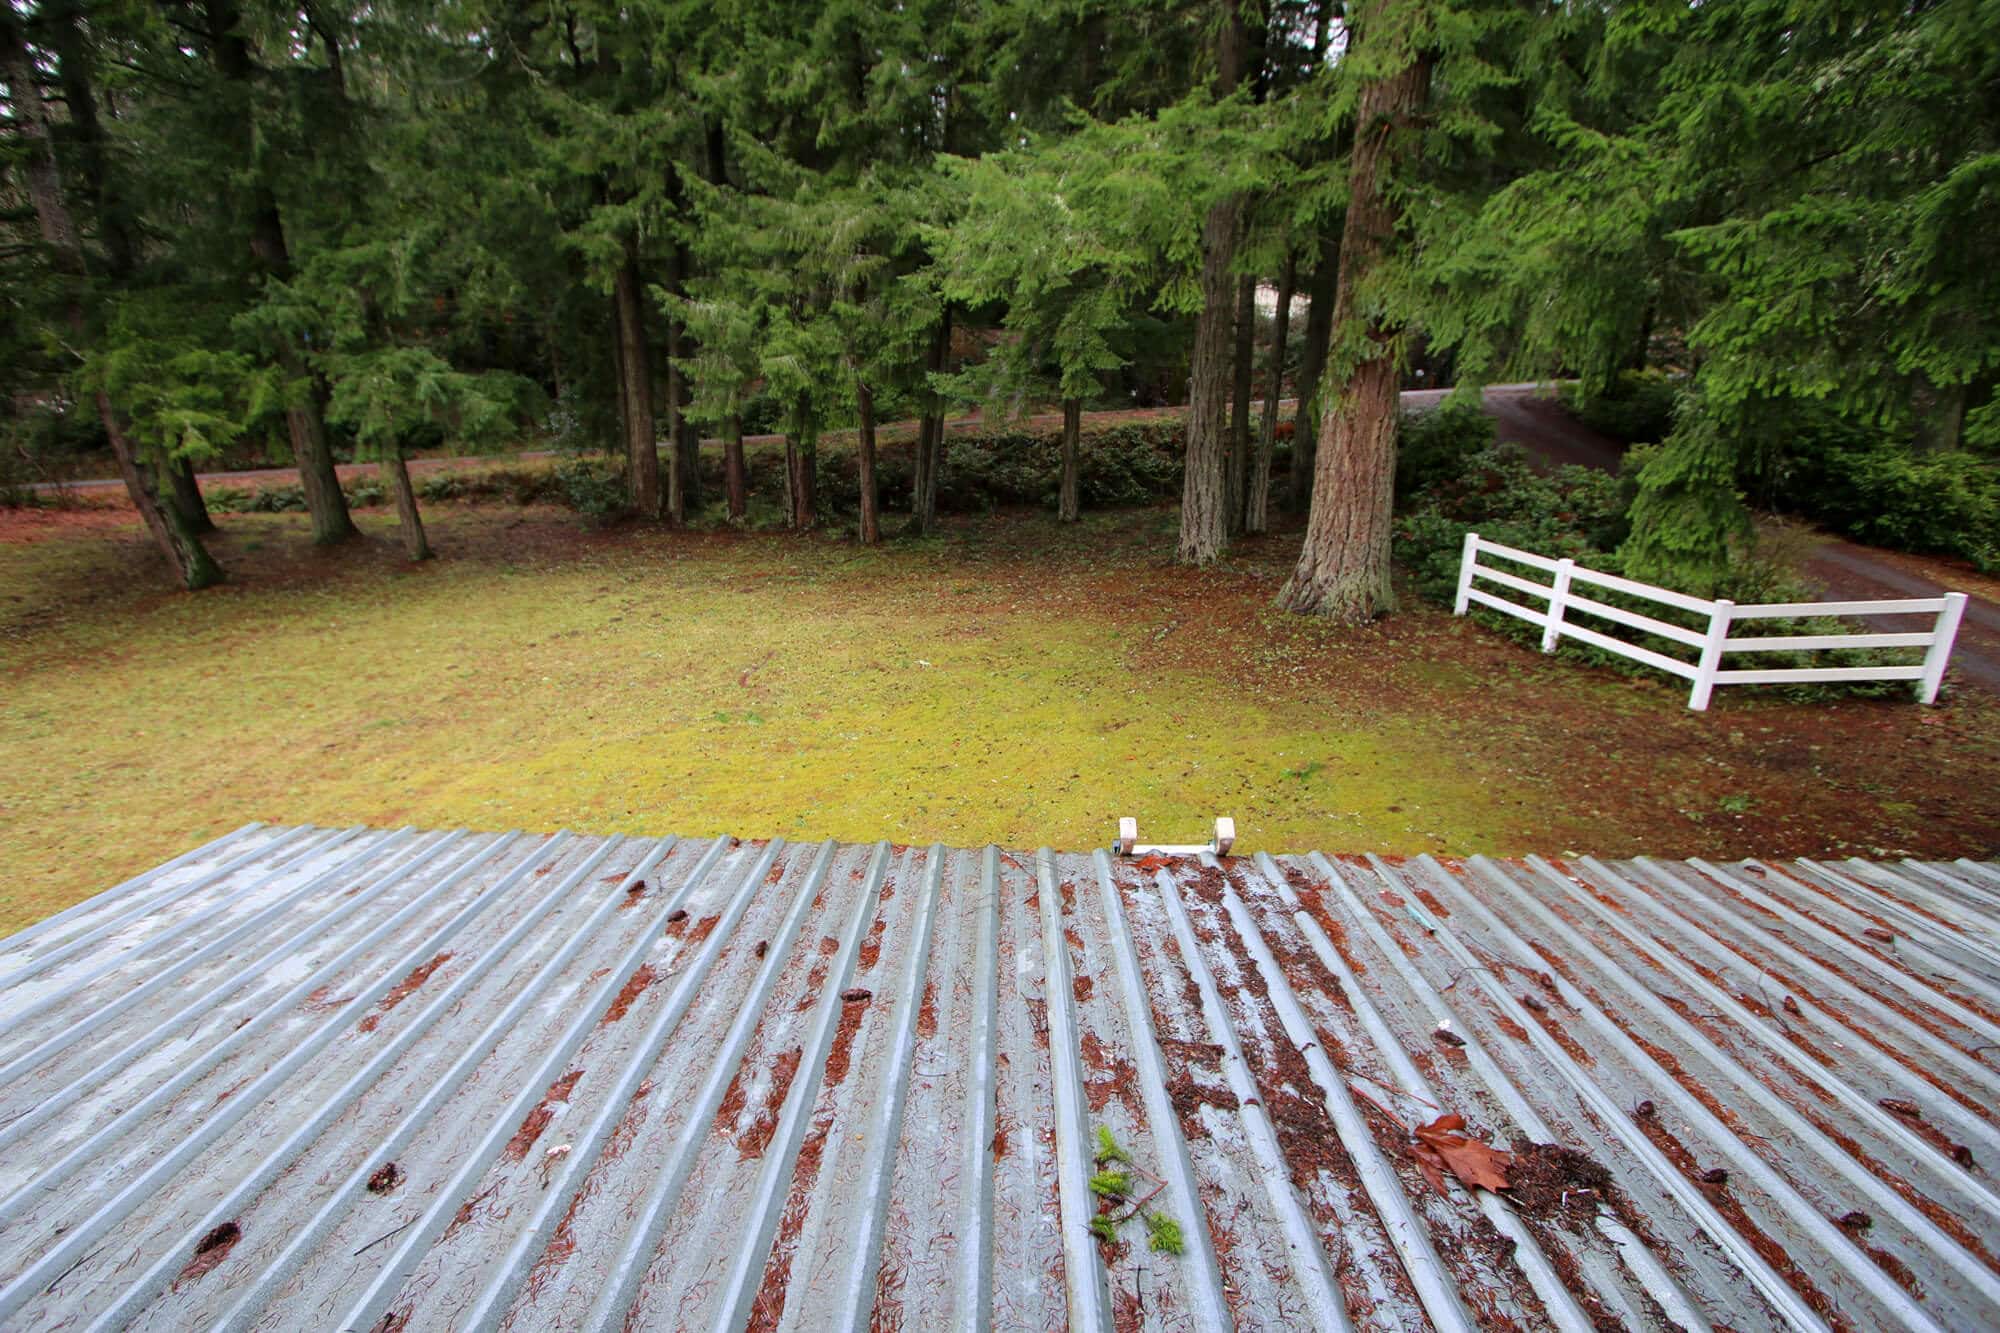
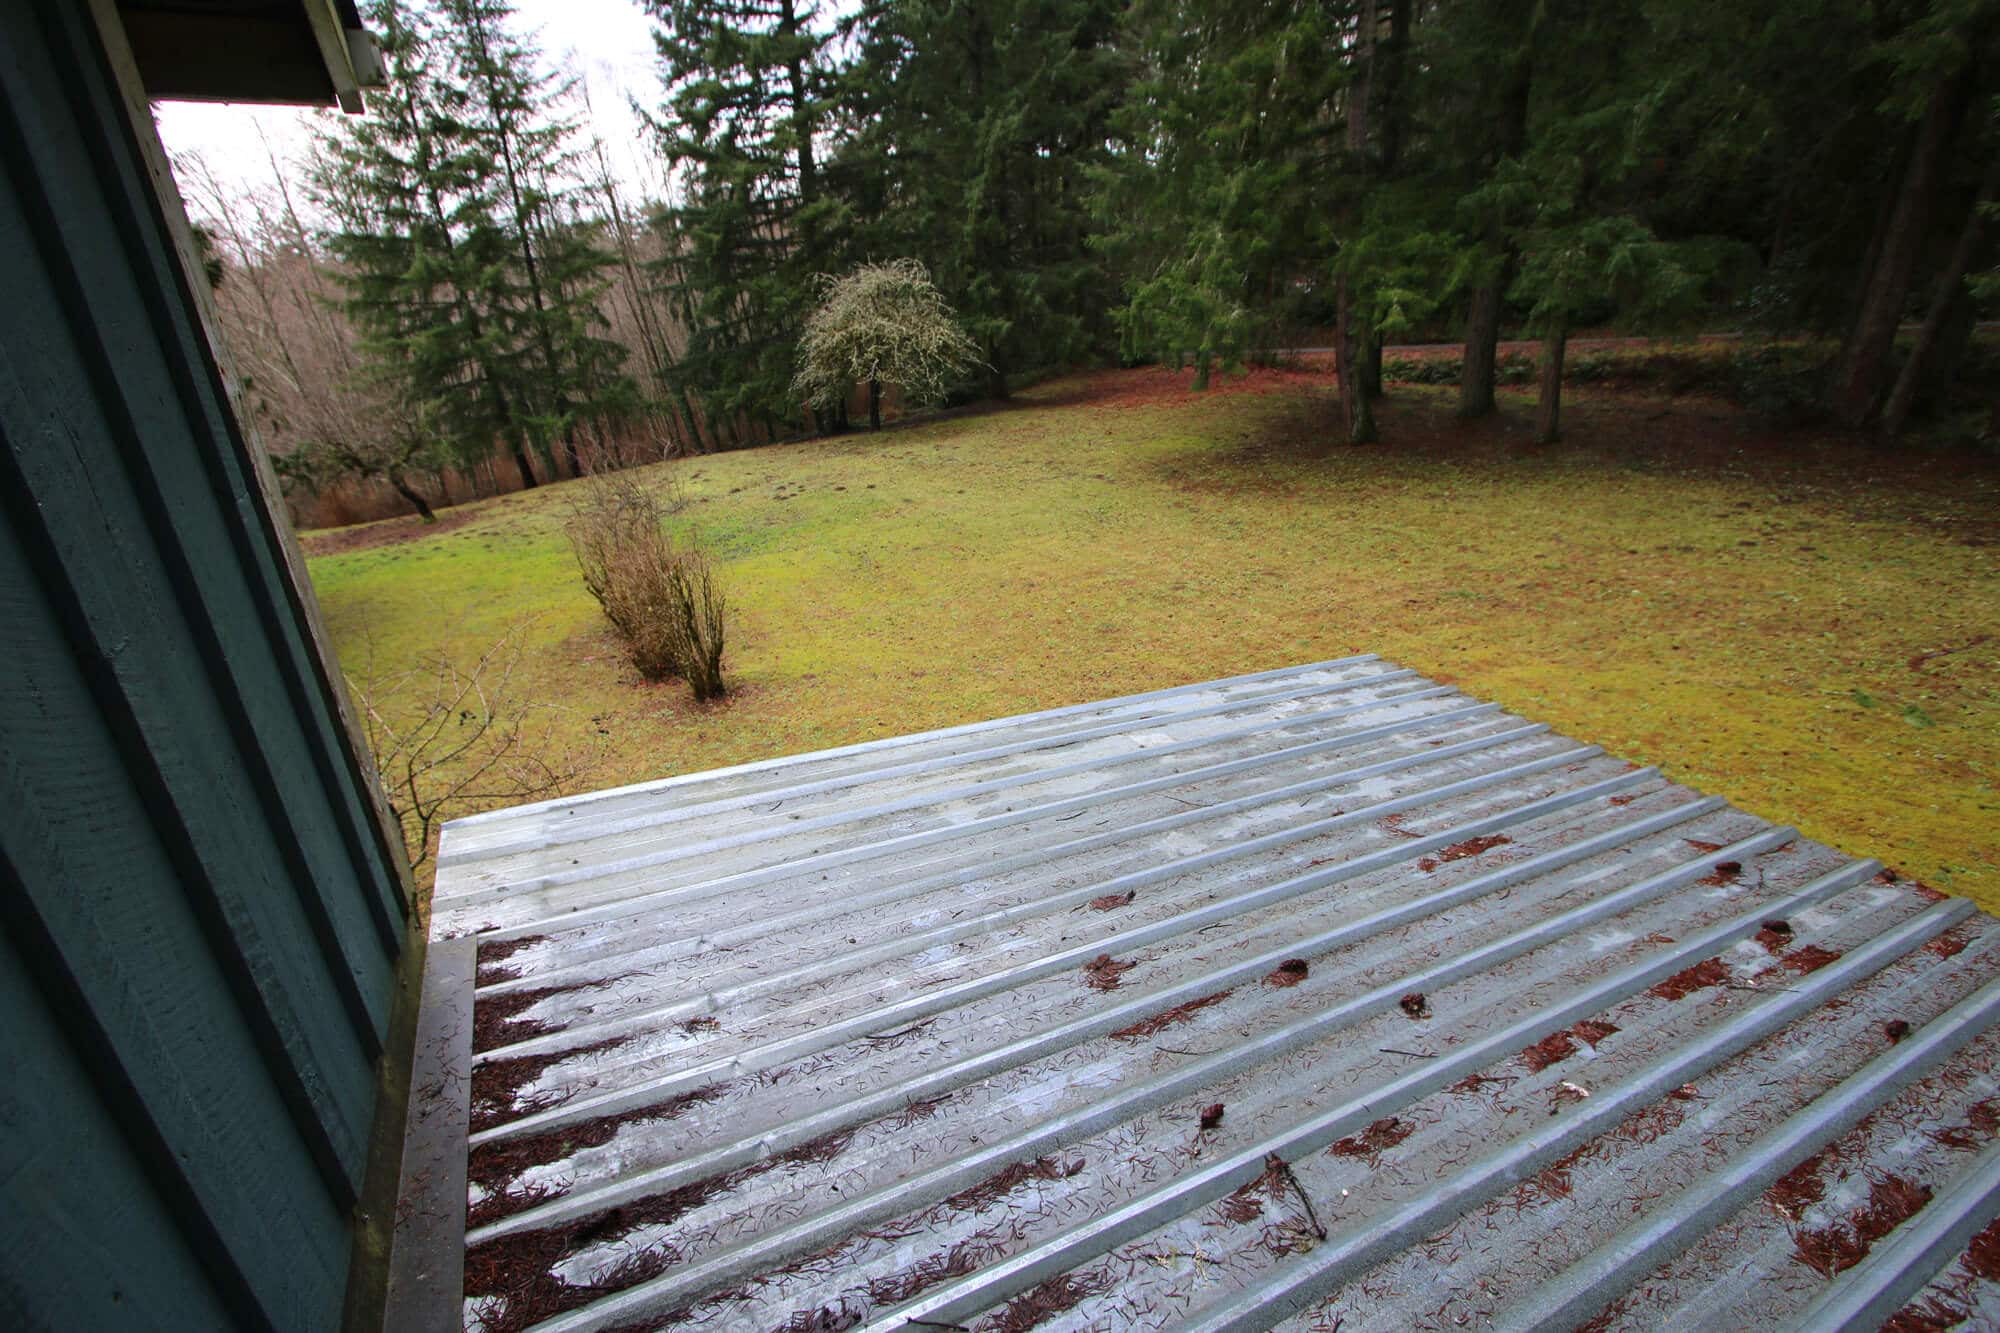
The moment I climbed onto the top of the metal roof leading into the unit, I got excited. When envisioning the potential of this space my first thought was: A deck. A BIG deck!
The support beams are already in place for the entire span of this metal roof, so that part is already taken care of.
I stood up there visualizing a nice, big wooden deck – the railings would have planter boxes hung from them on every side filled with colorful blossoms and herbs. And the peaceful views from this deck….With all the trees surrounding it, it almost feels like you’re in a treehouse.
Rooftop barbecue, anyone?
The plans for a deck and stairs are already well underway. We’re going to need the access of the stairs especially once we start hauling in cabinets, toilet, shower, drywall, etc.
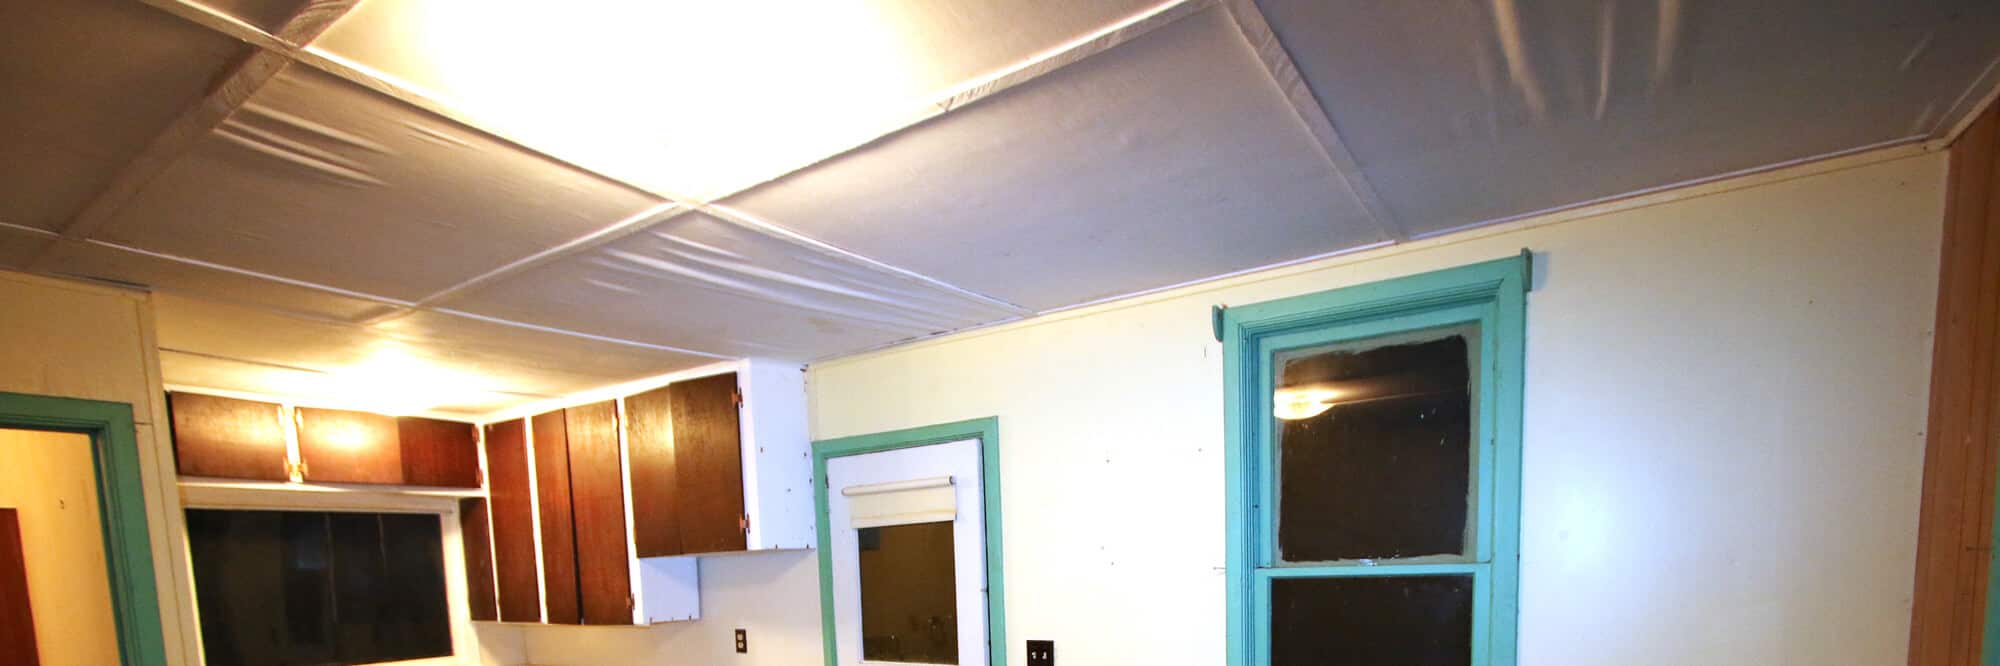
In the meantime, we’ve gotten started on some of the interior work.
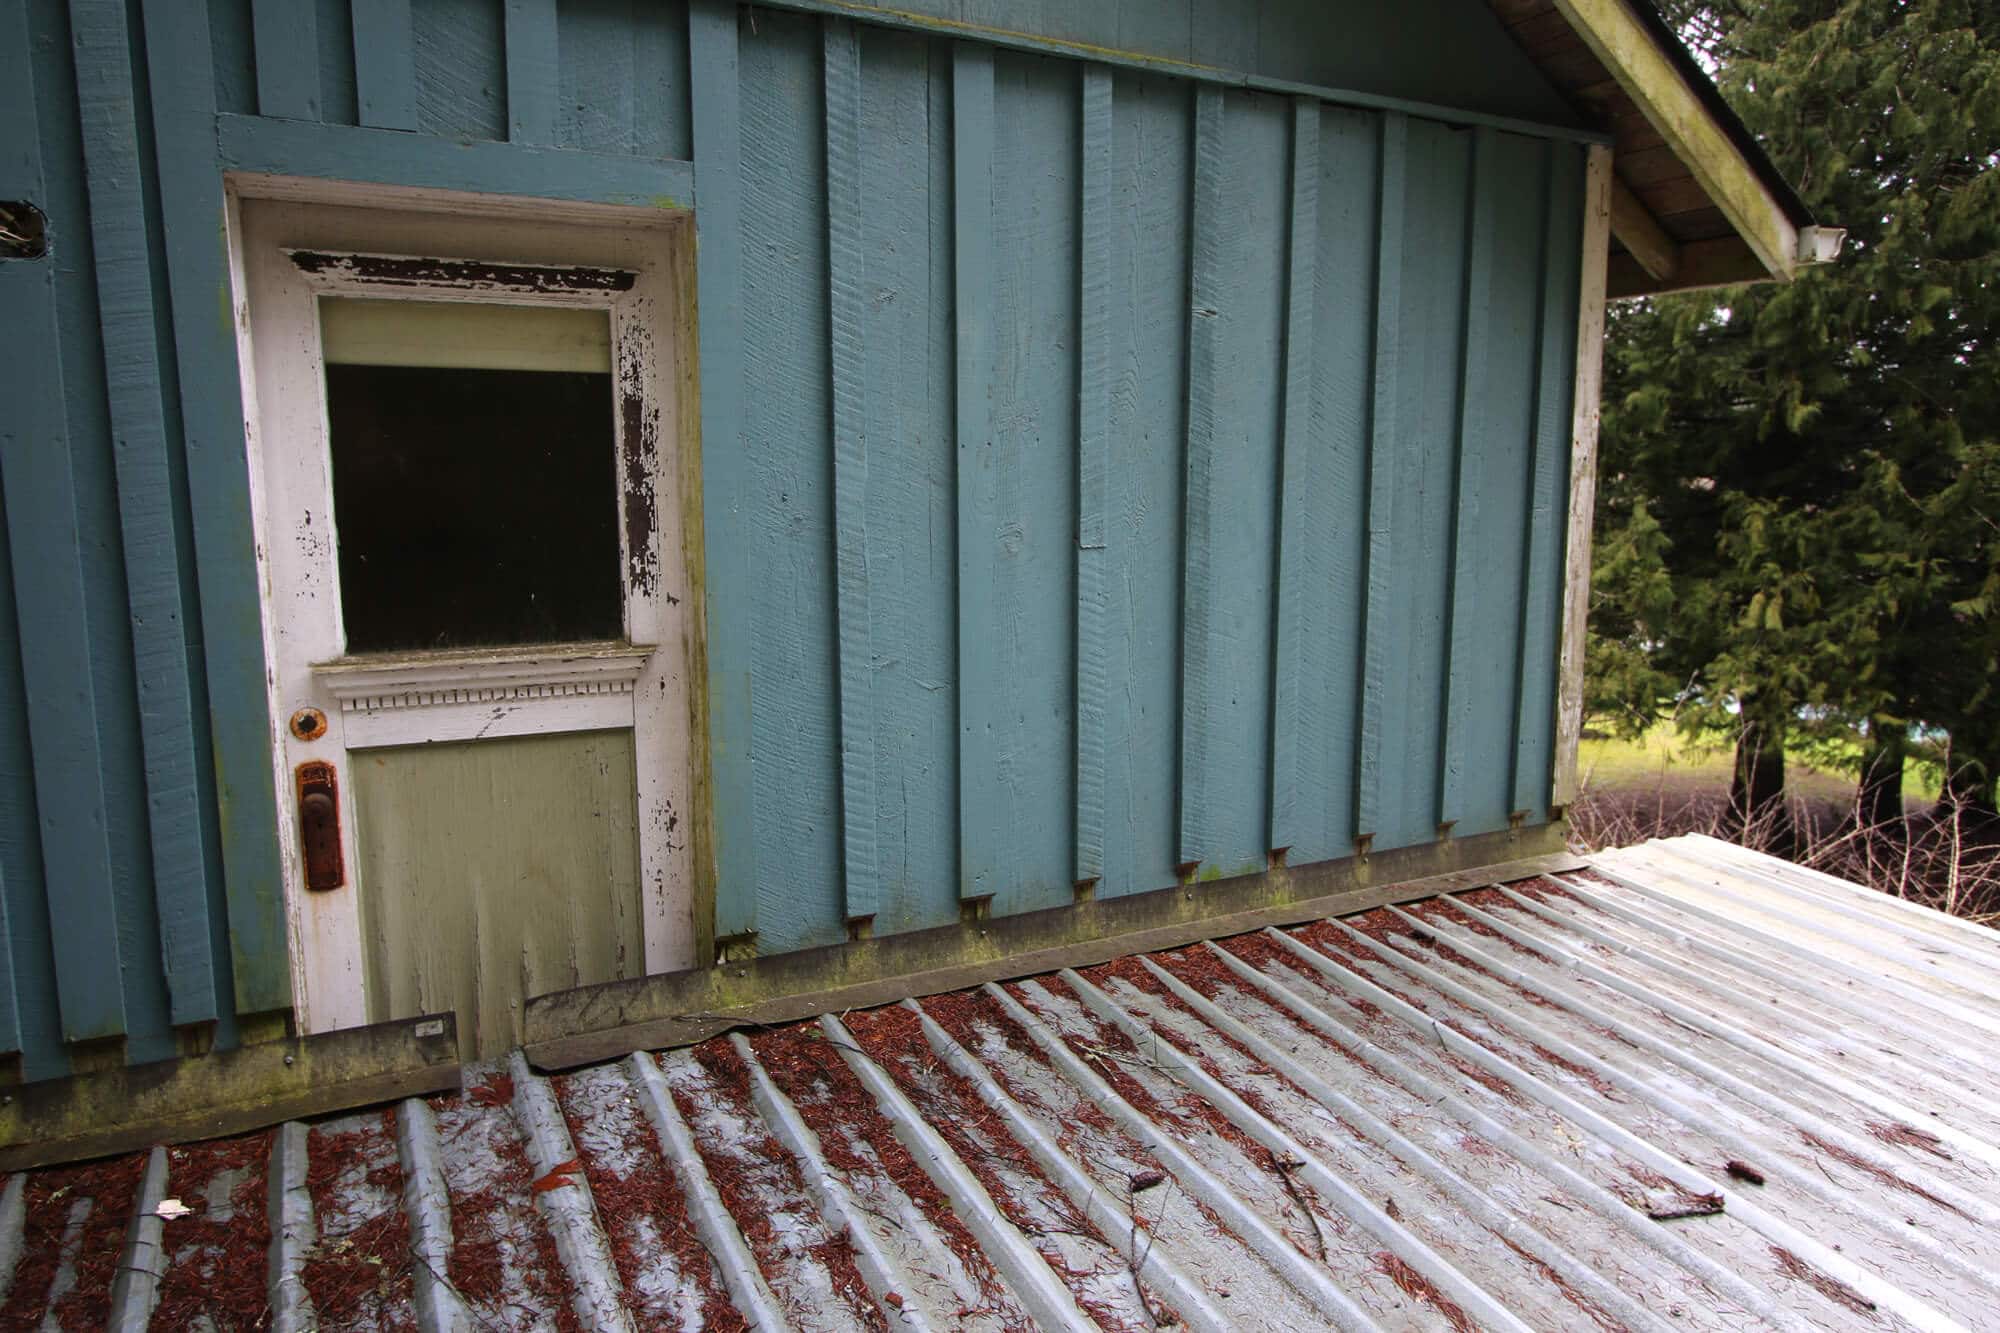
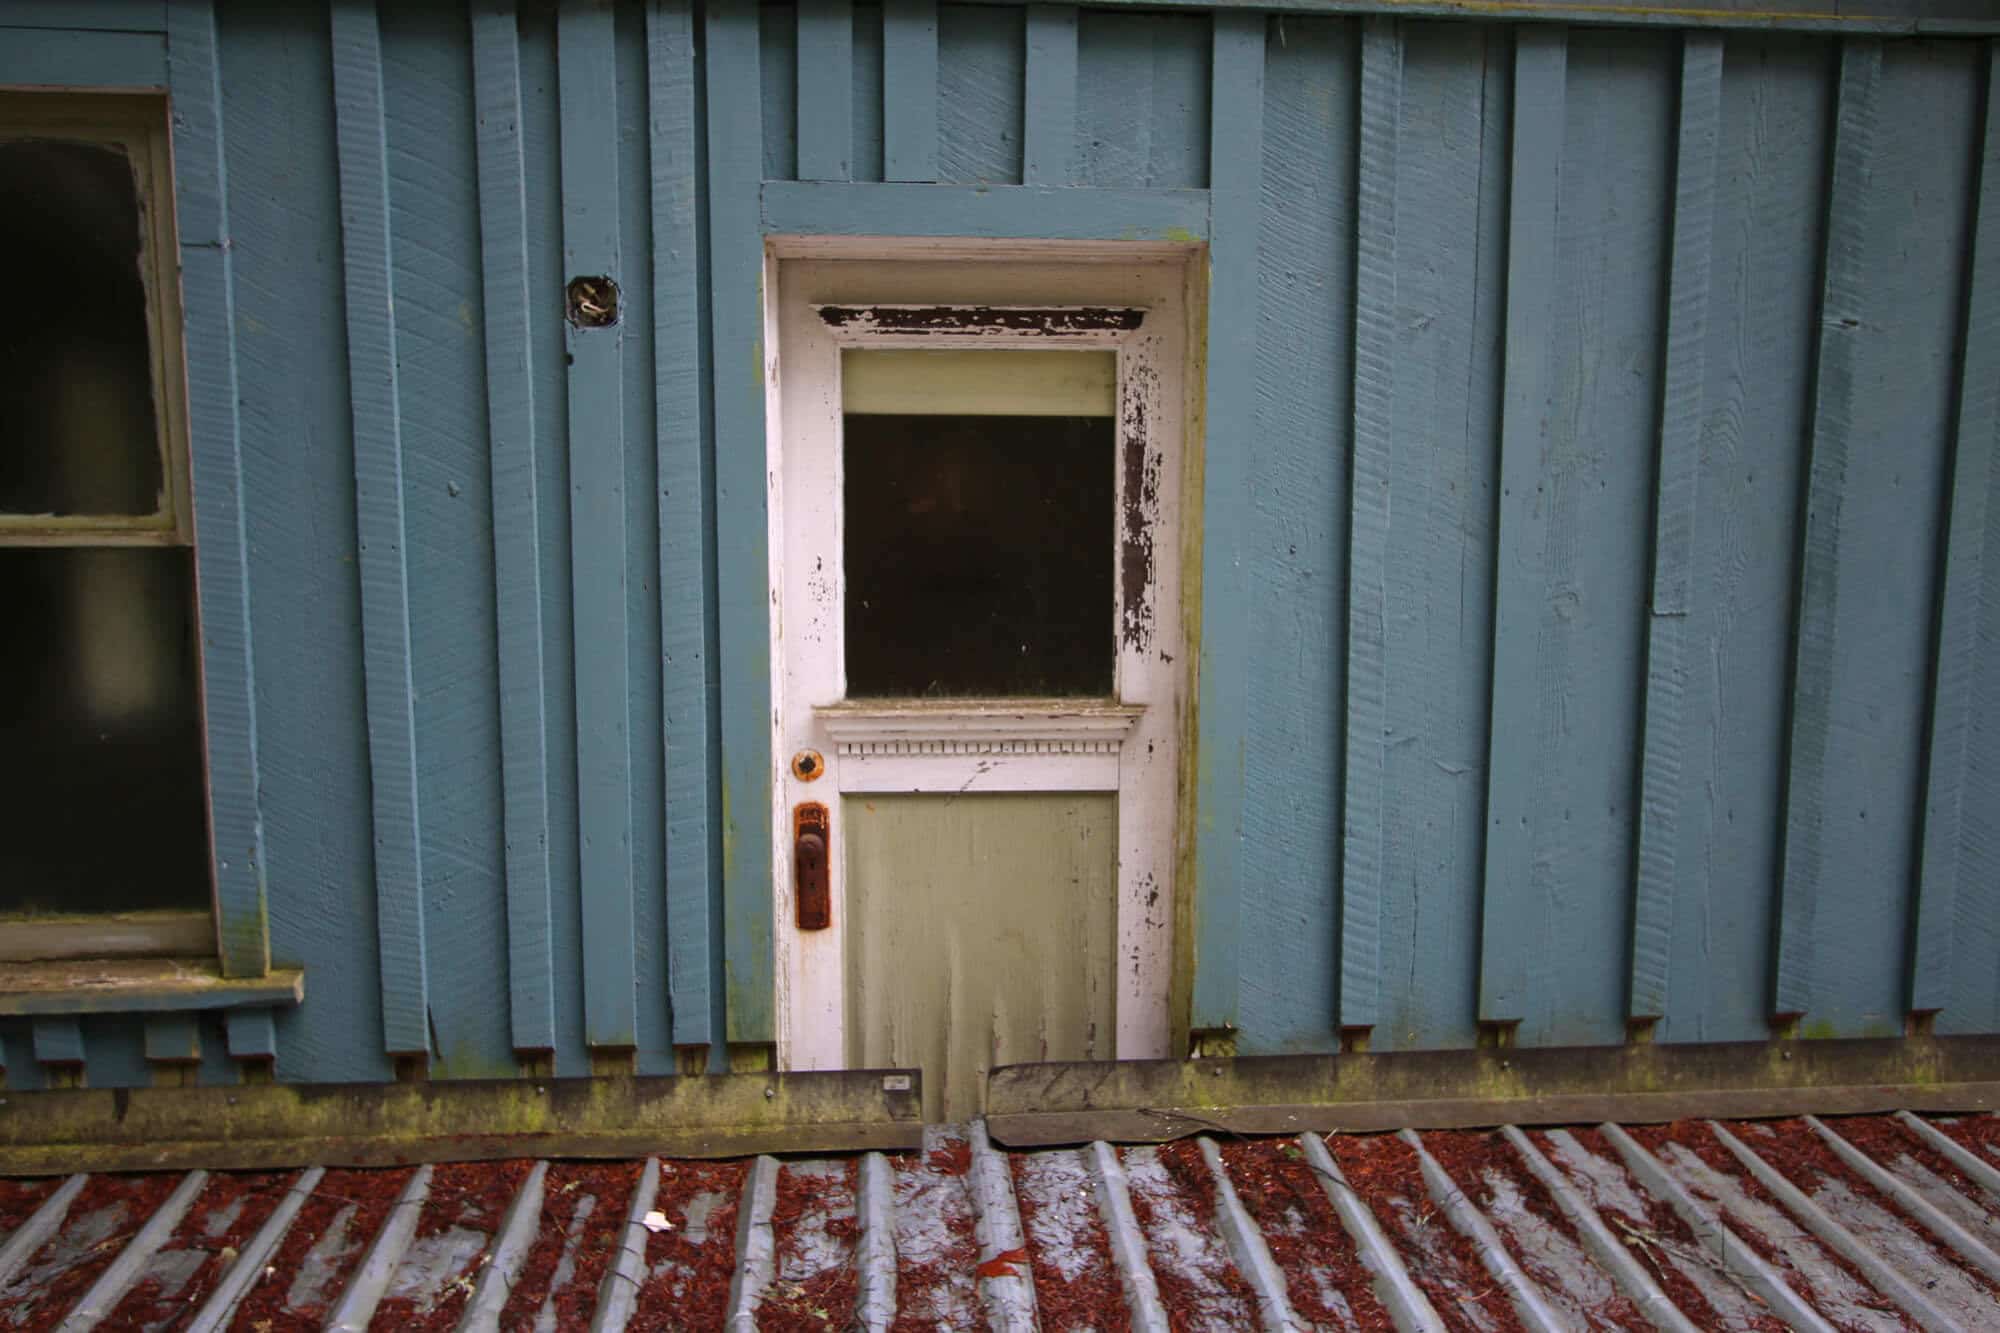
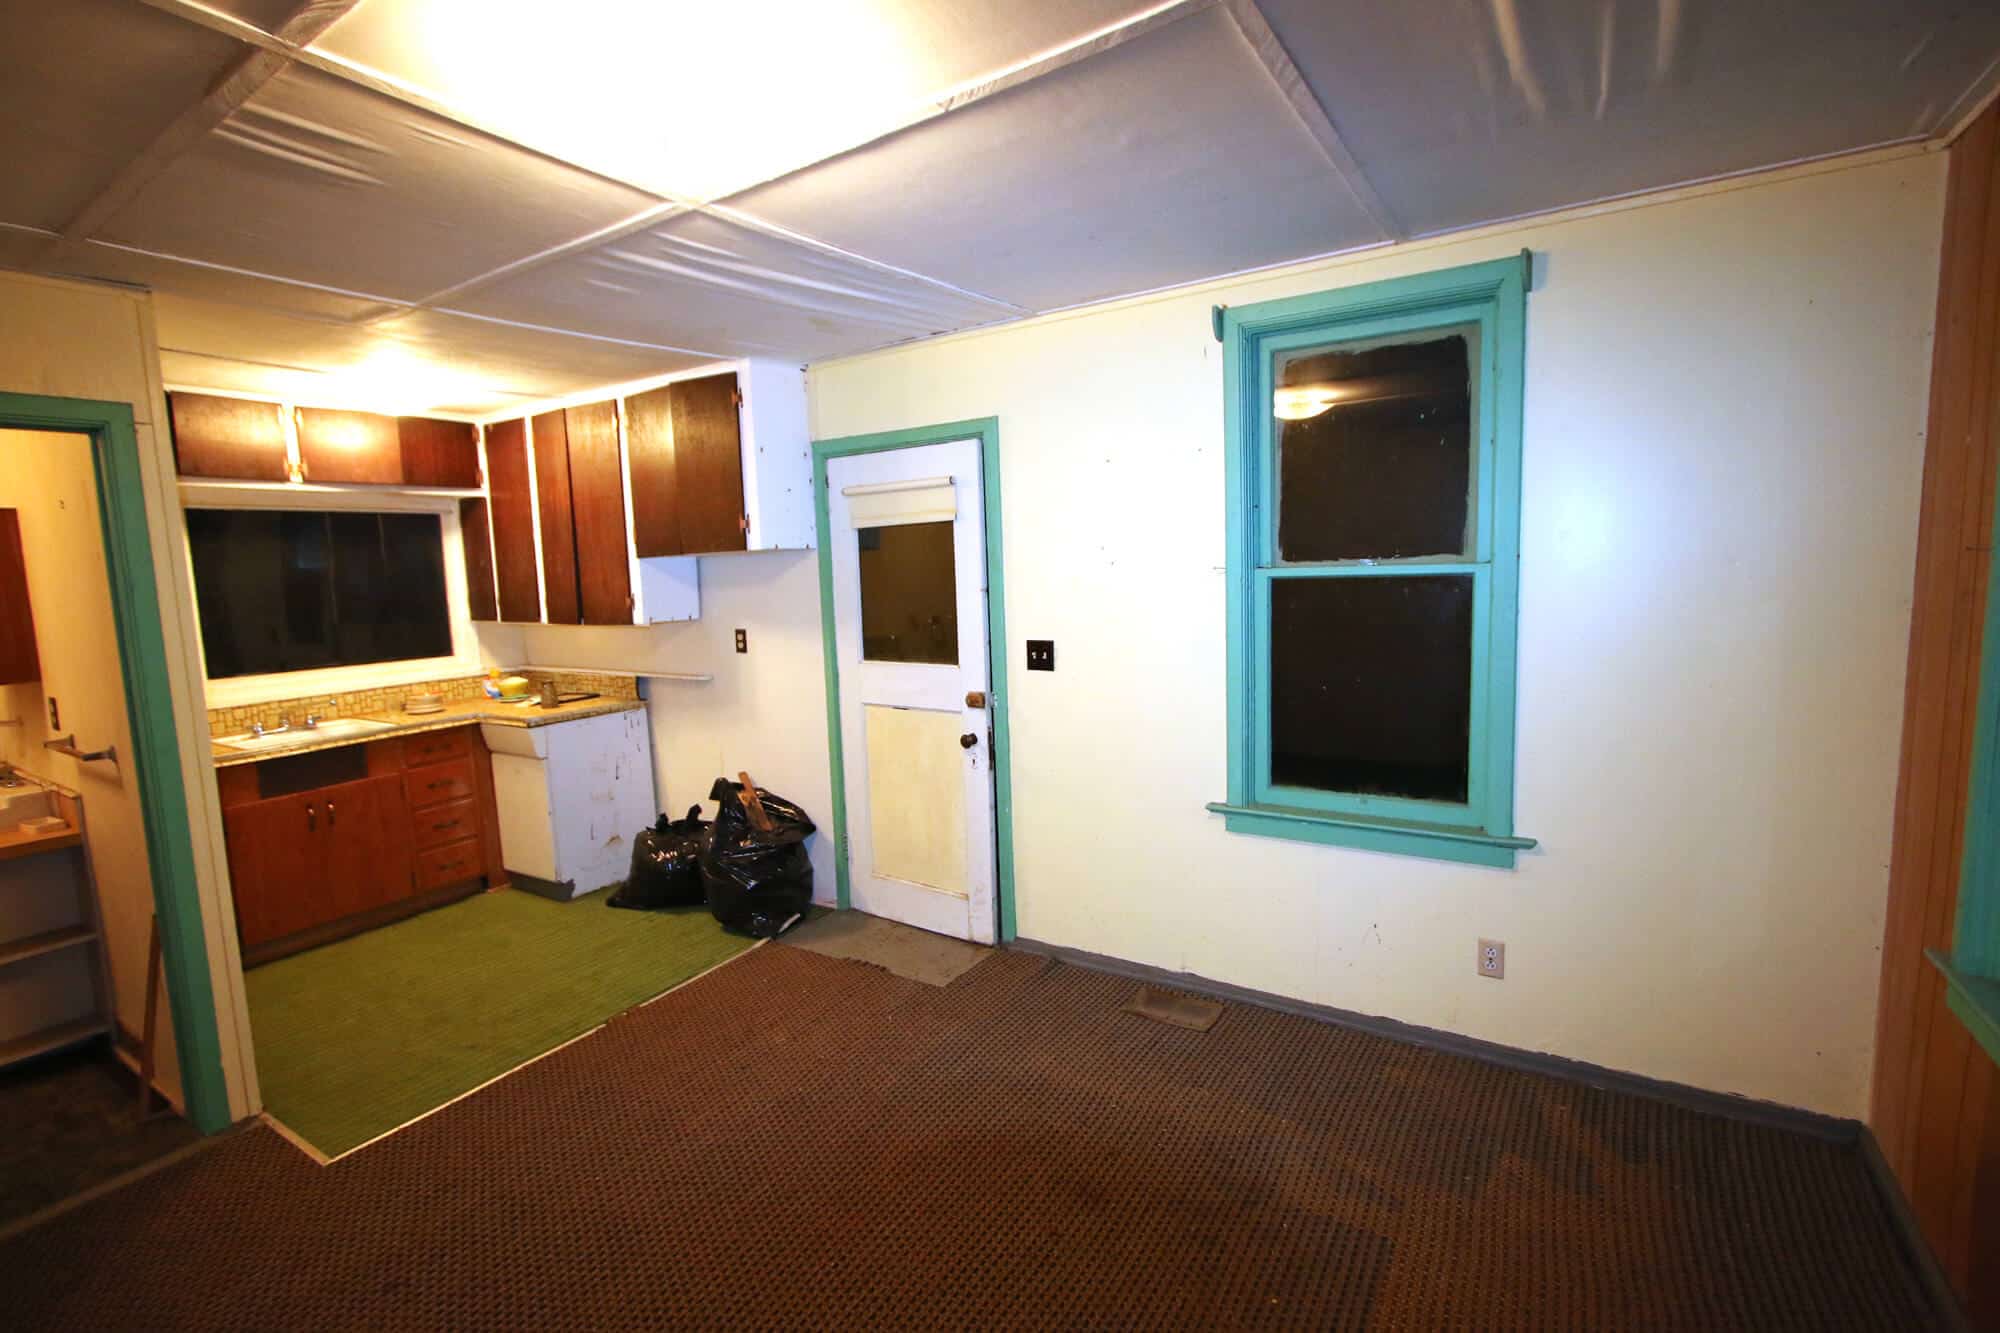
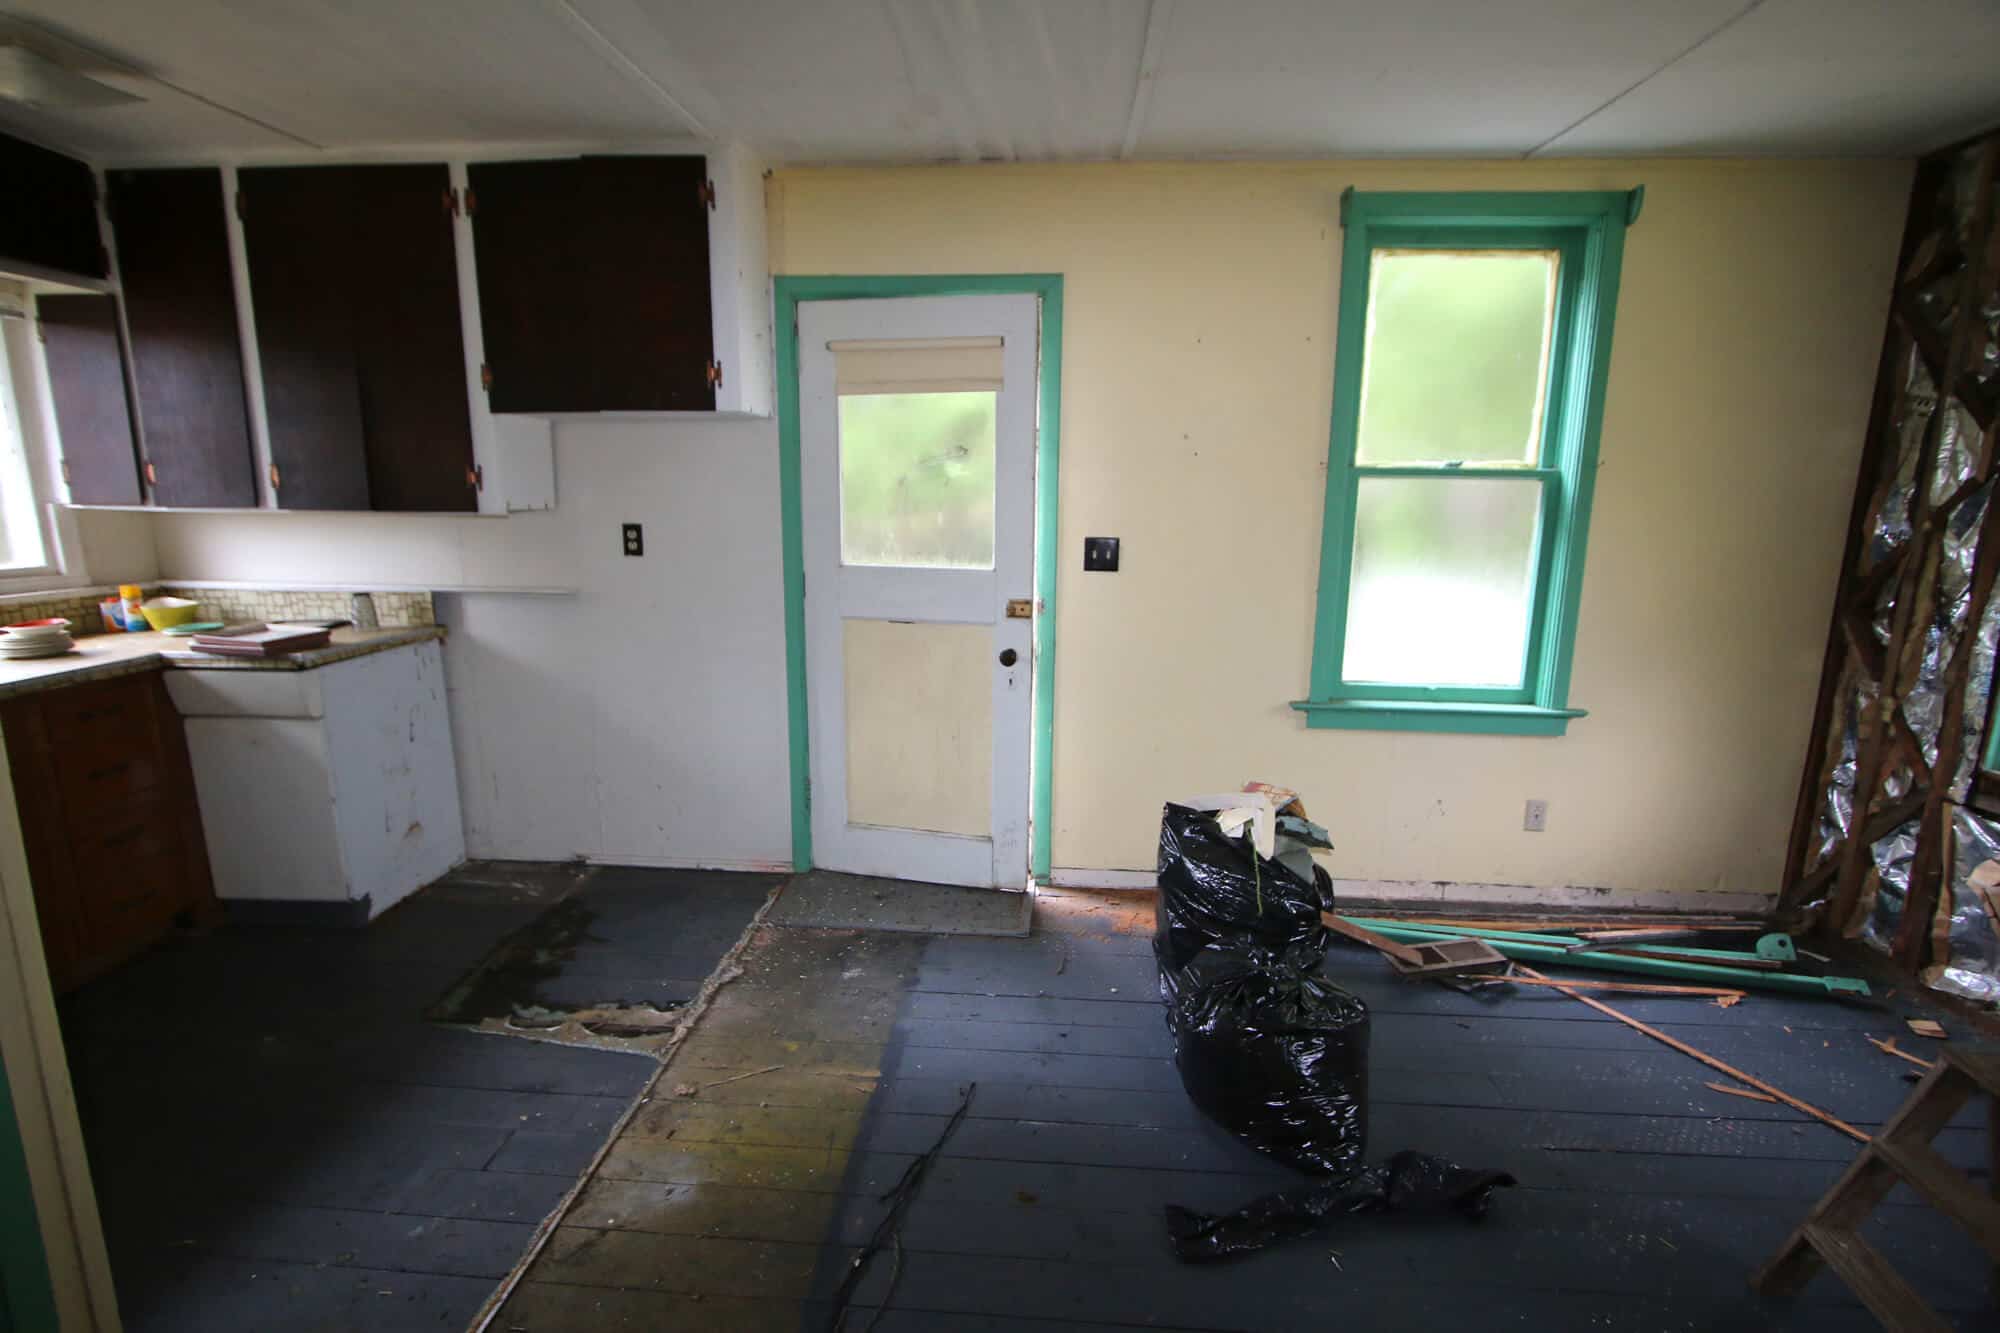
The current door is warped and will need to be completely replaced, which is a shame because it’s a very old door with some great character. We’re going to see if there’s any way to salvage it, but it’s bowed and doesn’t close tightly, so it’s not looking promising.
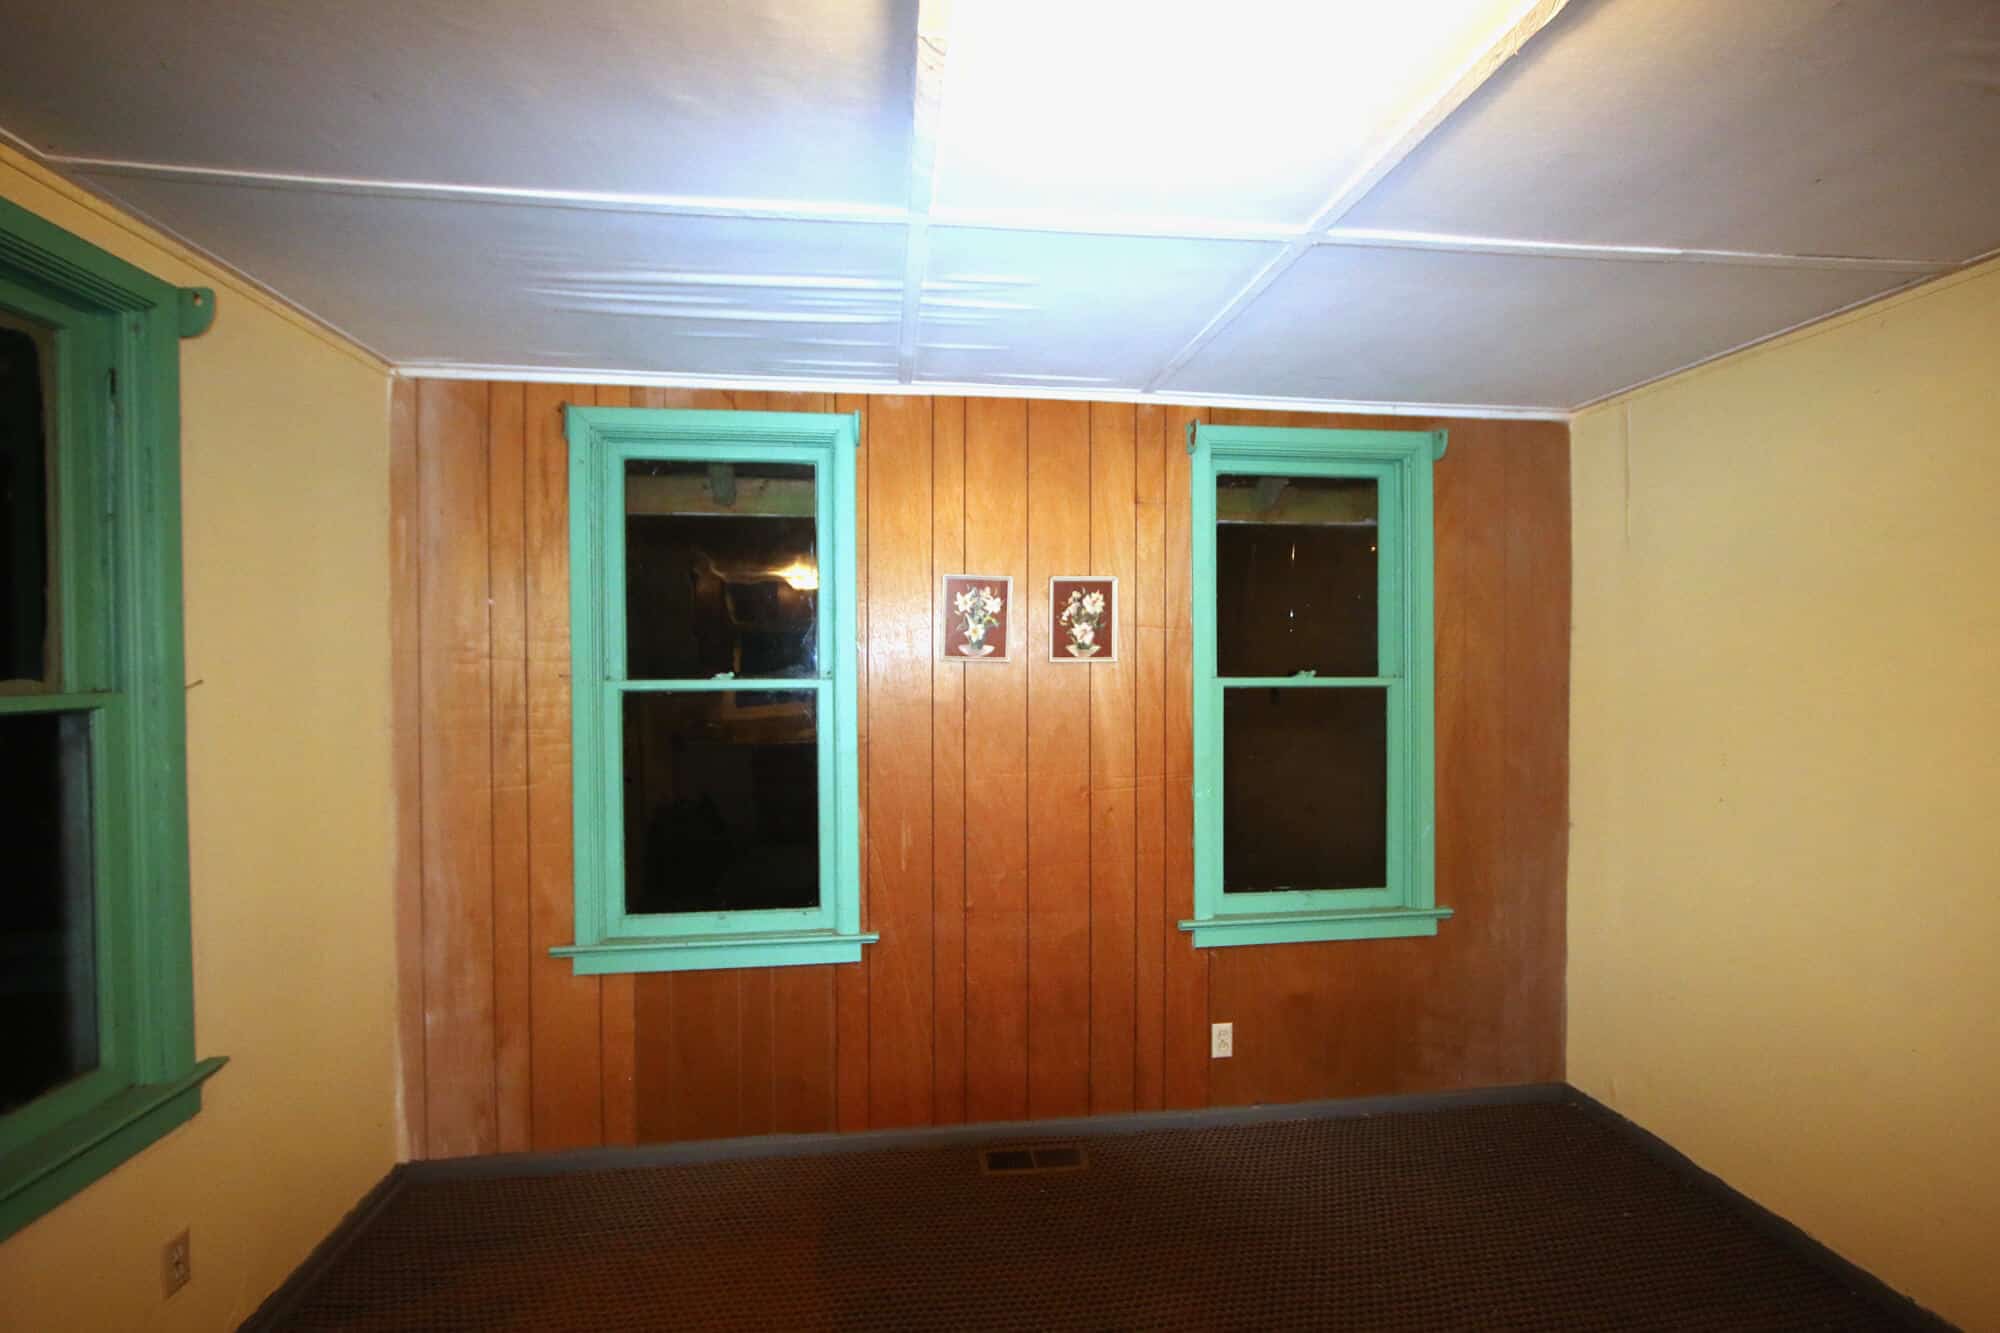
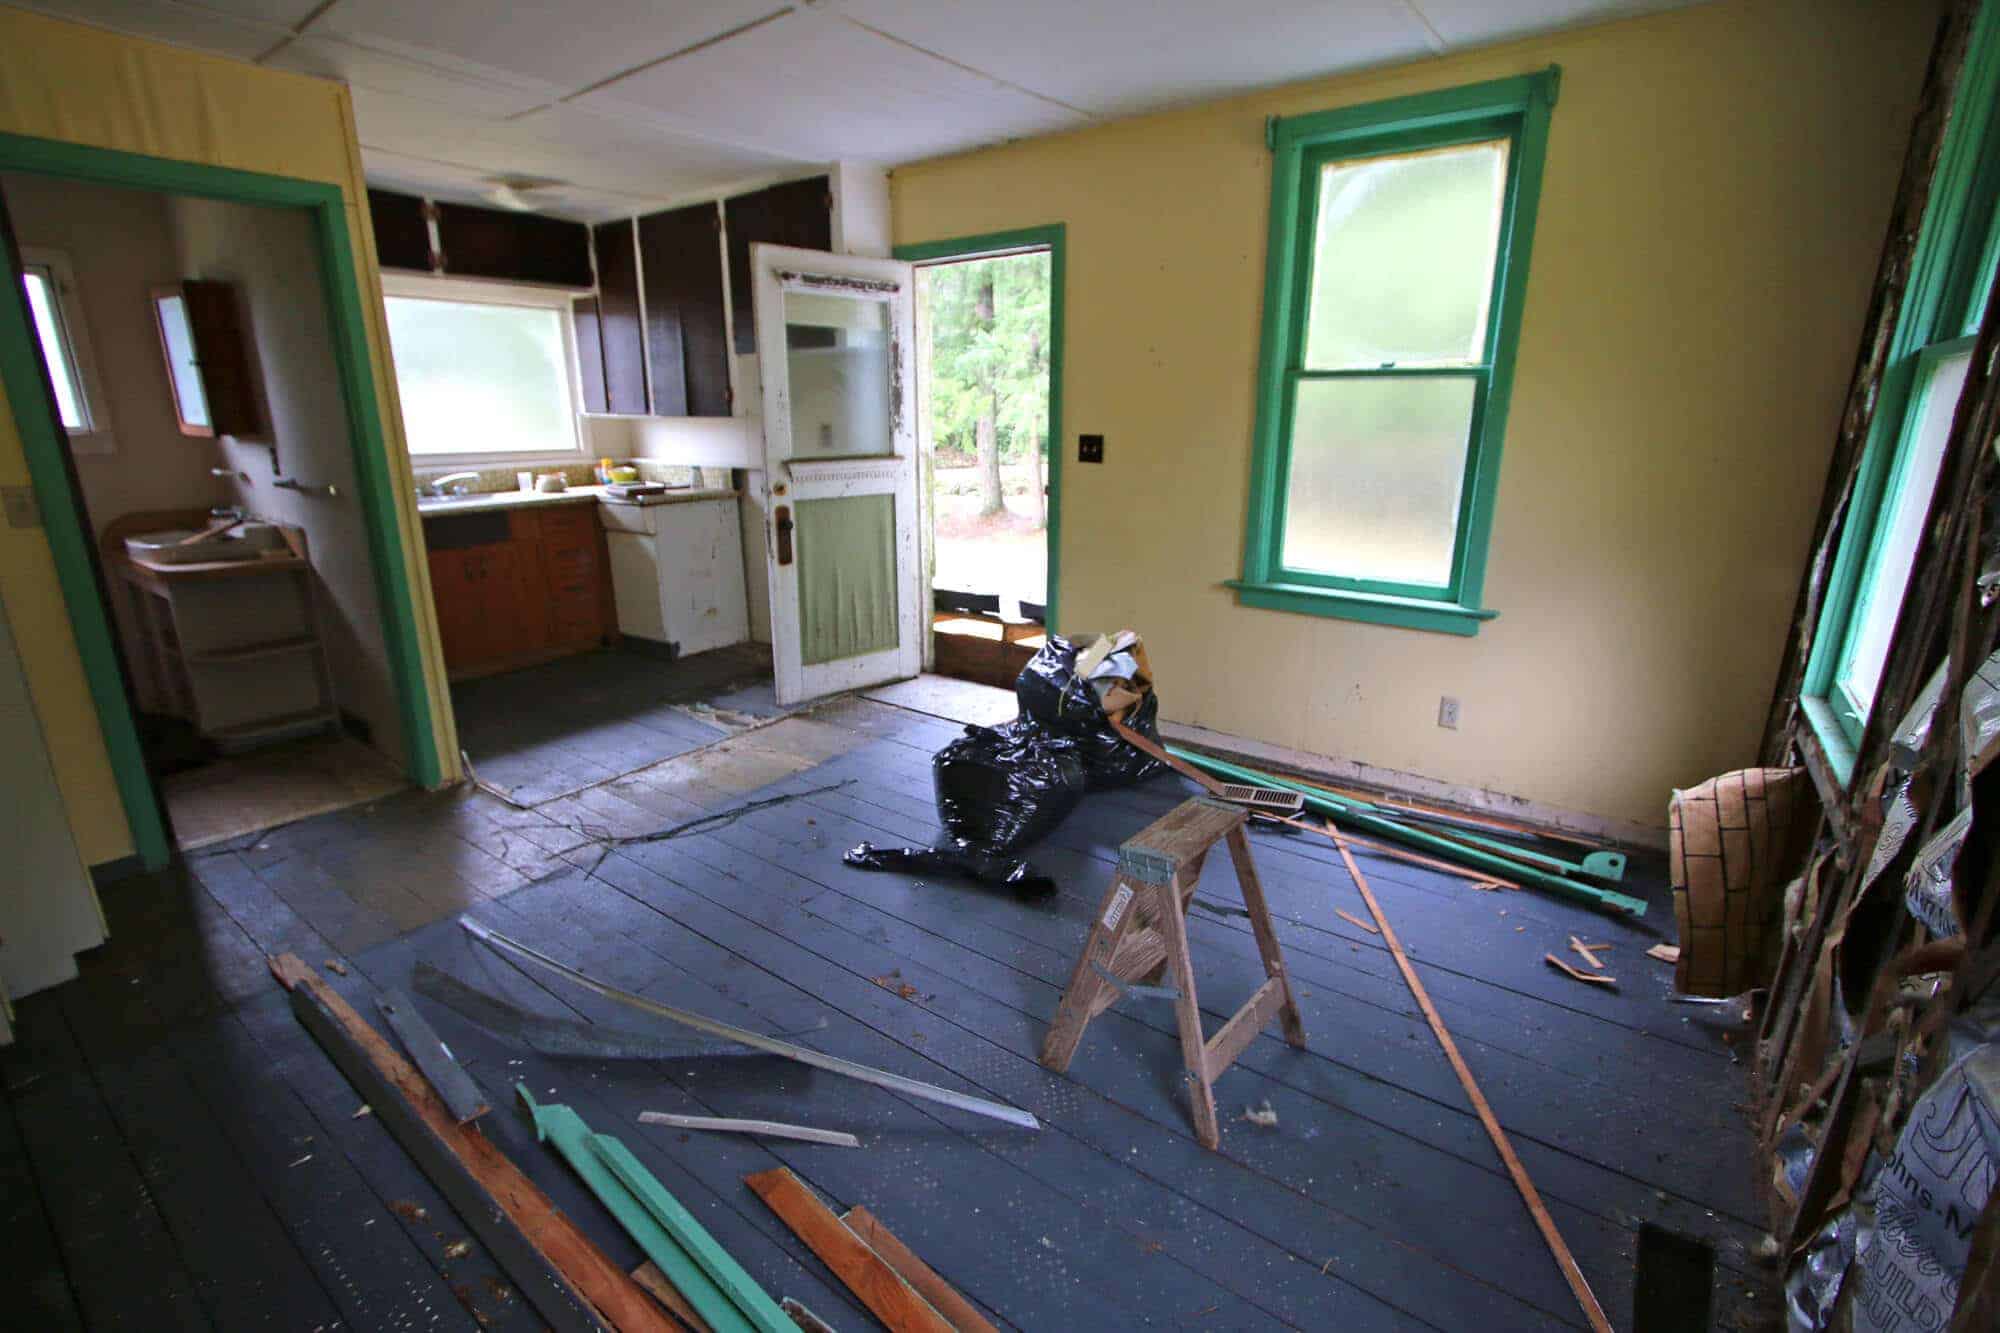
Let’s go inside!

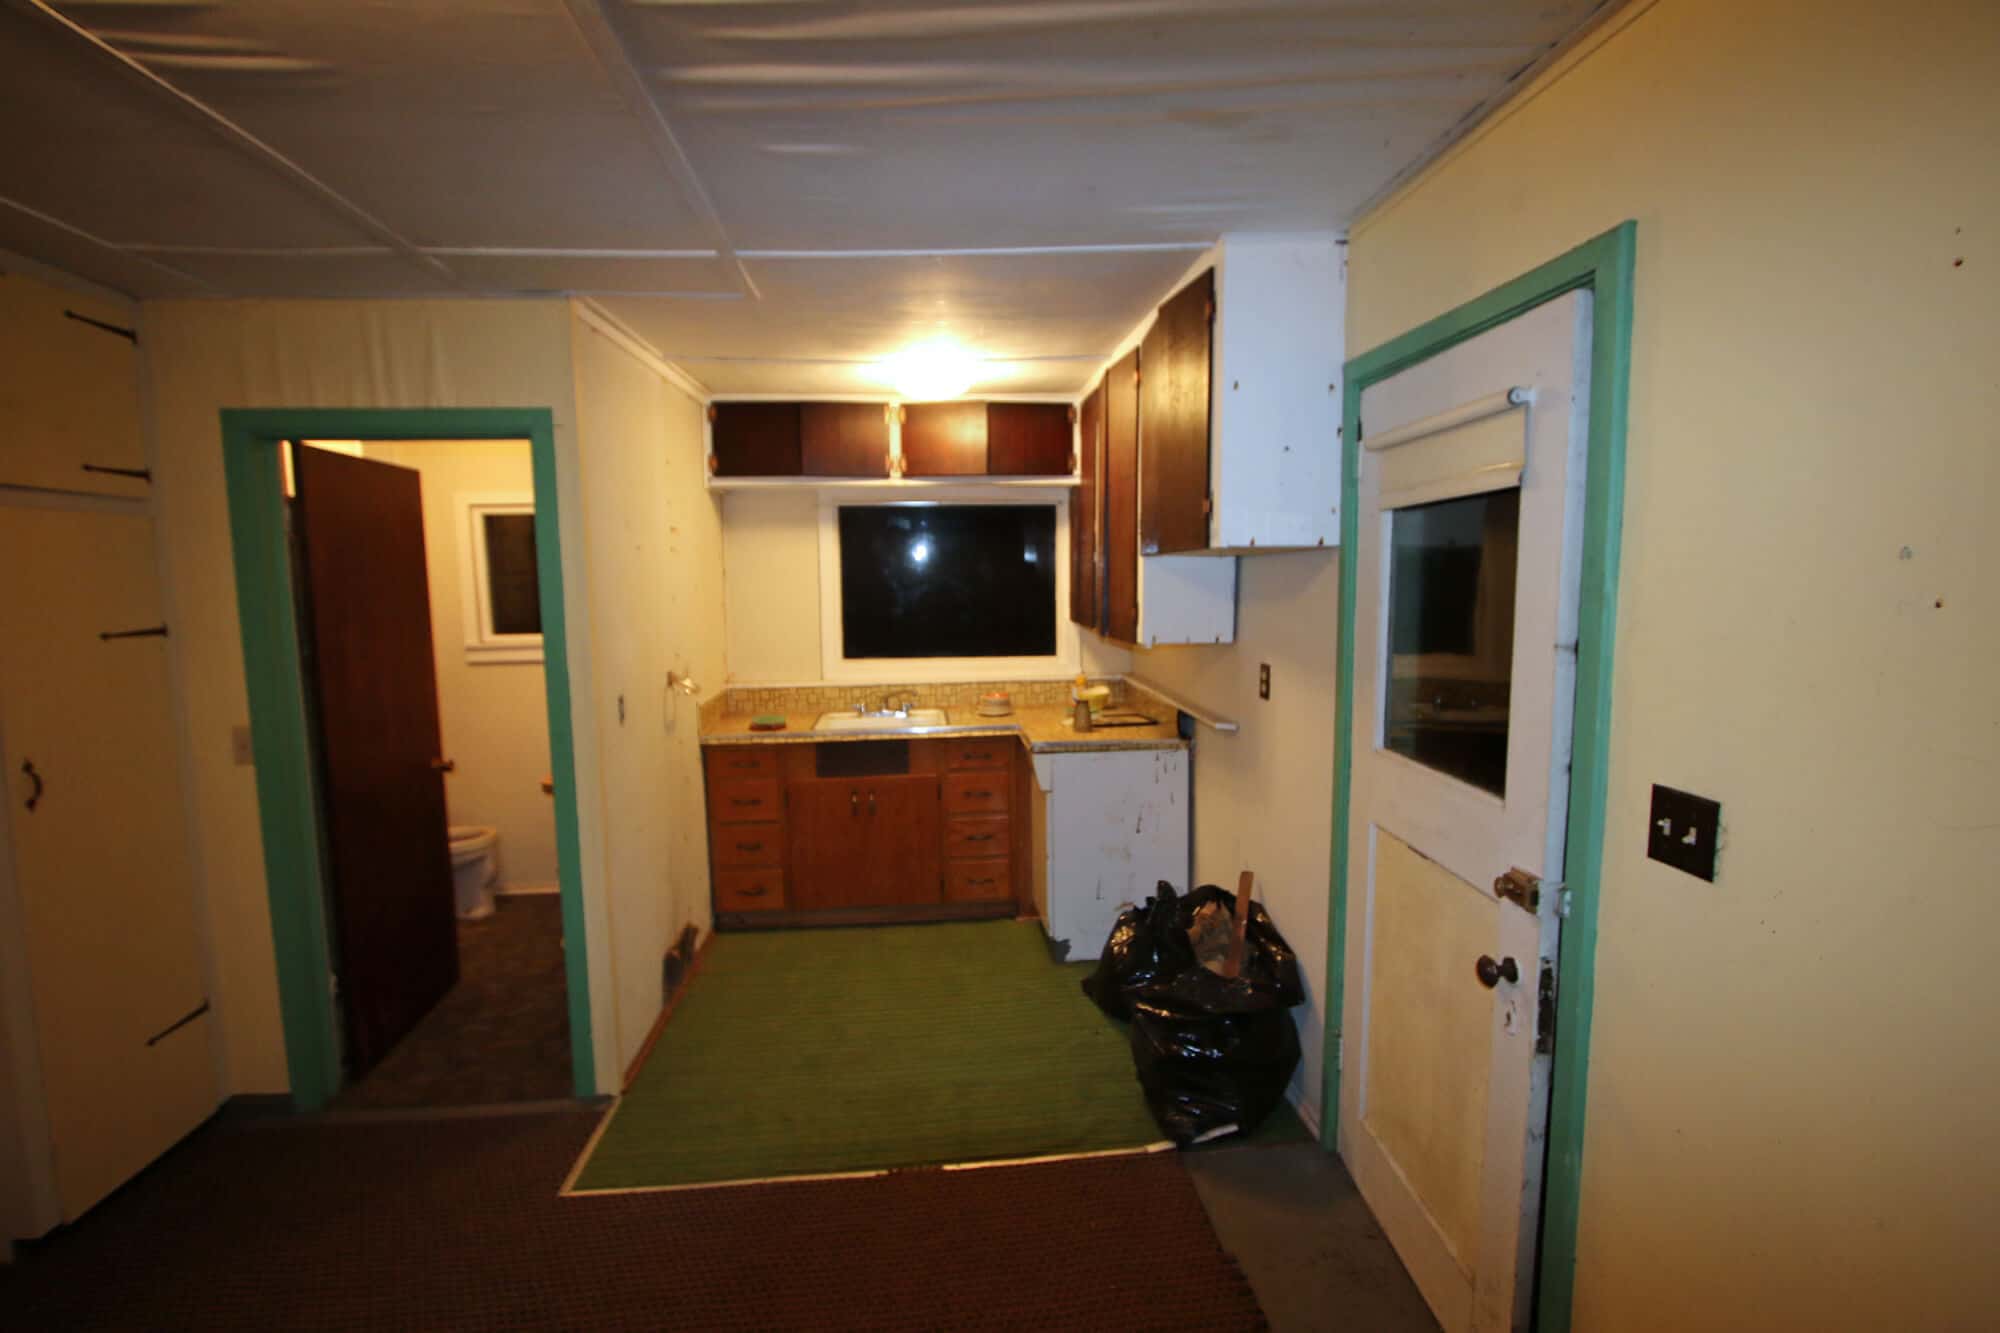
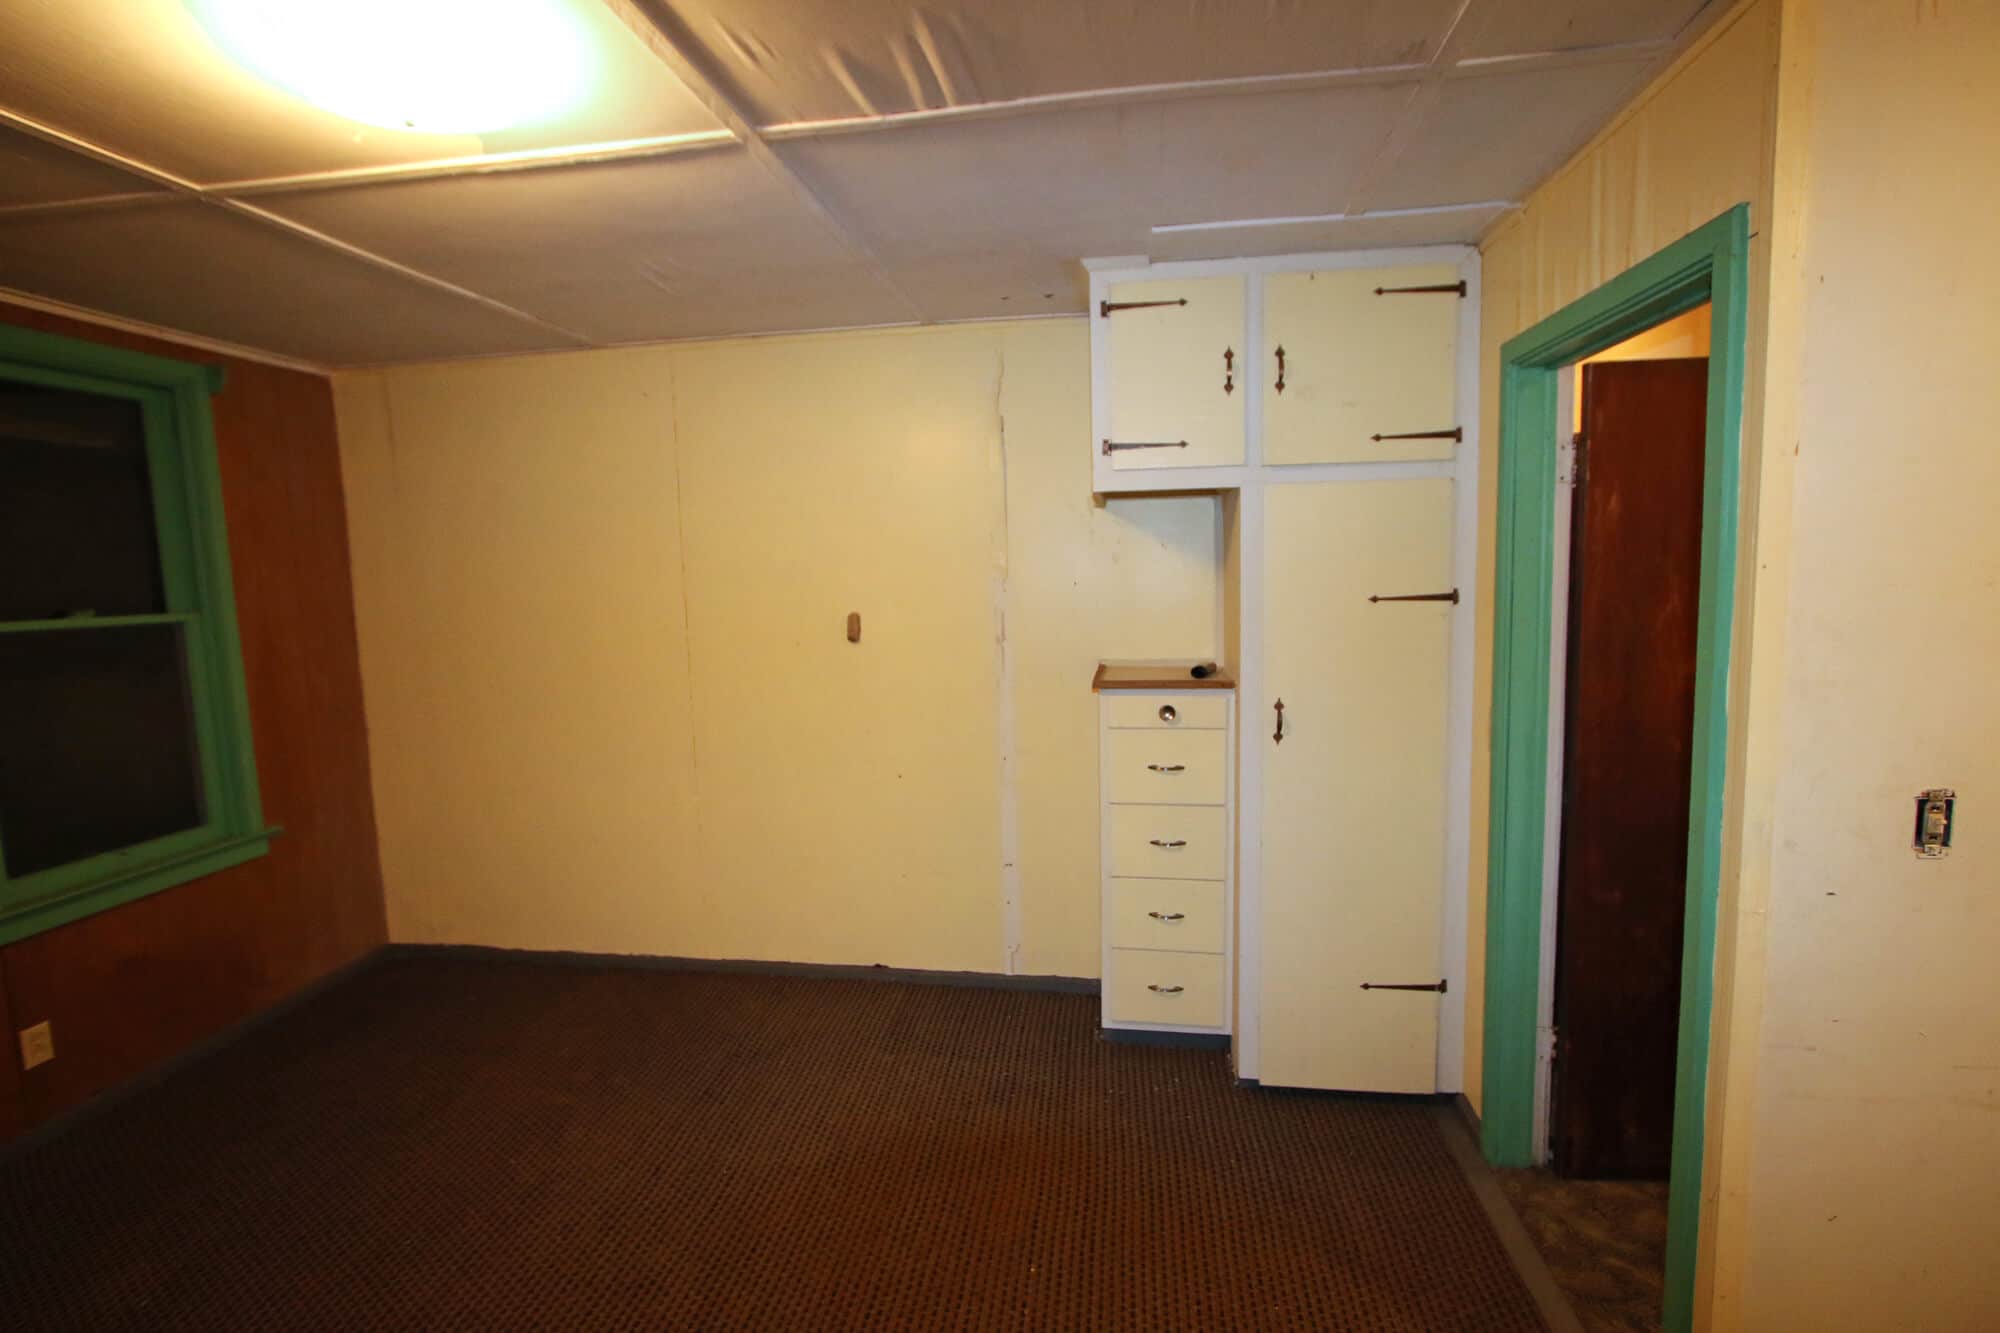
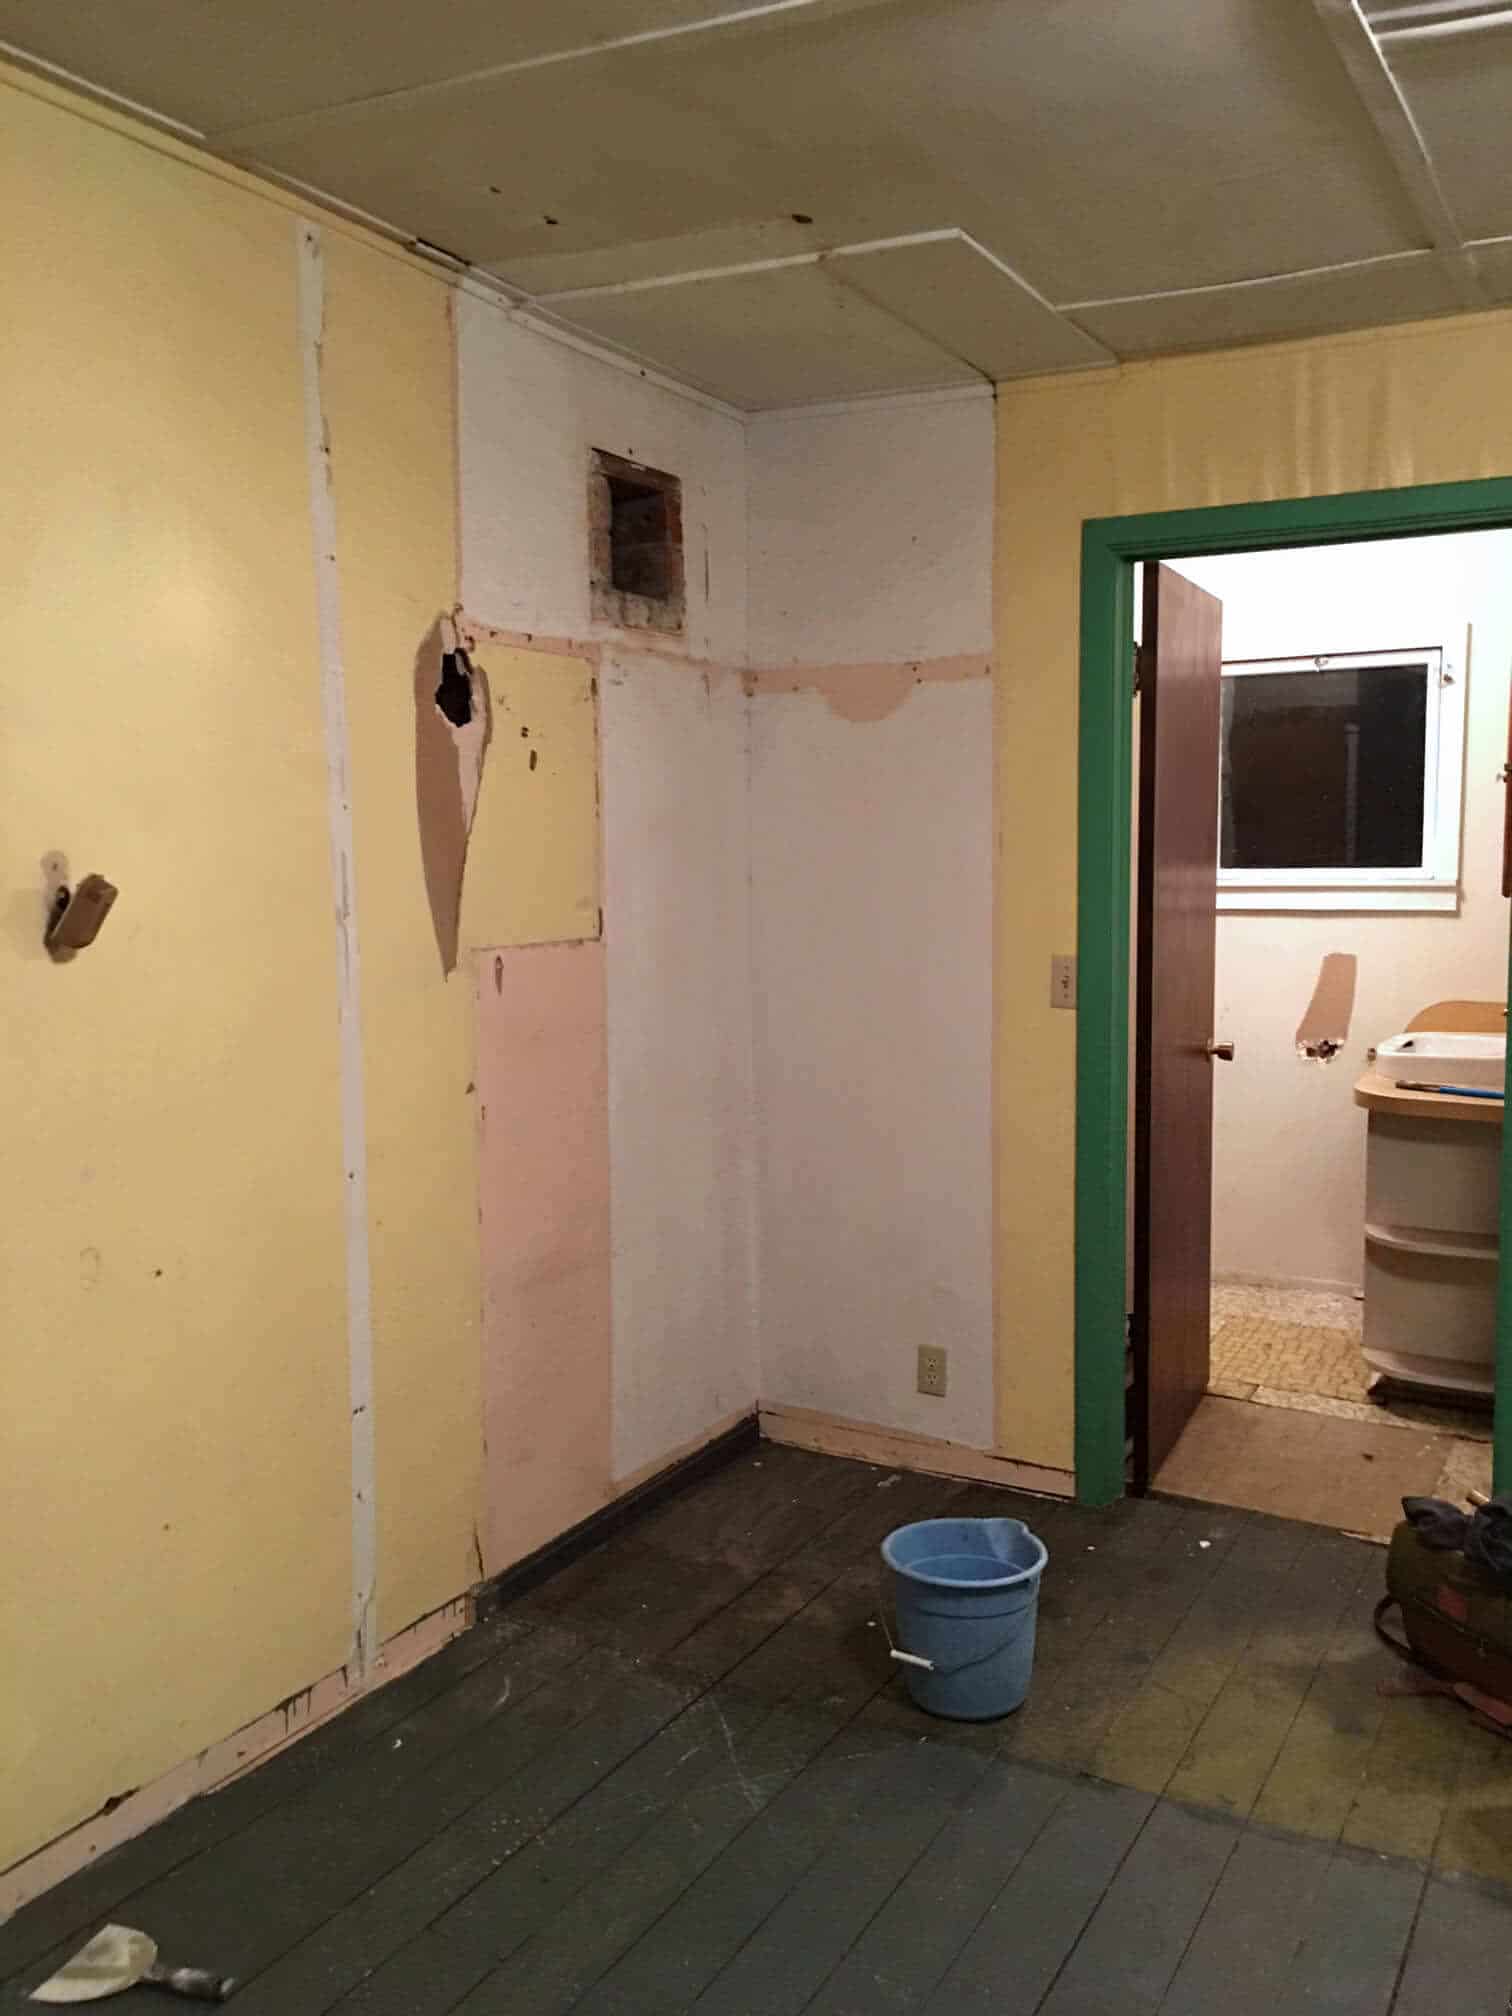
If you have a hard time seeing beyond the here and now, you’d probably take one step in and run the other direction (though really, it could be much worse. And actually, these pictures are of the place after we already cleaned out a bunch of debris). But if you’re able to discern a diamond-in-the-rough you’ll realize, like we have, what a gem this can be.
Not having any prior experience with remodeling, this is going to be a great learning experience for us and we’d like to invite you along for the ride. I’ll be publishing posts as we continue to make progress and I would love to hear your ideas and suggestions for how we can set everything up and where to put things!
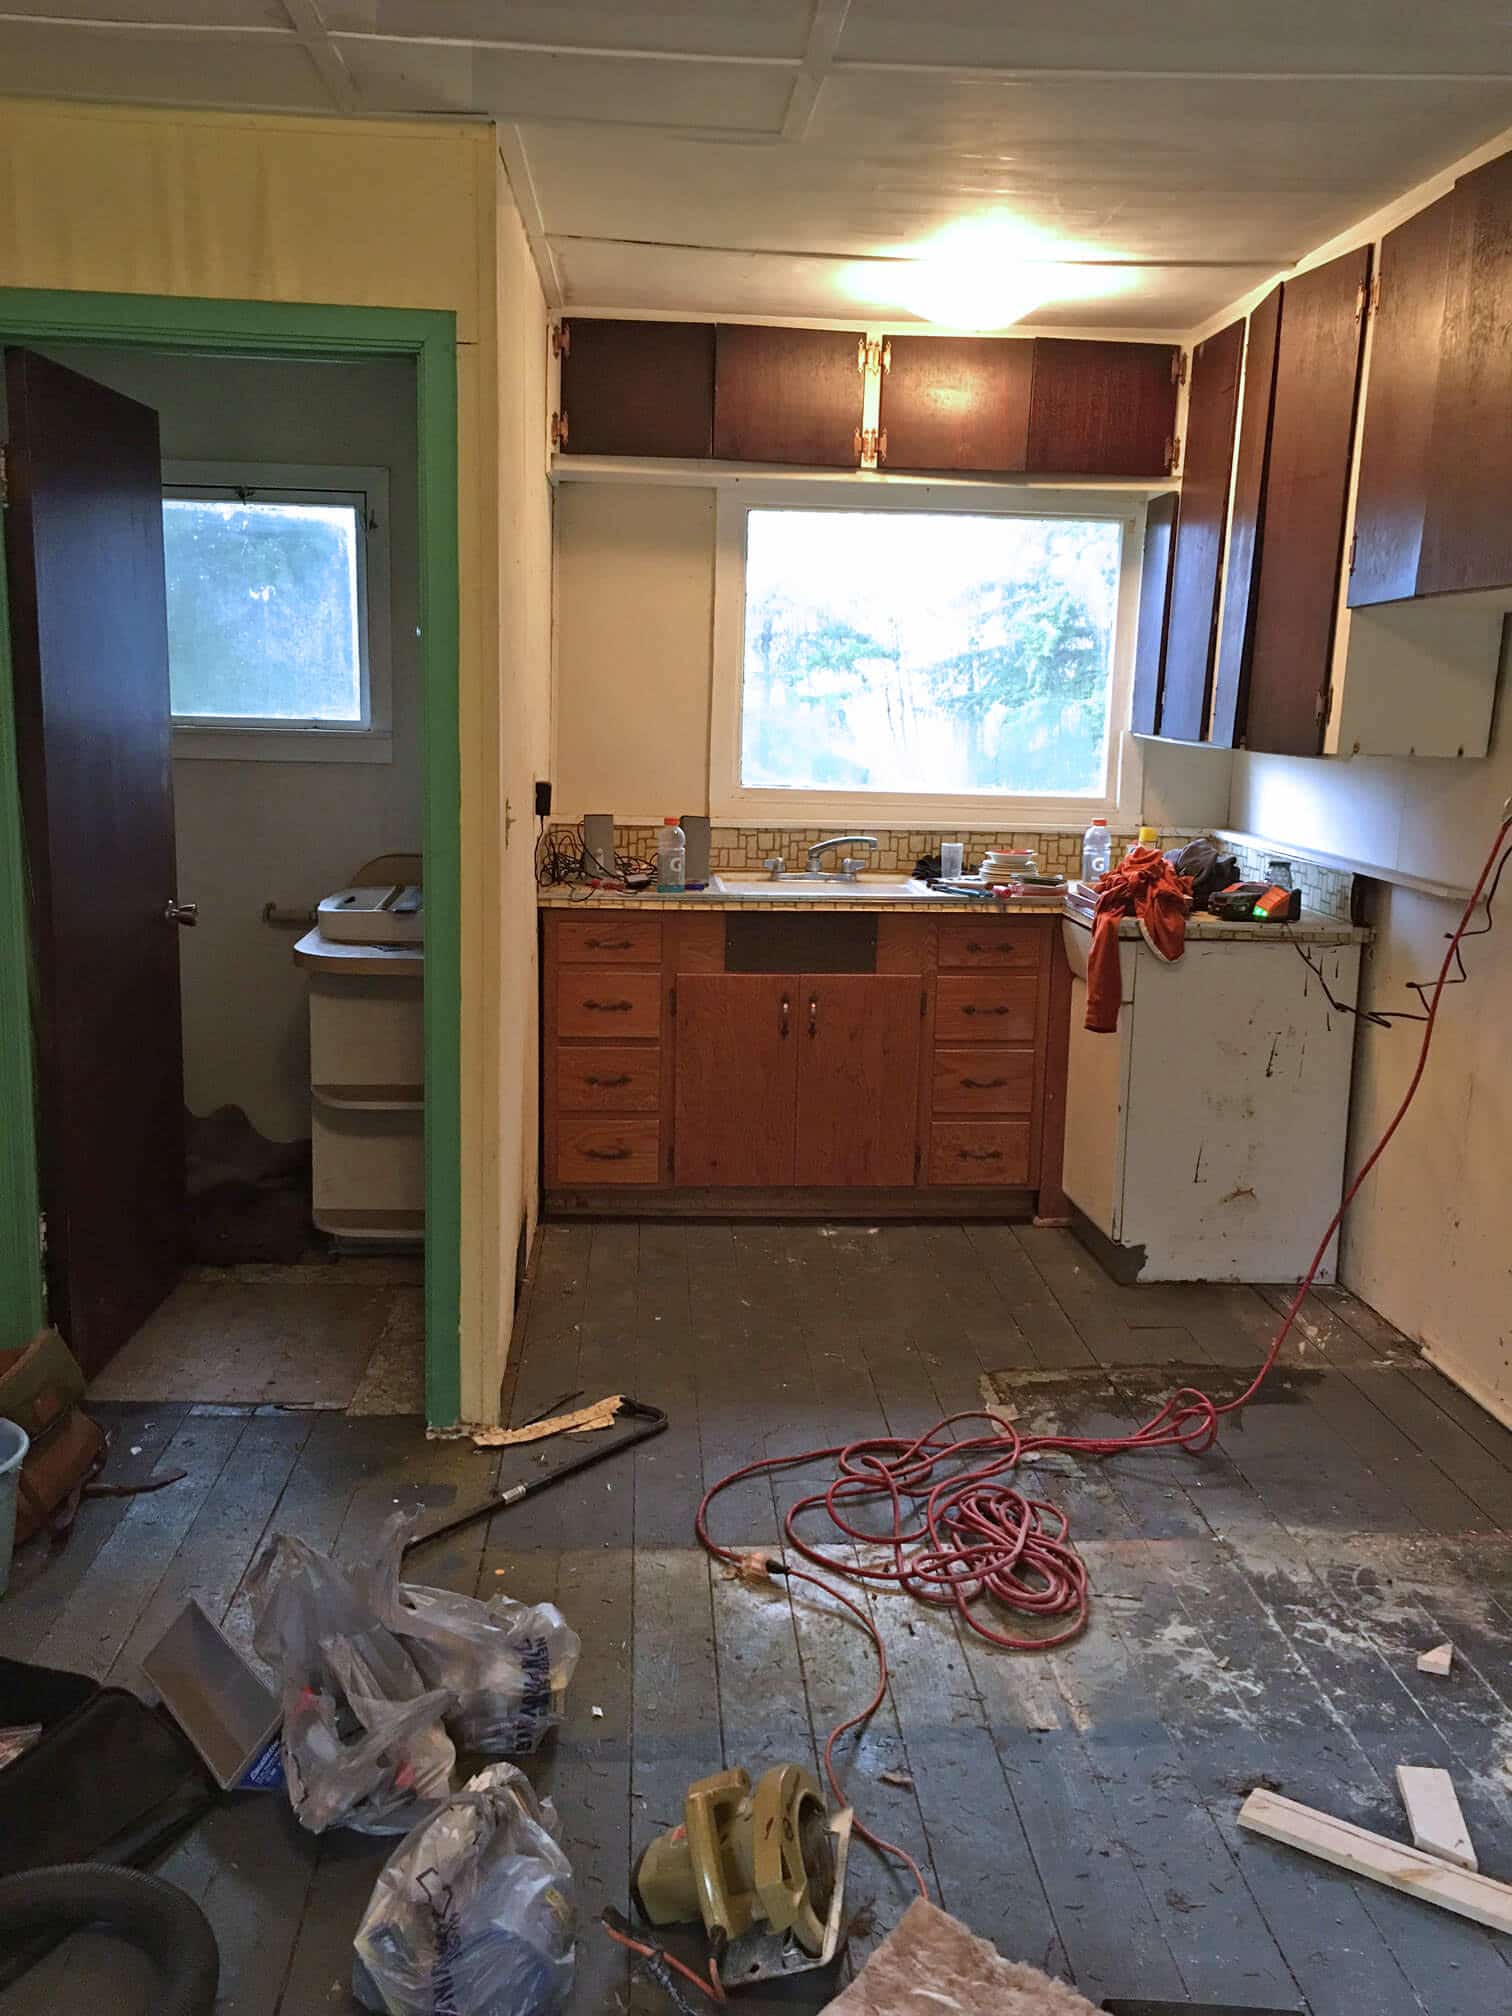
It’s only 250 square feet but we want to set it up so that we can maximize the living space without overcrowding it. Light, contemporary, and functional while creating as much sense of “space” as possible – that’s what we’re after. The kitchen especially – finding proper fitting new cabinets, small appliances, etc – and the microscopic-sized bathroom, will also require a lot of brainstorming.

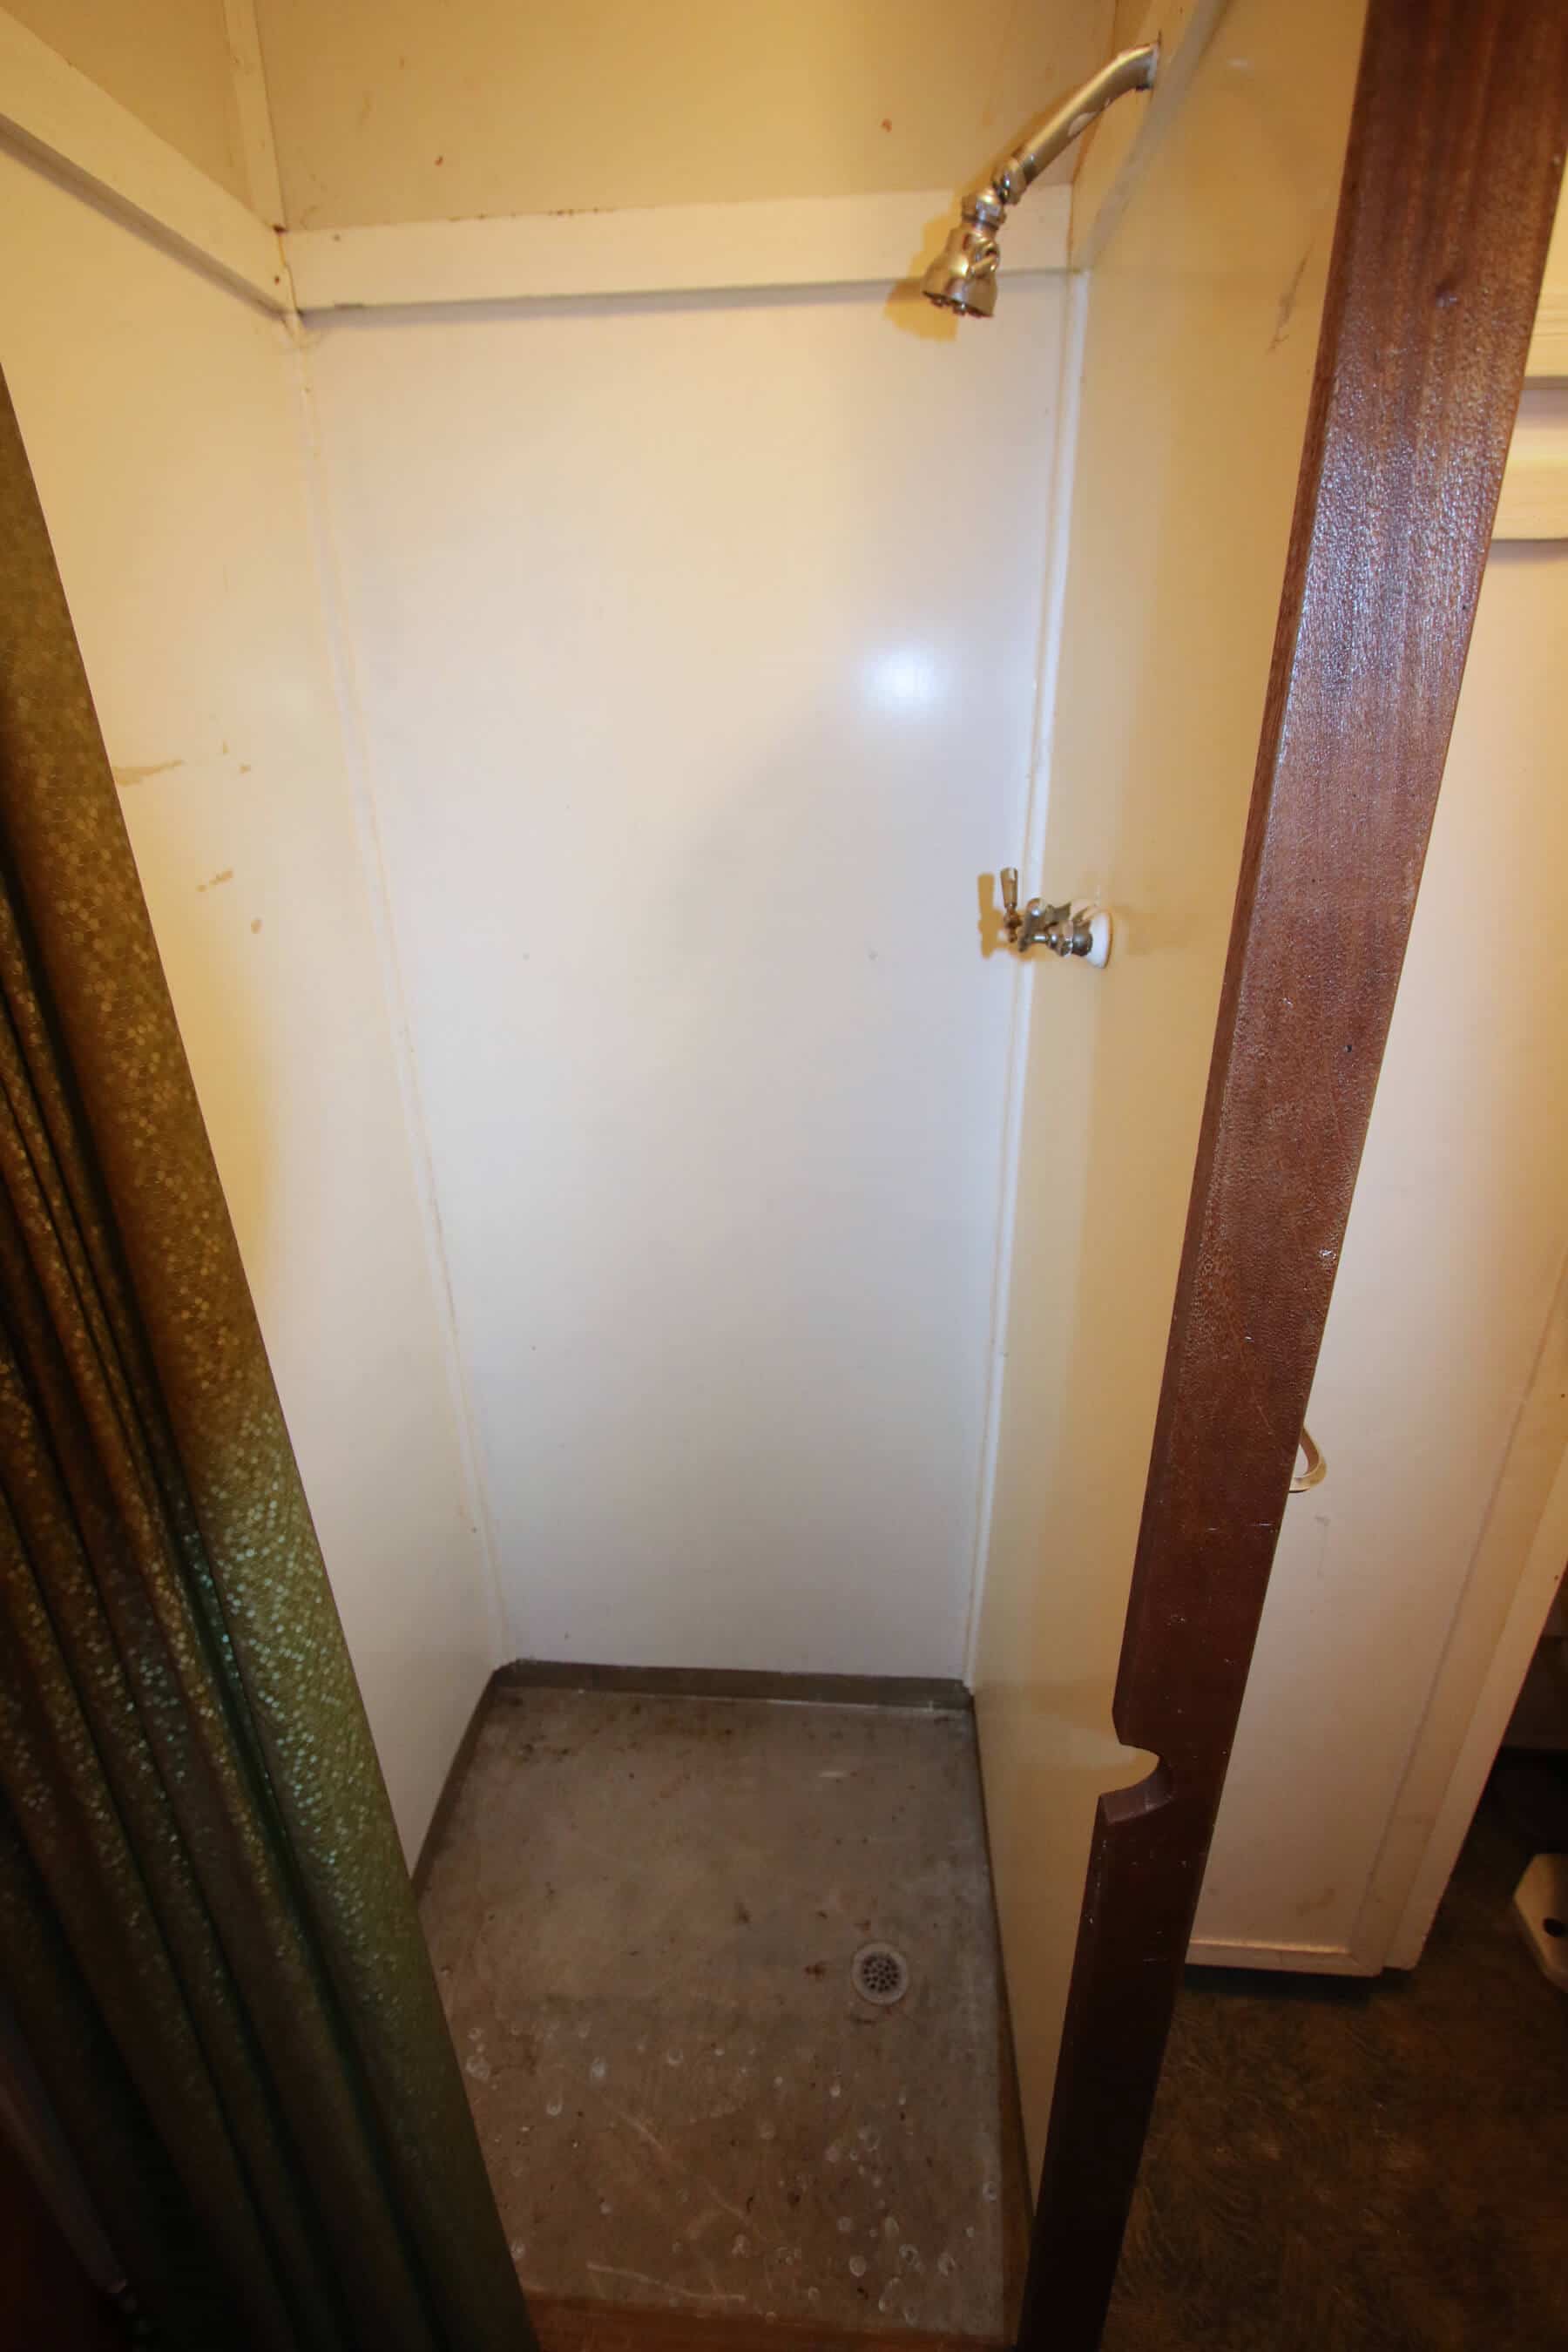
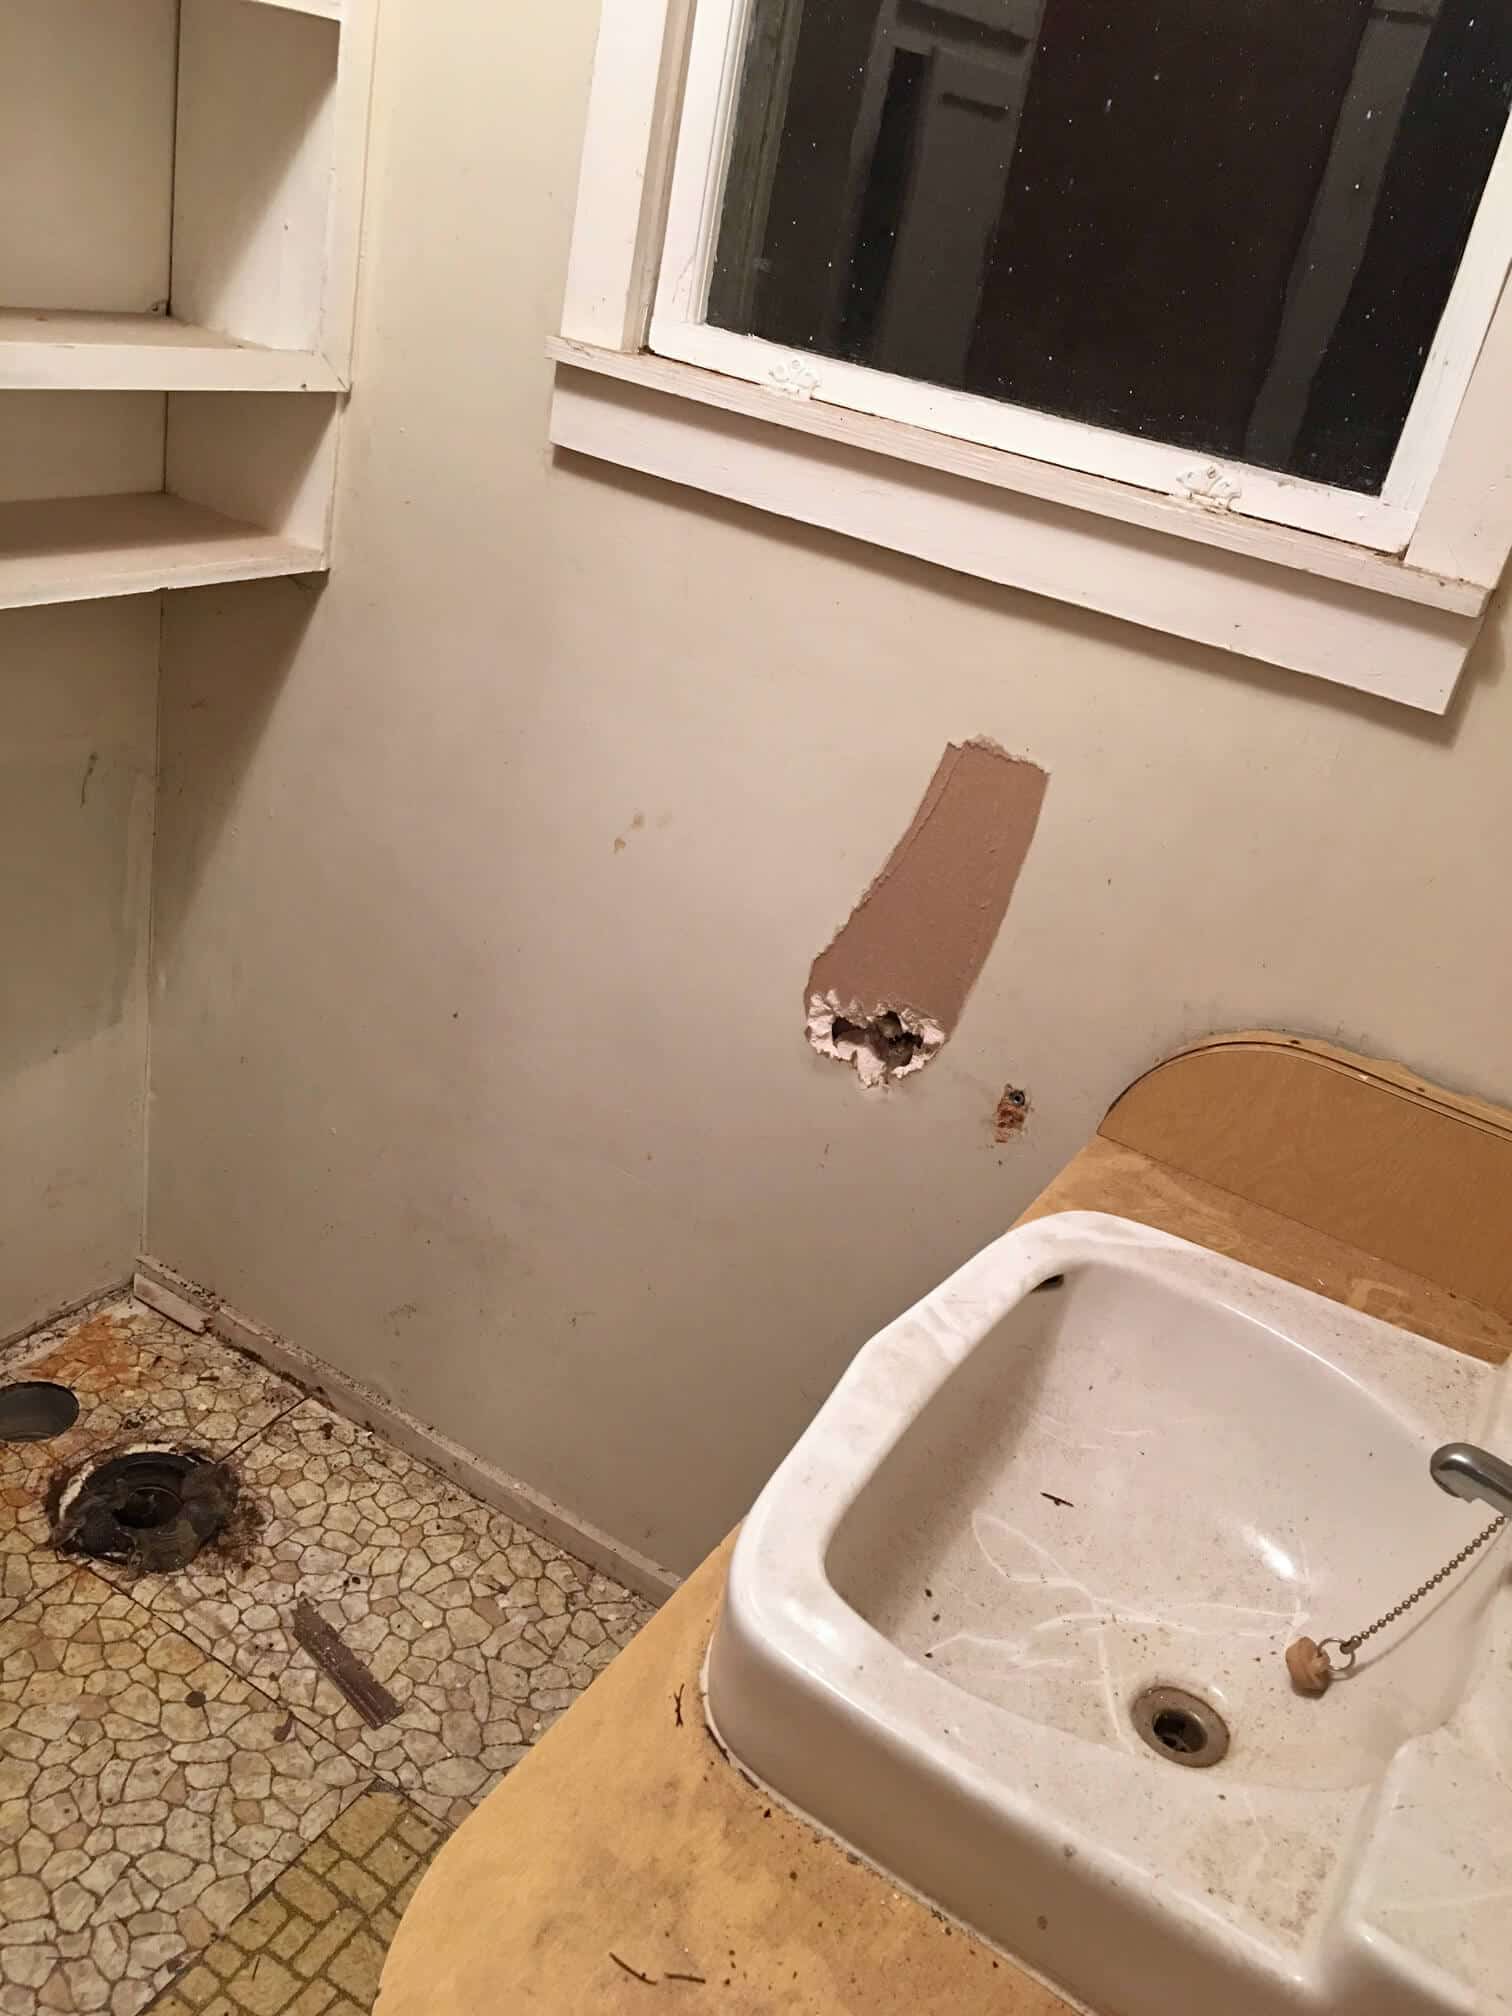
Carpet in the bathroom. That’s always my favorite. Yours, too?
Well, it’s gotta come out. Pass the latex gloves and the gas mask…
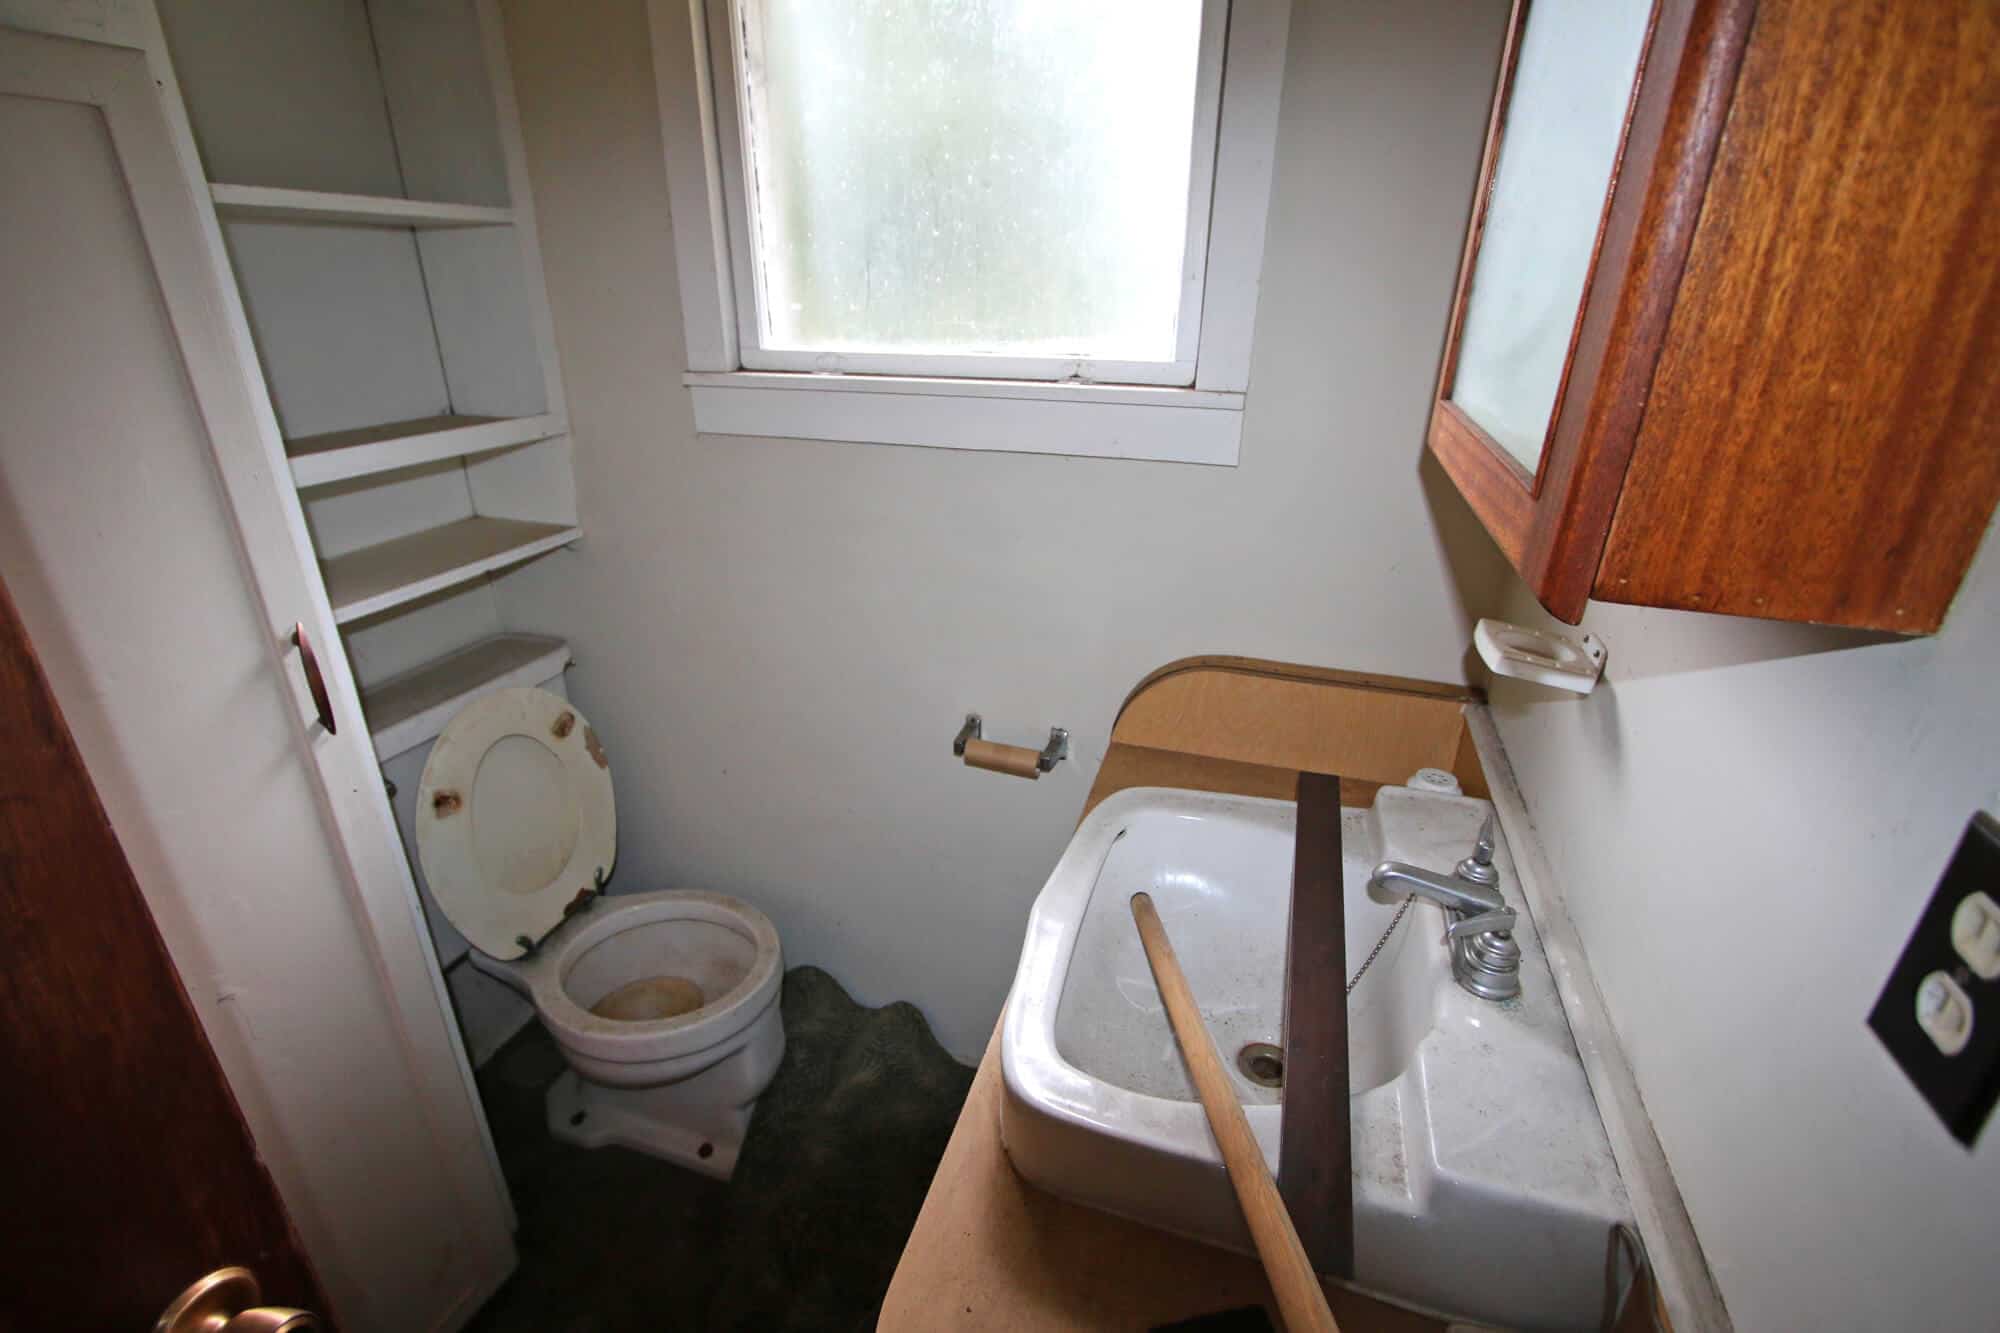
The shower is teeny-tiny and is directly to the left behind the door when you walk in. The walls are simply cedar with some kind of water-resistant paint and the flooring is an old metal shower pan. We’re currently researching tiny shower options that will create a sense of space where there is none.
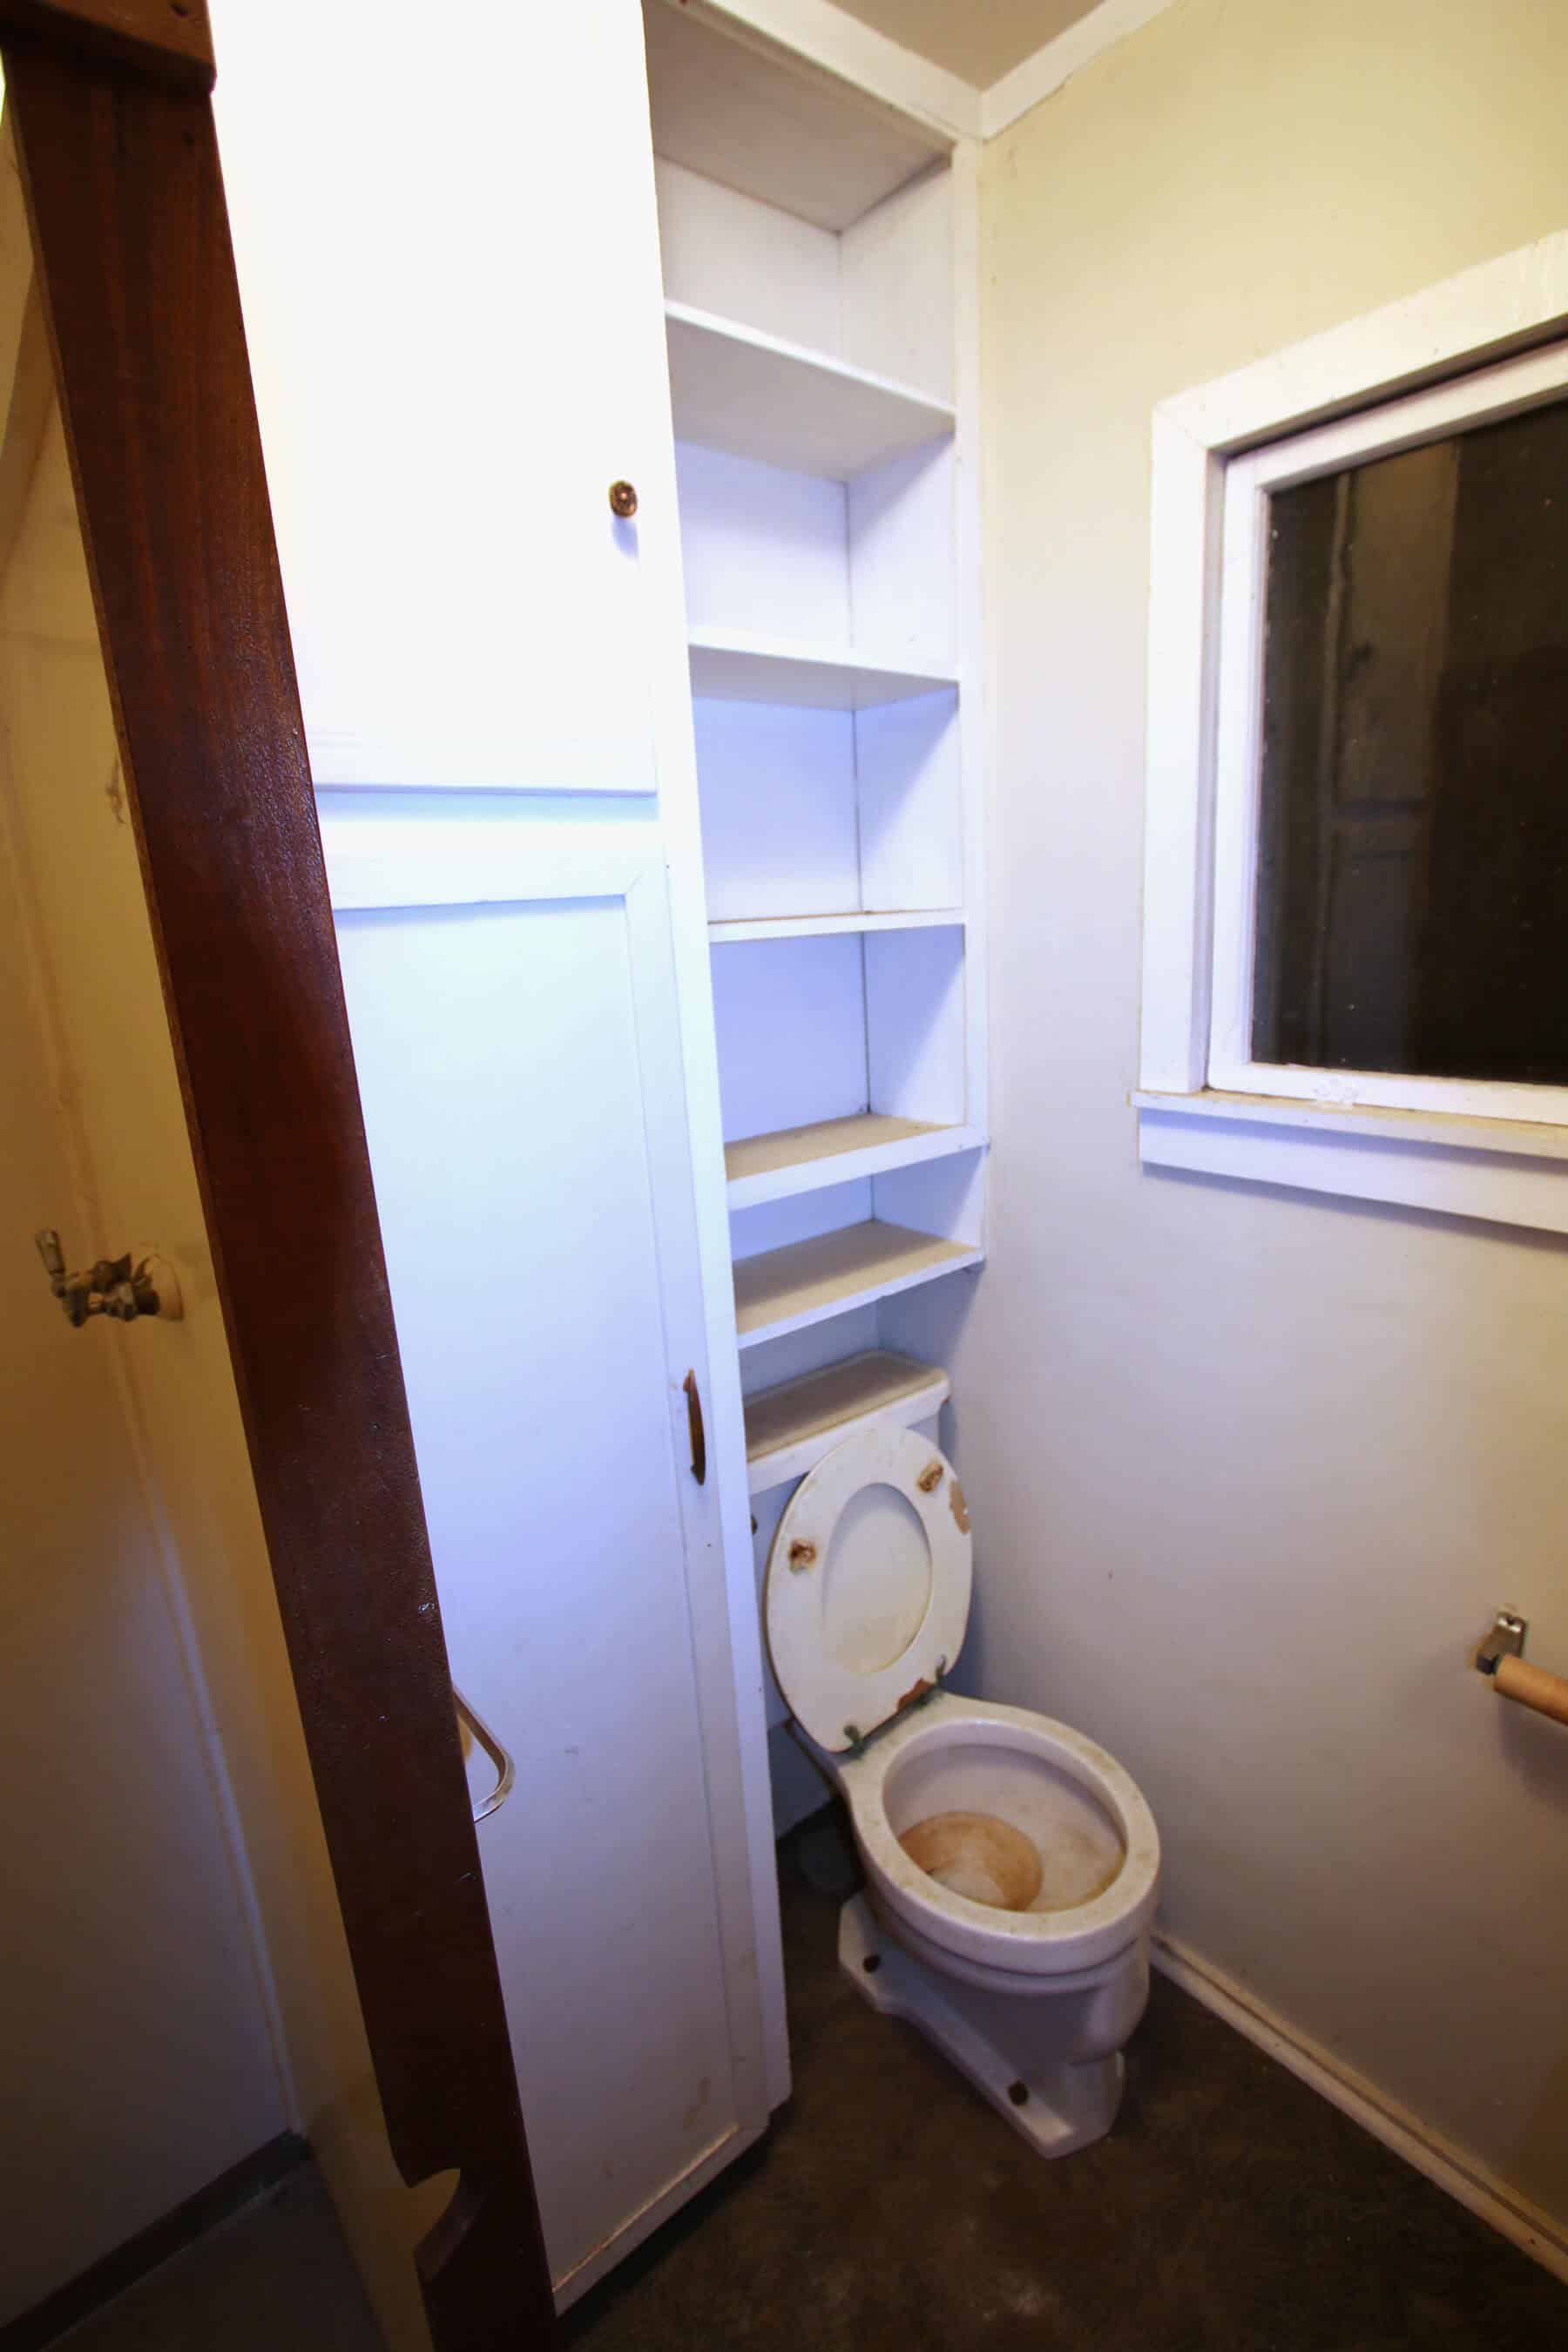
The bathroom is so small that you can see where the builder improvised – he cut out part of the wooden frame on the right so the bathroom door handle could fit through when you open it!
One bathroom change will be to rig the door so that it swings OUT into the living room instead of into that tiny bathroom.

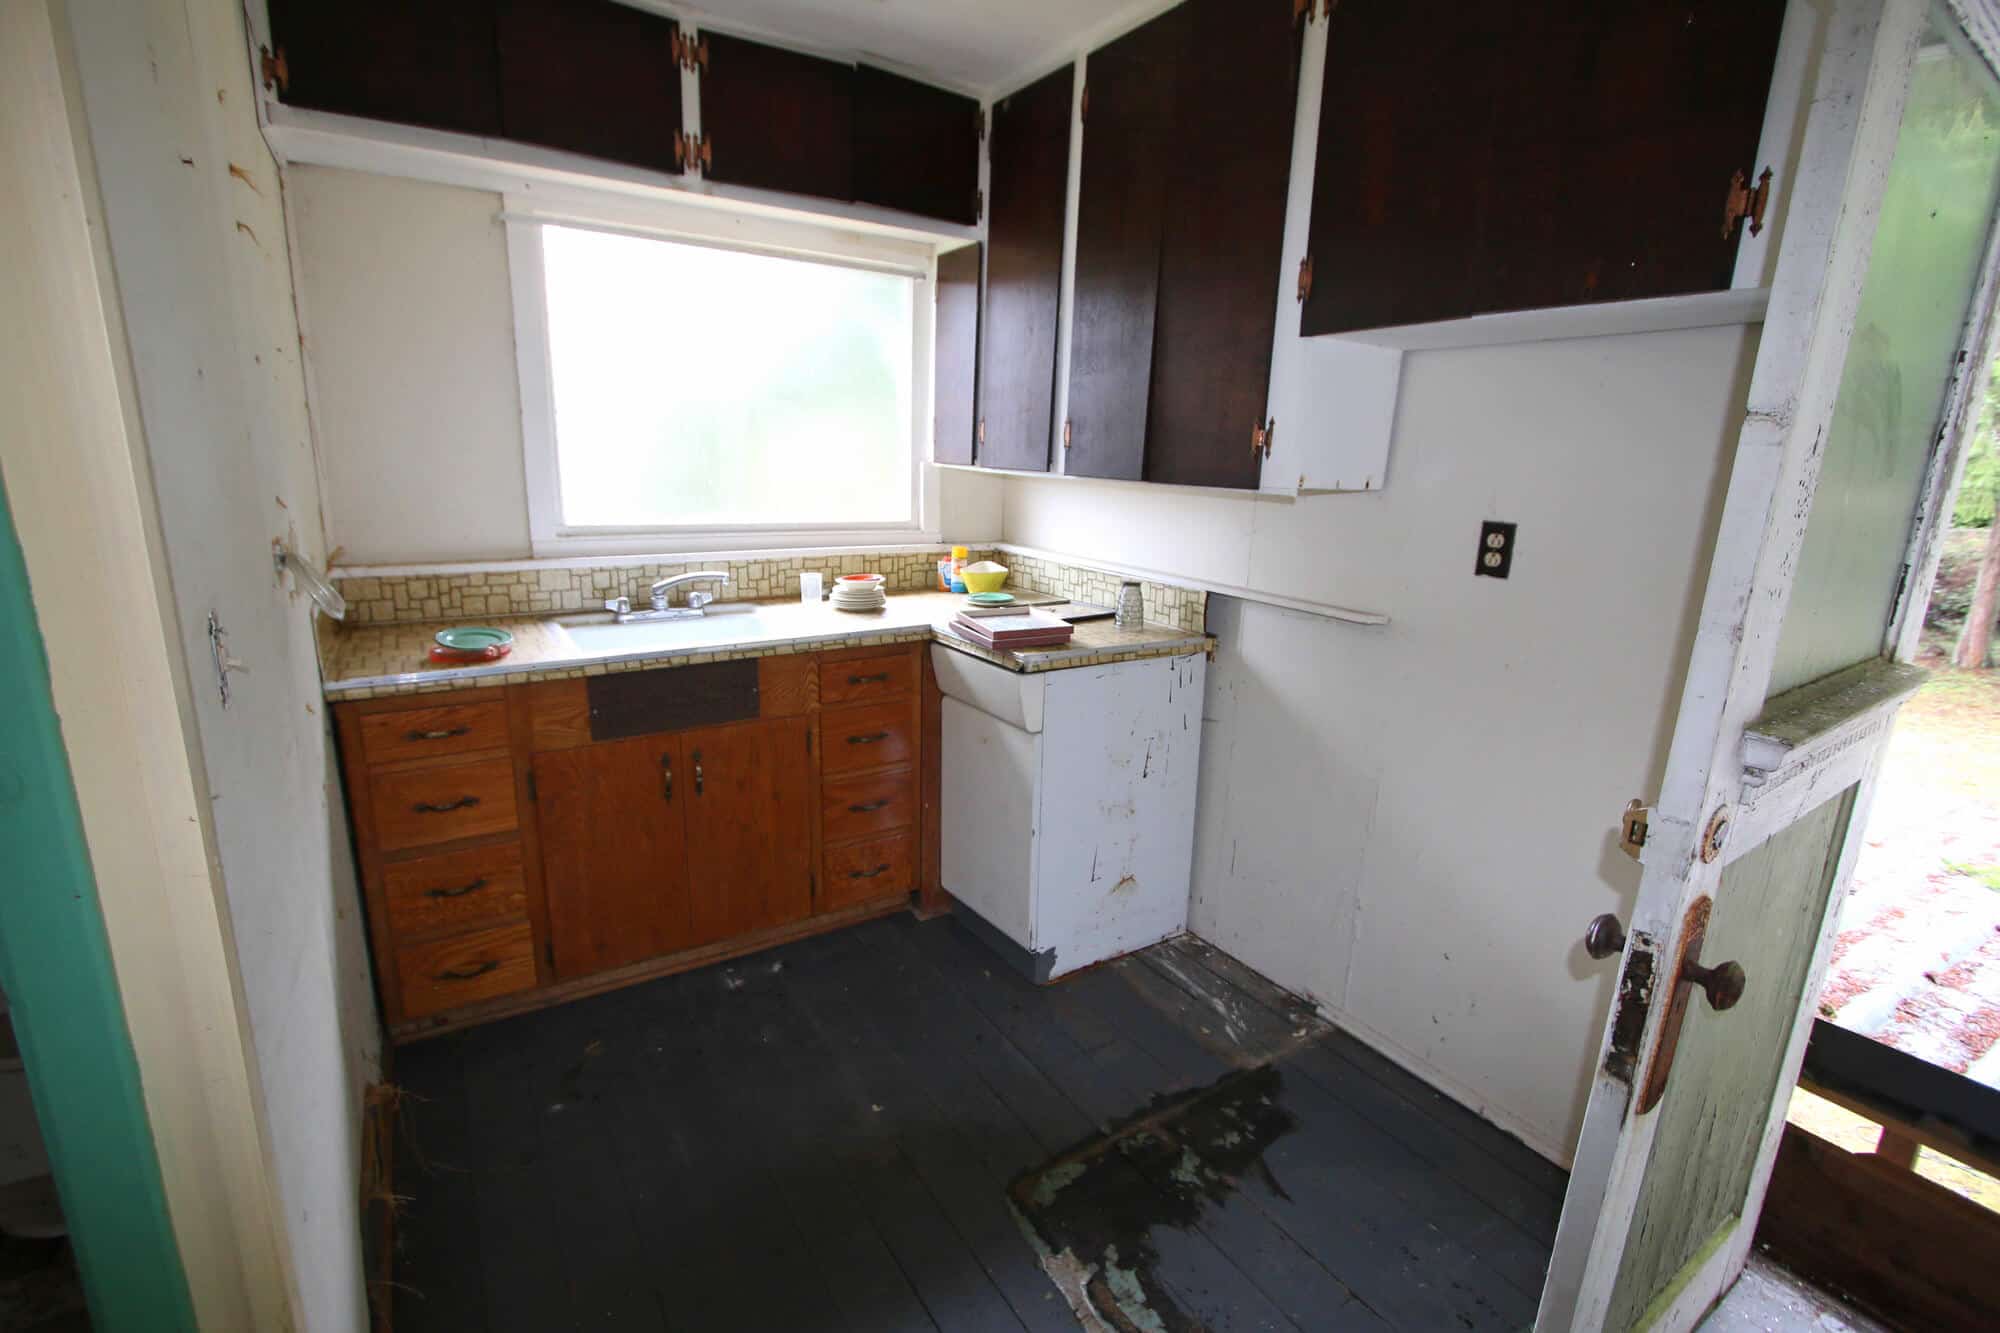
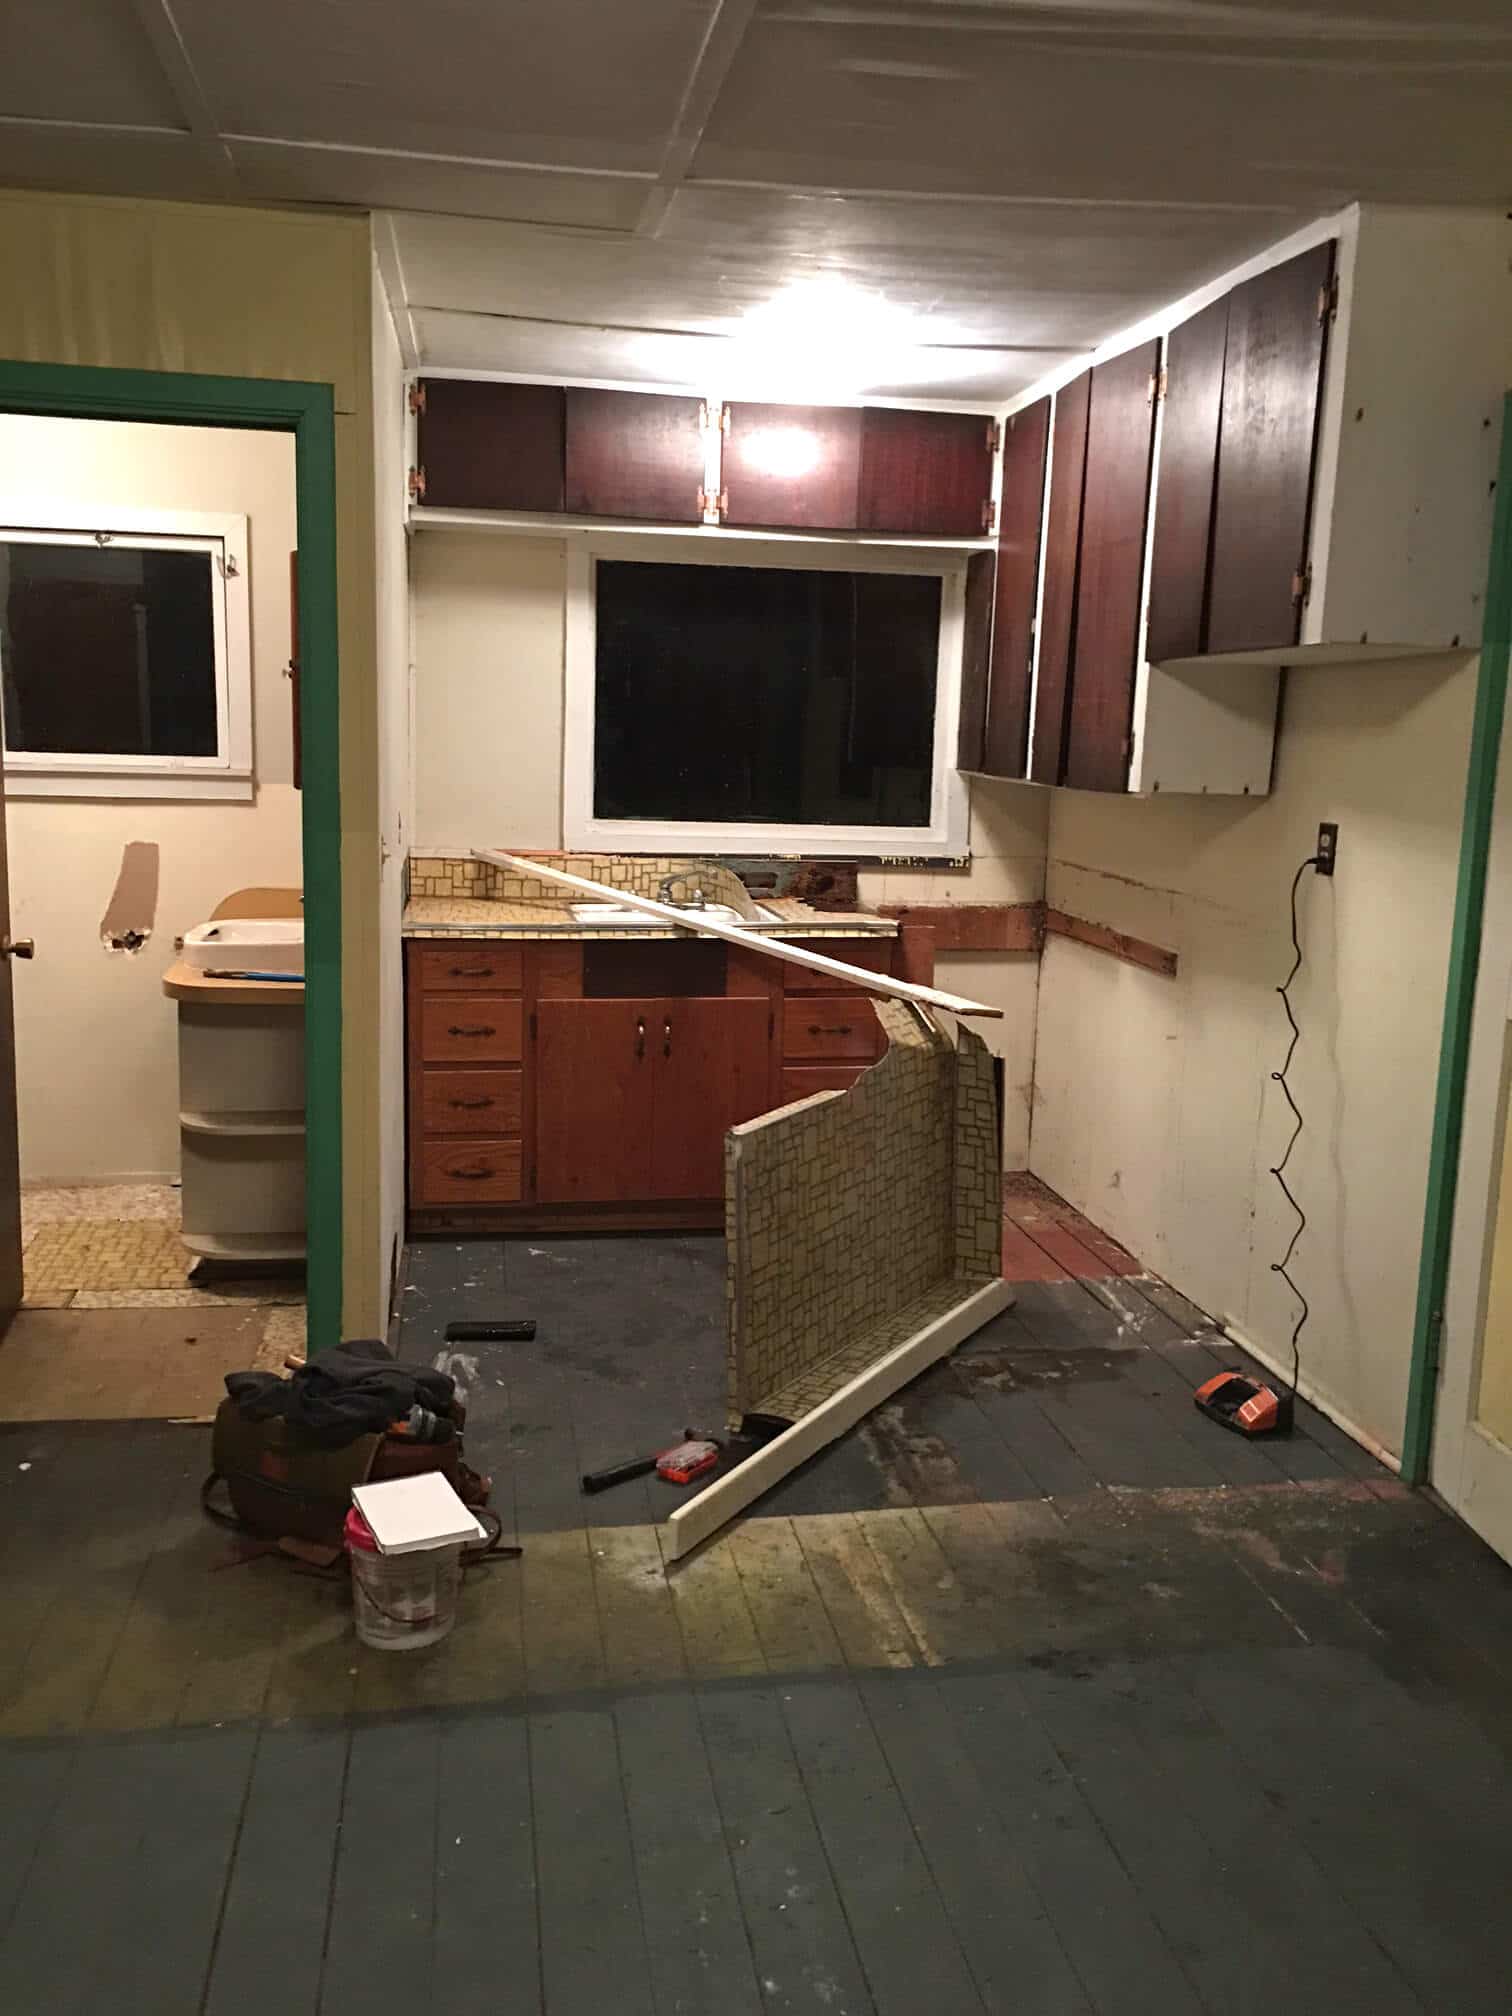

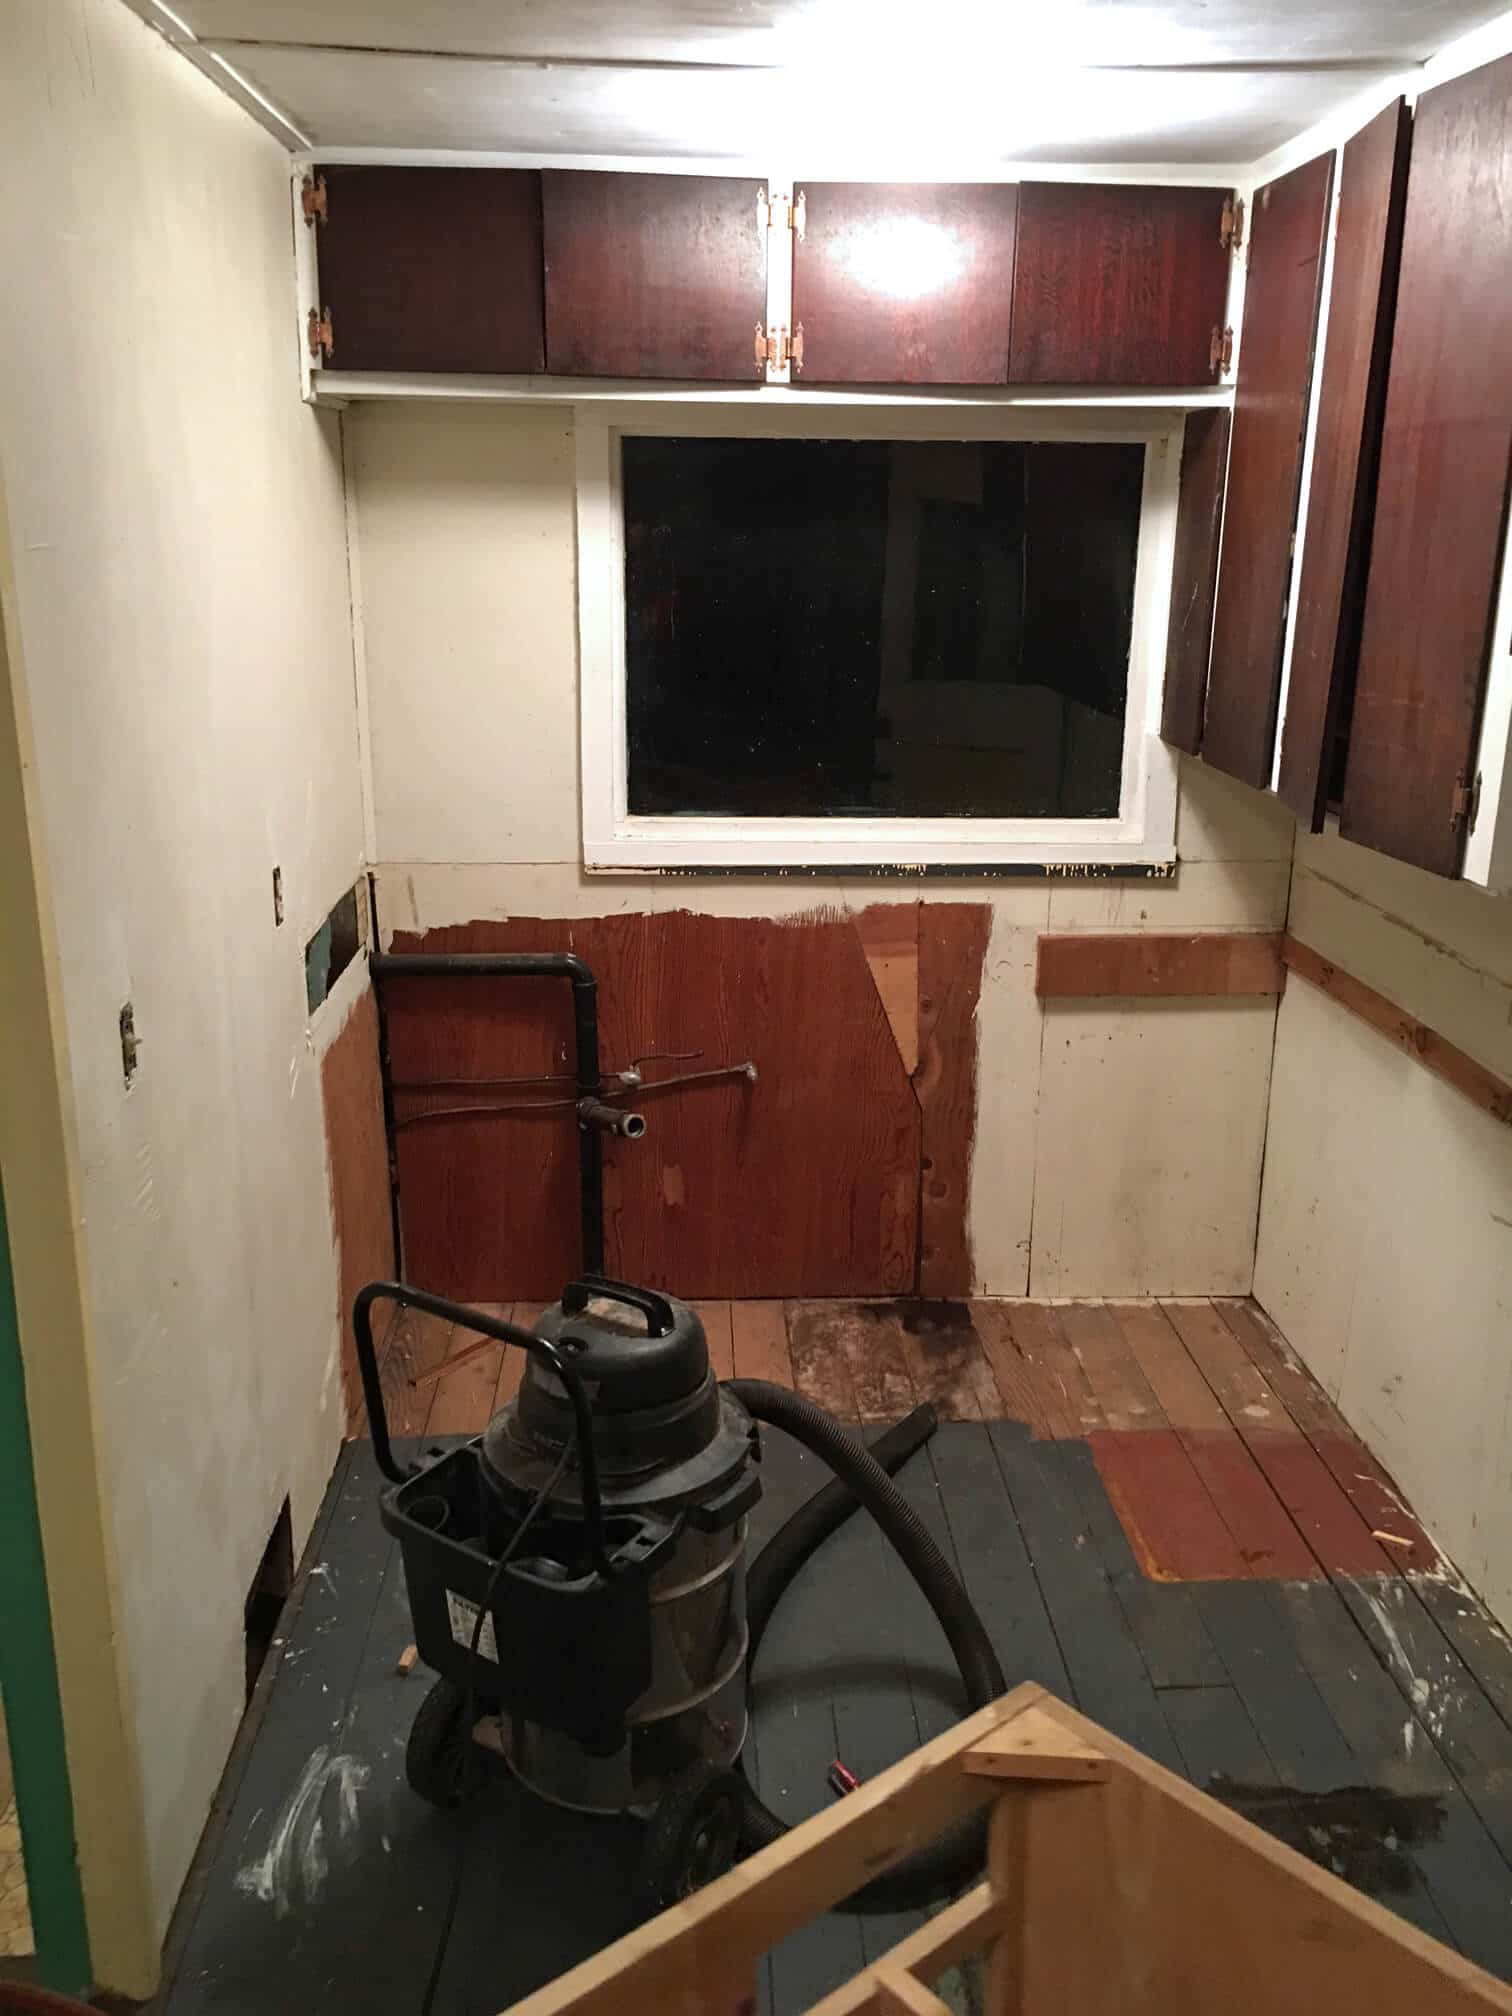
There is something really satisfying about taking a pry bar to old cabinets.
If you’ve never tried it I highly recommend it.
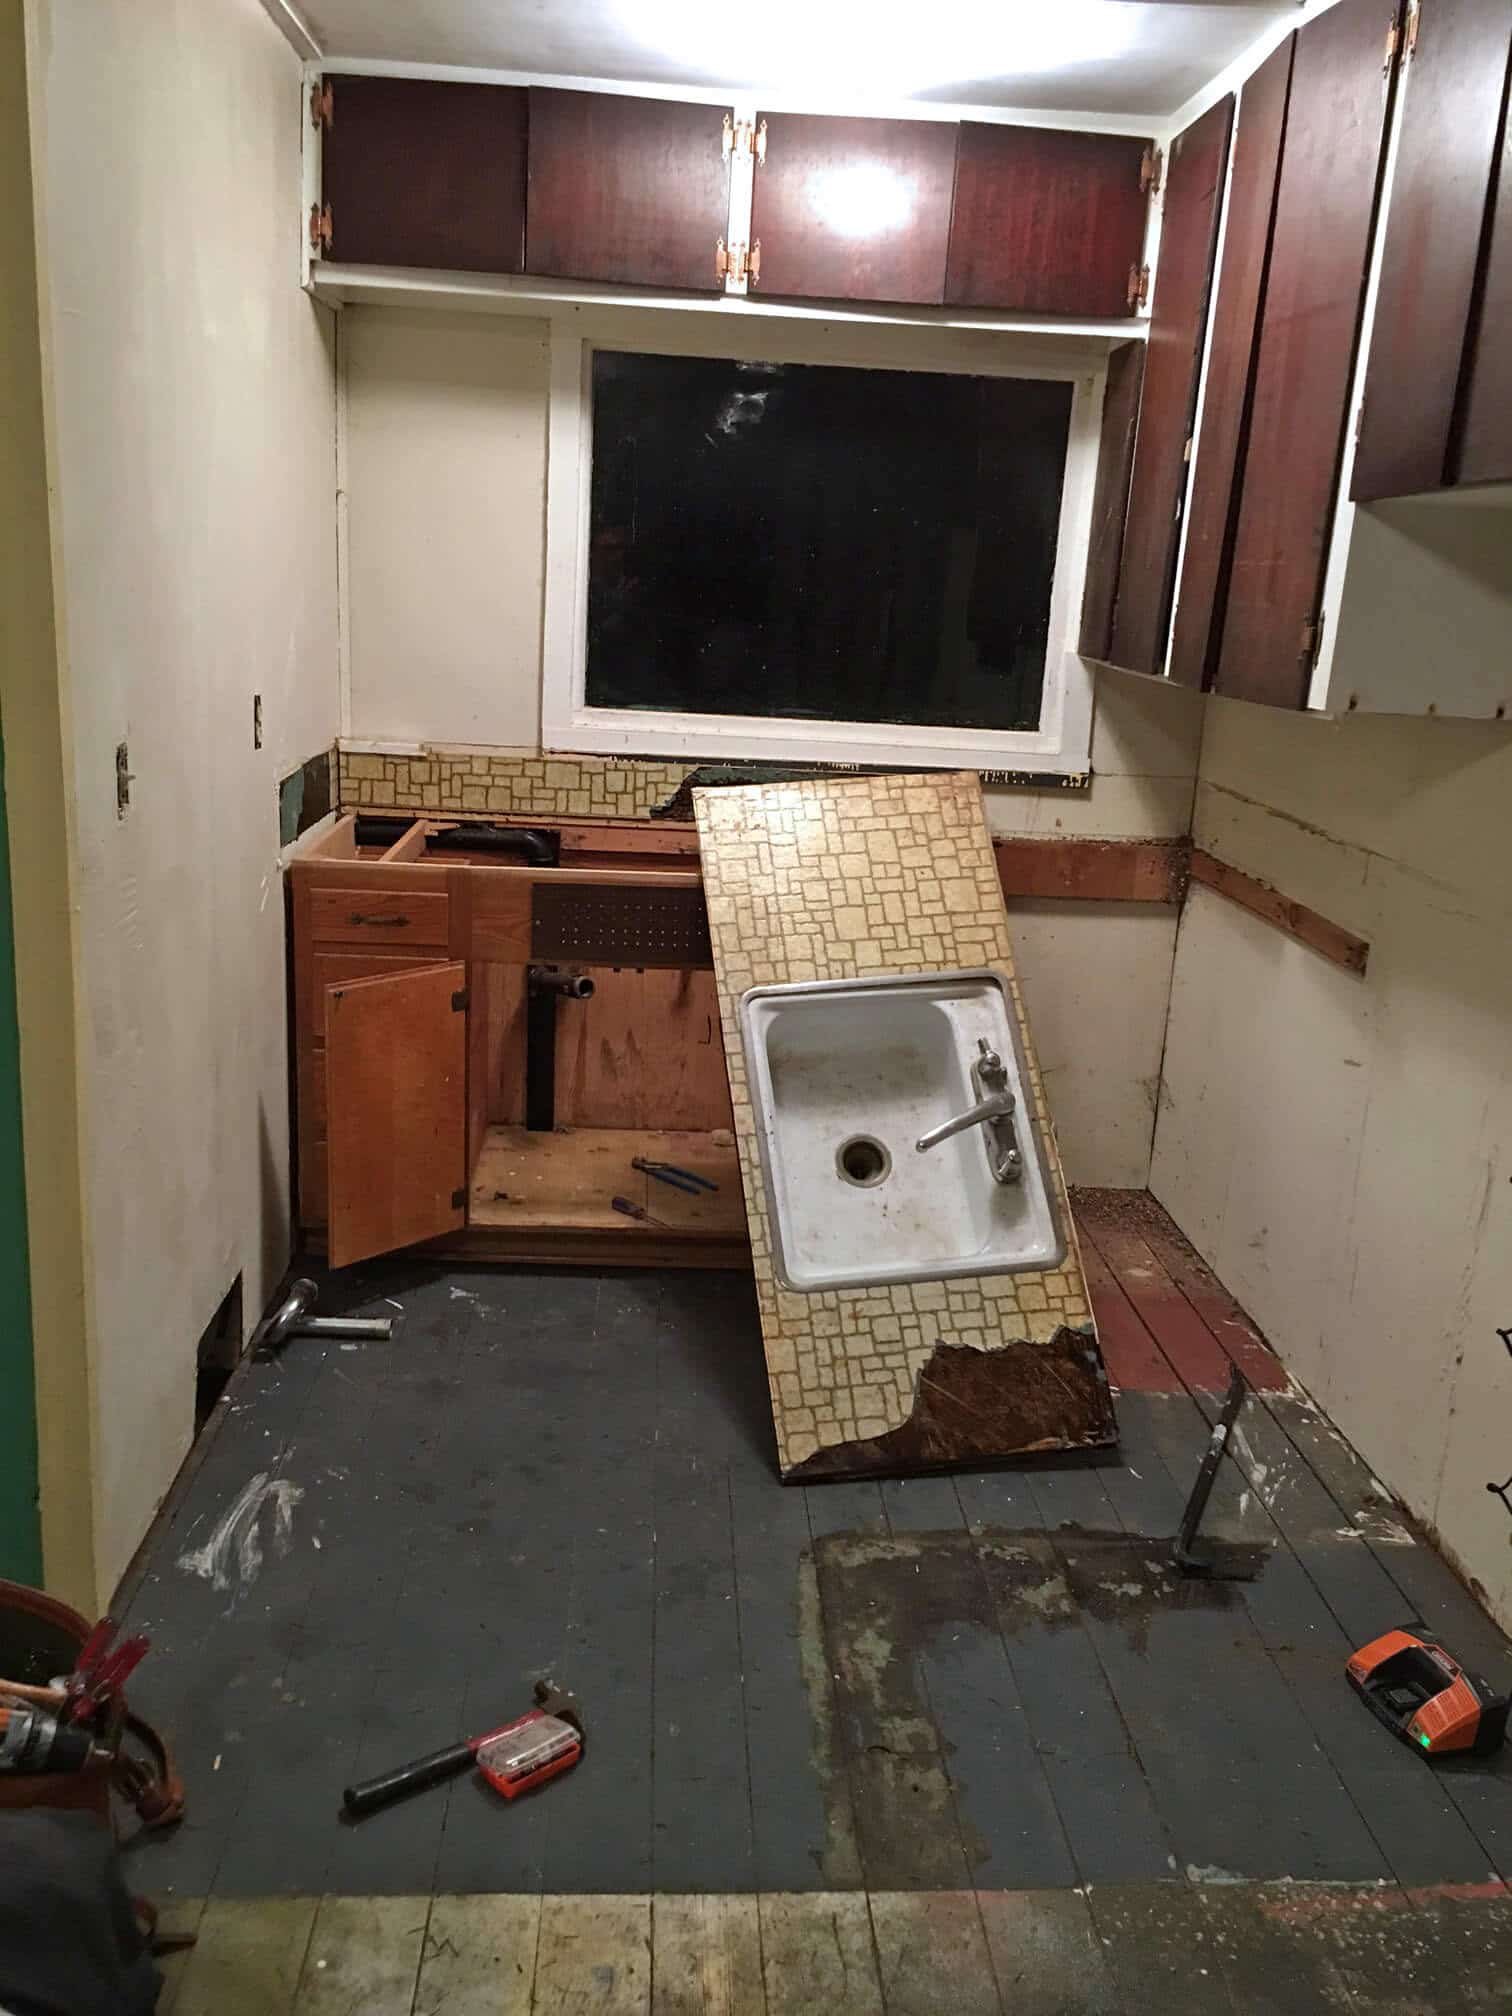
Upper cabinets are next.

Behind the built-in closet was a square brick opening going directly into the chimney. It must have been an inlet for a wood stove at some point. Within a minute of exposing that gaping hole a half dozen huge moths flew into the room. We discovered a large moth colony inside.
Mental Note: Eliminate moth colony, patch up the chimney hole on the wall.

Behind the old wood paneling on one of the walls we discovered the old insulation was full of squirrel poop and hazelnut shells. Better than rat poop, I said. Then my brother, who was helping us, had to point out that squirrels are in the rat family. I chose to ignore that and instead console myself with the mental image of cute fluffy squirrels perched on a tree branch gnawing on nuts between those cute tiny hands…
When we first began doing some initial cleaning we heard at least a couple of squirrels from somewhere behind the wall hissing at us. The squirrels were ticked.
After all, this unit had been abandoned since the 70’s, providing luxury housing for squirrels and mice alike. (We found three of the latter behind the kitchen cabinets surrounded by 40+ year old split peas.)
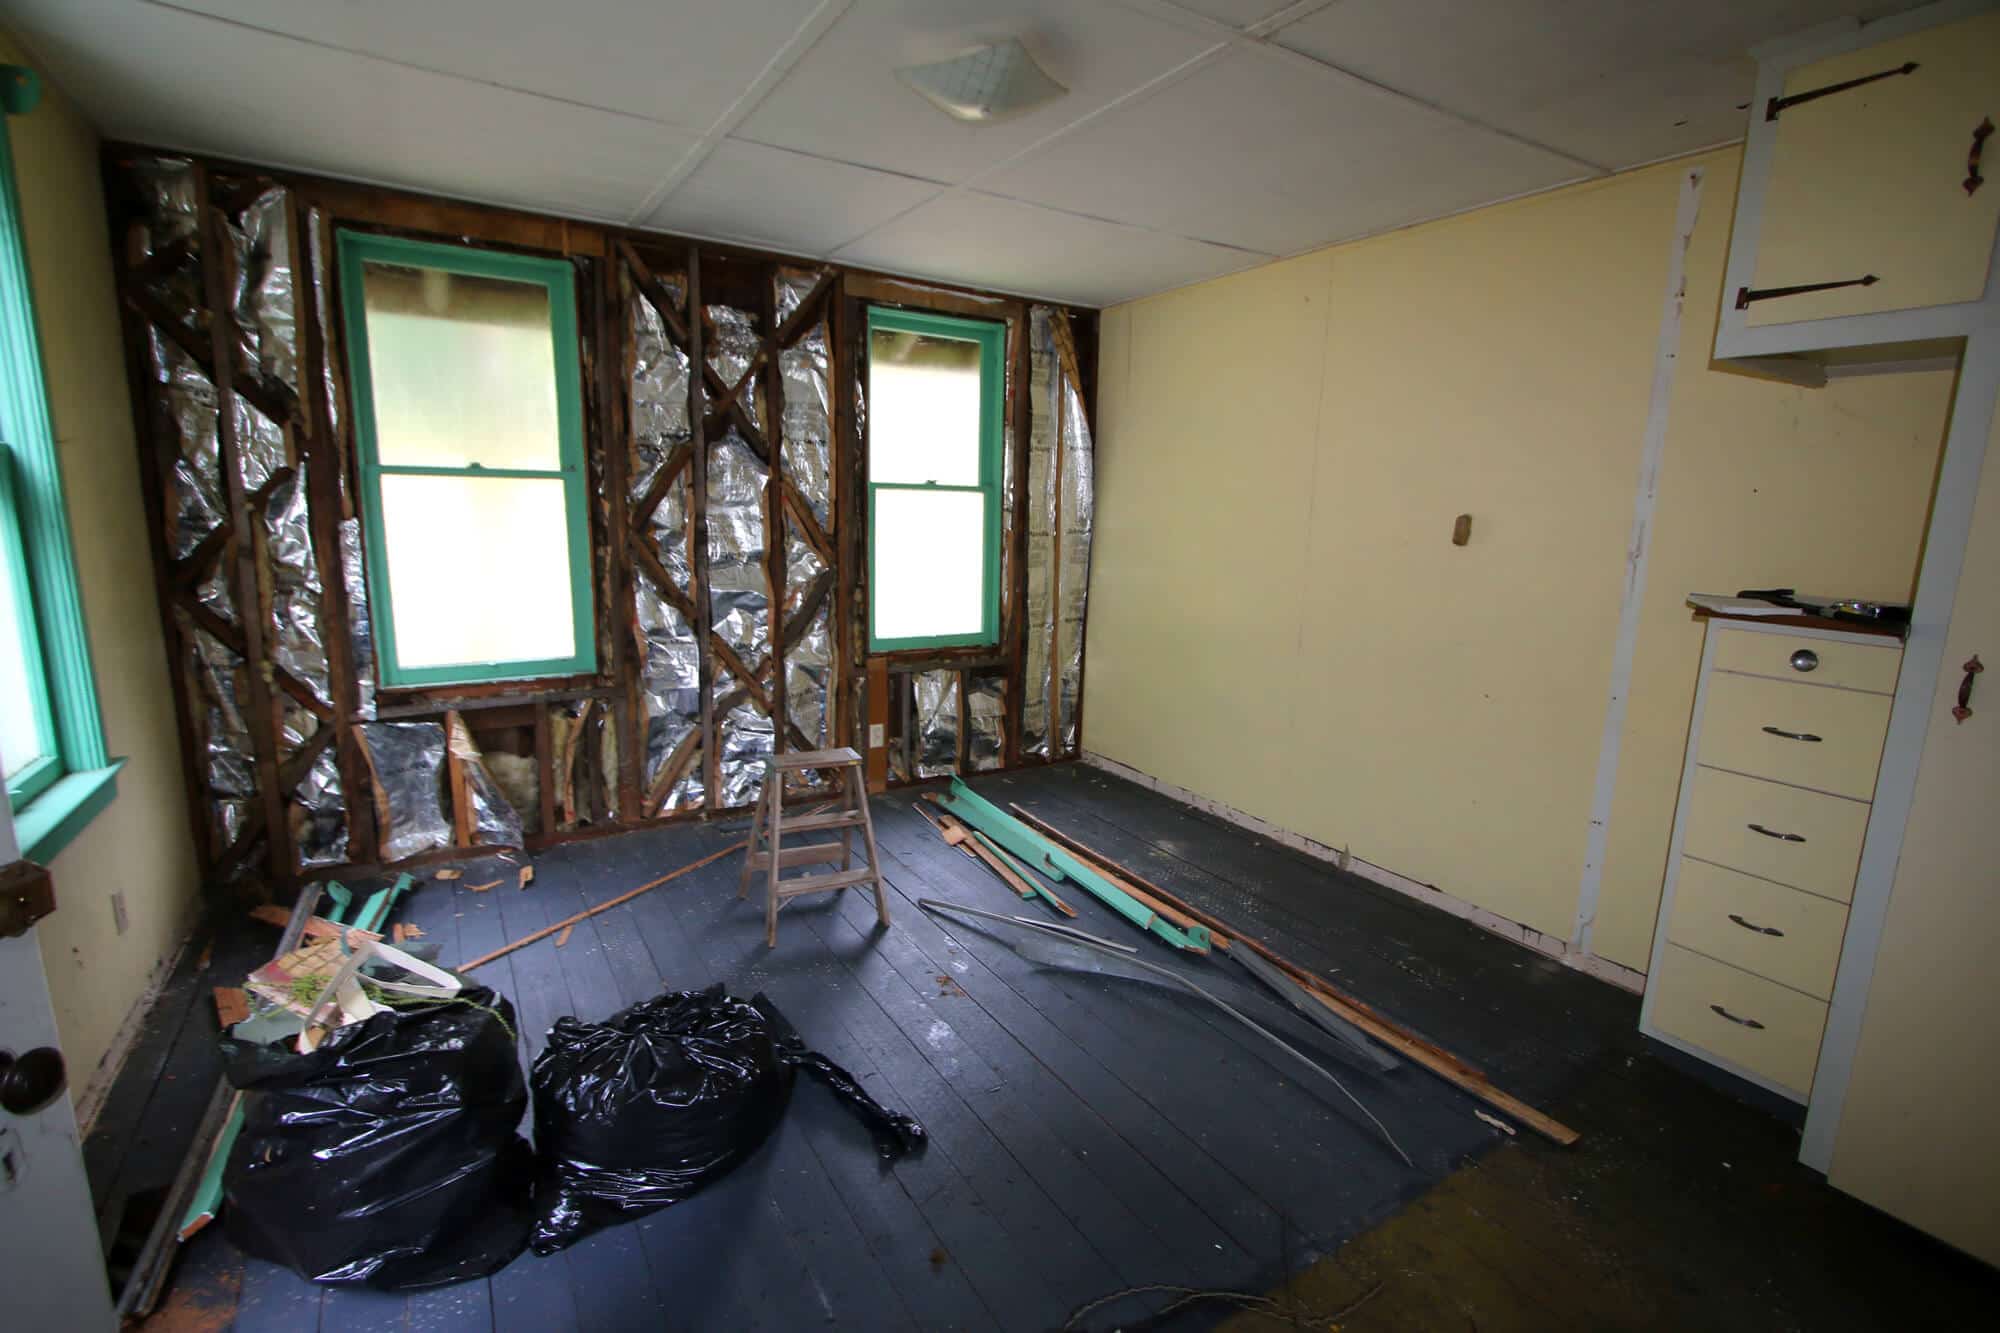
And so we ripped out the squirrel poop-infested insulation.
I never thought I’d use the word “poop” on my blog. I guess that comes with the territory of having branched out to include a Home & Garden section.
Ripping out the toilet was fun but not nearly as much as carrying it down that long, steep ladder – which is why we didn’t. We threw it off the roof and watched it explode at the bottom.
The hole on the floor where the toilet was has like an inch-thick layer of sticky molasses-like substance (I don’t want to hear it) that I stepped in…twice…with the back of my jeans under the heel of my shoes, so they both got a taste of it. Yeeeeah.

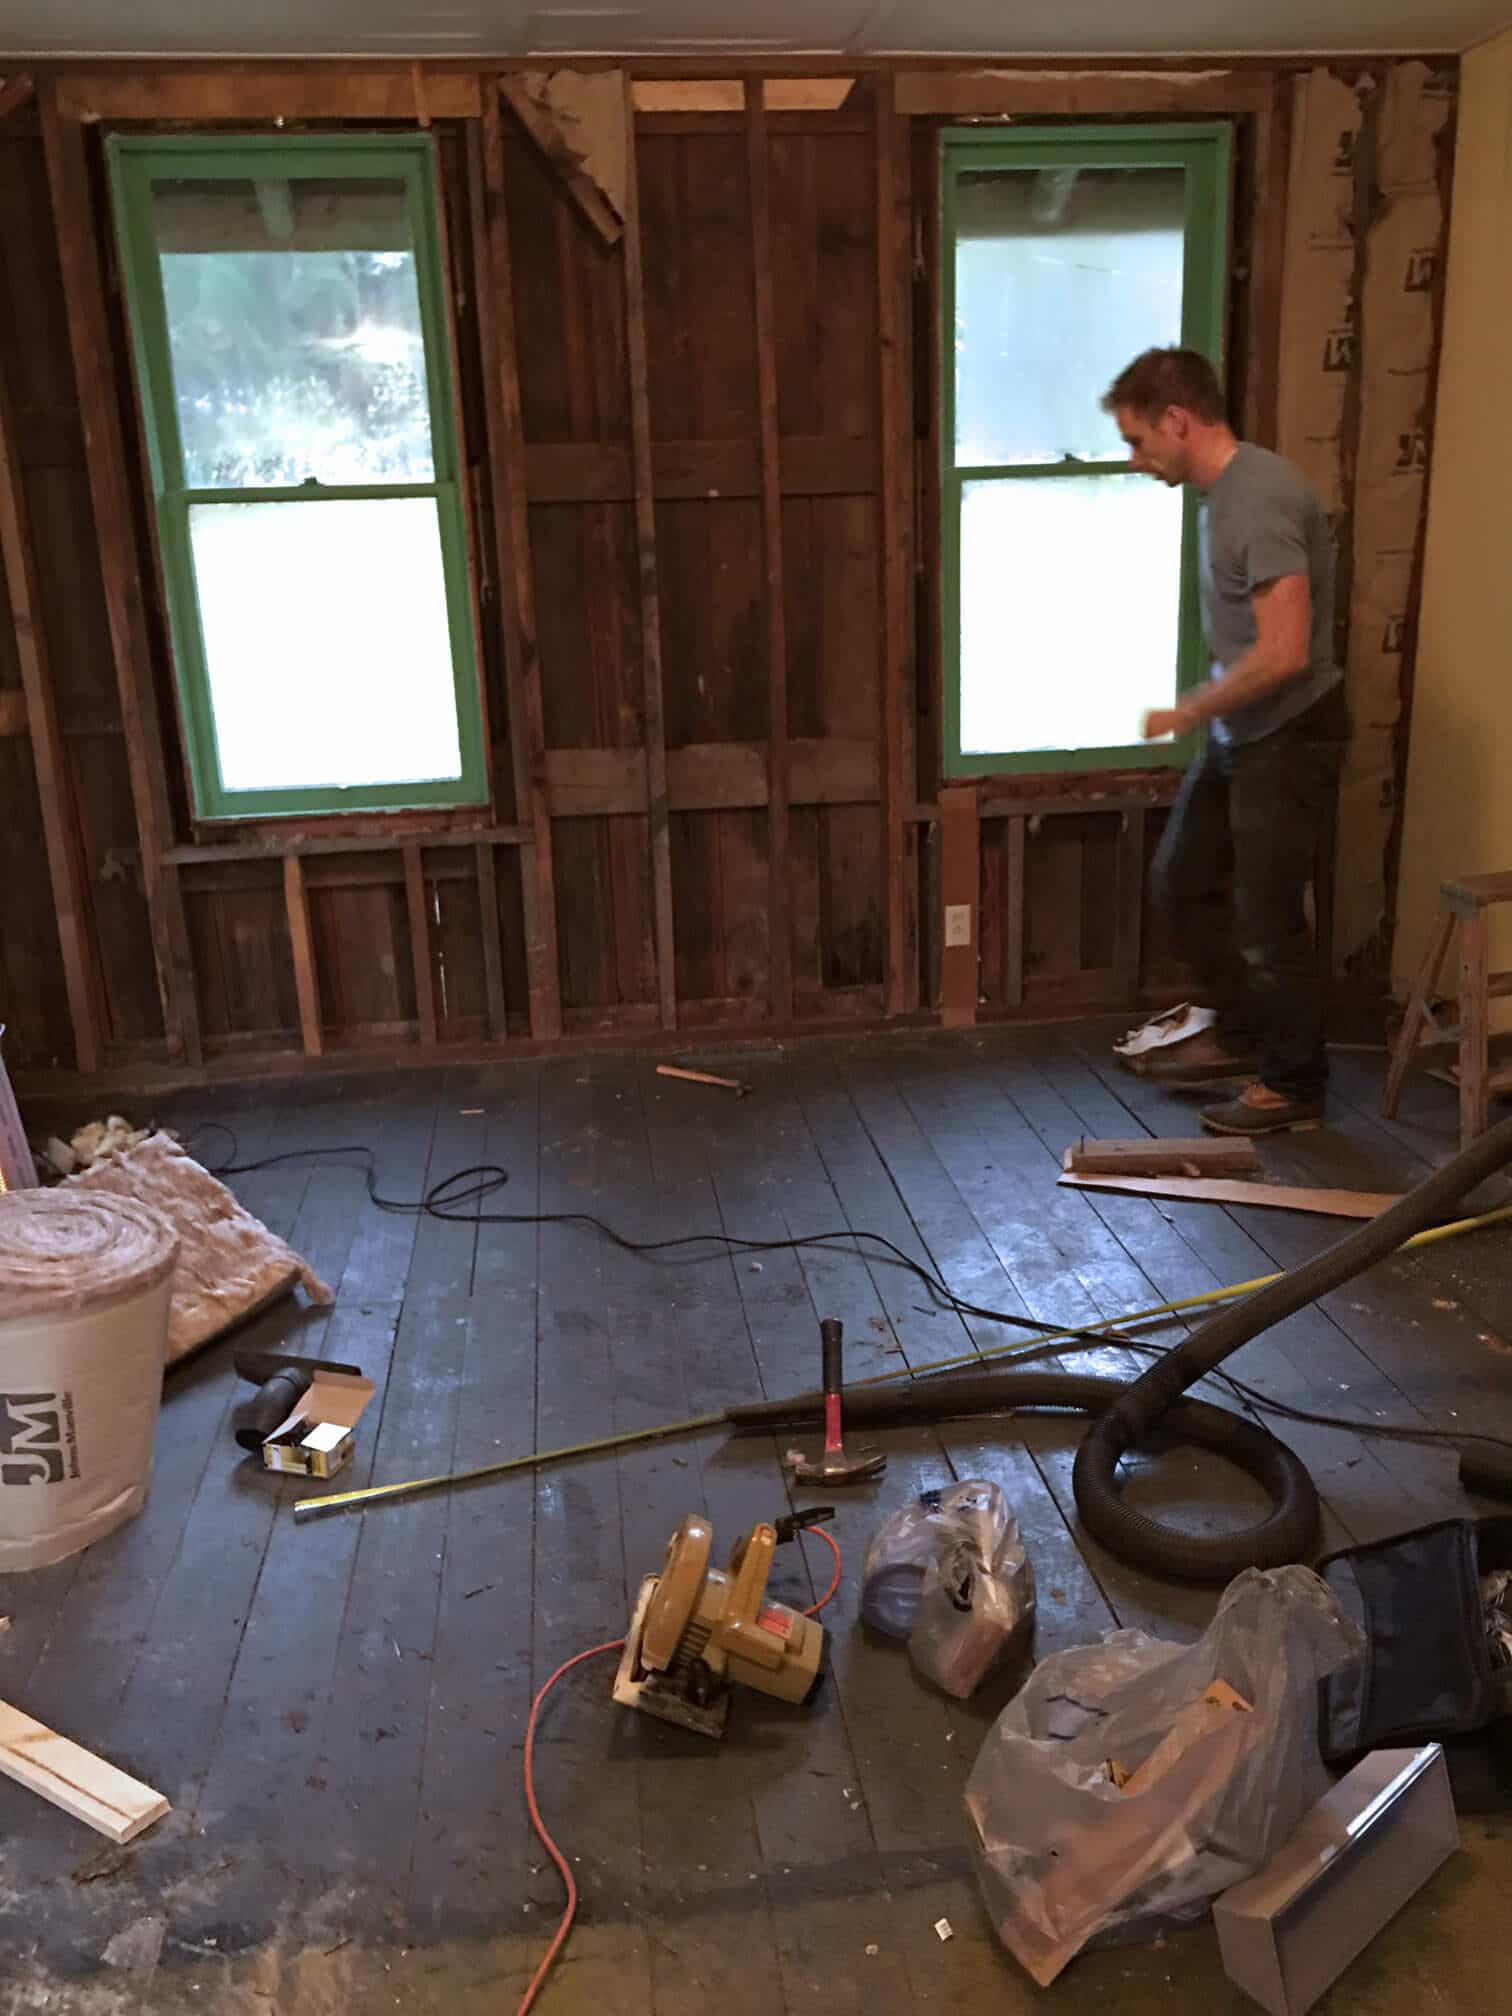
We originally thought the sagging was caused by warped ceiling joists. Fortunately that isn’t the case, one wall is just a little “off” which will require some finagling to make it look level when we put in a new ceiling.
It’s really exciting to think about what this place is going to look like when we’re done. We’re already dreaming and scheming what feels like a gazillion steps ahead of ourselves about where to place the furniture, how to decorate, how to maximize the living space without making it feel claustrophobic. But all of that will have to wait. Right now we’re on our hands and knees doing grunt work and there’s lots of elbow grease still ahead.
See you next time for Part II of The Micro-dwelling Project!

Hi, I’m Kimberly Killebrew and welcome to Daring Gourmet where you'll find delicious originals, revitalized classics, and simply downright good eats from around the world! Originally from Germany, later raised in England, world-traveled, and now living in the U.S., from my globally-influenced kitchen I invite you to tour the world through your taste buds!


Oh my gosh – what a fun post! I mean, yeah … so much work … I get that, for sure! But as someone living vicariously though your words and pictures, it really is a fun experience! Your new/old home is gorgeous, gorgeous, and this whole micro dwelling project is incredibly neat! Thanks for this great post!
Thanks, Shelley! :) It’s definitely both – a lot of hard work but also fun.
Sounds like quite the adventure! Can’t wait to see how it looks all done!
Neither can we, Anna! :) It’s a lot more work than we anticipated but we’re plunging forward!
Sure sounds like an exciting project! You’ll have to post pictures as you go and how it all looks after everything is done!!
Lots more pictures of the process coming, Vicky! :)
Congratulations on your new property…with land and a history! Love it! YOu guys will have a blast redoing!
Thanks, Collen :) It’s a ton of work but it really is rewarding knowing we’re going to create something nice with our own hands.
LOVE this! Some idle thoughts….if there’s any way to have a pocket door on the bathroom, would be a great help if there’s room inside the wall. Saw a one piece glass/plastic shower unit someplace, it was a circle, the shower door opened to the inside on a sliding track….a pedestal sink….would make the bath easier to access.
Hi Jean, thanks for the ideas! We did think about a pocket door, that would be the most perfect option for sure. The problem is we’d have to completely redo the infrastructure of the wall in order to allow a door to slide in. It’s doable but definitely not cost-effective. We’re going to rig the door so it opens “out” instead of “into” the bathroom. Yes, definitely a pedestal sink. And YES, we saw a similar shower online, it was like a glass tube that would fit perfectly! We’re trying to locate something like that right now.
I LOVE before and after projects! This is a huge project and I don’t envy all the work, but as with anything, the end result will be worth it, I’m sure!
Definitely a lot of work, Christina! I agree though, we’re confident the end result will be worth it!
If you can multi-purpose some things it could help. I don’t really have specific ideas, but I think you might find ideas by looking at the amazing mini house or apartment things that are floating around Facebook occasionally. If they can do a whole house in maybe 100 square feet, your project will be spacious. Look at camper equipment for the shower, maybe.
Definitely, Joyce, we’re going to be spending more time looking at pics of other micro-dwellings online and getting some ideas from those. 250 square feet is spacious indeed compared to 100 square feet! :)
I can just see the gorgeous potential of these homes! Good luck to you, it’s going to be absolutely fantastic once the dirt, grime, and issues are all gone!!! Love it.
We are determined to really make it shine, Fabiola! :)