Danish Rye Bread (Rugbrød)
This post may contain affiliate links. See my disclosure policy.
This authentic Danish rye bread recipe (rugbrod) is easier to make than you may think. It’s packed with nutrients, has a fantastic texture and old-fashioned flavor and is just plain delicious! Whether you prefer a bolder or milder flavor, you’re completely in charge of that in determining how long you allow the batter to ferment.
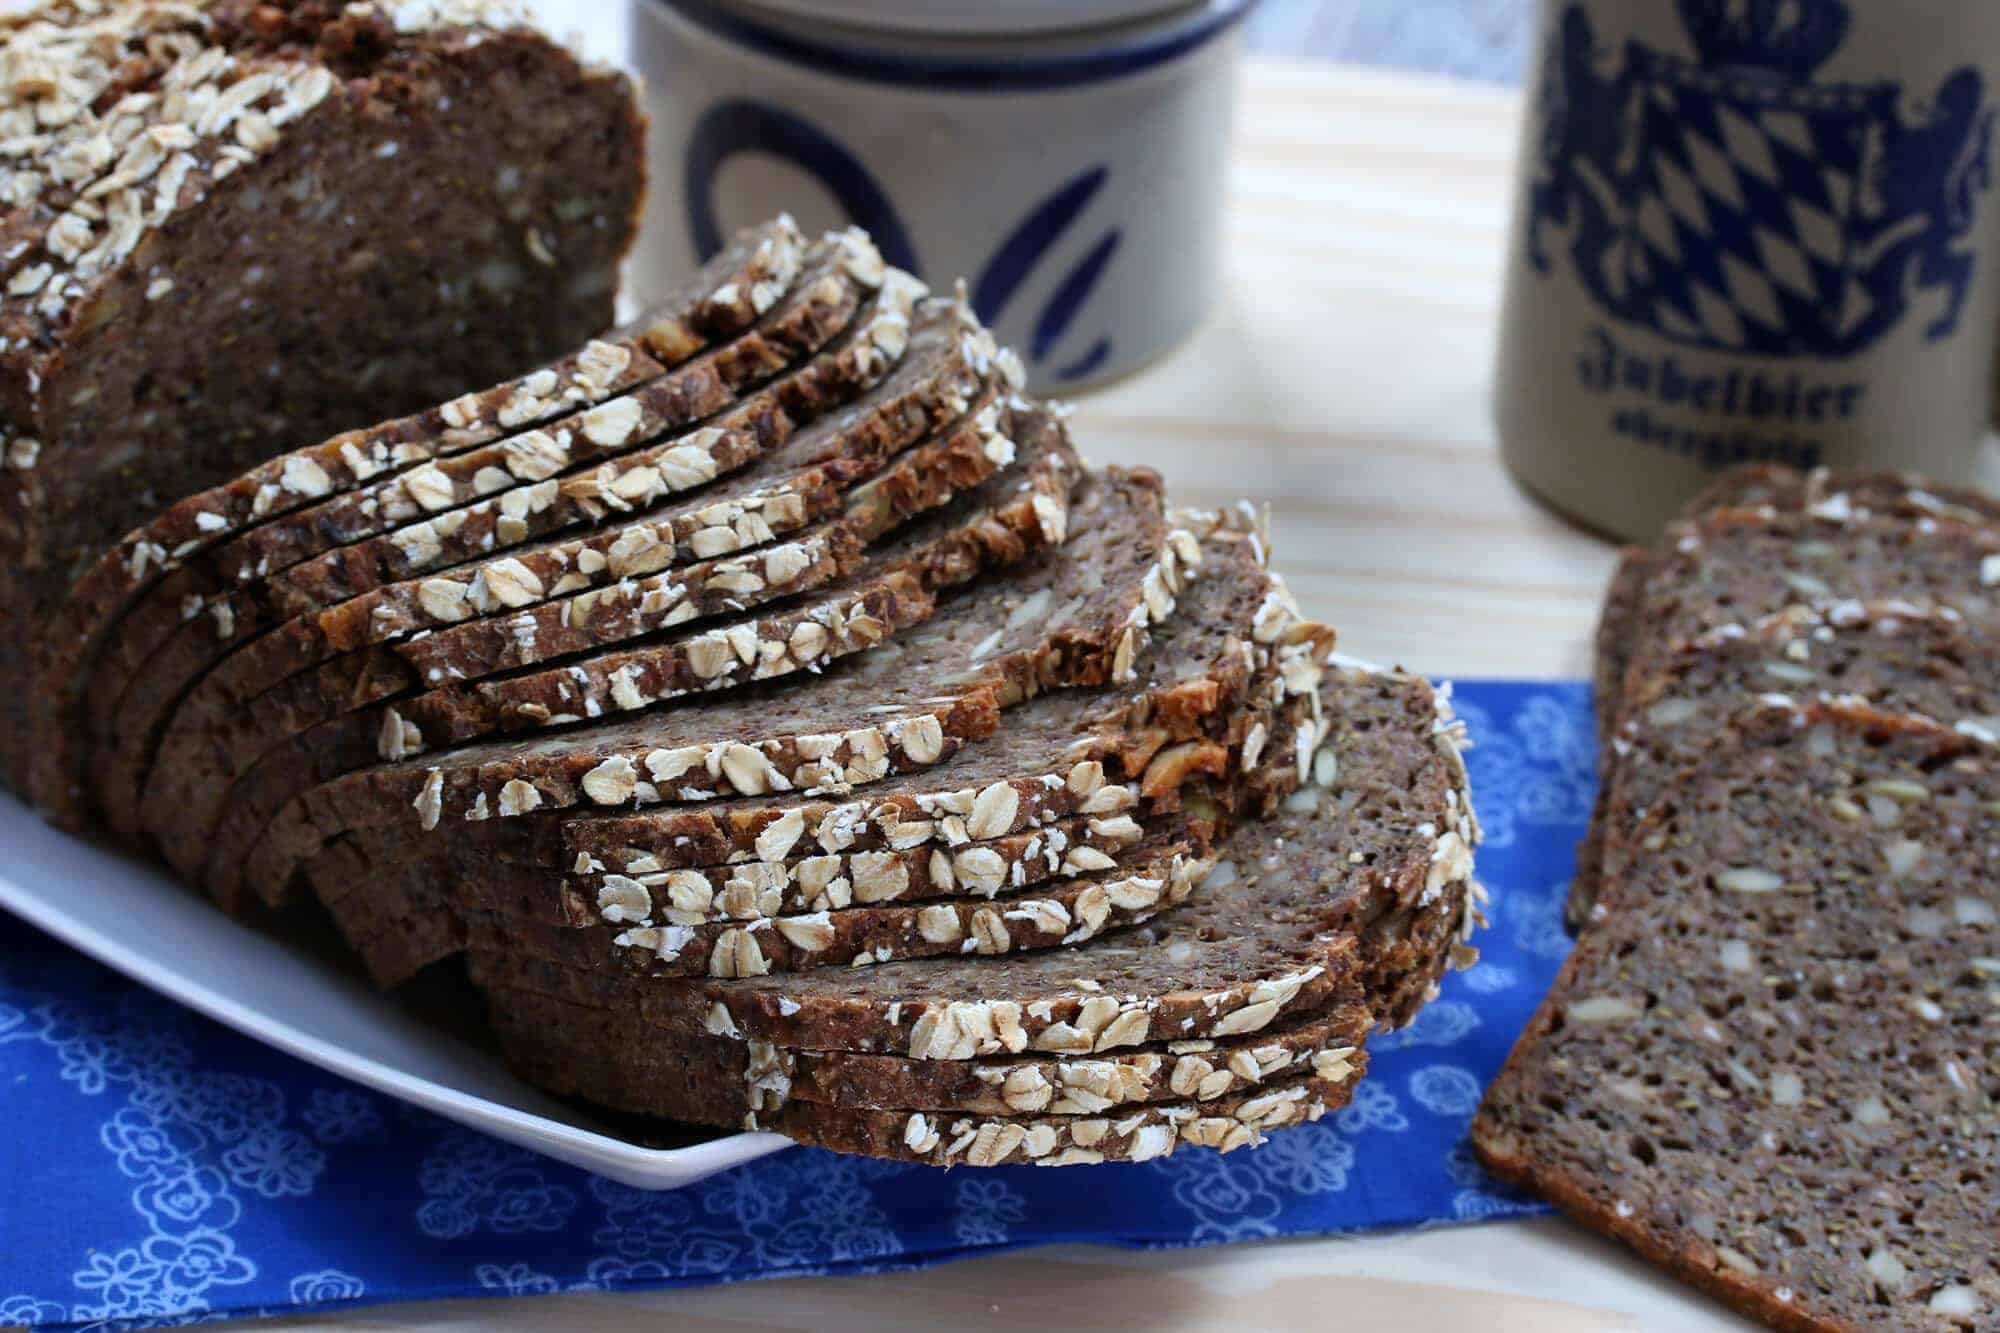
I love breads of all kinds, but there are two kinds that I especially love: Ones that are perfectly crispy on the outside and fluffy on the inside (eg, baguettes) and whole grain breads that are very dense and hearty like the kind I grew up with in Germany (eg, Vollkornbrot, Roggenbrot, Schwarzbrot, etc) and this Danish rye bread.
Smorrebrod
In Germany and throughout Scandinavia dense whole grain breads are particularly popular. You’ll see them served cut up in squares for a variety of hors d’oeuvres (for example, topped with gravlax/smoked salmon, a dollop of crème fraîche or hard-boiled eggs and a sprig of dill), served for breakfast with a tray of sliced cheeses and cold cuts, enjoyed for open-faced sandwiches or simply slathered down with good butter and jam.
In Denmark this rye bread (rugbrød) serves as the basis for their smørrebrød (ie, smorgasbord) wherein it is served buffet style with any number of fine toppings and is also a common accompaniment for many meals. Traditional options include herring, pickled vegetables, liver pate, smoked salmon, and sliced hard-boiled eggs. This Danish Rye Bread recipe is just what you need to create your smorrebrod!

I’ve known many people who have visited Denmark or Germany, fell in love with this type of bread and returned home to their countries unable to find it there. I haven’t been able to find it anywhere here in the U.S. except for German specialty stores and World Market stocks a very small selection of dense German breads. Though specifically Danish sourdough rye bread I haven’t found anywhere here for purchase. The good news is you can make it yourself and I’m going to be posting several recipes for this wonderful style of dense, hearty European bread.
We’re going to start with a favorite among many, Danish Rye Bread. And while this bread is also popular in Germany, it claims particular importance in Denmark, indeed it’s practically one of its national foods, so we’re going to go ahead and ascribe this bread to the Danes. (Plus it will make the maternal side of my husband’s family happy, they’re fiercely proud of their Danish ancestry. And I have some Danish ancestry myself, so we’re all happy.)
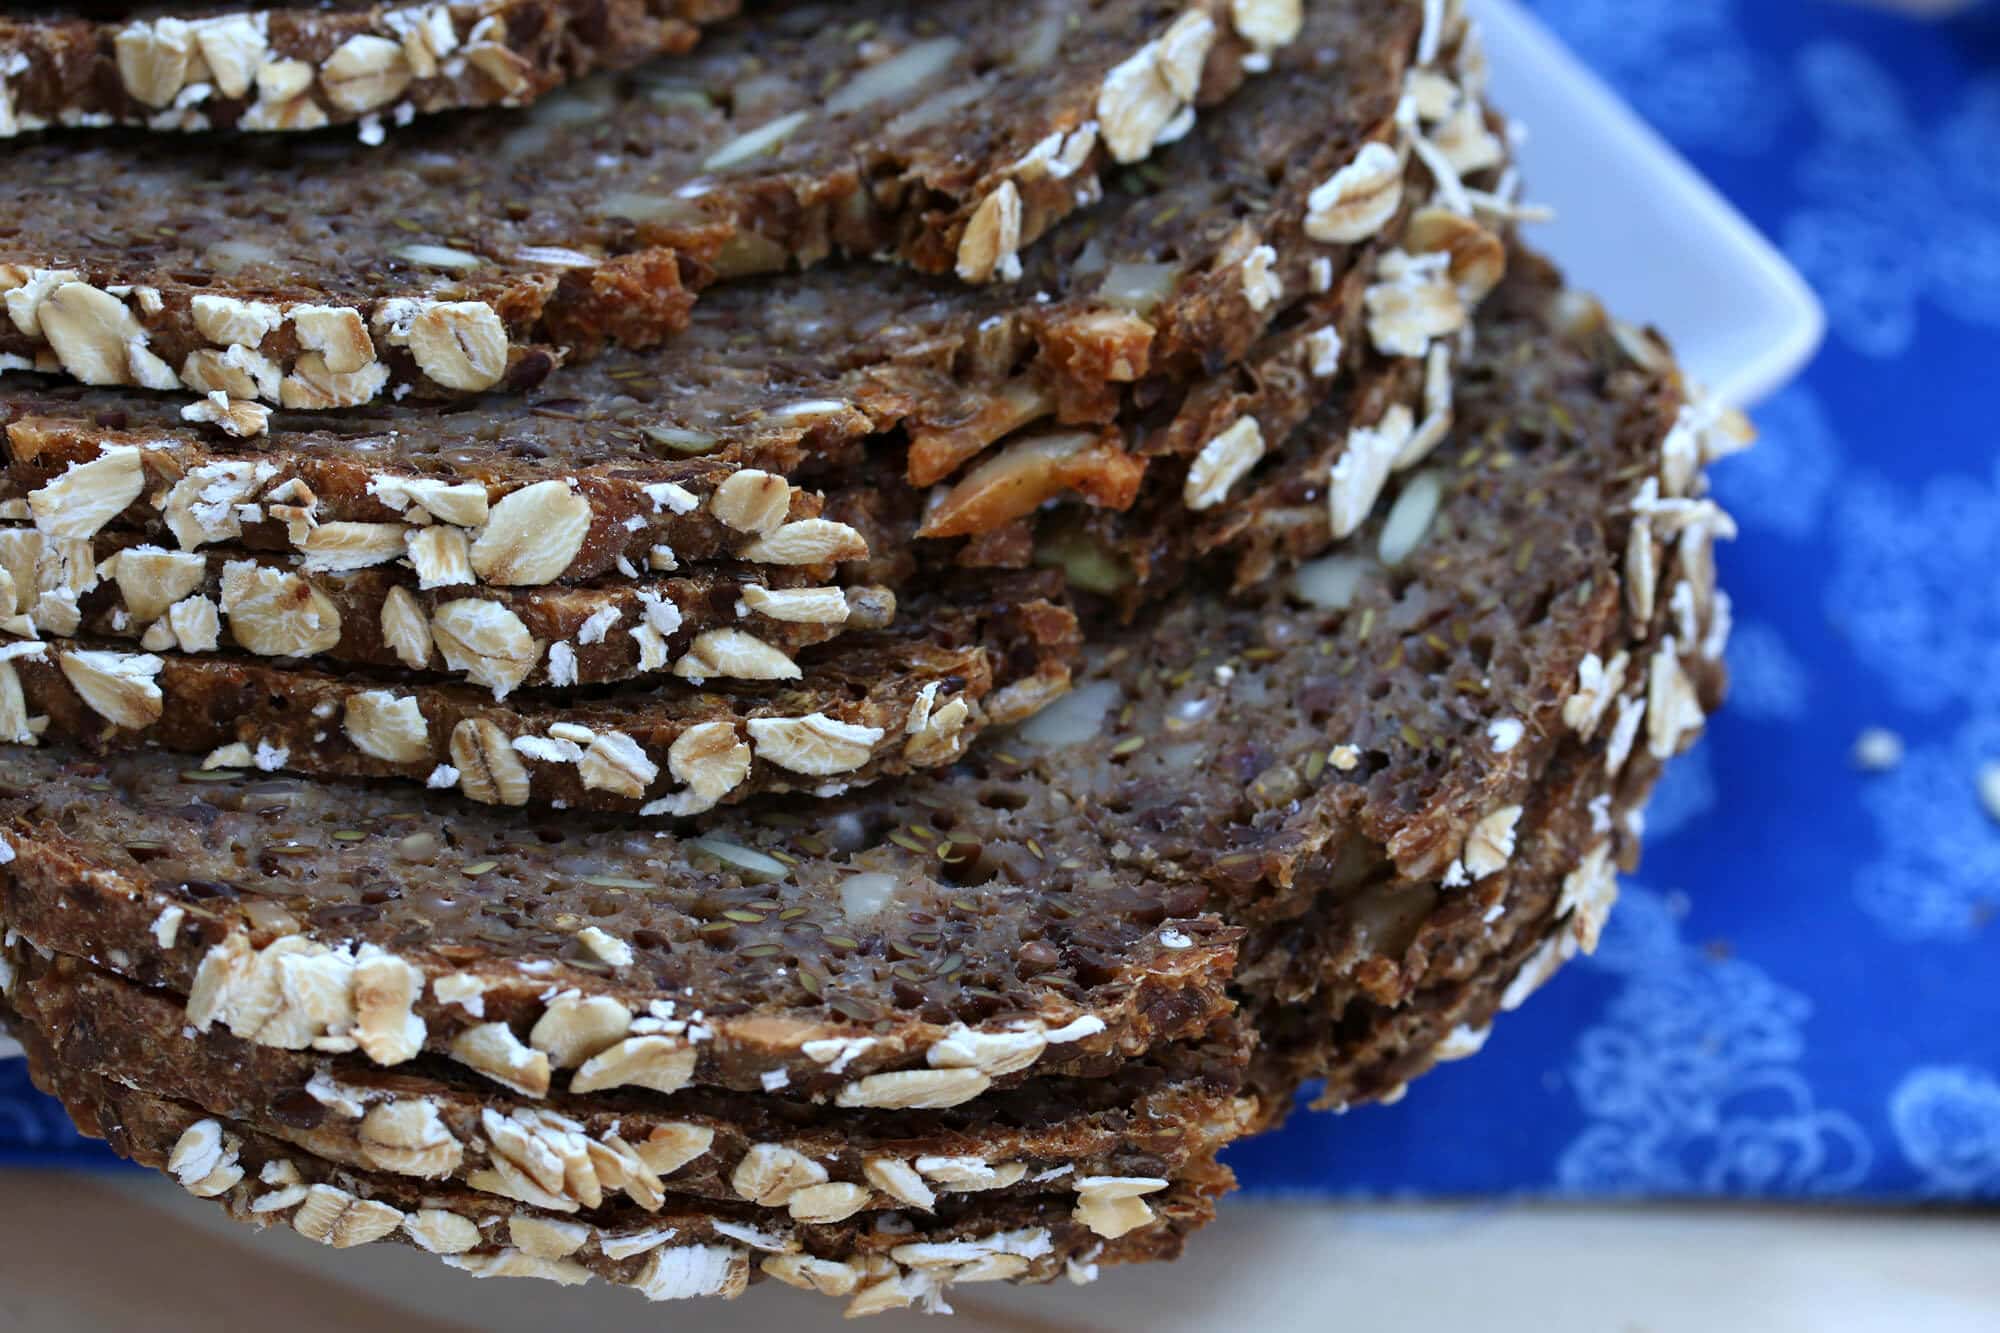
How to Make Danish Rye Bread
Danish rye bread is a sourdough bread that traditionally takes 2-3 days to make. Here is a super simple version that cuts the fermentation time down to as a little as 24 hours without the need to tend and feed it. This version calls for a yeasty beer. Beer and bread are cousins, both traditionally made from the same two ingredients, water and grains. The alcohol in this bread is burned off during the long baking process while the beer contributes to a fabulous texture and consistency (and flavor, depending on which beer you use).
The bread dough is allowed to ferment for 24 hours at room temperature (or 48 hours depending on how sour you like the bread). This fermentation process neutralizes the phytic acid in the grains, a naturally occurring substance that binds nutrients so that the body cannot properly absorb them. Not only does phytic acid acid bind the nutrients of the grains themselves, it binds the nutrients of anything else you eat with the grains. Fermenting the bread dough increases its nutrients and makes the bread easier to digest. And even after sourdough is baked it continues to sour and only gets better in flavor over time.
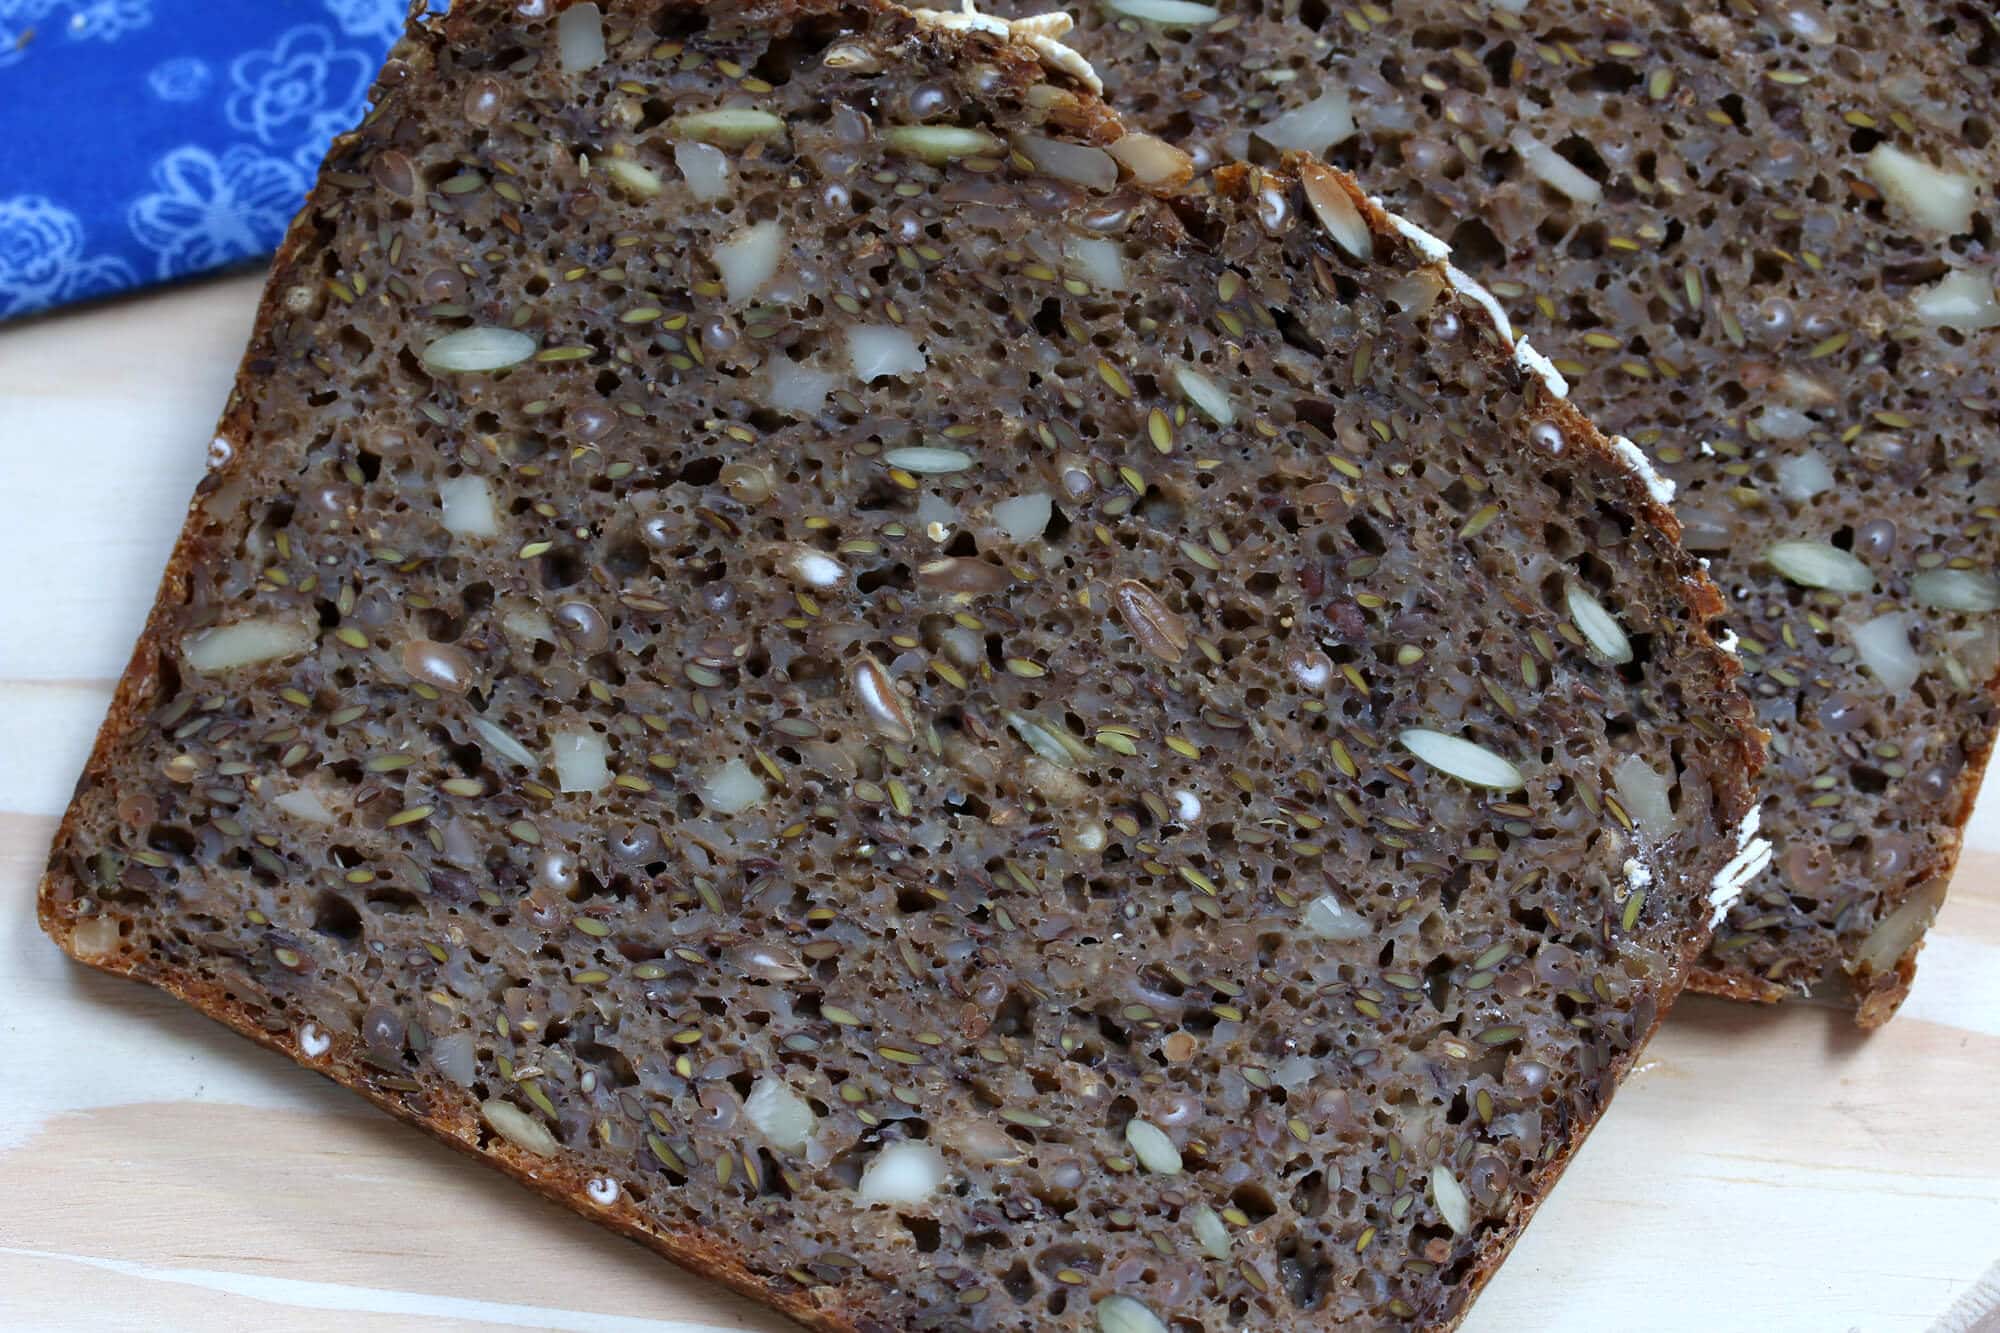
Danish Rye Bread Ingredients
This wonderfully nourishing bread is packed full of whole grains, seeds and nuts. The grains are included in the form of flour (rye and wheat), cracked rye berries and whole rye berries. Tons of similar styled breads incorporate these various forms of whole, cracked, coarsely ground and finely ground grains (eg, spelt, einkorn, wheat, kamut, etc) into the same loaf for a wonderful balance of textures, and that’s where a good grain mill really comes in handy. Not only can you grind your own fresh flour on demand with all the nutrients still intact (as opposed to flour that’s been sitting on grocery store shelves for ages), you can get exactly the kind of grind you need.
I buy my grains all in bulk, take out what I need to last me for a few weeks at a time and store the rest in a dark, cool place. I don’t even buy flour anymore, I grind all of my own flours, cornmeal and make my own baking mixes. For today’s Easy Danish Rye Bread I’m using my German-made KoMo Classic Grain Mill, another stellar example of German engineering and the pride and joy of my kitchen.
With a 12-year warranty, the quality and construction of the KoMo is amazing, plus it’s gorgeous and something you’d want to display on your counter. You can grind your grains as fine or coarse as you like. I use it nearly every day to make my own flours, cornmeal and mixes and cannot recommend it highly enough.
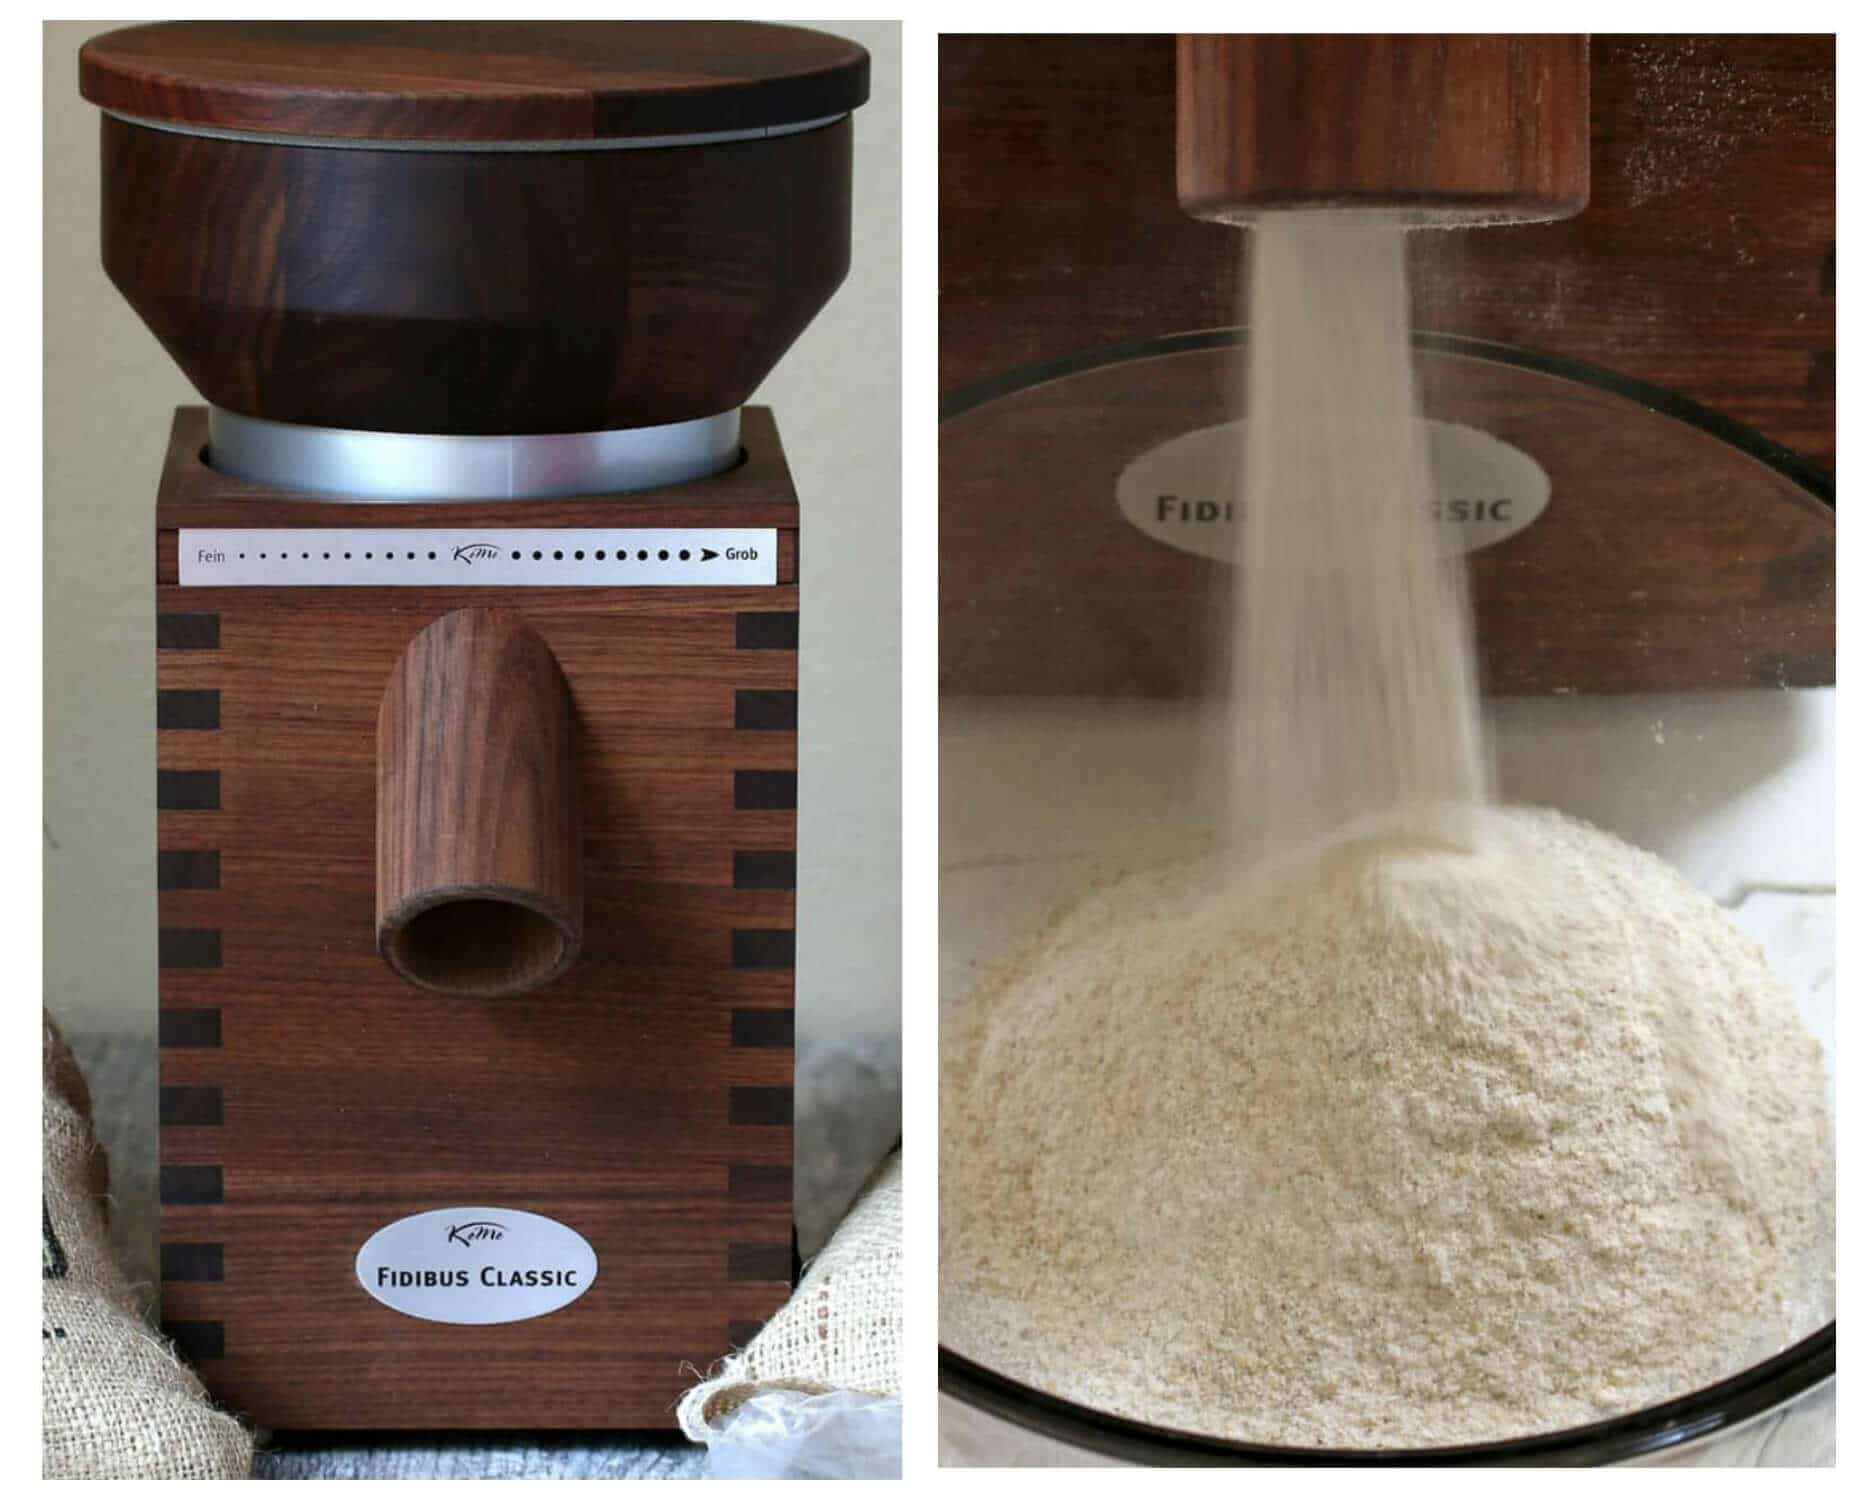
Check out my video below where I talk about some of the KoMo Classic Grain Mill’s features and show it in action in making today’s Danish Rye Bread!
Danish Rye Bread Recipe
Let’s get started!
If you’re grinding your own rye and wheat flour and cracking your own rye berries you’re in great shape! If you don’t have a grain mill you can easily find rye flour in grocery stores and you can “crack” the rye berries yourself by very briefly pulsing them in a good/powerful blender or food processor or smashing them in a bag with a meat mallet or other heavy object.
Combine all of the dry ingredients in a stand mixer bowl. Stir the yeast and sugar into the warm water and let sit for 10 minutes. Add all the wet ingredients to the dry ingredients.
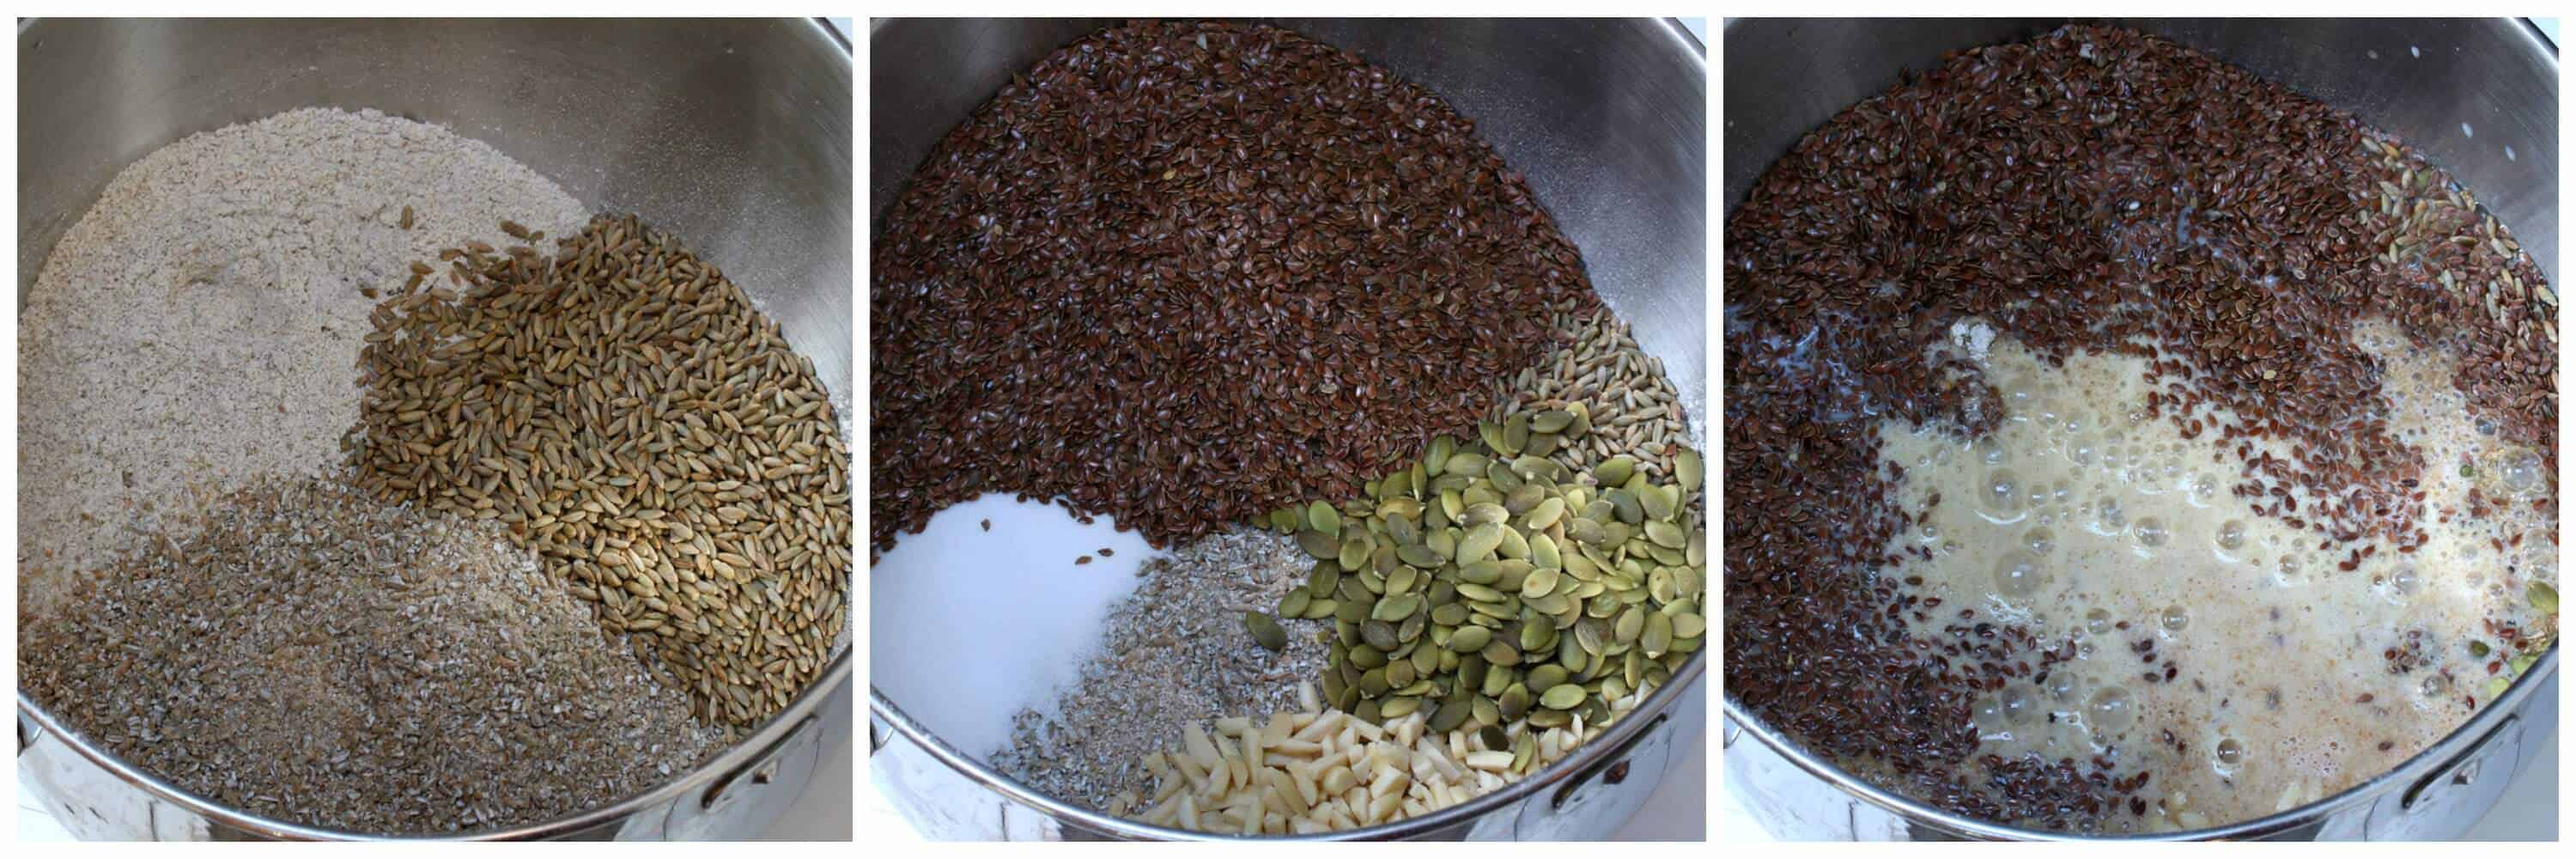
Give everything a stir manually to combine, then attach the dough hook on the stand mixer, set it to the bread setting (#2), and knead for 10 minutes. The dough will be very sticky, loose and not remotely malleable (ie, incapable of being shaped).
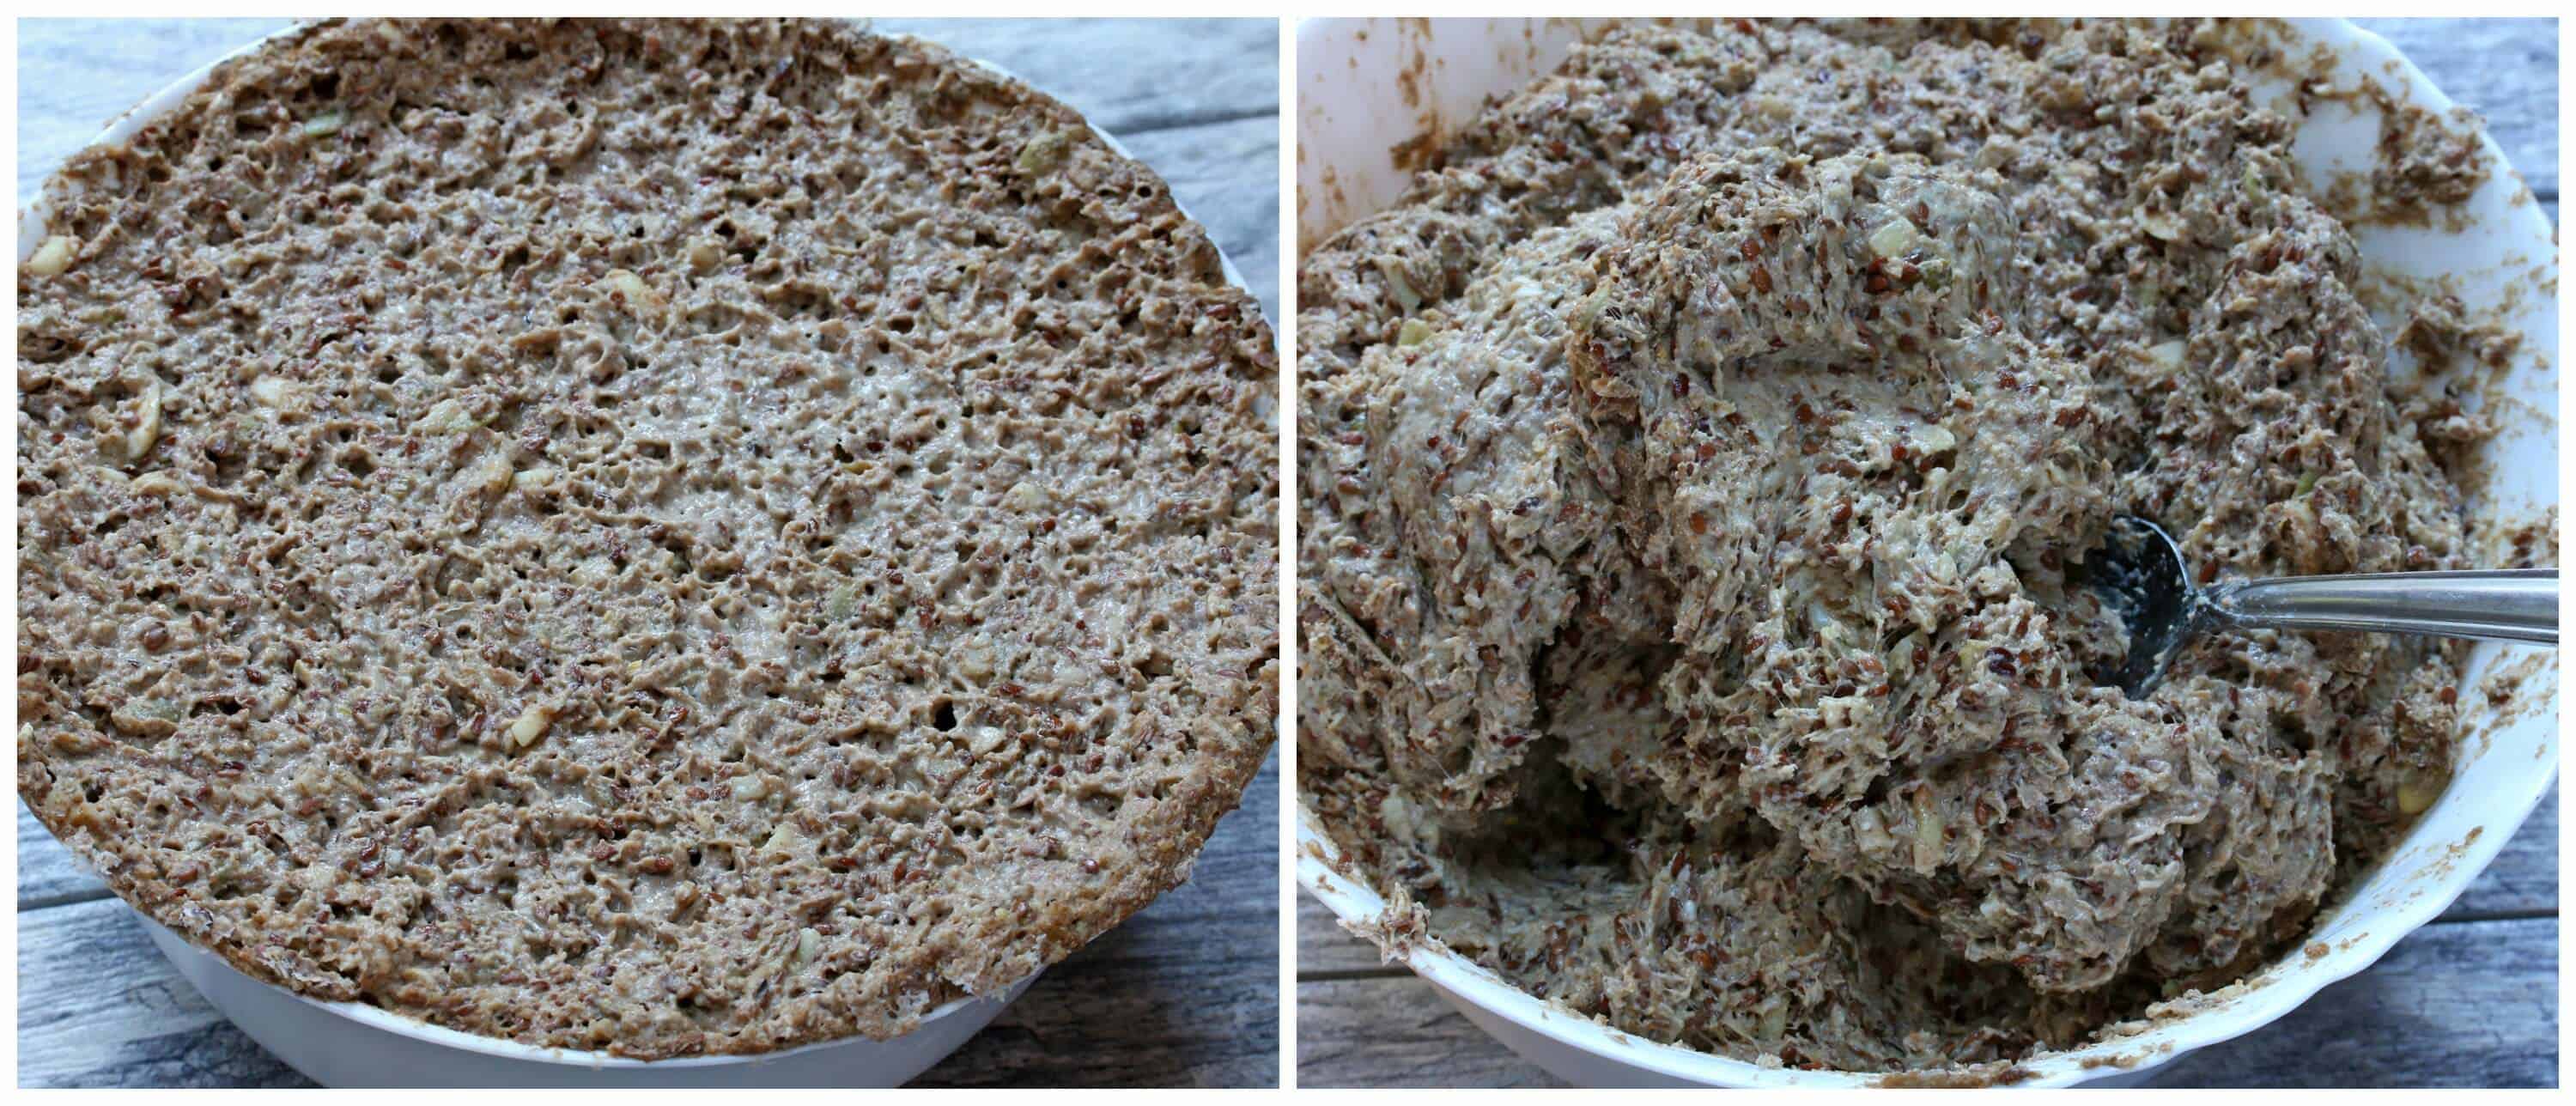
Scoop the dough into a very large non-metallic bowl. The dough will bubble up so use a very large, deep bowl with plenty of head room. Cover the dough loosely with plastic wrap and set it in a warm place (ie, room temperature) for 24-48 hours, depending on how sour you want the bread. I’ve done both with great results. If you’re only letting it ferment for 24 hours we recommend first soaking the whole rye berries overnight before using them (drain thoroughly).

After 24 hours the dough will be nice and bubbly with a very gooey texture.
For sourdough it’s recommended that you line your loaf pans so the acid in the dough can’t react with the metal. I use and love the Parrish Magic Line bread pan made of heavy gauge aluminum with straight edges (made in the USA). It’s a 9 x 5 x 3 inch loaf pan.
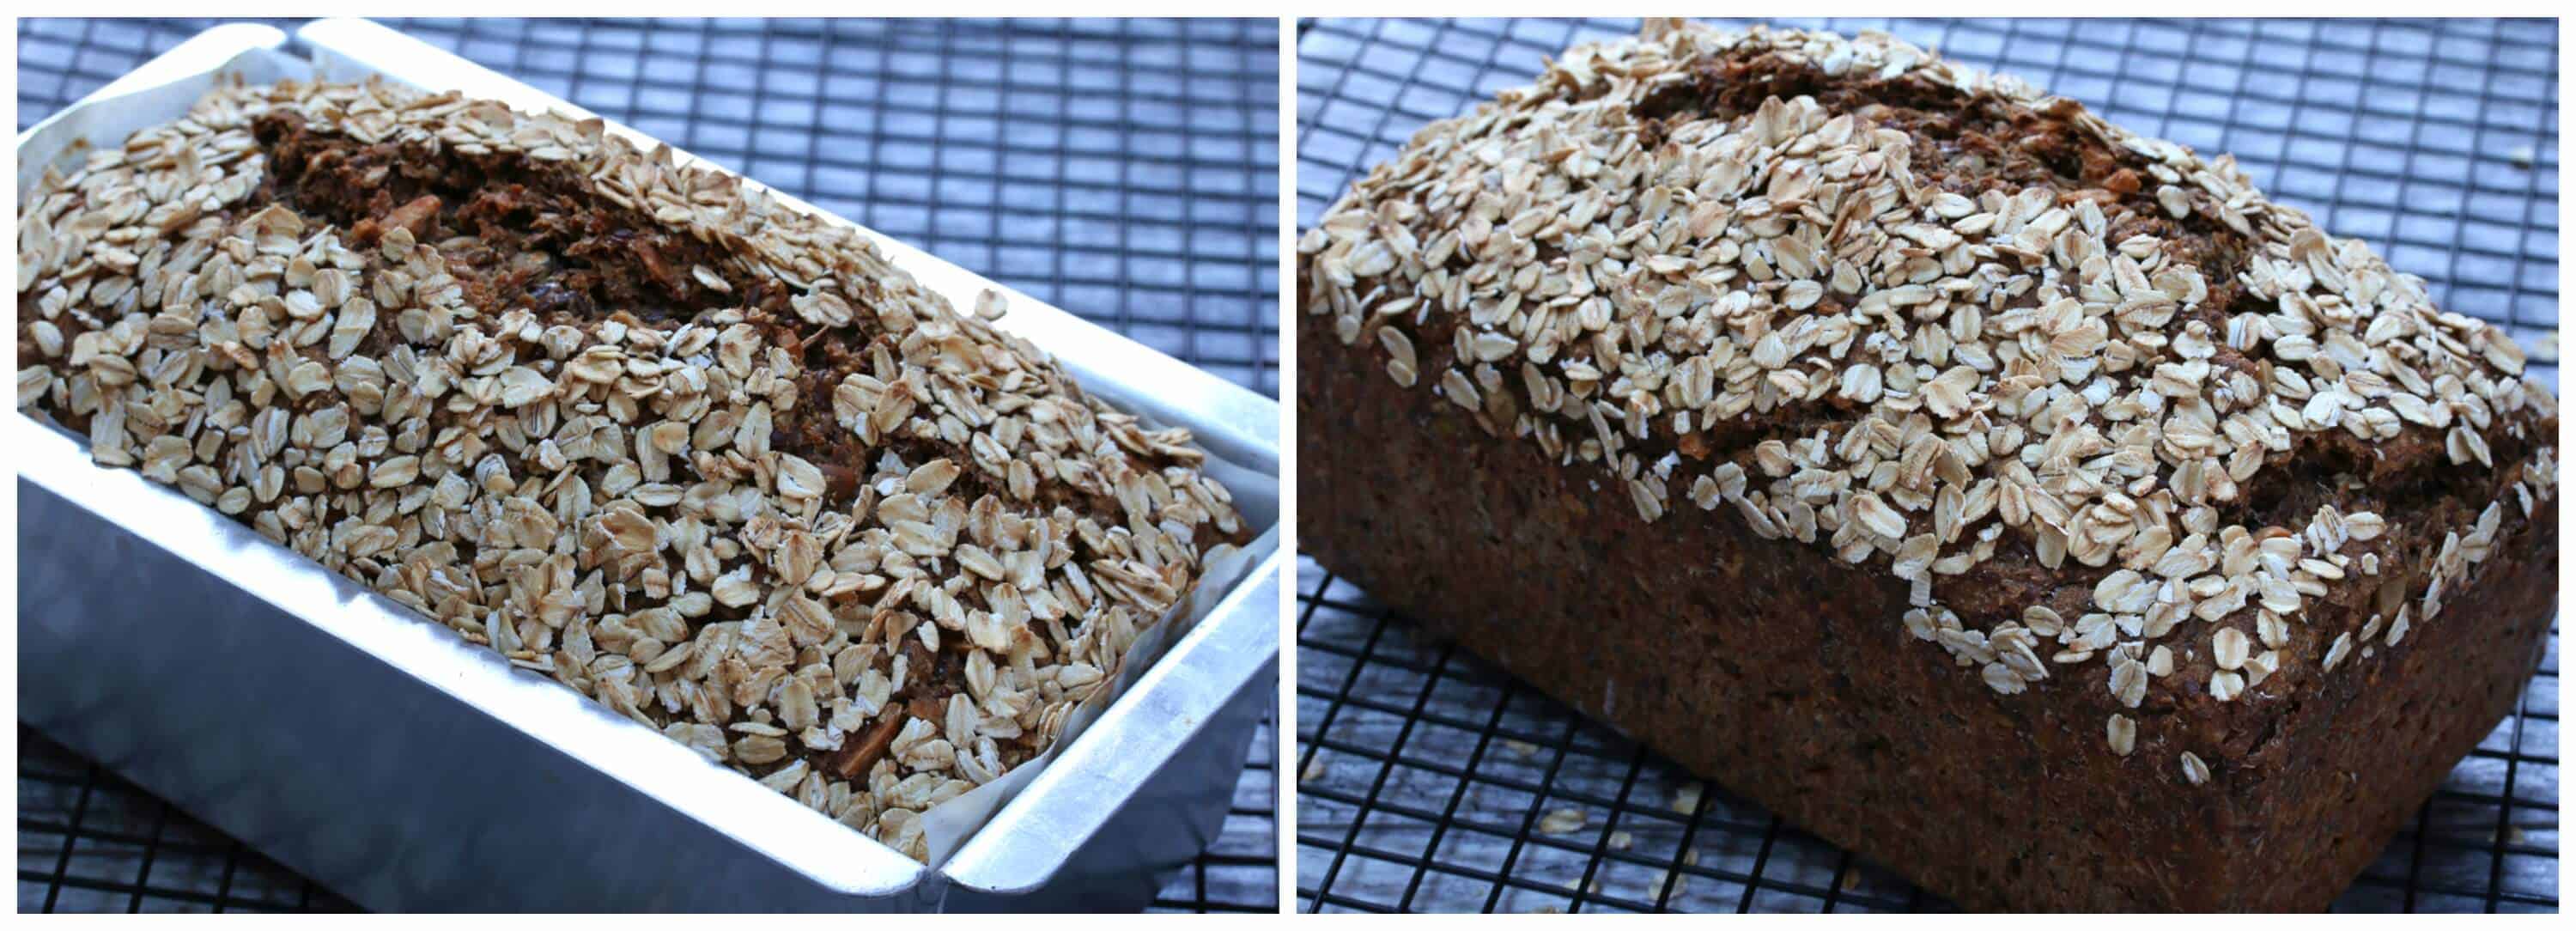
Scoop all of the dough into the loaf pan, patting it down. It’s a lot of dough but it’ll fit in there, just pat it down (be sure you’re using a 9x5x3 loaf pan). Brush the top with some water and sprinkle some oats evenly over it.

Bake at 350 degrees F for 100-120 minutes or until the center is done. For best and most accurate results use an instant read thermometer and aim for an internal temperature of at least 210 degrees F.
Let it sit for 5 minutes before removing it from the pan. Let the bread cool completely before slicing it. Your rugbrod is ready!
To prolong its shelf life I recommend storing it in the refrigerator or freeze part of it if you know it will take you a while to go through it.
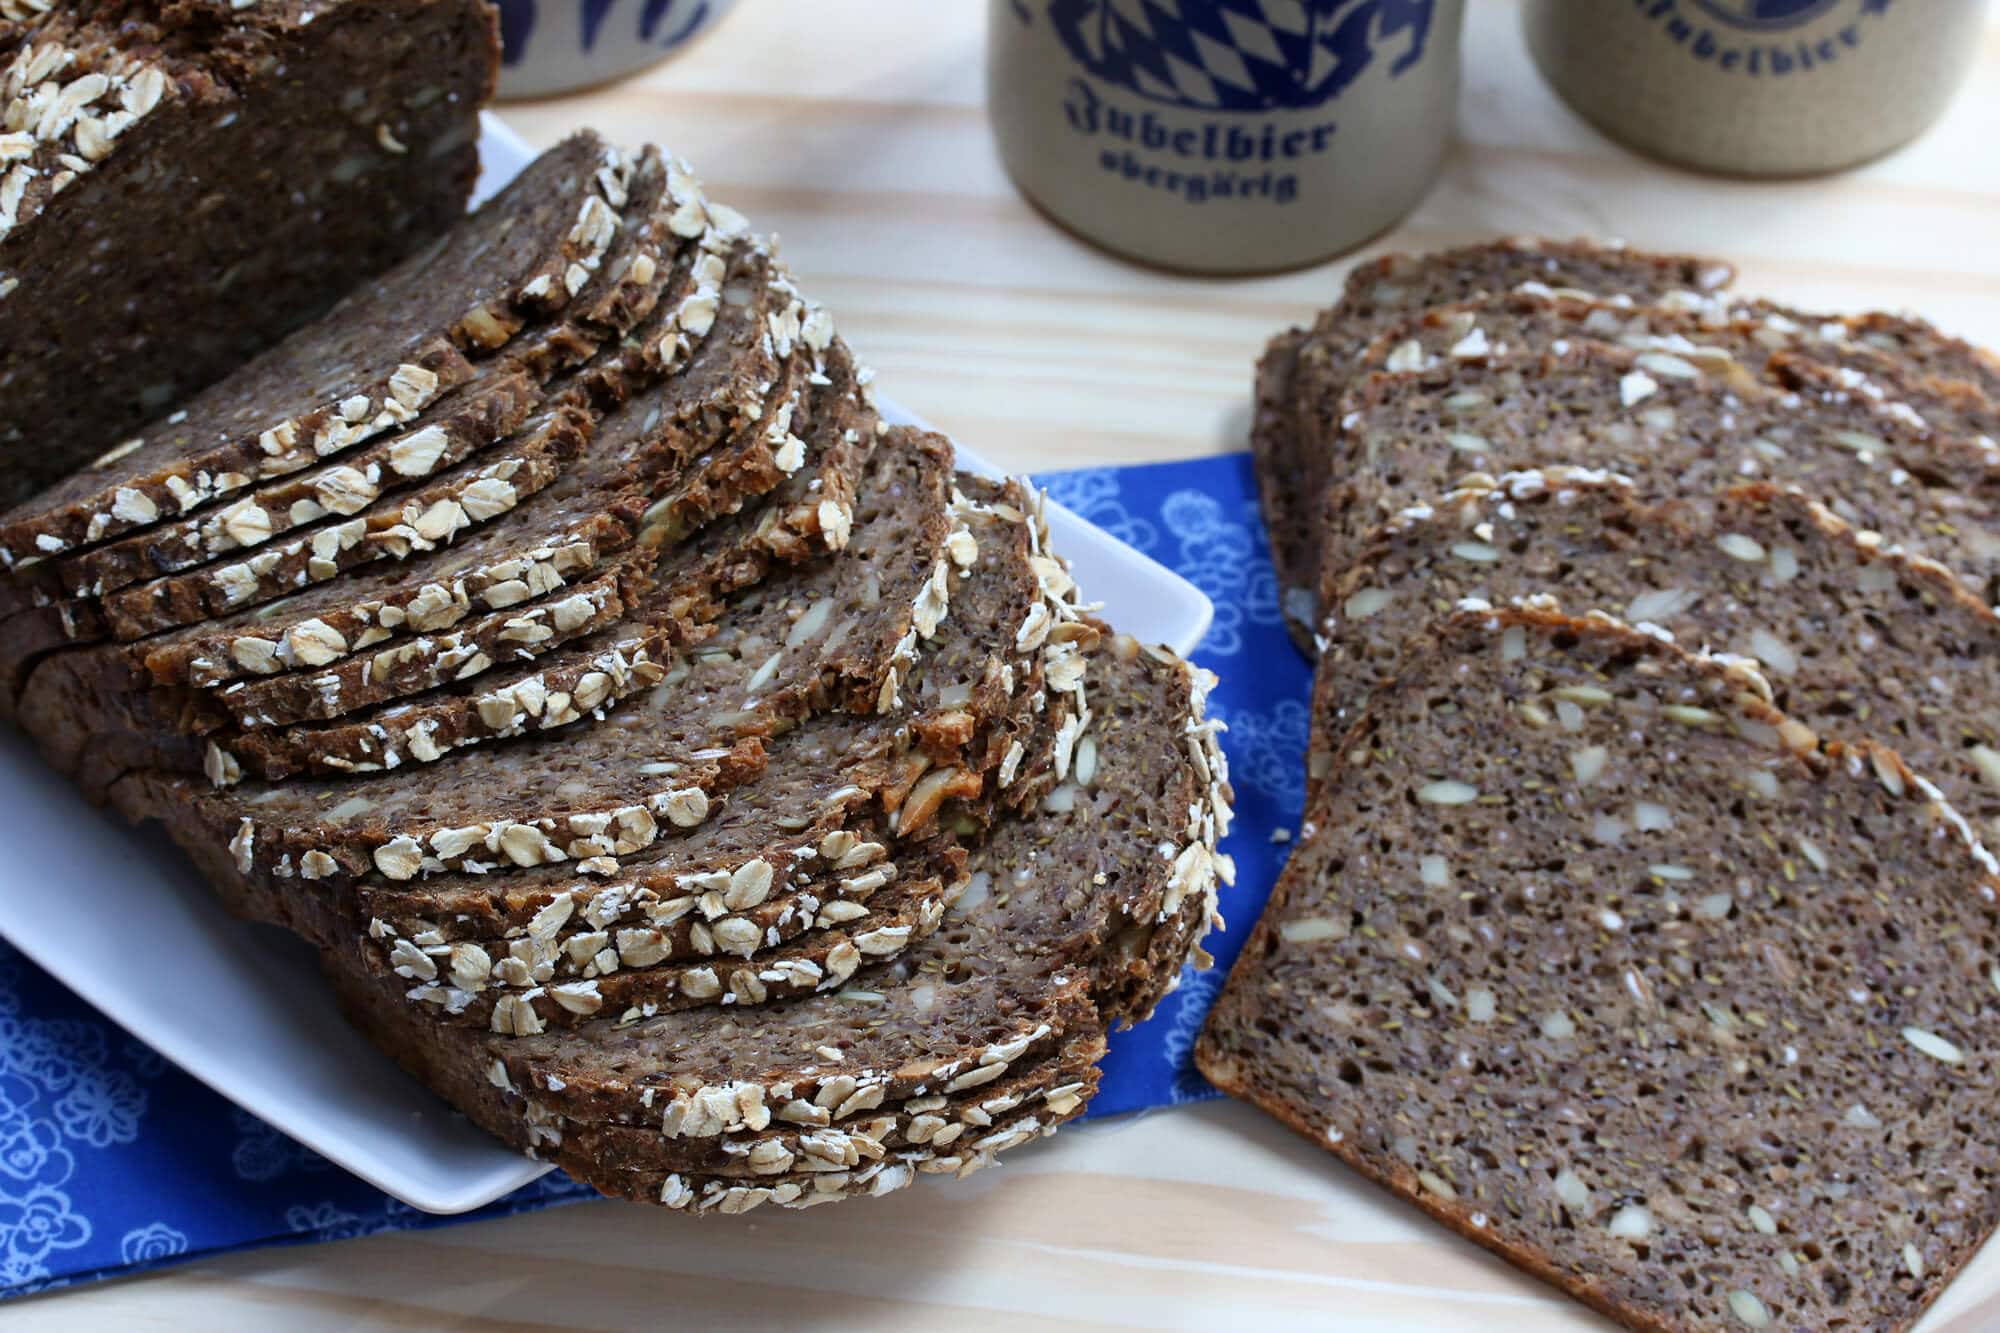
In order to get nice thin, clean slices that look like something you bought at a professional bakery, I recommend a slicer. Chef’s Choice Slicers are consistently ranked at the top and they get excellent reviews. I also use a slicer for meats and cheeses. Whenever I find chunks of cooked ham, turkey or cheese on sale I get those and slice them myself – it’s cheaper than buying them at the deli. At the very least you’ll need an excellent bread knife and for that my favorite knife, hands down, is the Cutco 9 3/4″ Slicer. It glides smoothly through bread and meat like no other.
Enjoy!
For more delicious breads from around the world be sure to try my:
- German Bread (Vollkornbrot)
- Lavash
- Injera
- Dosa
- Naan Bread
- Sourdough Naan
- Sourdough English Muffins
- Crumpets
- Olive Rosemary Focaccia
- Skillet Cornbread
Save This Recipe
Danish Rye Bread (Rugbrød)
Ingredients
- 2 cups lukewarm water
- 2 teaspoons dry active yeast
- 2 tablespoons sugar
- 2 1/2 cups dark rye flour
- 3/4 cup all-purpose flour
- 1 3/4 cup cracked rye berries (very briefly pulse whole rye berries in a strong blender or food processor until they're broken up into coarse pieces OR smash them in a heavy duty bag with a meat mallet or other heavy object)
- 1/2 cup whole rye berries
- 1 1/4 cup whole flaxseeds
- 1 1/3 cup sunflower seeds or combination of sunflower seeds ,pumpkin seeds and/or chopped almonds
- 3 teaspoons salt
- 1 cup dark beer (see note)
- 1 cup buttermilk or kefir (vegan: 1 cup almond milk mixed with 2 tablespoons cider vinegar) (I often use homemade kefir in place of buttermilk)
- Traditional rolled oats for sprinkling
Instructions
- Stir the yeast and sugar into the lukewarm water and let sit for 10 minutes until the yeast is frothy.
- Combine all the dry ingredients in the bowl of a stand mixer. Add the yeast mixture, beer and buttermilk. Stir to combine.Fit the stand mixer with a dough hook and knead on the bread setting ("2") for 10 minutes. The dough will be very sticky, loose and not remotely malleable (ie, incapable of being shaped).Scoop the dough into a very large non-metallic bowl with plenty of head space (the dough will bubble up). Cover loosely with plastic wrap and let it rest in a warm place (room temperature) for 24-48 hours, depending on how sour you want the bread to be (be sure to ferment it for at least 24 hours to ensure enough of the liquid is absorbed). If you're only letting it ferment for 24 hours we recommend first soaking the whole rye berries overnight before using them (drain thoroughly).
- Line a 9x5x3 inch bread loaf pan with parchment paper (SEE NOTE). Preheat the oven to 350 degrees F.Scoop all of the dough into the lined bread pan, pressing down as needed. (It's a lot of dough but it will fit.) Brush the top with water and sprinkle over evenly with the rolled oats.Bake on the middle rack for 100-120 minutes or until the center is done. For best and most accurate results use an instant read thermometer and aim for an internal temperature of 210 degrees F.Let the loaf cool for 5 minutes before removing it from the pan. Let the loaf cool completely before slicing. Keep stored in an airtight container. To prolong its shelf life I recommend storing it in the refrigerator or freeze part of it if you know it will take you a while to go through it.
Notes
* You can substitute water or more buttermilk for the beer
Nutrition
Originally published on The Daring Gourmet January 28, 2016



I am attempting this recipe for the first time, followed the recipe to the letter, put the bowl of dough on a desk near the wood burning stove…warm, but not hot…no bubbling…the yeast did proof and bubble in the water with the sugar. It has been fermentin ( i hope) for 24 hours. I will leave it for another 24…hope the results will improve…any suggestions?
Have you had the chance to check the metric values for this recipe? Something still feels a bit off. This morning, I did a quick comparison between your weights and what I get in my kitchen — and there are significant differences for the flours and rye berries.
Here is a link to to how things compare: http s://i.imgur.com/P8QmNoS.png
The rye/AP flour differences might be due to how we measure (the classic scoop v. spoon into issue). The seed weights are minor (and they are inclusions, so no worries there.)
But the weights for cracked rye and rye berries are significantly different. Any thoughts what might be going on?
Many thanks.
I couldn’t get your link to work, but you are correct. I just measured the whole rye berries and 120g was 1/2 cup and 1 tablespoon. I went by weight to soak them. I hope it works!
Help! I made this dough yesterday and 22 hours later my dough has not bubbled up or risen at all. It looks unchanged. My yeast proofed nicely, I kneaded for 10 minutes in my mixer, and the bowl is sitting on a heated floor, loosely covered in plastic warp. I did not substitute anything. I used a cup of Guinness, because that’s all I had for beer, and buttermilk. I plan to let it go another day as I did not pre soak my rye berries. Did I miss something? Thank you!
Also, a food processor nor my meat tenderizer did not crack the rye berries, but my spice grinder did an excellent job.
Hi Nancy, how did it end up going after sitting another day?
Well, it did not change, it seemed like it formed almost a crust on the top preventing it from rising- but I baked it anyway and though it was DENSE, it tasted good! I will make it again and see if I get a different result. It was hard to slice, so hopefully the next try will be easier. If not, I’ll try a slightly lighter version that calls for more all purpose flour. I made this loaf in New Hampshire, but the next try we’ll be down in Miami Beach- maybe the warmer weather will help the rise.
I also didn’t see the dough rise or bubble after 24 hours. I added in 1/2 tsp of yeast and 2tbsp of gluten, which made the dough rise a bit. Gluten is supposed to help the yeast in rye flour.
Hi! Just wanted to thank you for the recipe and offer up my review and a few tips.
First off, I’ve tried making this style of bread about 5 times with different recipes since I lived in Germany in 2019 (now living in Canada) and none have come close until I tried your recipe and I’ve pretty much nailed it on the head! Will try again with sourdough starter in the future to balance out the boozy taste. I fermented mine for 36 hours, which I think was perfect because it already tasted quite beer-like (and I didnt even add beer, I replaced it with water) and if I waited until 48 hours I think it would have been too strong.
I wanted to offer a few suggestions to people trying this recipe from my own experience and what i’ve read in the comments (and perhaps you can adjust the recipe to clarify things).
1) I recommend using only cracked/smashed rye berries if your rye grains aren’t fresh. When I’ve tried to make this style of bread in the past the whole grains just didn’t hydrate, regardless of a 12 hour presoak. Therefore, this time I tediously chopped all my rye grain up by hand because my food processor wasn’t taking care of it, and there were no hard/dry grains in the resulting loaf!
2) The flaxseed is essential for creating that moist texture. I think this is what I was missing from my previous attempts which only called for whole rye and sunflower/pumpkin seeds.
3) Look at and smell your dough every 8-12 hours or so during the 24-48 hours to see if it’s hydrated enough and is at your desired level of fermentation.
4) How to manage the gummy interior/hard crust: Fully bake the bread. Mine was in the oven for 2 hours and 40 minutes and only got to 201F but I called it good, but I think about 3 hours would have gotten me to 205F and a slightly firmer interior. Then after it’s baking it’s very traditional to let it rest at least 1 full day, usually wrapped in a towel or plastic bag so the moisture can redistribute and the crust softens, and in addition rye flour can be very gummy unless it has that resting time after baking. Although I didn’t wrap it I did let the bread rest a full 24 hours before cutting into and the crust was much softer and i think the interior was a better texture.
5) Please, please, dear author, please add grams and mL to your recipe. You can simply do this by weighing things out without making the bread. it will help everyone try to make this in the future no matter where they live. In addition, adding the temperature you let it ferment at would also be very helpful.
So yes great recipe but there’s a few things that I think need to be addressed in the recipe.
Hi Rachel, I’m happy you enjoyed it and appreciate your detailed feedback! As for adding metric measurements to the recipes, that feature is already there: To the right of the list of ingredients you’ll see two boxes with “US Customary” and “Metric.” Simply click on “Metric” and it will automatically convert the measurements. Thanks again for your feedback!
I made the bread today and it tastes great. The only problem is that the crust is too hard to eat, and this is around 4 hours after I took it out of the pan. I’ll wait until tomorrow and try again. I had to bake the bread for almost three hours before the internal temperature got to 205, maybe the extra-long baking time made the crust so hard?
Hi, Kimberly!
Many sources say that flax seeds go via human digestive truck untouched. Did you consider cracking them before adding to the mix?
Thanks, Greg
Hi Greg, yes, whole seeds will go right through undigested. They’re good for roughage, insoluble fiber. To get the omega 3’s you would need to crack them but they go rancid very fast after cracking.
Can I split the dough between 2 smaller loaf pans (8”x4”). How long should it bake?
Hi Birgitte, there won’t be enough batter to fill two 8×4 pans. I haven’t baked this in smaller pans so I’m not sure of the baking time. You’ll need to check it earlier and use an instant read thermometer to determine doneness.
Can I use more rye flower instead of cracked rye berries ?
Thank you