Whether you’re making regular or Greek yogurt, it’s time to learn How to Make Yogurt! It’s incredibly easy, requires virtually no prep work and the outcome will amaze you: Wonderfully thick, creamy, luxuriously delicious yogurt! This homemade yogurt recipe is SO good and SO easy, you’ll NEVER need to buy store-bought again!
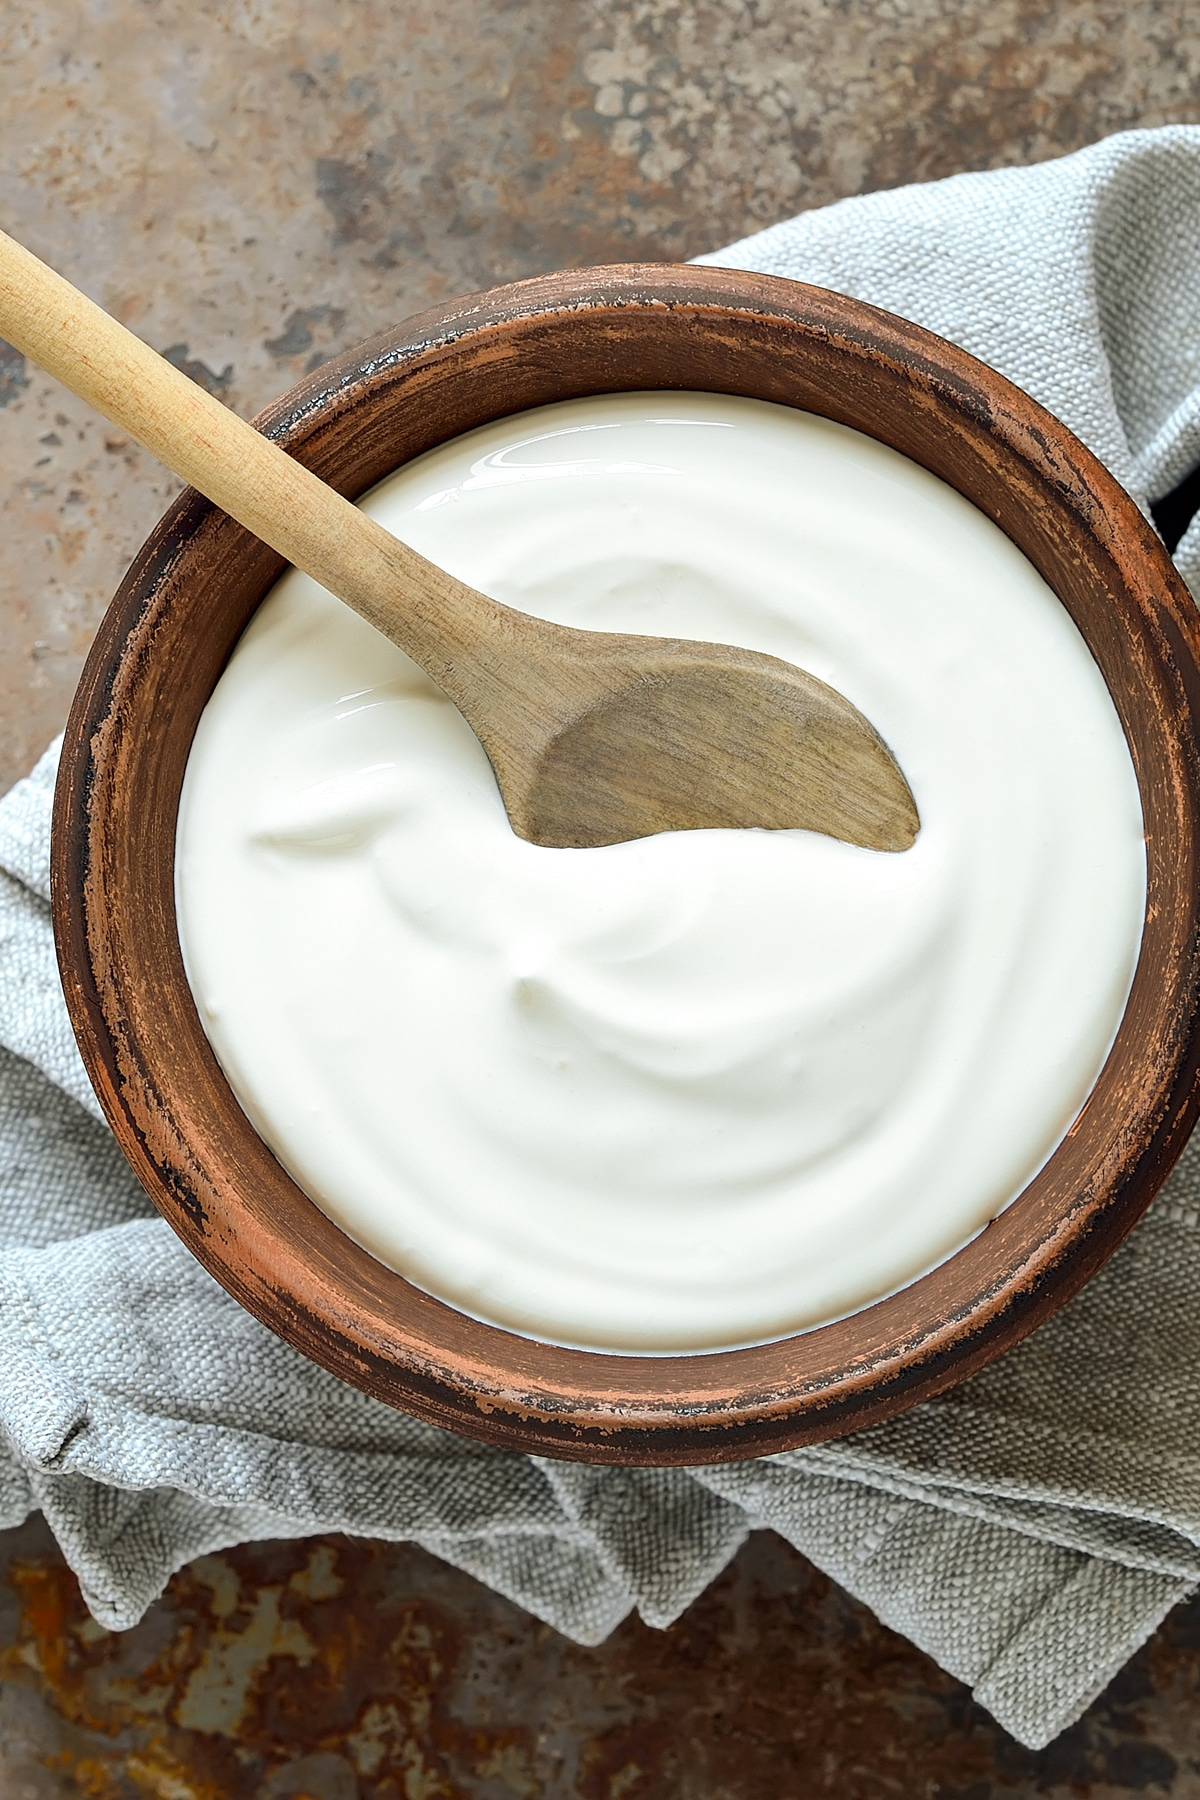
How long does it take you to pour a gallon of milk into a slow cooker? That’s how much prep time is involved in making this gloriously thick, rich, creamy Easy Homemade Yogurt recipe! And you have full control over its thickness – we’ll show you how to make Greek yogurt or regular yogurt, your choice!
Why Should I Make My Own Yogurt?
There are several advantages to making your own yogurt: It tastes better, has a better texture, is MUCH CHEAPER, and it’s MUCH HEALTHIER than store-bought because it has a MUCH HIGHER PROBIOTIC CONTENT. Really, it’s a complete win-win!
What Kind of Milk Should I Use to Make Yogurt?
For the thickest, creamiest yogurt we recommend whole milk but you can also use 2% and even skim milk.
How to Make Greek Yogurt
The difference between making regular and Greek yogurt simply comes down to how long you strain it. More on that in the recipe below.
What Do I Need to Make Yogurt?
- Milk
- Plain yogurt (as a starter culture)
- Cheesecloth
- Thermometer
- Pot or Slow Cooker
- Colander
Besides milk you’ll need some plain yogurt as a starter culture for your initial batch. Then you can use yogurt from that batch for your next batch and so on. There is no need to buy a special starter culture, all you need is plain yogurt. The plain yogurt will act as a starter culture to introduce healthy bacteria/probiotics to your homemade yogurt. It is essential that the yogurt you use has live cultures in it. Most grocery stores sell plain yogurt with live cultures but just be sure to check the label on the container confirm that it has l. bulgaricus and s. thermophilus in it.
You will also need some cheesecloth to strain the yogurt (trust me, it’s much easier than it may initially sound). I use and recommend this cheesecloth because it’s 100% unbleached cotton, is high grade, is very durable for multiple uses, and you get a ton of it. Overall it’s the best value I have found for the quality.
You’ll also need a thermometer. Heating the milk to right temperature and then reducing it to the right temperature are both critical to the success of your yogurt.
The other item you’ll need is either a slow cooker or a large, heavy stock pot and a colander for straining.
© Piliphoto | Dreamstime
Slow Cooker or Stovetop to Make Yogurt?
You can use either with great success and the choice is entirely up to you.
Using a Slow Cooker:
Pros: The heating process is slow and gentle so there is no risk of scorching the milk and having to throw it all out. Plus it’s hands free and the milk can heat up over the course of a few hours while you’re doing other things.
Cons: It takes a lot longer to heat up the milk than if you’re using a pot. But that’s only a disadvantage if you’re in a hurry.
Using a Stock Pot:
Pros: It’s much quicker than using a slow cooker. The milk heats up faster and then all you have to wait for is for it to cool back down and then set.
Cons: It requires your constant attention and as the milk gets hotter it requires constant stirring in order to prevent the milk from burning (and it can burn very easily if you’re not paying attention).
You can see that both have their pros and cons and it purely comes down to personal preference. I use and like both methods but generally use my slow cooker/crock pot more often because of the hands-free convenience of plugging it in and going about my daily tasks. Any crock pot or slow cooker will do the job. I use and love my Hamilton Beach Stay or Go 7 Quart Slow Cooker.
Do I Have to Bring the Temp to 180 F if I’m Using Pasteurized Milk?
Virtually every yogurt-making recipe will tell you to heat the milk to 180 degrees F before bringing it back down to 110 degrees F to inoculate it with a starter culture. The question you may ask yourself is, if I’m using pasteurized milk already do I need to heat it to 180 degrees or can I just skip that step?
Here’s what I’ve learned: Heating it to 180 degrees isn’t for the purpose of killing unwanted bacteria as much as it is for creating a thick texture. The heat changes the structure of the proteins in the milk and enables it to thicken into yogurt. I wanted to test that for myself and heated the milk to just a little over 110 degrees, added the starter culture, and proceeded from there. It hardly thickened at all. But when I heat it to 180 degrees, then let it cool to 110 degrees before adding the starter, it thickens up beautifully.
What is Whey?
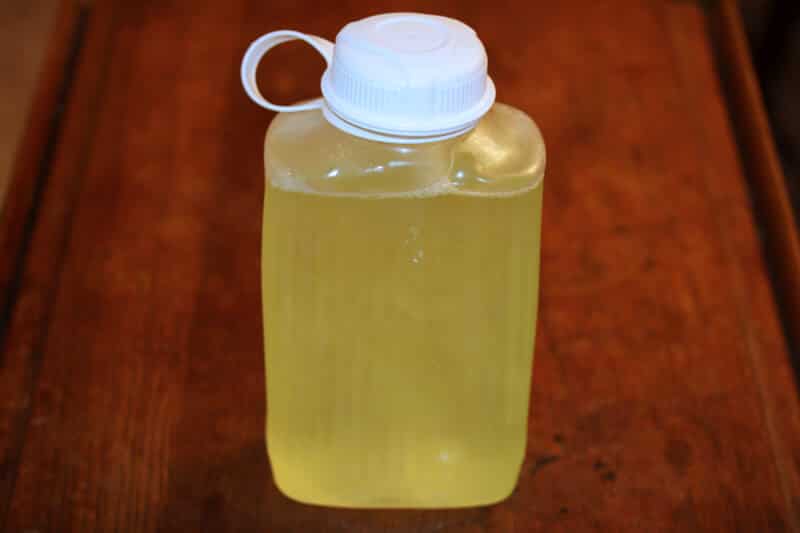
That yellowish liquid that’s left over after you strain the yogurt….that’s called whey. When making homemade yogurt, you’ll always end up with some whey as a by-product. The longer you strain the yogurt, the thicker it will get, the more whey it will yield. If you strain it to full capacity for an extra thick Greek yogurt, you’ll end up with about 8 cups of whey, but every batch will be different.
Whey is milk minus the fats and solids. It’s basically water with lactose and protein. And it’s the protein that’s the valuable ingredient here. Milk contains two types of protein, casein and whey. Most of the casein ends up in the yogurt and the whey is in the liquid by-product.
How to Use Leftover Whey
I’m so glad you asked! Whey is a great source of protein and is used in powdered form in protein shakes and protein bars. But how can you this leftover liquid whey? Here are a few ideas:
- Use it in place of water when you’re making broth or soup for an extra rich broth.
- Use it in place of water for baking bread or pastries.
- Add it to your smoothies of an extra protein boost.
- If you have a vegetable garden, use it lower the pH level of your soil if you’re growing things that prefer soil with a higher acidity level, like tomatoes.
Can You Freeze Whey?
Yes, it can be frozen for up to 6 months.
Can I Make a Smaller Batch of Yogurt?
This recipe calls for a gallon of milk because this yogurt will keep for a good 2 weeks in the fridge, giving you plenty of time to finish it off. (Note that a gallon of milk won’t yield a gallon of yogurt. It will yield about 2 quarts of yogurt depending on how long you strain it.) If however you would prefer to make less you can absolutely cut the recipe in half and use a half gallon instead. Just be sure to remember to reserve enough of the yogurt to act as the starter for your next batch.
How Much Protein and Calories Are in My Yogurt?
This is a question I get frequently. Calorie count and protein content will depend on how much whey was removed in the straining process and there really isn’t a way to measure that. Even calories are hard guess because through the straining process the end product is much more condensed that the original milk product. The best we can do is estimate.
© Fortyforks | Dreamstime
Homemade Yogurt Troubleshooting
“My yogurt didn’t set and I have yogurt soup!”
There may be an occasion or two when your yogurt doesn’t set properly. I’ve made probably close to 50 batches and fortunately it’s only happened to me twice but it was nevertheless disappointing. Many factors can be at play for a failed batch, anything from the first step to the last. If you’ve done everything right and have followed every step correctly from start to finish, all I can say is that the yogurt-making process involves fragile live bacteria and sometimes, well, they have a mind and will of their own. And if you’re using store-bought yogurt as your starter culture, it may claim to have live bacteria that is…no longer live. The only thing to do is try again with a new batch. But just because it failed turning into yogurt doesn’t mean you can’t still enjoy it.
Don’t throw out the “soup!”
Throughout Europe and other parts of the world you can get a variety of delicious plain and flavored yogurt drinks. You can drink your yogurt milk and you’ll still be benefitting from those healthy probiotics. Add some honey or flavored syrups or blend in some berries or fruits of your choice and enjoy it in smoothie form!
Ways to Eat Yogurt
The ideas are almost endless. Here are a few:
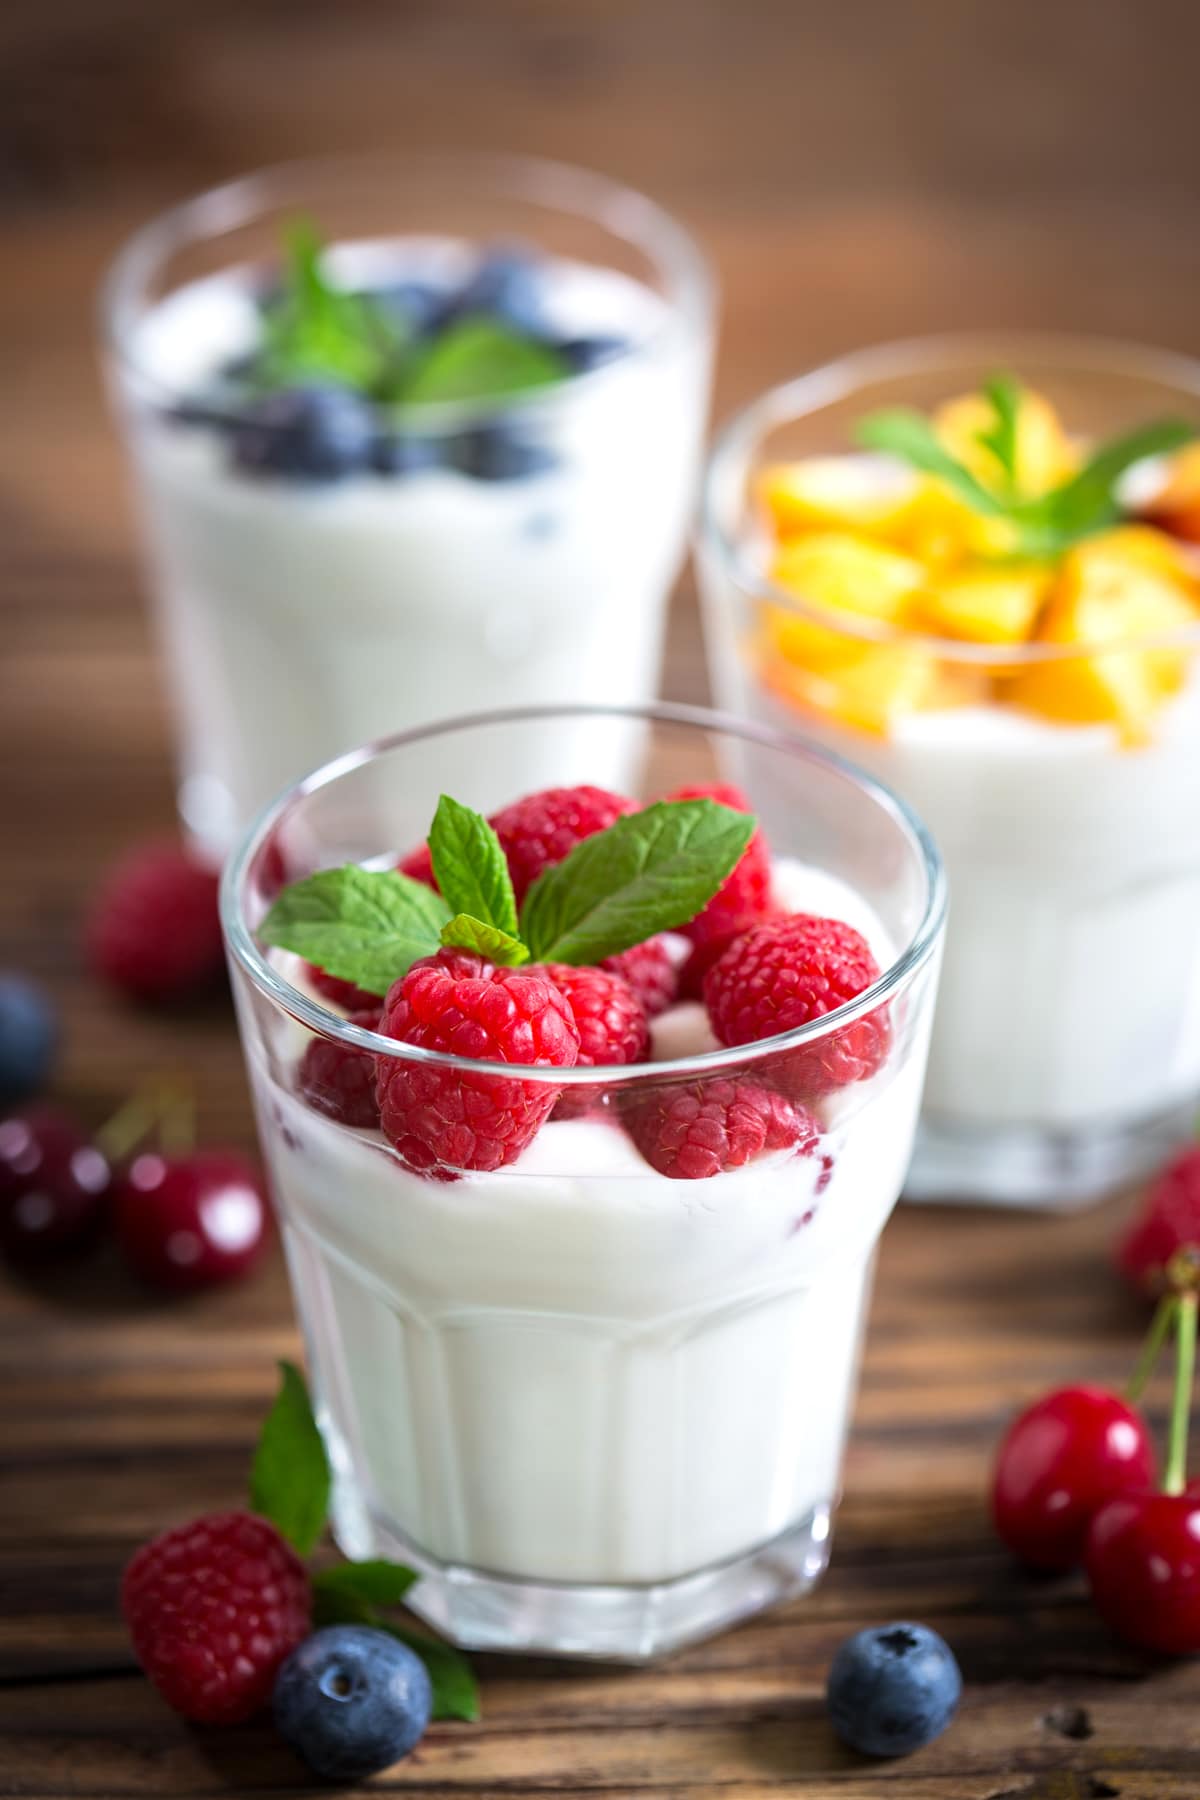
- Add fresh berries or cut up fresh fruits to enjoy with your yogurt along with a sprinkle of cinnamon and/or a drizzle of honey or maple syrup for a healthy breakfast or snack.
- Make parfaits with fresh fruit and granola.
- Blend it with fresh or frozen fruit or with nuts, peanut/cashew/almond butter, chocolate, etc. to make smoothies.
- Add other ingredients and seasonings to use as a sandwich, toast or bagel spreads.
- As the base of a savory dip for oven-baked chips, bread or raw veggies.
- As the base of a sweet dip for fresh fruits or toasted cinnamon pita strips.
- Use it in place of mayonnaise for ranch dressing and other creamy dressings.
- Make homemade tzatziki sauce.
- Replace sour cream and buttermilk with yogurt in baked goods like cakes, muffins, pancakes or our sweet potato pie.
- Make yogurt fruit popsicles.
- Use it in place of sour cream for things like tacos, enchiladas and burritos.
- Use it in place of mayonnaise for egg, tuna, chicken salad and potato salad.
The way I most commonly enjoy my yogurt is simply stirring in a spoonful of fruit preserves with a little powdered stevia for a healthy, low-carb treat to satisfy my sweet tooth. Another favorite way is to make vanilla yogurt by stirring in some high quality vanilla bean paste.
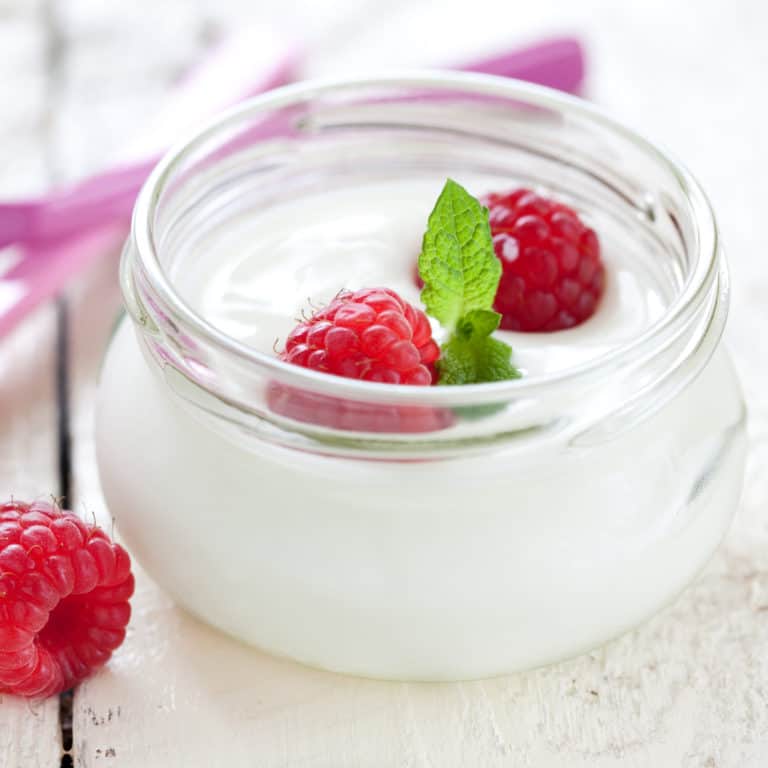
You’re going to love how rich and creamy this yogurt is – it’s almost like eating dessert!
© Corinna Gissemann | Dreamstime
How to Make Yogurt
Let’s get started!
IF USING A STOCK POT INSTEAD OF A SLOW COOKER: If you’re in a hurry or don’t have a slow cooker you can use a stock pot. Simply heat the milk in a large stock pot over low to medium heat. Just be sure to stir it regularly, especially as it gets hotter, to prevent the milk from scorching. Then follow the rest of the instructions as written.
Pour the milk into the slow cooker and set it to HIGH. Go about your business, it’ll take at least 2 hours (usually longer) before the temperature’s up to 180 degrees. Use a thermometer to check the temperature.
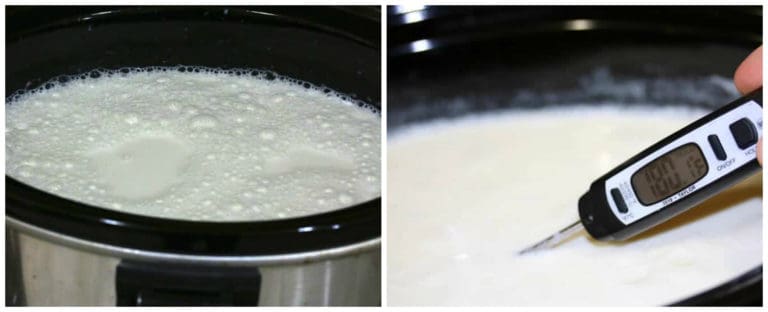
Once the temperature is up to 180 degrees, turn off the slow cooker or stove top and let the milk cool to 110 degrees F. Again, go about your business, this will take at least another 2 hours.
Once the temperature is 110 degrees, mix a little of the warm milk into the room temperature starter yogurt, then gently but thoroughly stir it back into the milk using up and down, left and right motions (not circular). Close the lid and turn off the slow cooker.
Wrap a large bath towel around the slow cooker and let it sit undisturbed in a draft-free, room temperature (or warmer) area for 10-12 hours or overnight. If the environment is too cool the yogurt will not set.
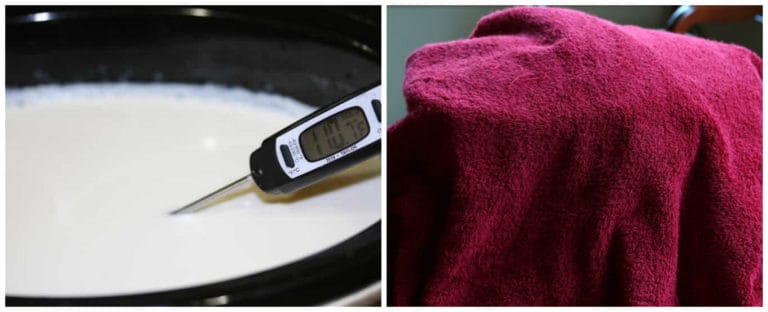
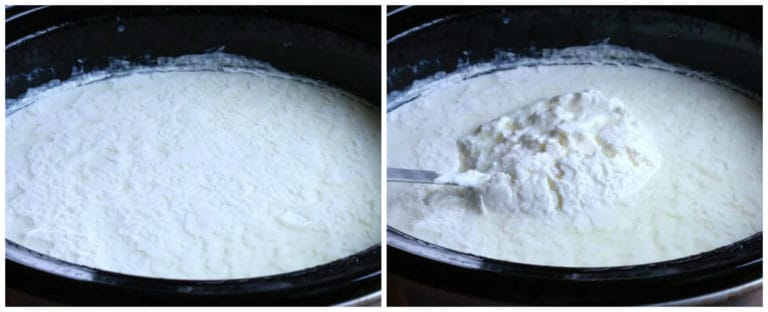
When you remove the lid you’ll find that the milk has thickened and the whey has separated.
Look at that fabulous thick texture! The transformation is almost magical. You’ll be so excited the first time you make this! I still get excited every time I lift the lid.
Line a colander with some cheesecloth.
I currently use this cheesecloth. It’s great quality and you get a lot of it for an excellent price.
Pour the yogurt into the cheesecloth. If it doesn’t all fit (depending on the size of your colander), let the yogurt strain until there’s room enough to add the remaining yogurt, then continue to strain.
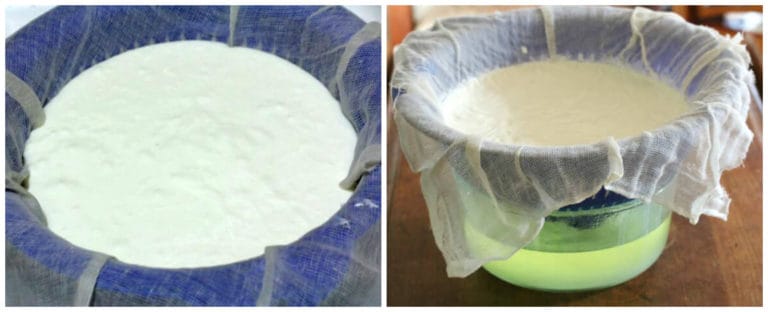
Depending on how thick you want the yogurt, this will take several hours. For thick Greek yogurt, you’ll end up straining it for at least 4 hours. That will also depend on the gauge of the cheesecloth. Set the colander on top of a large glass bowl. If leaving it to strain for several hours, you can put it in the fridge if you prefer and let it strain there.
See the liquid in the glass bowl above right? That’s whey. See the section “How to Use Whey” for ideas.
Store the yogurt covered in the fridge for up to 2 weeks. When you’re ready to make another batch, use some of the previous batch for the starter culture.
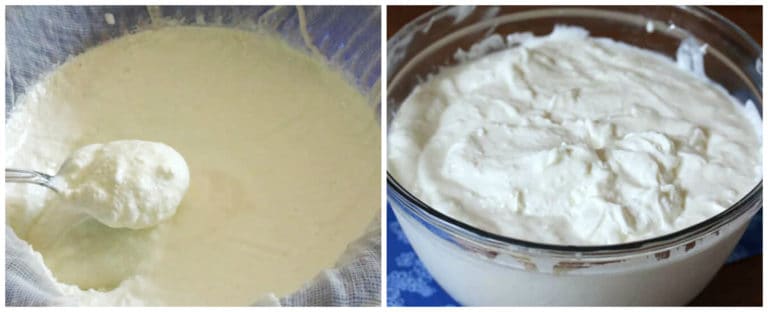
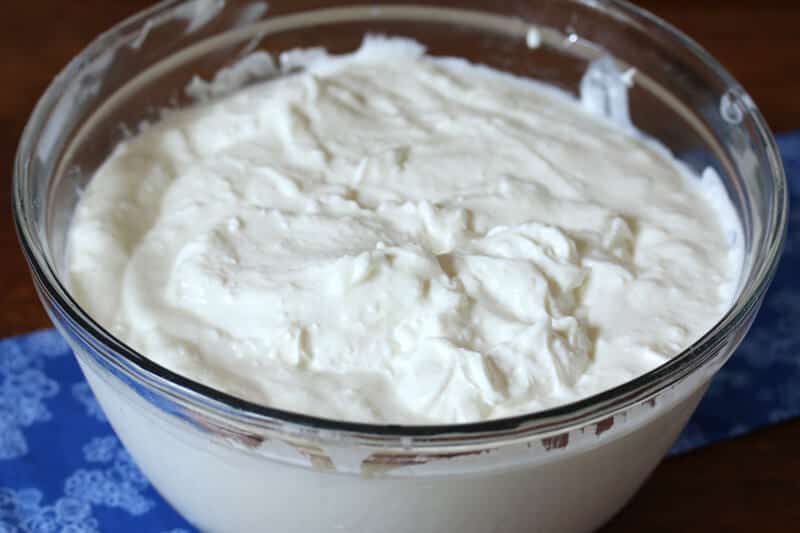
If fully strained to make Greek yogurt, you’ll end up with about 2 quarts (8 cups) of whey and 7-8 cups of Greek yogurt.
You’ll end up with less whey and more yogurt if you strain it less to make regular yogurt.
Cook with it, bake with it, eat it plain or with a variety of mix-ins, whatever your heart desires!
Enjoy!
Be sure to also check out our tutorials for how to make:
- Quark
- Mascarpone
- Sauerkraut
- Collard Kraut
How To Make Yogurt
Ingredients
- 1 gallon whole milk, 2% or skim milk (whole milk is recommended for thickest, creamiest results) (see note about using raw milk) *this method does NOT work with non-dairy alternatives
- 1 cup plain yogurt at room temperature, either from previous batch or store-bought (**The yogurt must have live cultures in it to work. Check the ingredients to make sure they include l. bulgaricus and s. thermophilus.)
- Equipment:
- Slow cooker or Pot
- Thermometer
- Cheesecloth
- Colander
Instructions
- IF USING A STOCK POT: If you're in a hurry or don't have a slow cooker you can use a stock pot. Simply heat the milk in a large stock pot over low to medium heat. Just be sure to stir it regularly, especially as it gets hotter, to prevent the milk from scorching. Then follow the rest of the instructions as written.IF USING A SLOW COOKER: Pour the milk into a slow cooker set to HIGH and close the lid. It will take 2-3 hours before the temperature of the milk is up to 180 degrees F. Check it with an instant-read thermometer. Once it's at 180 degrees, turn off the slow cooker, close the lid, and let the milk cool to 110 degrees F. This will take another 2-3 hours. Once the temperature is between 110 and 115 degrees F, add some of the warm milk to the plain yogurt, stir to combine, and then gently but thoroughly stir the mixture back into the milk in the slow cooker using up and down, left and right motions (not circular).
- Close the lid, wrap the slow cooker or stock pot with a large bath towel, and let it sit undisturbed in a non-drafty place at room temperature (or warmer) for 10-12 hours or overnight. If the environment is too cool the yogurt will not set. During this process the milk will have thickened and the whey will have started separating from the milk.
- Line a colander with a cheesecloth and pour the yogurt into it. Set the colander over a large glass bowl and let it strain at room temperature for several hours, until you've achieved the desired thickness (length of straining time will also depend on the gauge of the cheesecloth. I use this cheesecloth - excellent quality and you get a lot of it for a great price) For thick Greek yogurt plan on at least 4 hours. You'll end up with about 8 cups of whey and 7-8 cups of Greek yogurt.
- Store the yogurt in the fridge in an airtight container, preferably a glass bowl for up to 2 weeks. When ready to make another batch of yogurt, use a cup of the previous batch as the starter culture.
Notes
**You don't have to use the slow cooker method. For a quicker method simply heat the milk in a large stock pot over low to medium heat. Just be sure to stir it regularly, especially as it gets hotter, to prevent the milk from scorching. Then follow the rest of the instructions as written.
Nutrition
First published on The Daring Gourmet June 2017
Melissa says
Hi! So excited about this! Thanks for the recipe. Currently in the straining process, I’m using a glass bowl, and while I have great yogurt in the colander, that’s slowly straining, I’ve noticed the whey is the bowl is milky, and not the clear, yellow consistency in the images above. What’s up with that? Is this milky whey still usable in the recipes you provided above?
Thanks for the help!
Kimberly @ The Daring Gourmet says
Hi Melissa! Yes, that’s perfectly normal, it’s simply some escaped milk proteins. You’ll notice the longer the whey sits the proteins will start to settle at the bottom and the whey will become clearer. Enjoy!
Ter says
Can I make this with almond or coconut milk instead
Kimberly @ The Daring Gourmet says
Hi Ter, not using this particular method, it would involve a different process and different culture starters. If you google homemade yogurt with almond milk for example I’ve seen some recipes.
Anonymous says
This is a wonderful recipe! Thank you!
Kimberly @ The Daring Gourmet says
Thank you! :)
Trudy says
Do you have The nutritional value on this mainly I’m looking for calories carbs and protein? thank you
Kimberly @ The Daring Gourmet says
Hi Trudy, because that’s dependent on how long you strain it there’s really no way of knowing exactly. The best you can do is just estimate based on how many calories/carbs/protein are in the gallon of milk to begin with and then figure it based on how many cups you’re eating per serving.
ginger heath says
Question: I set a timer to alert me when two hours are up. Today I was outside when the timer went off and the heat went over 200 degrees…probably exceeded time by 45 minutes. Can I cool it to 110 degrees and expect okay results? I have been making yogurt for over two years and occasionally I do slip and get a bad batch, but I don’t remember ever letting it get this hot before.
This is a great site for questions and information…this is exactly as I have been making it with generally very good results. Like one comment above, I have trouble finding good 100% fat yogurt and have settled for Fage 2%. I have used 2% milk as well but I add a cup of powdered milk when I use the lower fat.
Kimberly @ The Daring Gourmet says
Hi Ginger, I’ve never let it get that high but it might be forgiving on that end – the worse offense is to let it get below 110 before it’s inoculated with the culture. Let us know how it turns out! I know, full fat yogurt is ridiculously hard to find which is just…ridiculous! We’ve been taught for several decades now that full fat dairy is bad for your health when exactly the opposite is true. With tons of new research over the last few years, the FDA has finally admitted to this myth, but the unlearning of decades of false indoctrination usually takes at least a generation. And so for the time being, we’ll just MAKE our own full fat yogurt! :)
Rose says
I will never buy yogurt again. This recipe works like a charm. So easy and so much better and cheaper then store bought. Thanks so much for this and all your recipes.
Kimberly @ The Daring Gourmet says
Awesome! I agree, Rose, and appreciate the feedback!
Jeannie Morrissette says
First time making yogurt and this recipe is incredible!! I don’t ever want to buy yogurt again. Thank you for sharing your recipe and tips. I am wondering how you would calculate the calories? When you drain the liquid whey, does that change the amount of calories? I also wonder, do you find the next batch turns out just as good with using 1 cup of the homemade yogurt or are you better to buy store bought for the 1 cup each time? Again – this is awesome!!!
Kimberly @ The Daring Gourmet says
Hi Jeannie, awesome, I’m so glad you enjoyed it! That’s a good question – I’m not sure how many calories are left in the yogurt versus the whey and the calories would of course vary from batch to batch anyway depending on how long you strain the yogurt. The starter yogurt: I’ve used both homemade from the previous batch and store-bought many times and both turn out great.
Jeannie Morrissette says
Thanks – honestly the taste and texture of this yogurt is so awesome (made with whole milk)….I could care less about the calories…..LOL One other quick question – when you begin the process, do you leave the crock pot lid on while the temp reaches 180? Lid on while it’s cooling down to 110?
Kimberly @ The Daring Gourmet says
Hi Jeannie, leave the lid on at all times, otherwise a thick film will form on the top of the milk.
Margit says
Do you have a recipe for kefir? Could I use the kefir I have as a starter or do I need to buy one?
Kimberly @ The Daring Gourmet says
Hi Margit, I’m actually going to be publishing a post about making homemade kefir. But as far as using kefir as the starter to make yogurt, it’s worth a try but I’m not sure it would work too well because 1) it has different strains of bacteria than yogurt has and 2) it has vastly more of them – as a result I think you’d end up with very thin yogurt – in other words, essentially kefir.
Margit says
I just read your answer to Jen. I was wondering the same thing.Do you know the reason why raw milk wont work?
Kimberly @ The Daring Gourmet says
Hi Margit, it has to do with the types of strains of healthy bacteria (as well as the high quantity of them) in the raw milk which prevents the milk from thickening the same way pasteurized milk does. The family who runs the local farm where we buy our raw milk makes their own yogurt using the raw milk, but they pasteurize it first. The difference though is that the pasteurized milk in the grocery stores is pasteurized via high heat, killing off all of the healthy bacteria and the enzymes and completely altering the natural nature and molecular structure or the milk, but the method this family uses is very low heat pasteurization. I’ve been planning on stopping by to discuss this with them in more detail and hope to post a “how to” on making yogurt with raw milk.
Margit says
I am moving to the country and will get free range cow milk.Is there a special way I have to treat the yogurt? Can’t wait to try and make it your way.
Kimberly @ The Daring Gourmet says
Hi Margit, by free range do you mean raw (not pasteurized)? Our family drinks raw milk and I make kefir with it on a daily basis but raw milk won’t thicken into yogurt unfortunately.
Jen Hawk says
Can I use raw cows milk to make my yogurt? I’m going to use maple hill creamery as my starter. The only yogurt that I will ever eat sore boughten.it’s delicious.I can’t wait to make mine now
Kimberly @ The Daring Gourmet says
Hi Jen! No, you cannot use raw milk for this. We only drink raw milk in our family but unfortunately it doesn’t work for yogurt.
Mary says
Made yogurt yesterday using your instructions. It turned out wonderful! I’ve made yogurt several other ways but I think I’ll be making it this way now. Thank you!
I have a couple questions. I would like to know what yogurt starter you use. Do you use your homemade yogurt as a starter? If so, how many times do you use it? And, although my milk did not burn when I was heating it to 180 degrees in the crock pot, it did form a skin on top that I removed. Does that happen when you make yours?
Kimberly @ The Daring Gourmet says
Hi Mary, fantastic and thank you! For yogurt starters it depends: When I’m in a regular routine of making yogurt I’ll use my own for the next batch. And once I’ve made the next batch I’ll reserve a bit of that for the batch after that and so on. You can use the same batch of starter for up to two weeks. If I’ve gone too long without making yogurt and don’t have any of my own starter left, I’ll just use plain store-bought yogurt.
Kimberly @ The Daring Gourmet says
Hi Mary, I forgot to add – the skin forming on the top is the result of air exposure when the seal on the slow cooker isn’t air-tight. It’s not a big deal whatsoever, simply remove and discard it.
Madeline Carol Matz says
Hi, I just wanted to tell you how much I love your yogurt-making write up! I have been taking a pro-biotic that is a bit expensive – $90 a month – and I am now using two-days worth of the the pro-biotic and any leftover yogurt from my previous batch as the starter culture and it is working wonderfully! I use whole grass-fed milk and started the first batch with some store bought whole milk grass-fed Greek yogurt. I keep the yogurt in those little 4 ounce Italian hermetic seal jars with a metal clamp and a rubber seal ring and flavor them with a bit of fruit spread with no sugar or honey with vanilla and Vietnamese cinnamon. Saves me a ton of money on the pro-biotic, ensures I am getting grass-fed yogurt plus I can control what goes in for the flavoring! And I really enjoy making it! Thank you for sharing!
Kimberly @ The Daring Gourmet says
That’s wonderful, Madeline, thank you! And thank you for sharing how you store and use your yogurt. Something I’ve been doing for a while is making my own kefir for a highly concentrated probiotic drink. Have you tried kefir or making your own? If not, I think you would be thrilled with the results. It not only has different strains of beneficial bacteria that yogurt does not have, it also has much more of it. It’s a very concentrated probiotic drink. You can find “recipes” for it everywhere online but it’s something I’ll be posting about in the near future.
Kendra Martin says
Could you tell me if this is an S or an FP according to Trim Healthy? My store-bought Greek yogurt is an FP. However, because it has whole milk in it, I’m guessing it is an S???
Kimberly @ The Daring Gourmet says
Hi Kendra, I’m not familiar with those acronyms or with Trim Healthy so I’m afraid I can’t help there. I’m assuming it has something to do with fat or carbs. Here is an article you may find interesting though that discusses the latest research about fat – we’ve been mislead for decades and the FDA has finally come around to acknowledging that fat isn’t the enemy we’ve been told it is: http://www.daringgourmet.com/2015/01/13/dr-killebrew-the-truth-about-full-fat-dairy/
Leahjtatina@gmail.com says
THM also promotes good, healthy fats. It’s just the eating plan promotes not eating healthy fats and healthy carbs together at the same time if you’re trying to get to a healthy weight. They use a lot of Greek yogurt, but I’m assuming since this is made from whole milk it has a lot of fat in it? I’m curious, too, because eating this yogurt on the THM plan means I wouldn’t eat it in combination with certain foods.
Laurent says
Hi Kimberly,
Gosh, would you have ever guessed there would be so many questions about a ‘simple’ yogurt recipe?? lol
I’ve read all the posts and some seem to be contradictory…
1) after turning off the CP to cool the milk, then add the culture, wrap the CP in a towel, do you leave the CP ON OR OFF for the rest of the night? One commenter said he times his CP to come on and off every 15 mins to keep mixture at 110 all night, and you approved.
2) if you ARE supposed to keep it at 110 all night, my oven has a proofing setting for the rising of dough to make bread, which I assume is around the same temp or I could set oven for 110. Can I put the CP in the oven at the setting?
3) I eat Fage 2% yogurt. It’s ingredients say part skim milk and cream (plus the bacteria). Is the cream essential to the yogurt? Can I use extra rich milk instead? (I also still have to strain the Fage and have to toss about a cup or so of whey away to get the yogurt thicker)
4) Cheese cloth…can I just not line the CP with the cheese cloth first and then pour milk into CP? Then I could just grab all corners and lift it out and drain that way by squeezing and rolling it in the cloth to quicken the process up? I really want a very dry yogurt left.
Thank you so much for your help.
Laurent
Kimberly @ The Daring Gourmet says
Hi Laurent! I’ll do my best to answer your questions:
1) The 15 minutes on and off won’t hurt but it isn’t necessary and I haven’t heard of anyone else doing that. Turn it off and fully wrap it in a large bath towel to trap in the heat.
2) I haven’t tried the oven method (setting the oven to 110 all night) but it’s certainly worth a try.
3) I don’t know what their ratio of skim milk to cream is but it sounds like it’s essentially the equivalent of whole milk and that’s what I always use. Just make sure it’s pasteurized as it won’t work with raw milk.
4) I’m not sure how well that would play out. One concern would be that in cooking the cheesecloth you would get strands of fiber in your yogurt. If your purpose for doing that is simply to to get very dry yogurt, using the colander method will let you achieve that perfectly. All that matters is how long you strain it. Keep straining it until it reaches the consistency you want, you can even leave it in the refrigerator overnight to strain longer. I use this same recipe for making yogurt that is so thick it’s essentially a soft cheese that I can lightly shape into balls and submerge in olive oil.
Good luck and let us know how your first batch turns out! As I’ve mentioned before, I’ve had one or two failed batches and there are so many variables that can affect that, including ones that are out of your control. Culturing is a temperamental thing. So don’t give up if it doesn’t turn out the first time because the second round will probably be perfect! And the comforting thing about this is that if you get a failed batch you haven’t lost that $3.50 gallon of milk – you can still use it for other purposes and it will have some healthy probiotics in it.