Pastéis de Nata (Portuguese Custard Tarts)
This post may contain affiliate links. See my disclosure policy.
A thoroughly traditional Pastéis de Nata recipe. Crispy-crunchy pastry crust with a smooth and creamy custard filling is what awaits your bite into these traditional, world famous sweet custard tarts from Lisbon, Portugal!

On our most recent trip to Lisbon, Portugal we made it a point to sample (as many as we could fit!) the city’s famous pastry that The Guardian designated as among the world’s “50 best things to eat.” Today I’m sharing with you how to make the perfect pastel de nata with the finest texture and best balance of flavors.
What are Pastéis de Nata?
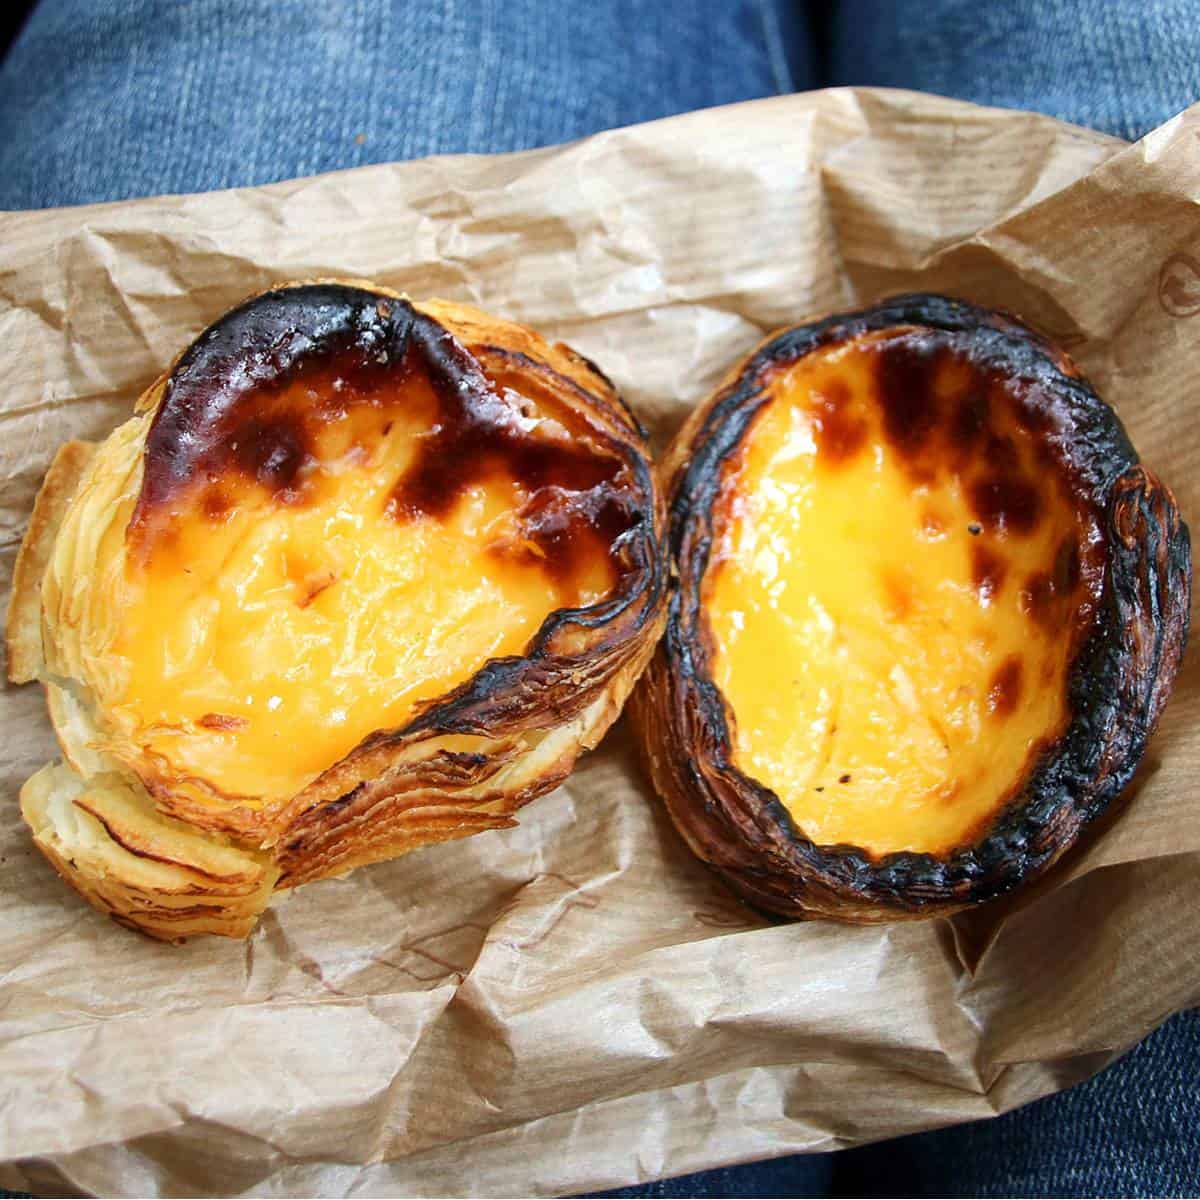
A pastel de nata is a Portuguese custard tart made with puff pastry and filled with egg custard that is served with a dusting of powdered sugar and a pinch of cinnamon. The tarts are baked at a blazingly hot temperature until the tops are scorched.
Some people also refer to them as Pastéis de Belém (pastries of Bethlehem) but that name is a patented one and refers strictly to the pastries made in that specific bakery. The pastry was created sometime prior to the 18th century by Catholic monks of the Jerónimos Monastery. The monastery closed in 1834 and the recipe was sold to a sugar refinery whose owners opened the bakery, the Fábrica de Pastéis de Belém in Lisbon, in 1837. It is still operated by the original family’s descendants today.
Can You Freeze Them?
Yes and no….mostly no. You can freeze them in an airtight container or in freezer bags for up to 3 months, however they don’t thaw well. Like most products with dairy, the fats and water thaw at different rates leaving you with soggy pastry crust and custard that has split. So while you can freeze them if you find you have more than you can eat, just know that the texture won’t be nearly as good as freshly baked.
How Long Do They Keep?
Pasteis de Nata are best eaten warm (or cold) the same day they are baked. However you can store them at room temperature in an airtight container for up to two days.
How To Serve Pastéis de Nata
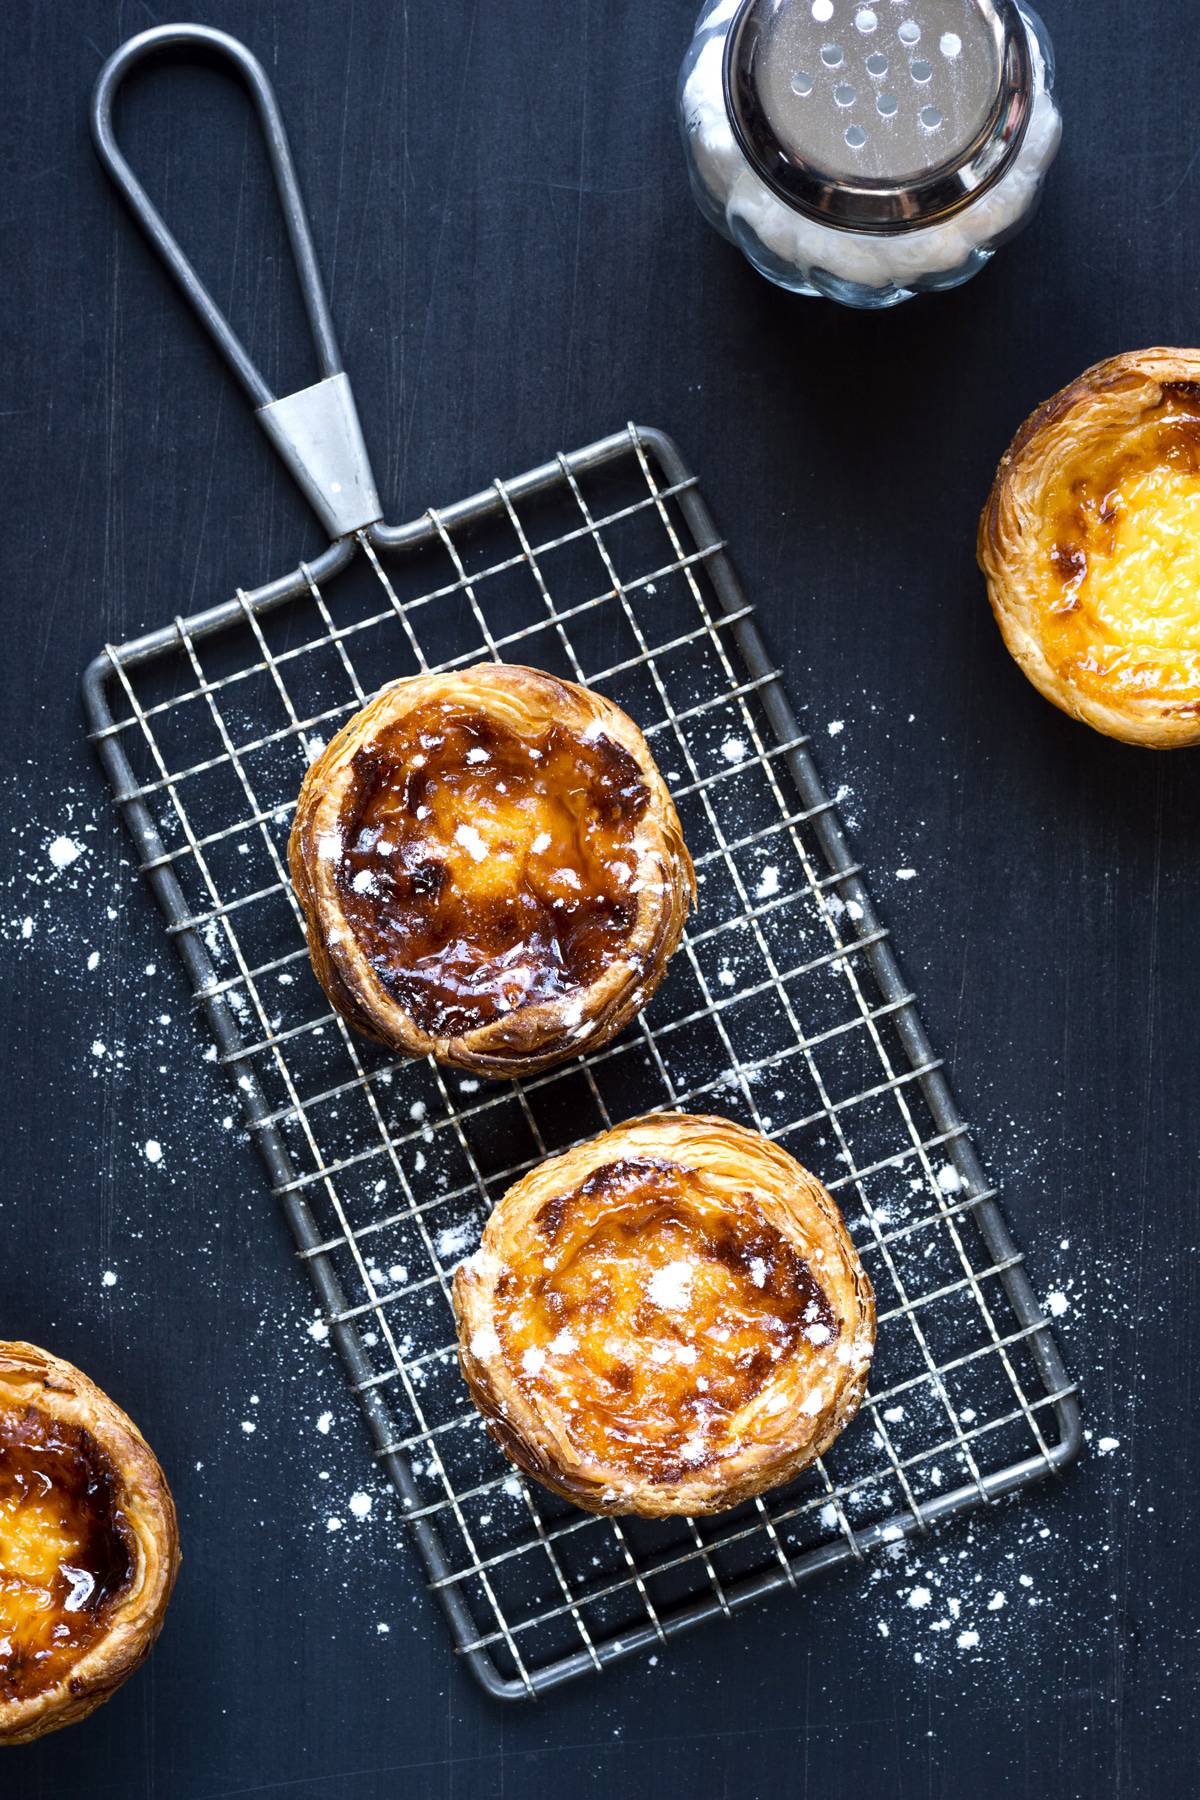
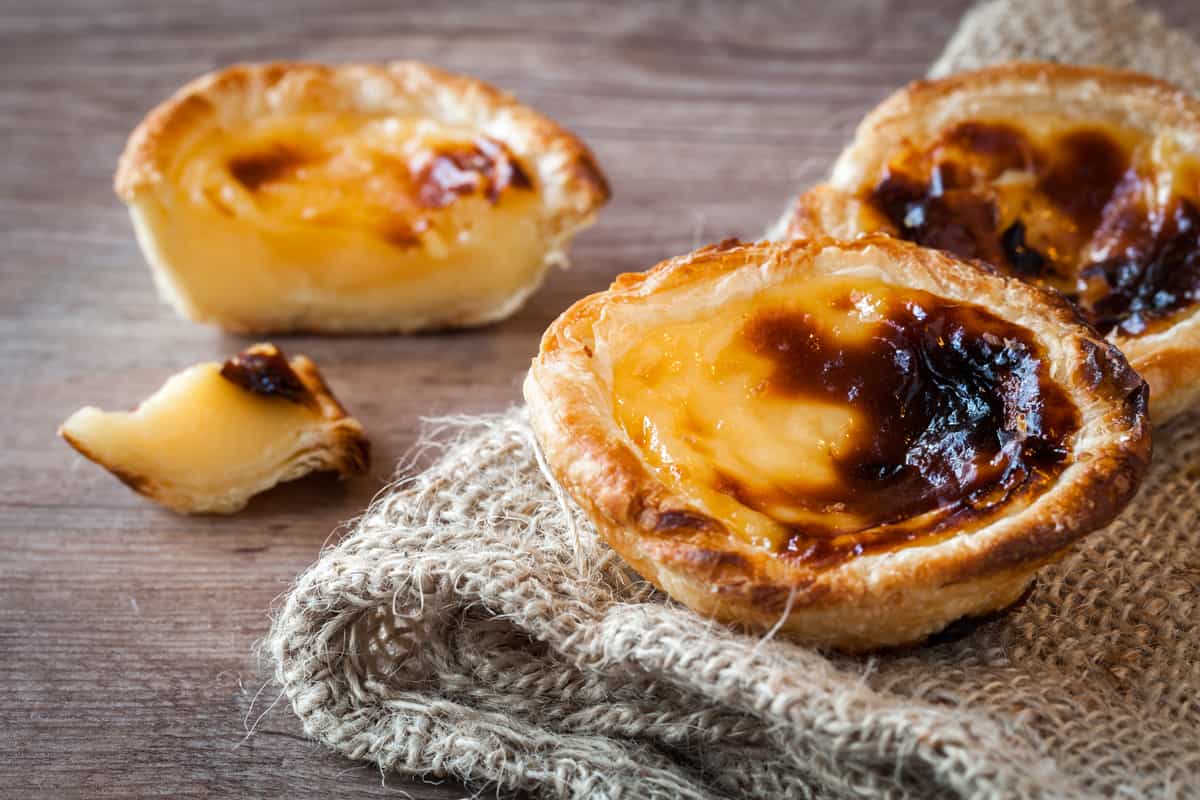
These pastries are commonly served with a dusting of powdered sugar, cinnamon, or both. Some bakeries serve them with neither. They’re best enjoyed warm within a few hours of baking when the pastry is nice and crispy and the custard is delicately smooth and creamy.
Pastéis de Nata Recipe
Let’s get started!
Make the Custard:
Place the water, sugar, cinnamon and lemon rind in a medium saucepan and bring it to a boil. Reduce the heat to medium and let it simmer – without stirring – until it reachers 220 degrees F on an instant read thermometer.
Remove from the heat and let it cool for at least 15 minutes while you prepare the rest of the ingredients.

In a separate medium saucepan scald the milk (heat until up to the boiling point but don’t let it boil). Turn off the heat and add the flour and salt to the hot milk and whisk constantly until the mixture is nice and thick.

Add the egg yolks and whisk until combined.
Whisk in the vanilla extract.

Remove the cinnamon and lemon rind.
In a thin, steady stream pour the syrup into the egg/flour mixture, whisking constantly.
The custard will be very thin, this is normal.

Pour the custard through a fine mesh sieve to strain out any chunky bits.
Cover the bowl with plastic wrap and set aside until ready to use. You can make this in advance and refrigerate for up to 3 days.

Prepare the Pastry Dough:
On a lightly floured work surface, roll the pastry dough out to roughly a 11×14 inch rectangle.
Beginning at the short end, roll up the pastry dough, rolling it tightly as you go along.

Wrap the pastry roll in plastic wrap and refrigerate for at least 2 hours.

Assemble the Tarts:
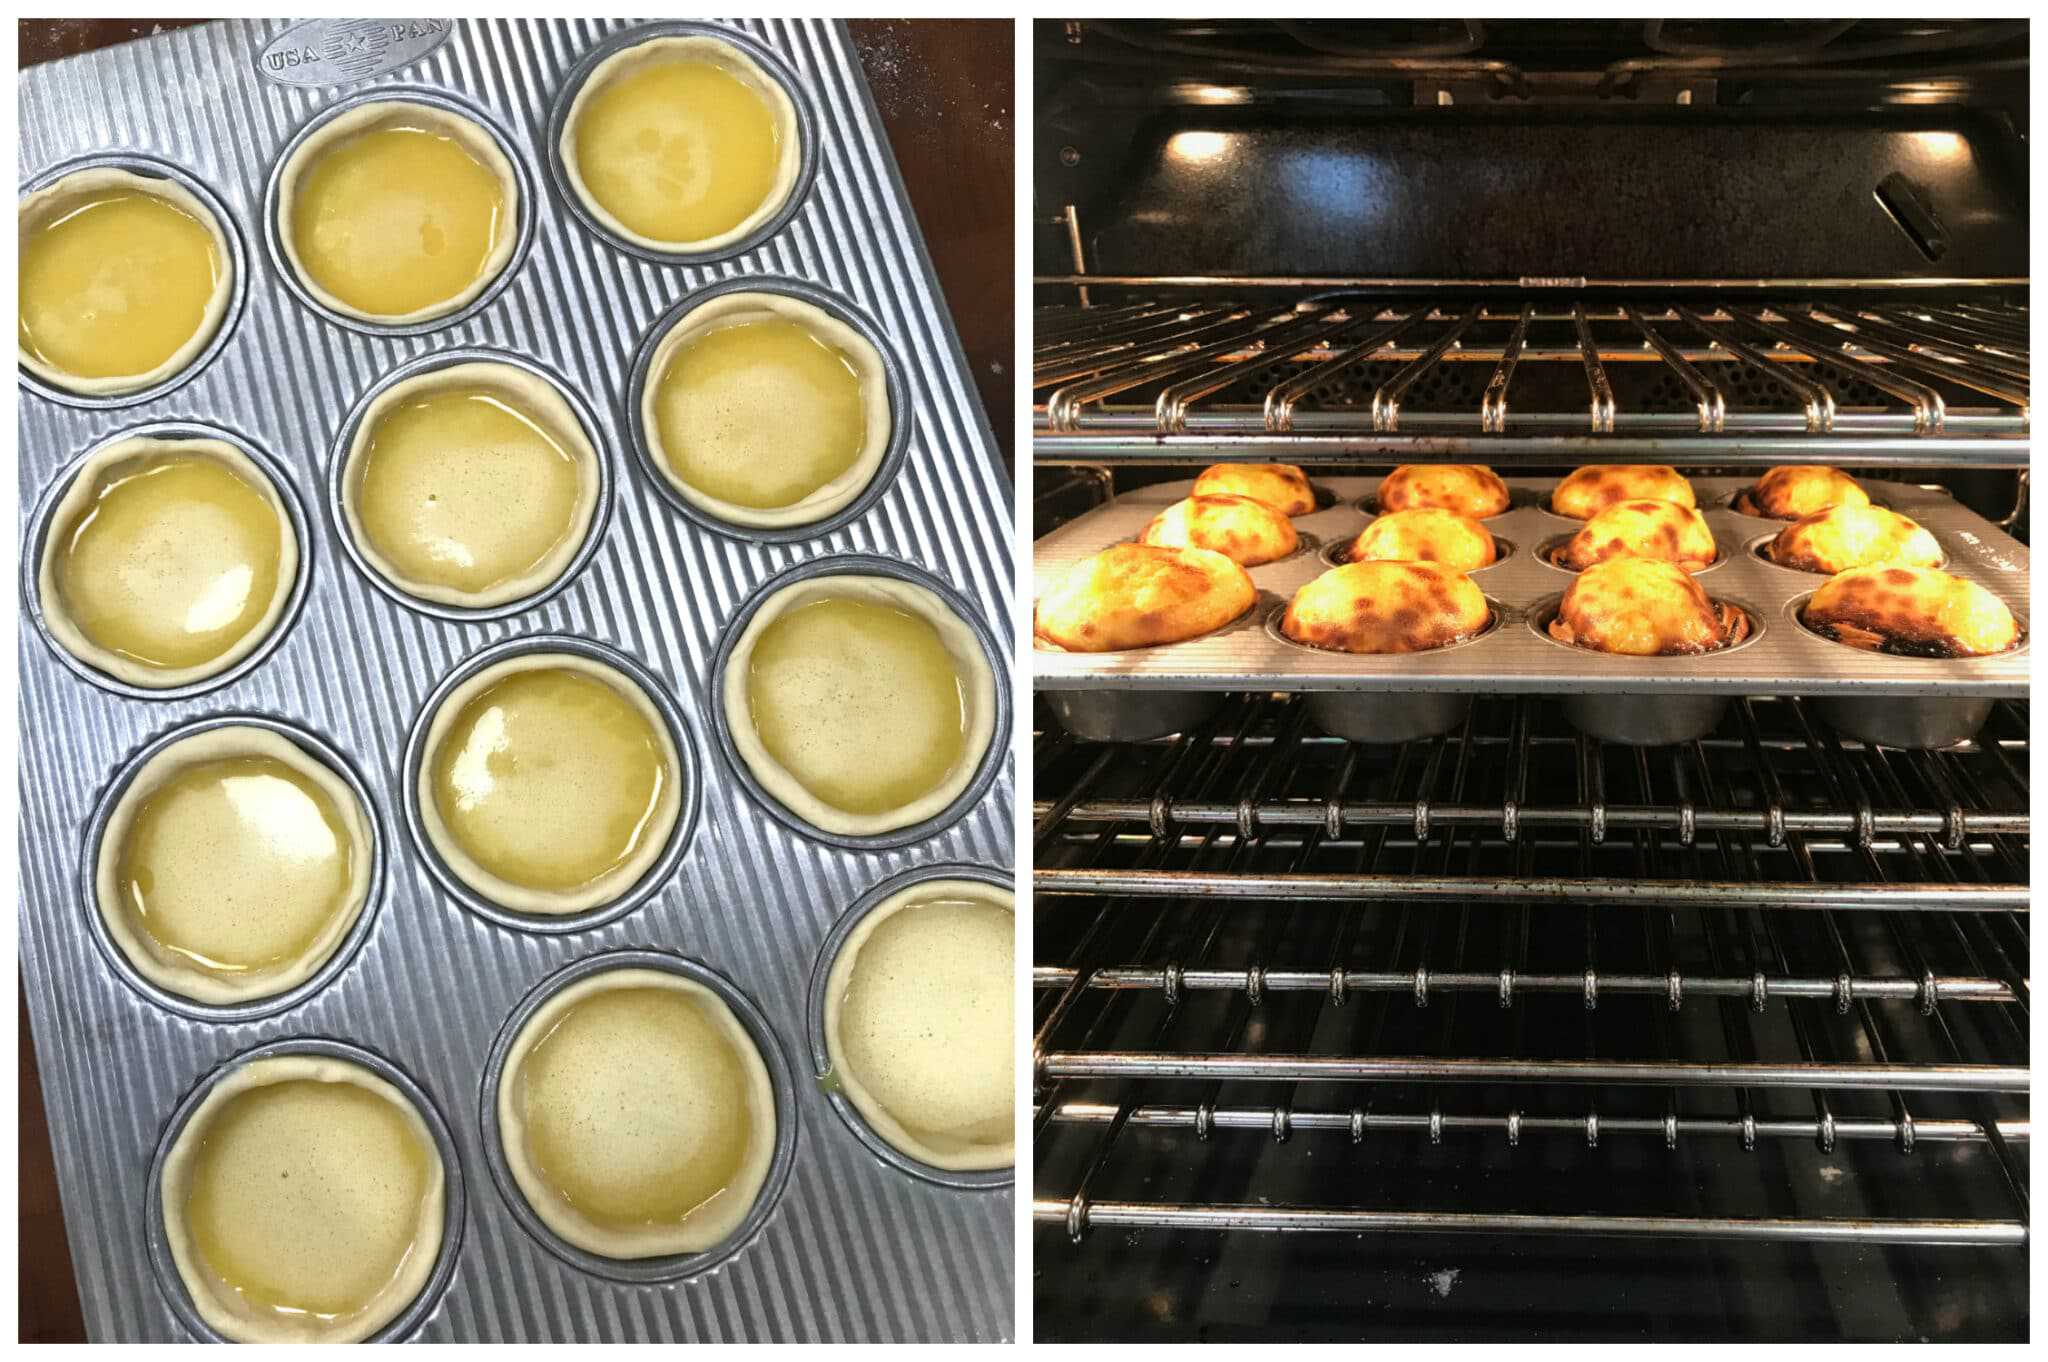
Preheat the oven to the highest temperature it will go (I heated mine to 525 degrees F).
Use a pastry cutter or sharp knife to cut the pastry log into about 3/4 inch thick rounds. (Cut a thin layer off each end and discard.)
Those lovely layers are going to make your tart pastry beautifully crisp and flaky.

Use a standard size non-stick muffin pan (I love my USA Pan muffin pan). Depending on how full you fill the tarts this recipe makes about 16 tarts so you may need a second muffin pan.
Place a pastry round in each tin. Use your thumbs to press the pastry down and up the sides to the very top to fit the mold.

Now it’s time to fill the tarts!
Pour the prepared custard into each pastry case to about 3/4 of the way full. Don’t fill them too full or the custard will overflow onto the rims of the tart crusts.

Place the pan on the middle rack of the preheated oven.
Depending on the max temperature of your oven, bake for about 14-16 minutes (my temperature was set to 525 degrees F). You’ll know the tarts are done when the tops are nicely scorched and the filling is set. The filling will initially puff up while baking but once the pan is removed the filling will sink back down.
Remove from the oven and let the tarts cool for about 8-10 minutes before removing them.
Serve with a dusting of powdered sugar and a small pinch of cinnamon if desired.
These pastries are best eaten warm the same day they are baked.
Enjoy!
Be sure to also try my Broas Castelares (Portuguese Sweet Potato Cookies)!
Save This Recipe

Pastéis de Nata (Portuguese Custard Tarts)
Ingredients
- 1 pound puff pastry , click link for easy homemade rough puff pastry recipe
- For the Custard:
- 2/3 cup water
- 1 1/4 cup granulated sugar
- 1 large cinnamon stick
- rind of one large lemon , cut into wide strips
- 1 1/4 cup whole milk
- 1/4 cup all-purpose flour
- 1/4 teaspoon salt
- 6 large egg yolks
- 1 teaspoon quality pure vanilla extract
Instructions
- Make the Custard:Place the water, sugar, cinnamon and lemon rind in a medium saucepan and bring it to a boil. Reduce the heat to medium and let it simmer – without stirring – until it reachers 220 degrees F on an instant read thermometer.Remove from the heat and let it cool for at least 15 minutes while you prepare the rest of the ingredients.In a separate medium saucepan scald the milk (heat until up to the boiling point but don't let it boil). Turn off the heat and add the flour and salt to the hot milk and whisk constantly until the mixture is nice and thick. Add the egg yolks and whisk until combined. Whisk in the vanilla extract.Remove the cinnamon and lemon rind from the syrup. In a thin, steady stream pour the syrup into the egg/flour mixture, whisking constantly. The custard will be very thin, this is normal.Pour the custard through a fine mesh sieve to strain out any chunky bits.Cover the bowl with plastic wrap and set aside until ready to use. You can make this in advance and refrigerate for up to 3 days.
- Prepare the Pastry Dough:On a lightly floured work surface, roll the pastry dough out to roughly a 11×14 inch rectangle. Beginning at the short end, roll up the pastry dough, rolling it tightly as you go along. Wrap the pastry roll in plastic wrap and refrigerate for at least 2 hours.
- Assemble the Tarts:Preheat the oven to the highest temperature it will go (I heated mine to 525 degrees F). Use a pastry cutter or sharp knife to cut the pastry log into about 3/4 inch thick rounds. (Cut a thin layer off each end and discard.)Use a standard size nonstick muffin pan. Depending on how full you fill the tarts this recipe makes about 16 tarts so you may need a second muffin pan.Place a pastry round in each tin. Use your thumbs to press the pastry down and up the sides to the very top to fit the mold. Pour the prepared custard into each pastry case to about 3/4 of the way full. Don't fill them too full or the custard will overflow onto the rims of the tart crusts. Place the pan on the middle rack of the preheated oven.Depending on the max temperature of your oven, bake for about 14-16 minutes (my oven was set to 525 degrees F). You'll know the tarts are done when the tops are nicely scorched and the filling is set. Remove from the oven and let the tarts cool for about 8-10 minutes before removing them. Serve with a dusting of powdered sugar and a small pinch of cinnamon if desired. These pastries are best eaten warm the same day they are baked.
Nutrition
Custard adapted from Leite’s Culinaria
Originally published on The Daring Gourmet December 22, 2020

Hi, I’m Kimberly Killebrew and welcome to Daring Gourmet where you'll find delicious originals, revitalized classics, and simply downright good eats from around the world! Originally from Germany, later raised in England, world-traveled, and now living in the U.S., from my globally-influenced kitchen I invite you to tour the world through your taste buds!


Do do I need to bake tarts right away or can the pastry in muffin tins be ok
Hi Cathy, you can cover the raw pastry in the muffin tin with plastic wrap and refrigerate it until you’re ready to fill them and bake.
Was craving these randomly and decided to make them at home! I even made the puff pastry from scratch, using the recipe linked to this one. 10/10, absolutely love this, even my father did, and he always has something to say when it comes to food. LOL. Definitely try this out!
I am so thrilled that you and your father enjoyed these, Lilianne, thank you very much for the feedback! <3
Knowing 250g of sugar is too sweet, I reduced it to 180g.
This recipe is not suitable for using egg tarts moulds. Will not make this recipe again.
I’m not sure what I am doing wrong. I’m an avid baker and cook- followed this recipe and the first batch (trial run) I used store bought puff pastry. I only made 12. I had my oven set to 500. The puff pastry was burnt at 10 minutes. The were otherwise really good- but I had about 1.5 cups of leftover custard.
I made again today, still using store bought puff pastry. I made 16 and separated into 8 per tin. After 10 mins in the oven at 500 degrees, the pastry was burnt and the custard not set. And I still had a cup and a half of custard left over. (Made some crème brûlée!).
I put back in the oven on a lower temp to at least set the custard but seriously just can’t figure out what I have so off about this recipe…
I made the custard but I want to use puff pastry cups. I think you’re supposed to bake cups first and then bake with filling? I am thinking since this recipe bakes at such high temps I should fill them frozen and bake till they look done? What are your thoughts?
Hi Ramona, no you don’t pre-bake the puff pastry cups for this. Let them thaw, line your muffin pan with them, and then chill them in the refrigerator. Then fill them while they’re cold and bake.
I hope no one else had my problem.. but my cookware (calphalon) was apparently NOT rated to withstand my ovens 525 max temp.. so we had a custard explosion on our hands! But everything else about this recipe was great and they look beautiful and are delicious, just had to take the temperature down a few notches! Still a 5, but know your own cookware!
I’m so thrilled that you enjoyed these, Dayle – in spite of the cookware catastrophe! – and really appreciate the feedback, thank you! <3
I was extremely intimidated to try making these but we fell in love with them on our visit to Lisbon and I wanted to take on the challenge of making them myself. I found your recipe and your tutorial was so detailed, you gave me the courage to try. They turned out beautifully and as delicious as we remembered them. Thank you!
I’m so glad you decided to make them, Teresa, and congratulations on your success! I’m thrilled that you enjoyed them, thank you!