Rough Puff Pastry
This post may contain affiliate links. See my disclosure policy.
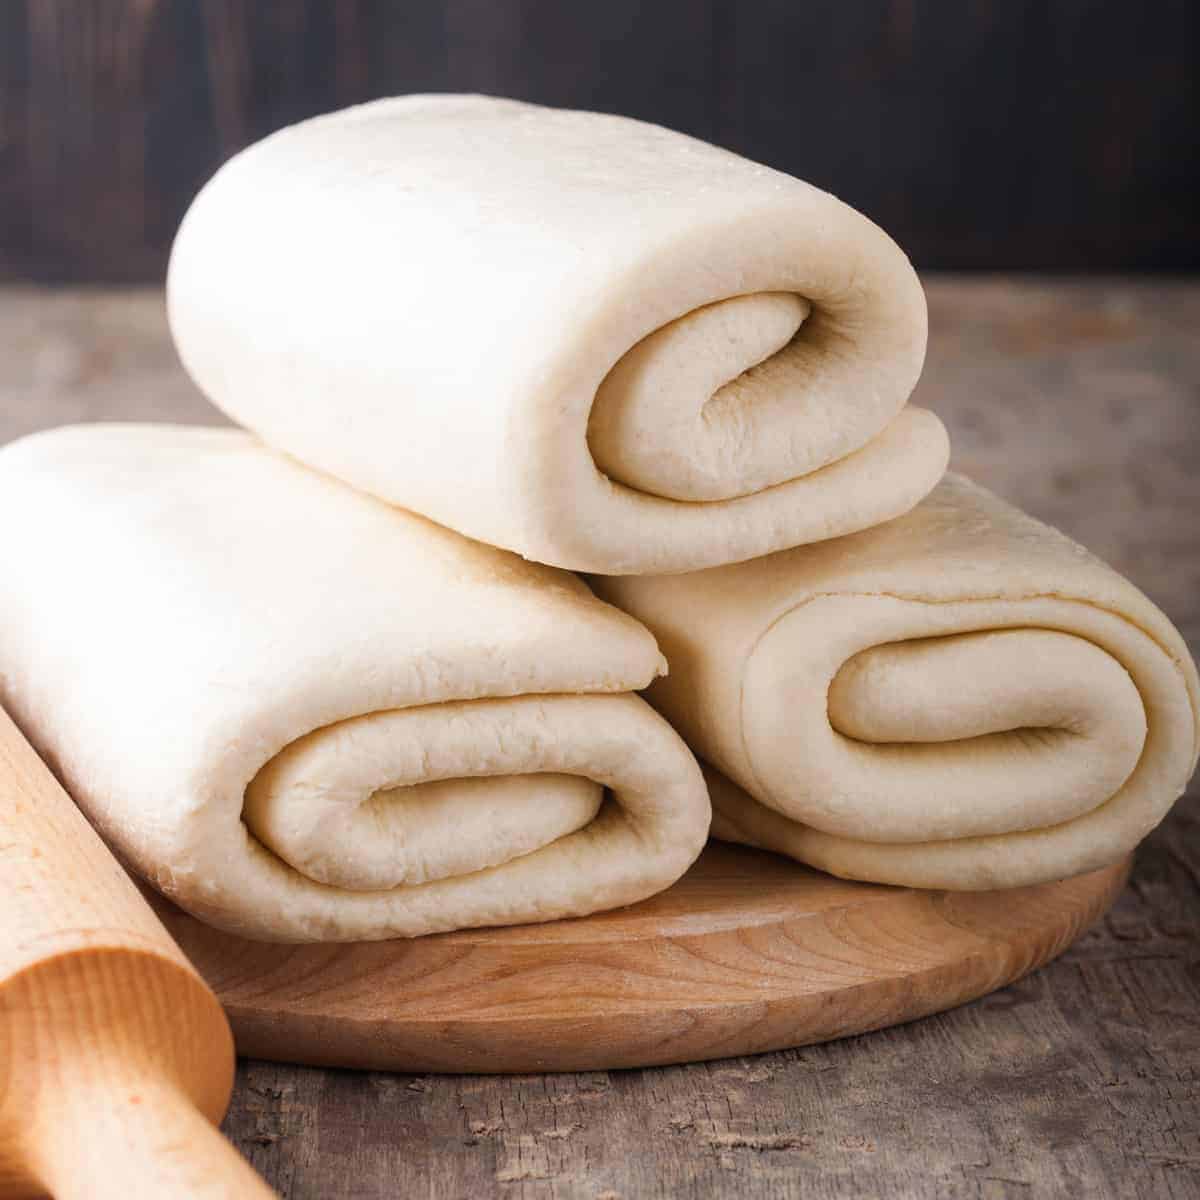
This Rough Puff Pastry recipe is MUCH quicker and easier to make than classic puff pastry and produces beautifully flaky, buttery results! You can freeze it so you always have it on hand and use it in any recipe that calls for puff pastry.
Puff pasty is divine. Whether sweet or savory, puff pastry is manna from heaven – light, crispy, airy, delicate, delicious. Its exact origin is unknown. Some have attributed it to Claude Gelée, a French painter in the 17th century, who reportedly made it for his sick father. (Forget the chicken noodle soup, right? Who wouldn’t feel better after eating puff pastry??) But references to puff pastry date back even earlier to Middle Eastern-influenced phyllo dough, a close relative that is layered with olive oil instead of butter.
Puff pastry is pricey, but understandably so. It’s time-consuming to make and uses lots and lots of butter. Dough is rolled out, layered with butter, folded, rolled out again, layered with butter, folded, rolled out again, layered with butter…this process is repeated like a gazillion times. To give you an idea, depending on what you’re making with it, Julia Child recommends anywhere from 73 to 730 layers! Ummm, thanks but no thanks. So that just leaves us with the option of buying pre-made puff pastry, right? Wrong! There is an easier way. Much easier. Enter rough puff pastry.
What is Rough Puff Pastry?
Rough puff pastry is exactly that – rough. In other words, it’s not quite as delicate or as intricately layered as traditional puff pastry but it’s still pretty darn amazing and is also vastly less work. Classic puff pastry takes several hours to make compared to about 30 minutes of active prep time (not counting the freezing time) to make rough puff pastry.
Unlike classic puff pastry where you roll a large solid slab of butter into the dough, rough puff pastry dices the butter into small 1/2 inch pieces and incorporates it that way. Advocates of this method maintain that using the larger chunks of butter produces a flakier end result. An alternative method involves pulsing the butter and flour in a food processor to get coarse crumbs, similar to making pie crust. Both methods work well and you can choose either one. In short, rough puff pastry is easier and quicker to make than classic puff pastry and works beautifully for any recipe calling for puff pastry.
Can You Freeze Rough Puff Pastry?
Yes, you can! Wrap it very well and tightly in plastic wrap, place it in a ziplock freezer bag, and freeze for up to a month. When you’re ready to use it let it thaw at room temp and then proceed with your recipe. Be sure the dough is still very cold when you use it.

Rough Puff Pastry Recipe
Let’s get started!
There are two methods for making rough puff pastry and you can choose whichever suits you.
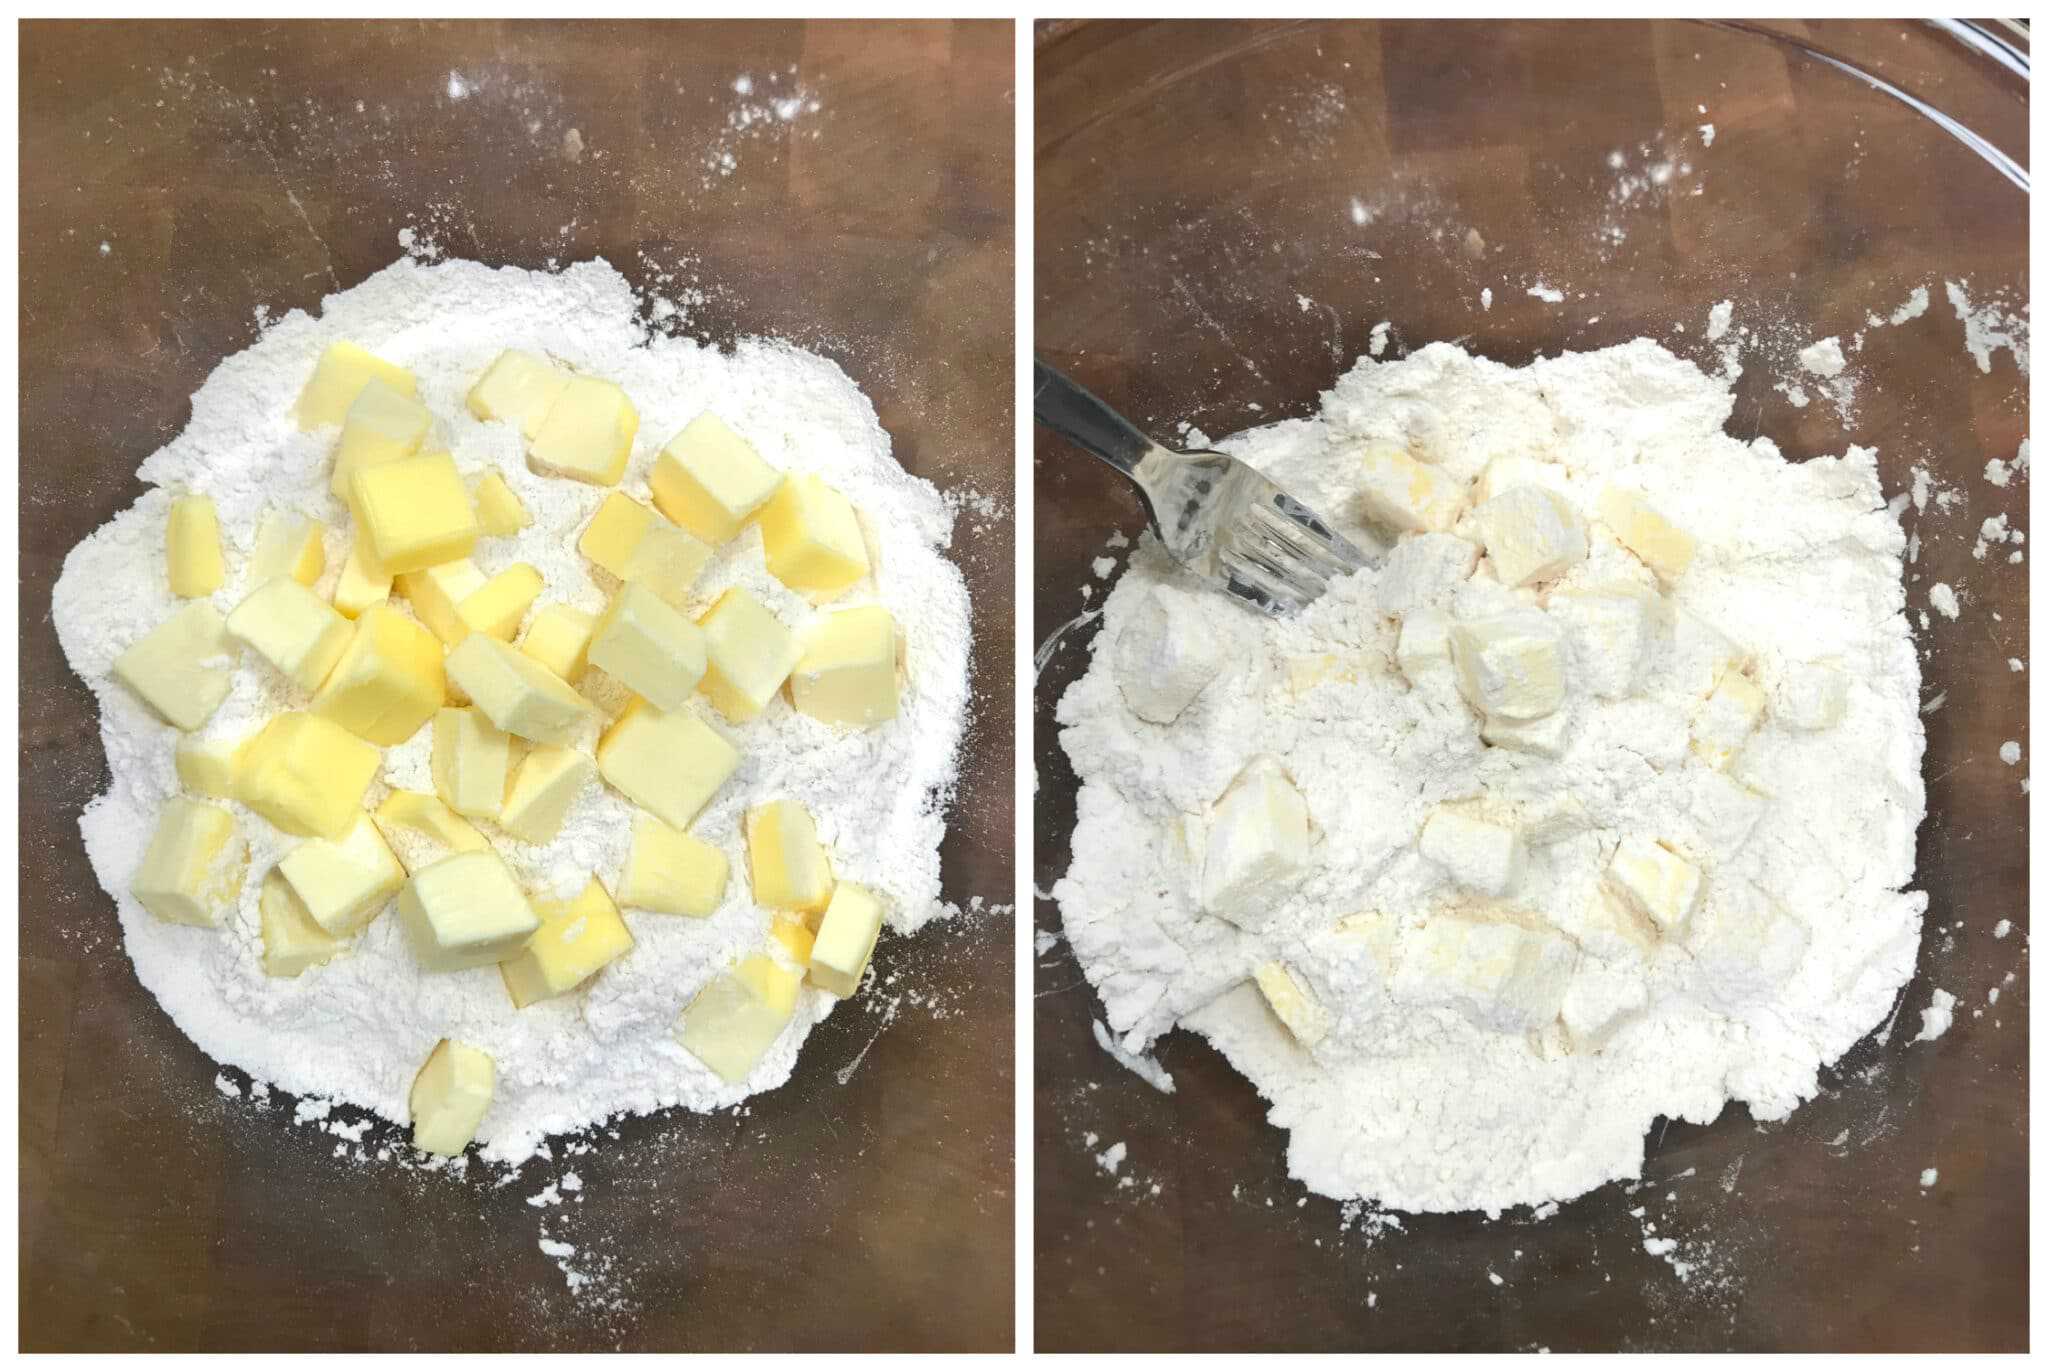
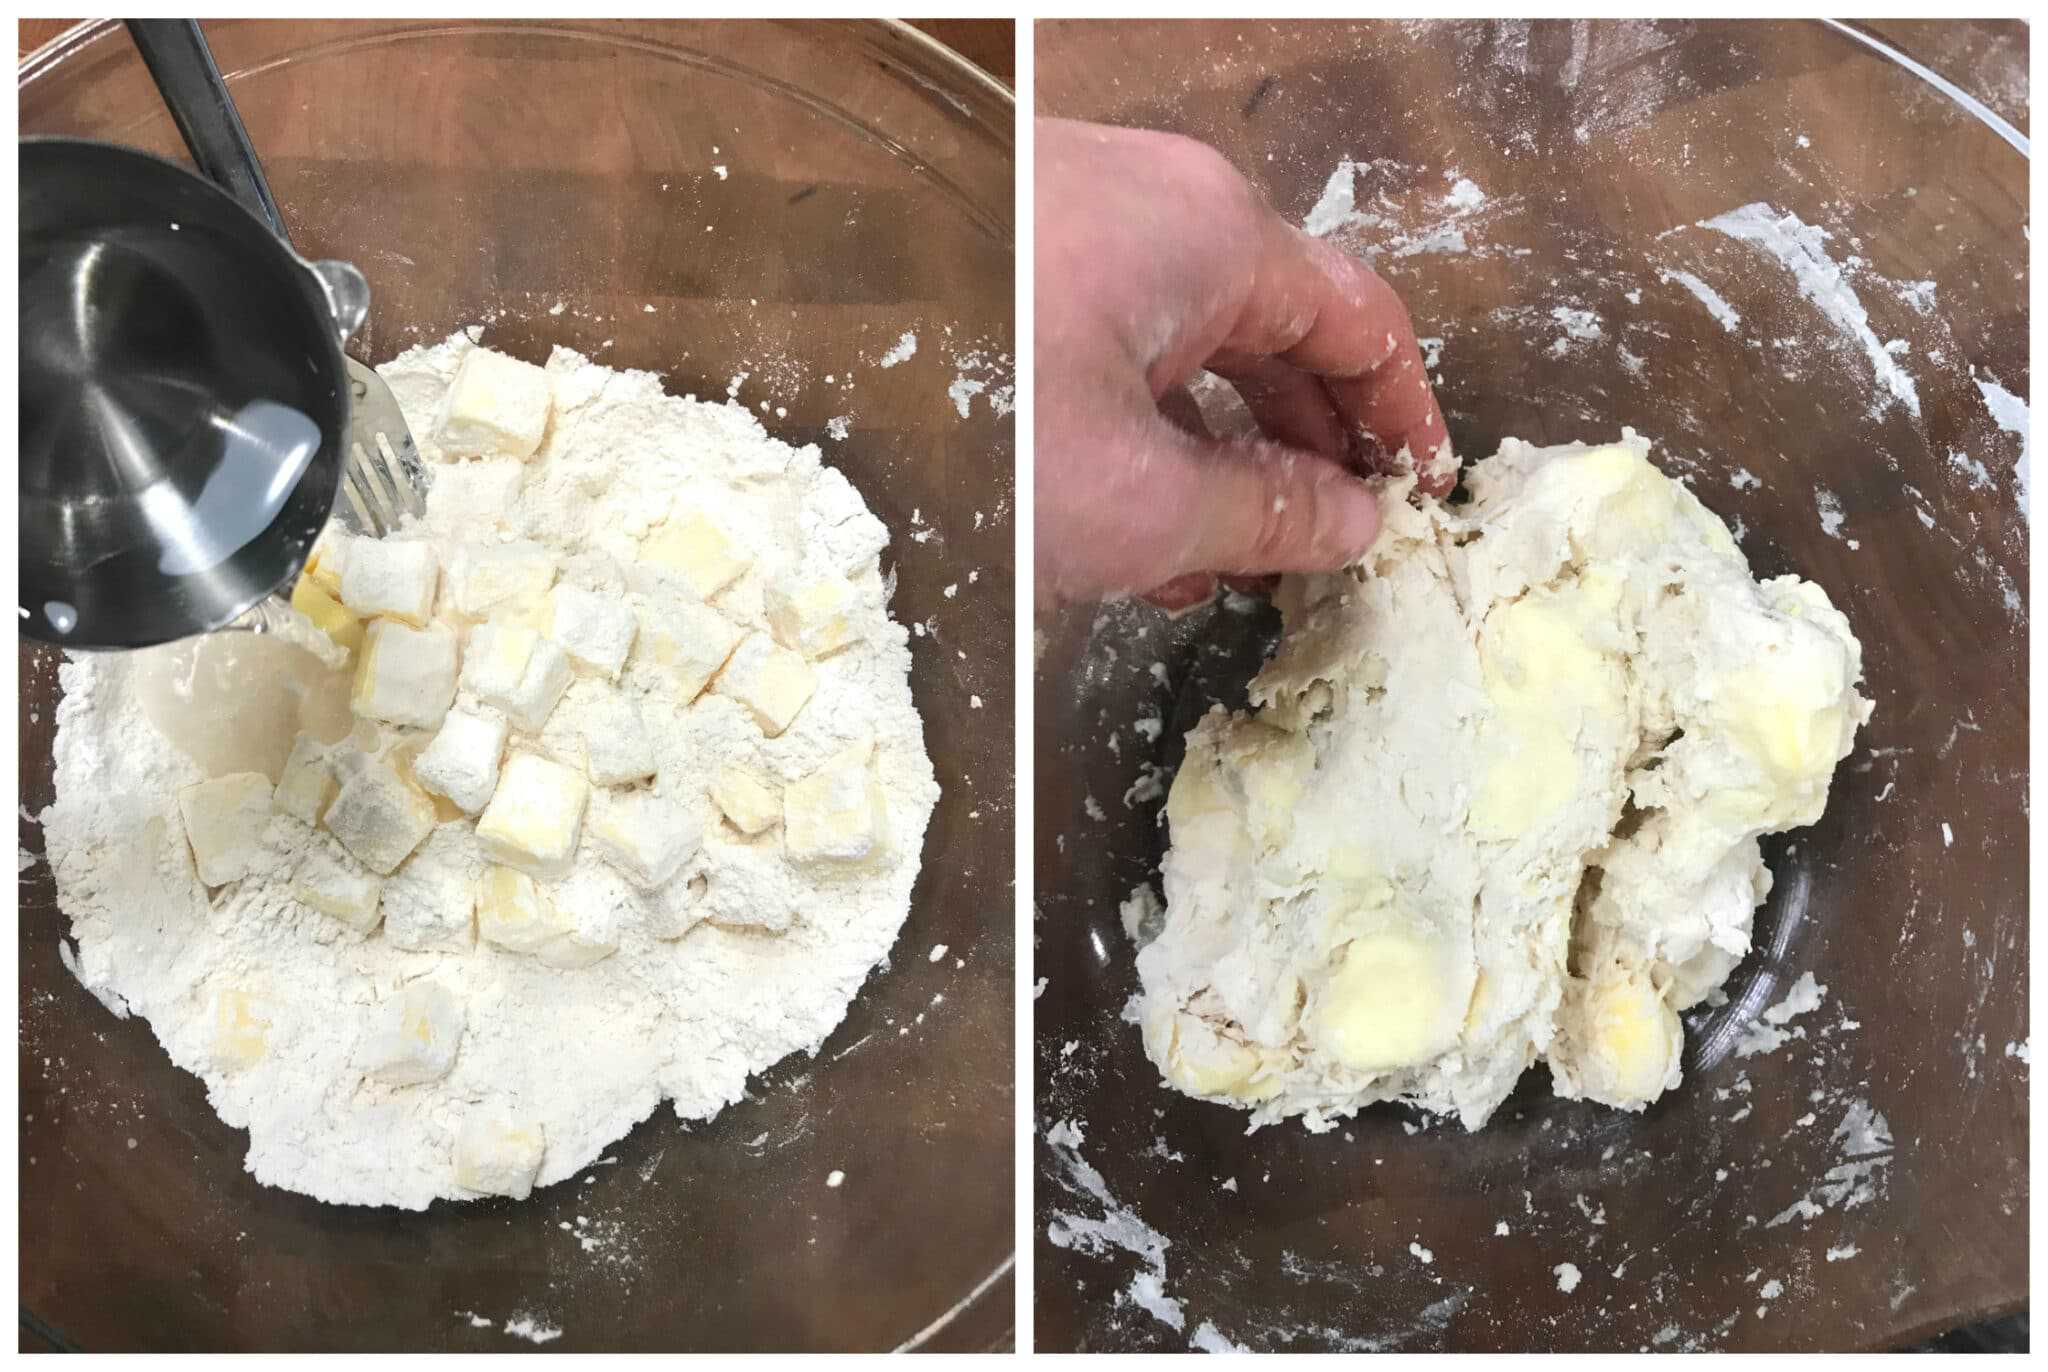
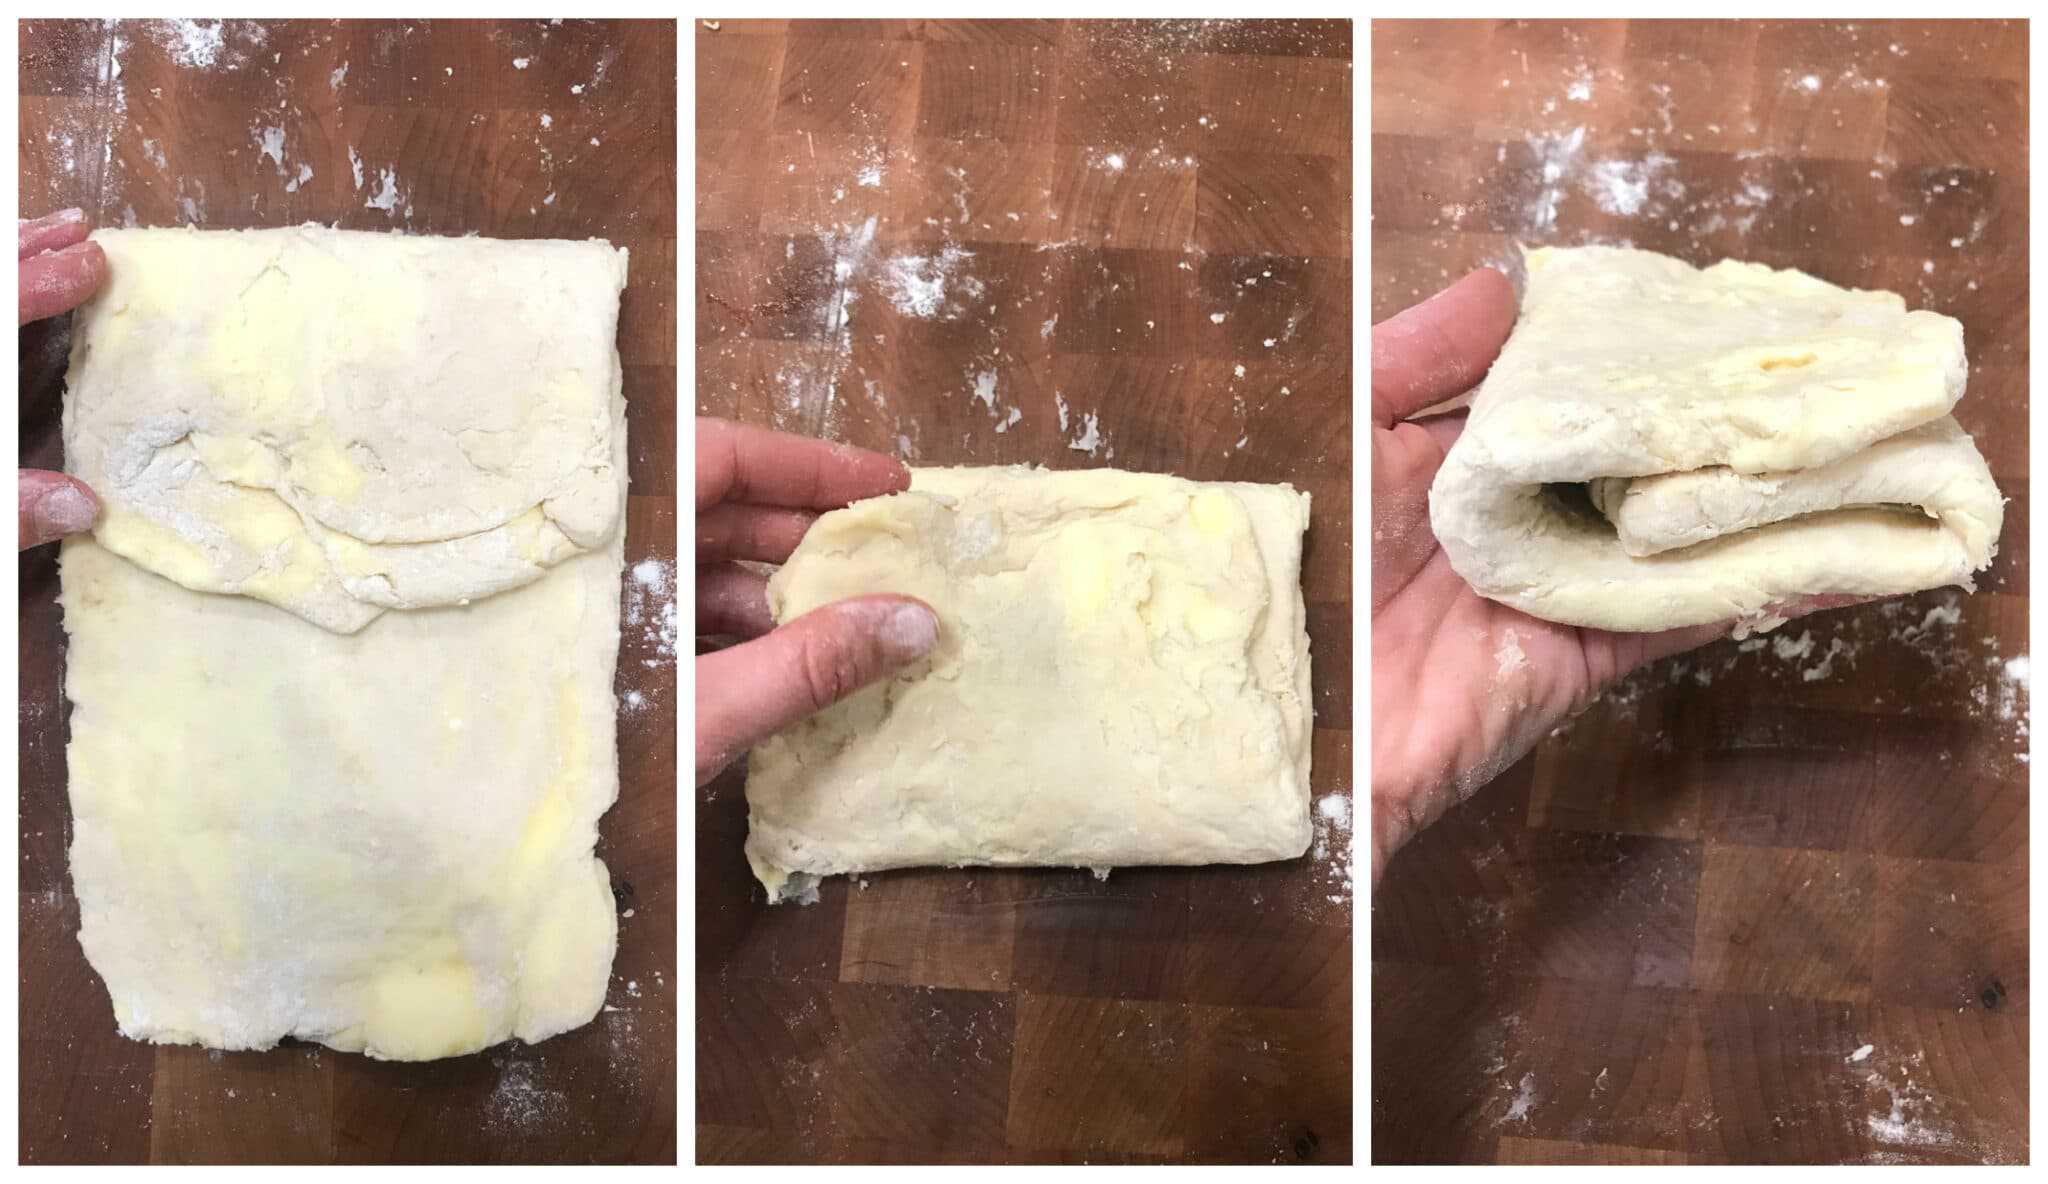
The first method is pictured below. Add the chunks of butter to the flour and simply toss them with flour, then add the water and start working the dough with your hands until it comes together in a rough, chunky mass (the large chunks of butter will remain in the dough). Then proceed with rolling out the dough. Advocates of this method maintain that using the larger chunks of butter produces a flakier end result.
The other method is to pulse the chunks of butter and flour in a food processor until the mixture resembles coarse breadcrumbs, then add the water and work the dough until it comes together. The proceed with rolling out the dough.
Both methods work very well, your choice.
Work very quickly when rolling out the dough so that the butter doesn’t get too soft and smear.
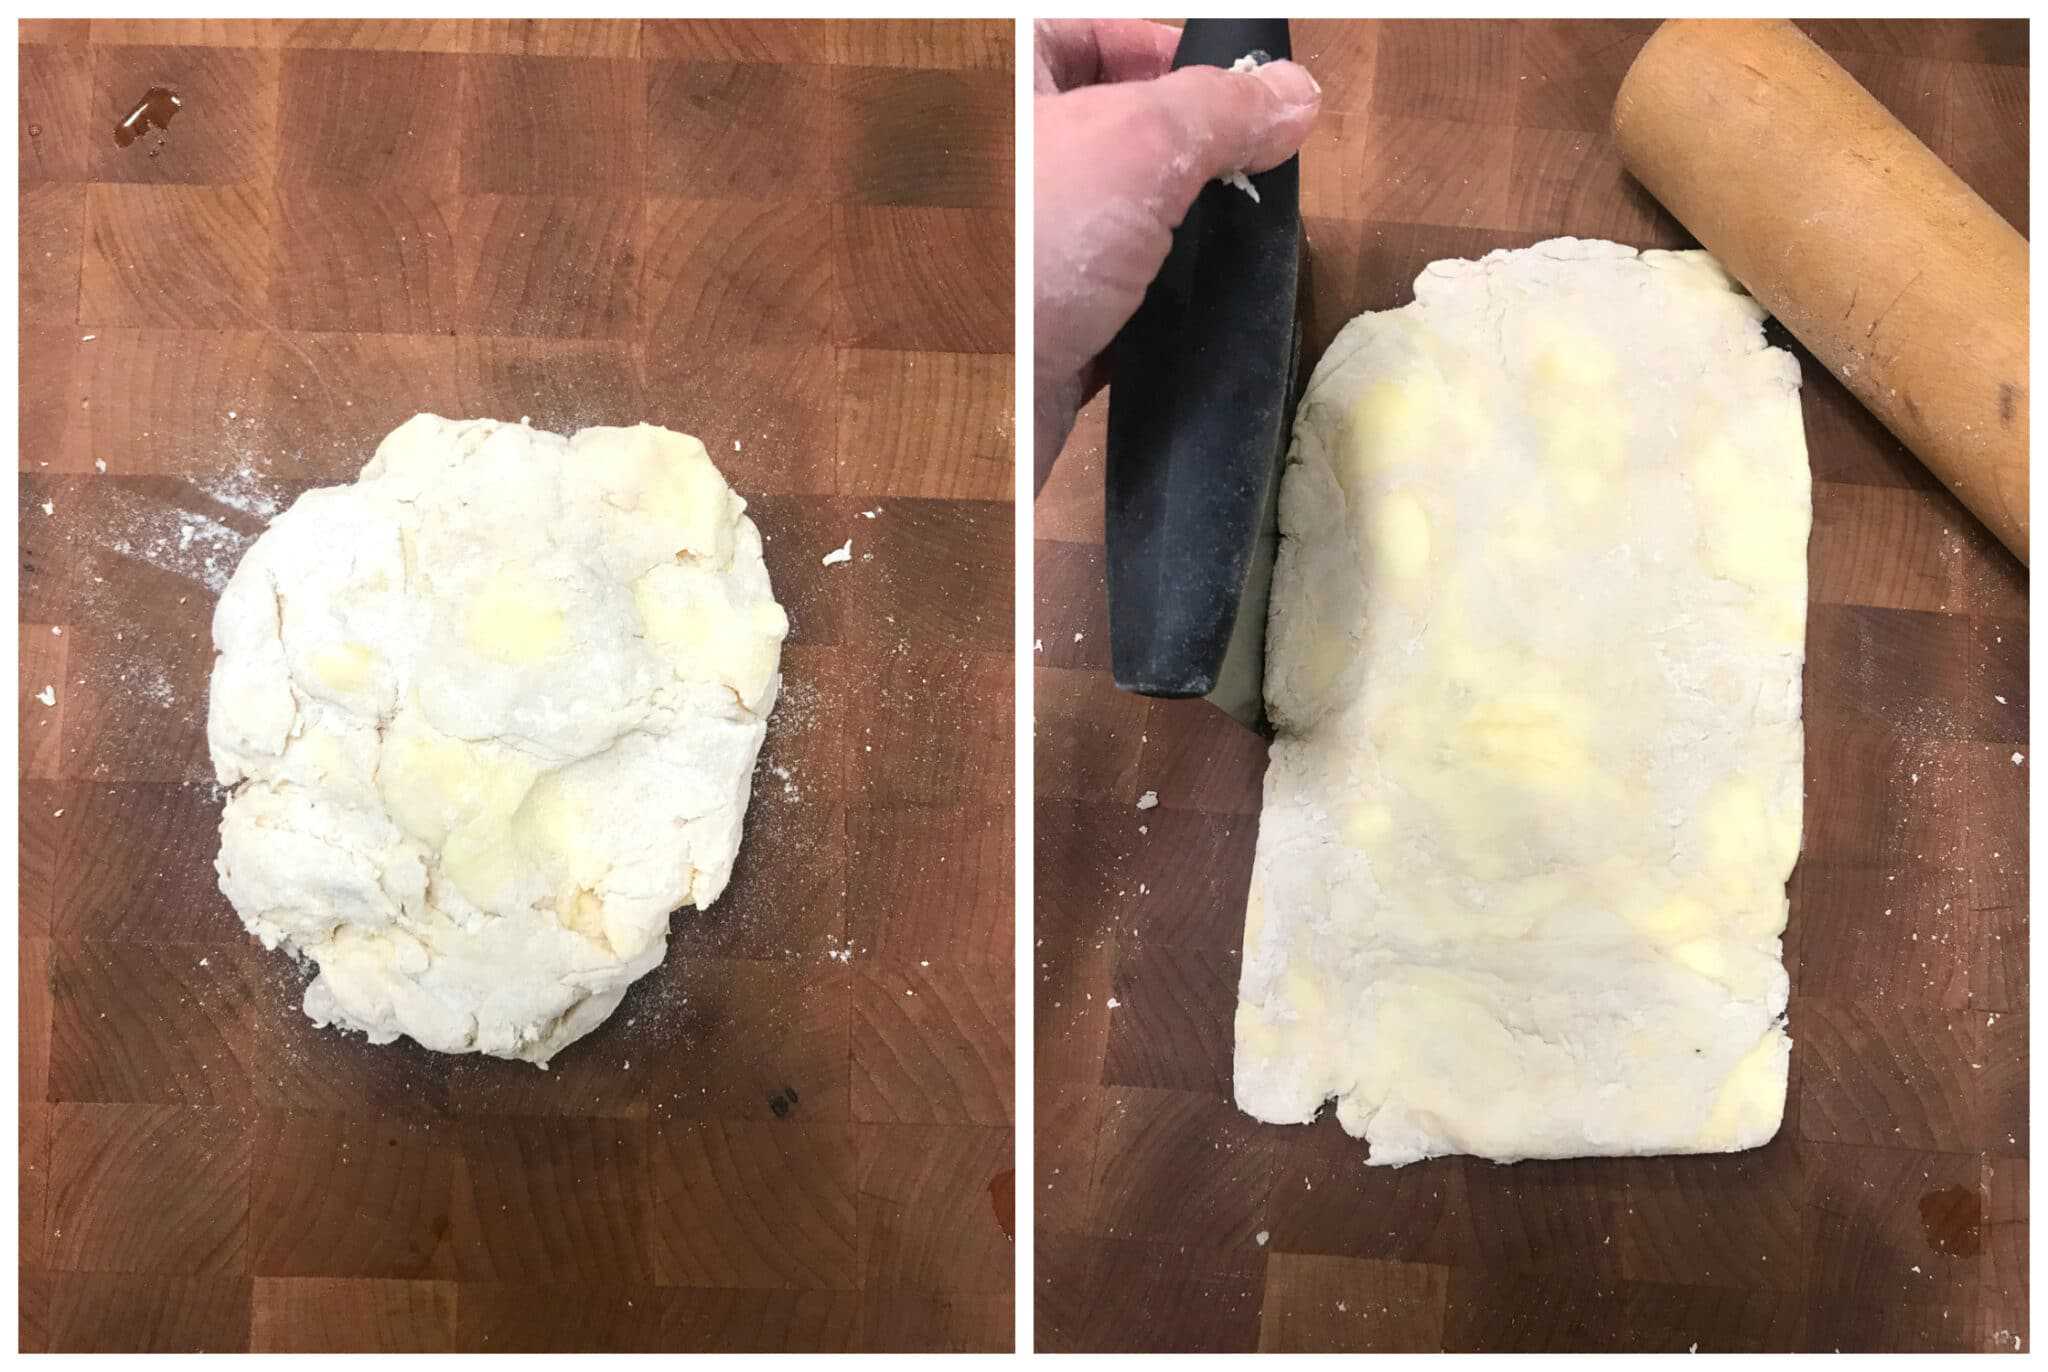
Roll the dough out into a rectangle, about 1/4 inch thick. Use a pastry cutter or similar to straighten out the sides of the dough.
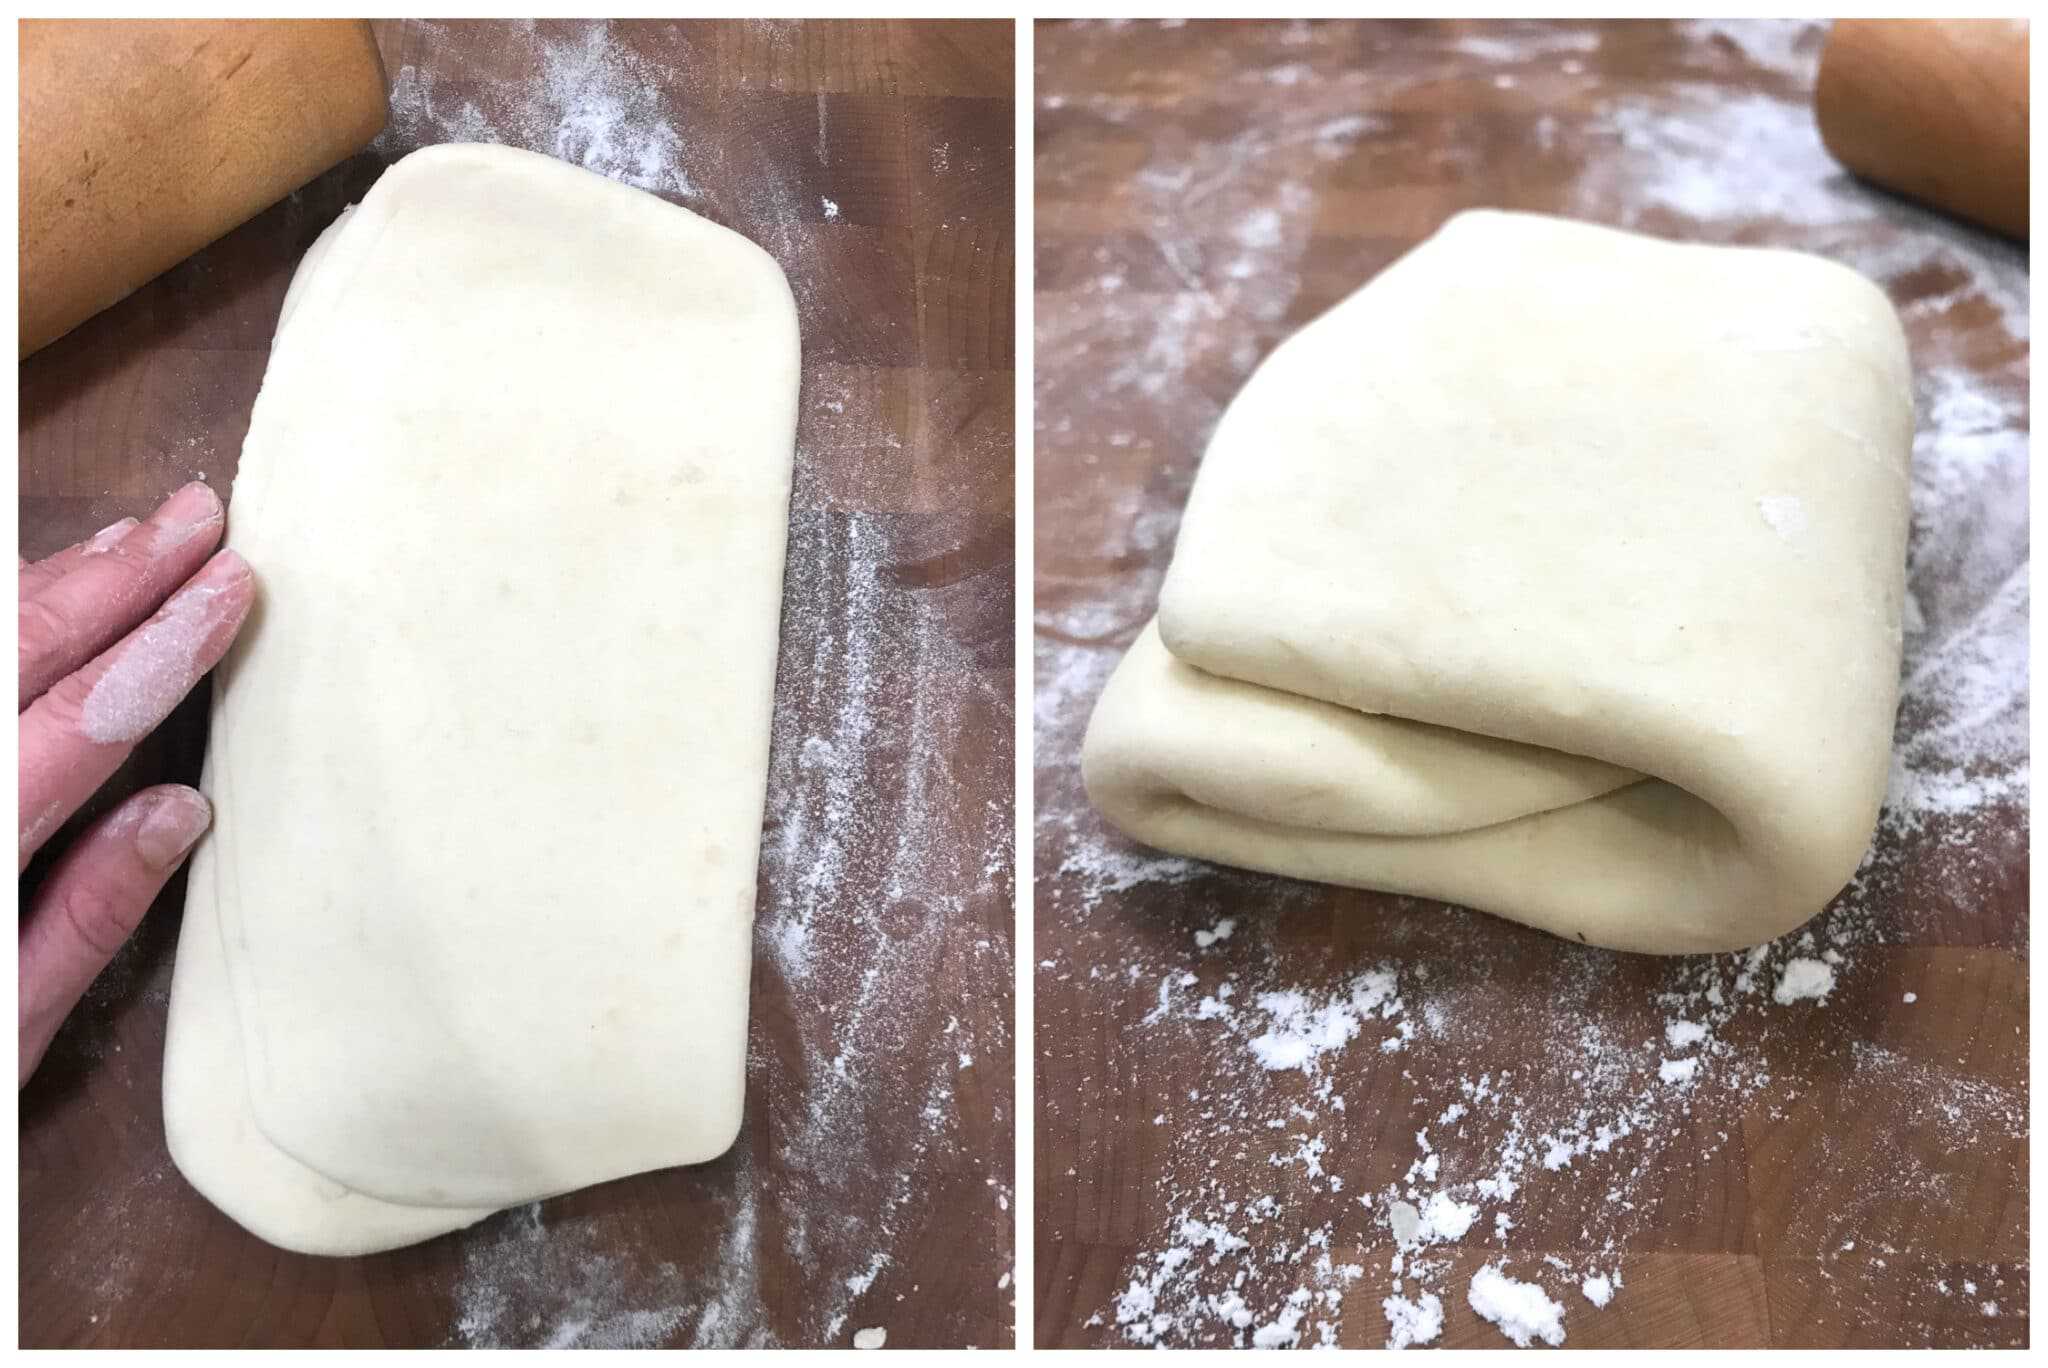
Fold the top of the rectangle (the short side) down to the middle of the rectangle. Then fold the bottom half up over the top half, folding it like a letter.
Wrap the dough tightly in plastic wrap and freeze for 20 minutes.
Repeat the process again at least 4 times and up to as many times as you like, wrapping and freezing each time. It’s critical that the butter in the dough stays very cold so don’t skip the freezing step.
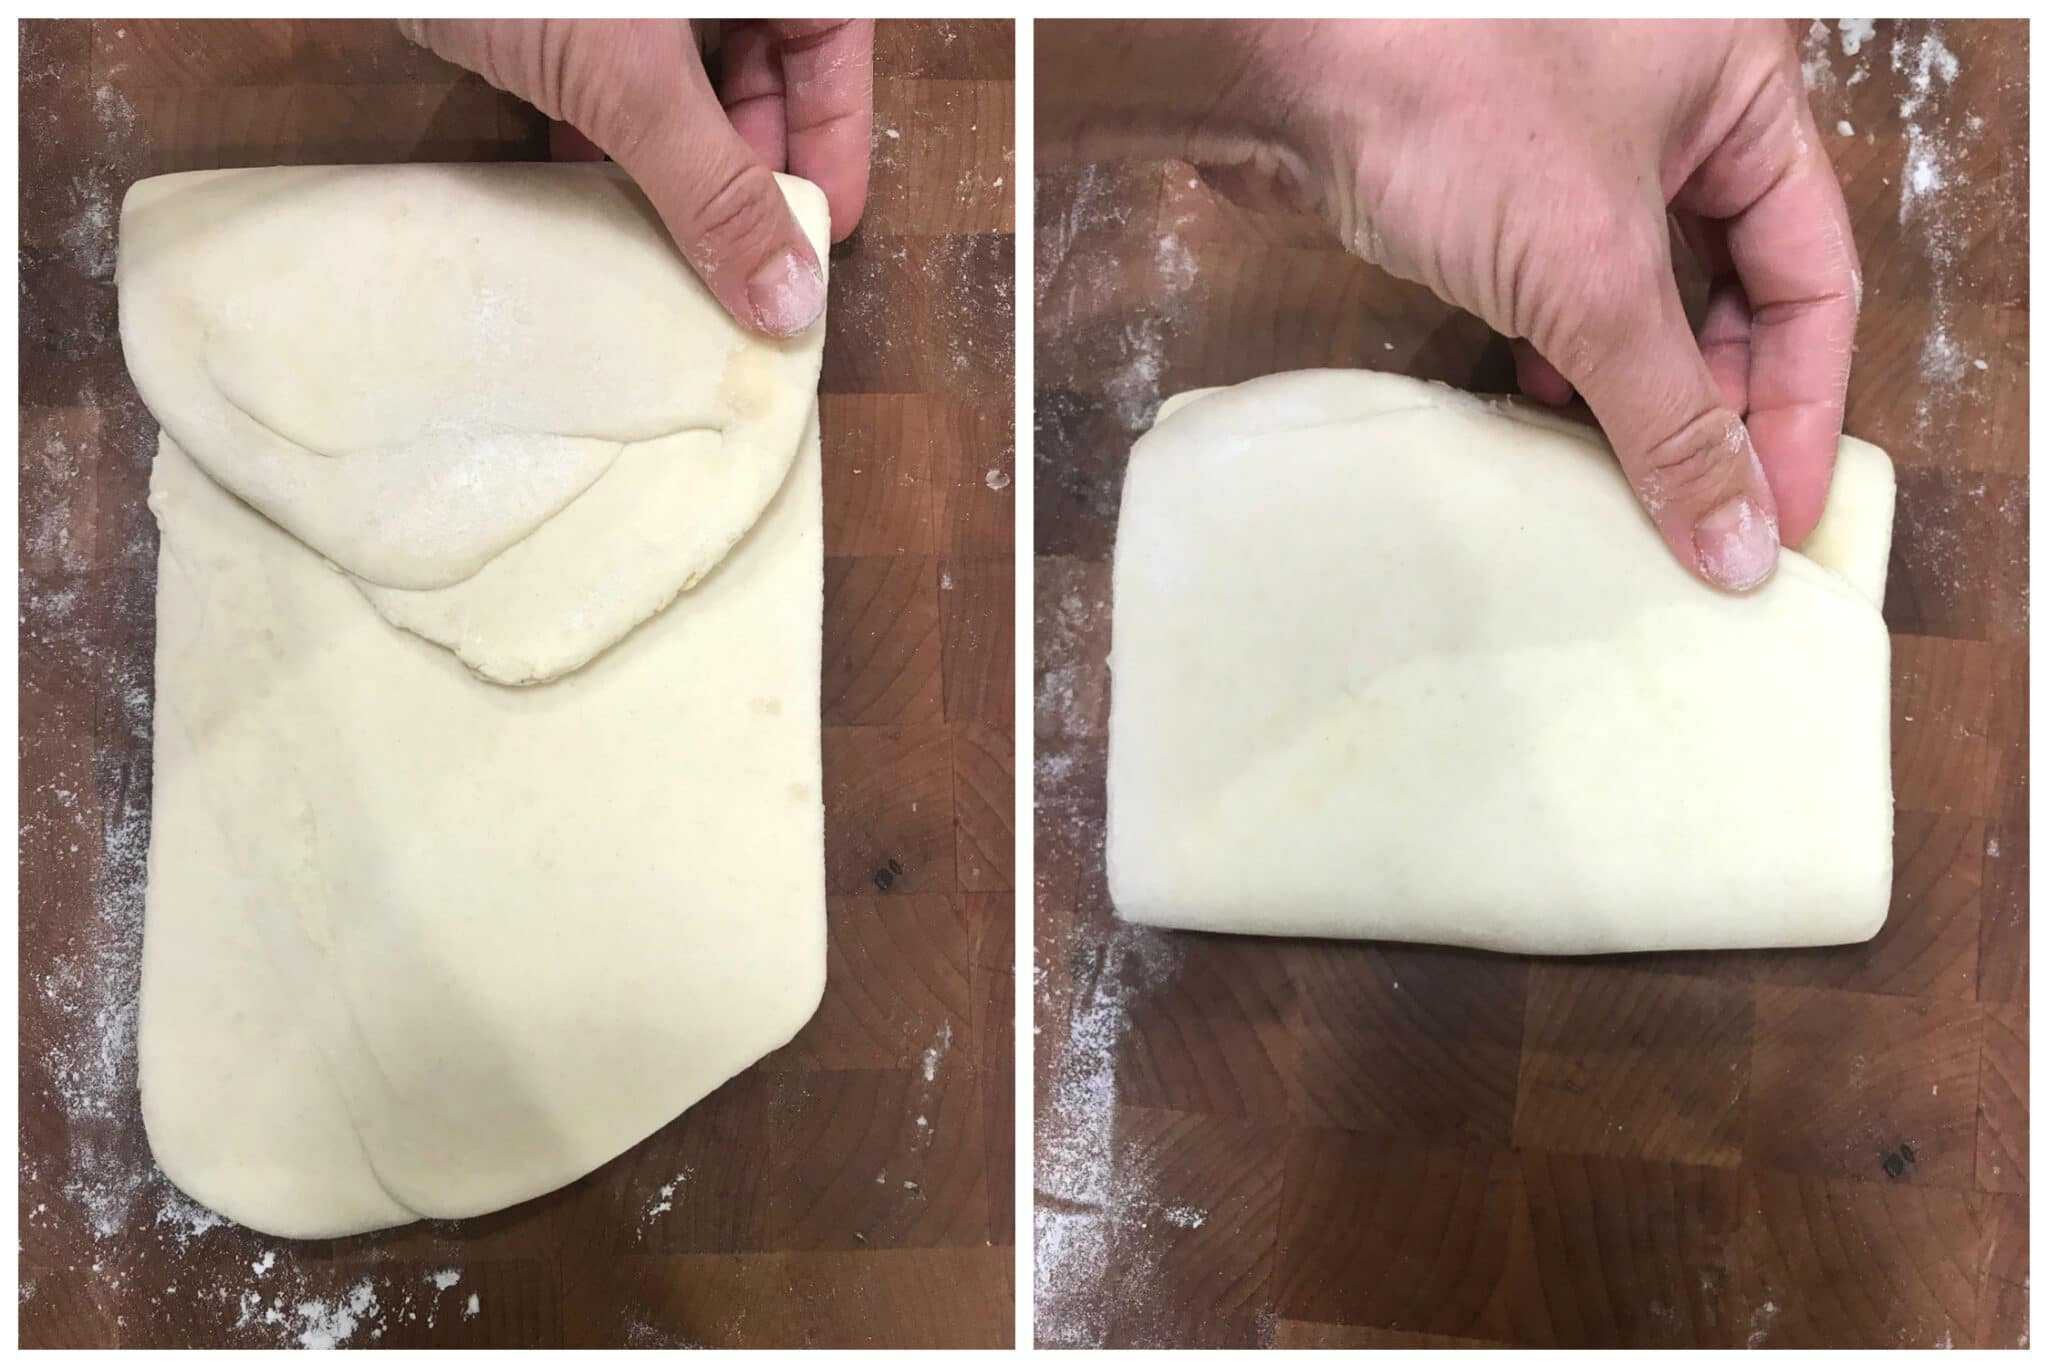
Each time the process is repeated the dough will become smoother and more and more refined.
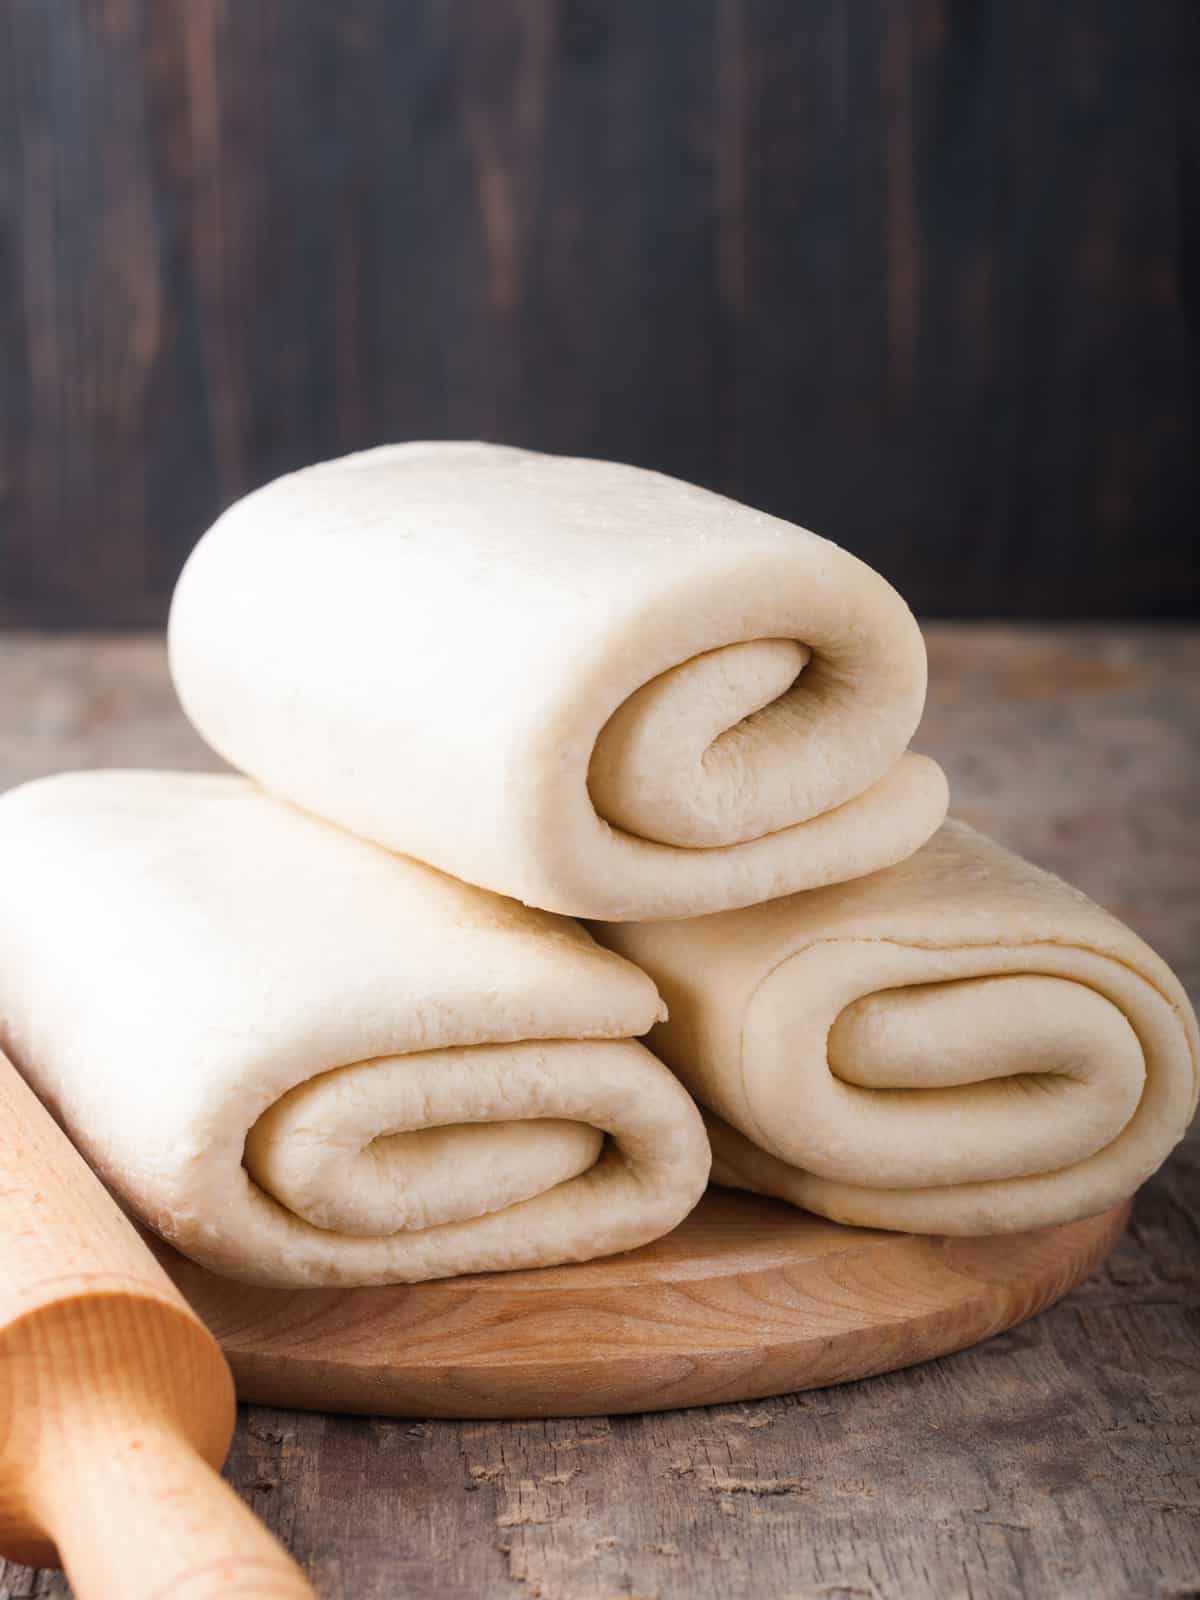
After the final time of rolling, fold the dough like a letter again, wrap very tightly in plastic wrap, and store either in the fridge for up to 3 days or freeze (place the wrapped dough in a freezer bag) for up to a month. When you’re ready to use it simply remove it from the freezer and let it thaw on the counter.
Use your rough puff pastry in any recipe calling for puff pastry. Be sure to chill the pastry for at least one hour before using it.
Enjoy!
Use this rough puff pastry to make our Portuguese custard tarts, Pasteis de Nata!
Save This Recipe

Rough Puff Pastry
Ingredients
- 1 1/4 cups (155 g) all-purpose flour
- 1/4 teaspoon salt
- 1 1/2 sticks (170 g) chilled unsalted butter , cut into 1/2 inch pieces
- 6-8 tablespoons (80-118 ml) ice water
Instructions
- There are two methods for making rough puff pastry and you can choose whichever suits you.The first method is pictured in the blog post above. Add the chunks of butter to the flour and simply toss them with flour, then add the water and start working the dough with your hands until it comes together in a rough, chunky mass (the large chunks of butter will remain in the dough). Then proceed with rolling out the dough. Advocates of this method maintain that it produces flakier end results.The other method is to pulse the chunks of butter and flour in a food processor until the mixture resembles coarse breadcrumbs, then add the water and work the dough until it comes together. The proceed with rolling out the dough.Both methods work, your choice.
- For the following steps work very quickly when rolling out the dough so that the butter doesn't get too soft and smear.Roll the dough out into a rectangle about 1/4 inch thick on a lightly flour work surface. Use a pastry cutter or similar to straighten out the sides of the dough.Fold the short side of the rectangle down to the middle. Then fold the bottom half up over the top half, folding it like a letter (see blog post for pictured illustrations). Wrap the dough tightly in plastic wrap and freeze for 20 minutes.Repeat the process again at least 4 times and up to as many times as you like, wrapping and freezing each time. It's critical that the butter in the dough stays very cold so don't skip the freezing step.After the final time of rolling, fold the dough like a letter again, wrap very tightly in plastic wrap, and store either in the fridge for up to 3 days or freeze (place the wrapped dough in a freezer bag) for up to a month. When you're ready to use it simply remove it from the freezer and let it thaw on the counter.Use your rough puff pastry in any recipe calling for puff pastry. Be sure to chill the pastry for at least one hour before using it. Makes about 1 pound rough puff pastry.
Nutrition
Originally published on The Daring Gourmet on December 18, 2020

Hi, I’m Kimberly Killebrew and welcome to Daring Gourmet where you'll find delicious originals, revitalized classics, and simply downright good eats from around the world! Originally from Germany, later raised in England, world-traveled, and now living in the U.S., from my globally-influenced kitchen I invite you to tour the world through your taste buds!


I like your recipe but I don’t know where you got those nutrition facts from. I usually cook using low sodium amounts & that’s what drew me to your recipe. It only calls for ¼ tsp salt which your chart says 1795 mg. In ¼ tsp there’s only 581 mg sodium. Your chart has 3 times that amount. There’s a little less than 2300 in 1 tsp. It’s confusing. Friends of mine many times will only check the chart before deciding on a recipe. Just an FYI.
Hi Bea, I’m glad you enjoyed the recipe, thank you! Thanks also for catching that glitch. The nutrition calculations are done by a third party software and I think it must have been calculating for salted butter, not unsalted. I’ve just corrected it. Thanks again.
can you use this dough for German apple turnovers?
Hi Elaine, yes this is perfect for apple turnovers.
Ok I’m ready to take my dough out of the freezer for the 4th time and it still has large chunks of butter in it. Do I keep rolling it and make it thinner? The butter refuses to incorporate, very stubborn!
Can you also use a little almond flour in place of some of the regular flour?
Hi Ruth, you can (Keto recipes use it) but just know that it will compromise the texture and flakiness.
Could I use this recipe for my pie crust?
Hi Suzanne, you can use it for any recipe that calls for puff pastry, so if the pie is for a puff pastry base then yes. Alternatively you can try my recipe for Ultimate Pie Crust.
How great to have a recipe for homemade puff pastry! So many goodies to make with this!