The 1912 Modern Farmhouse Kitchen Remodel: The Demolition
This post may contain affiliate links. See my disclosure policy.
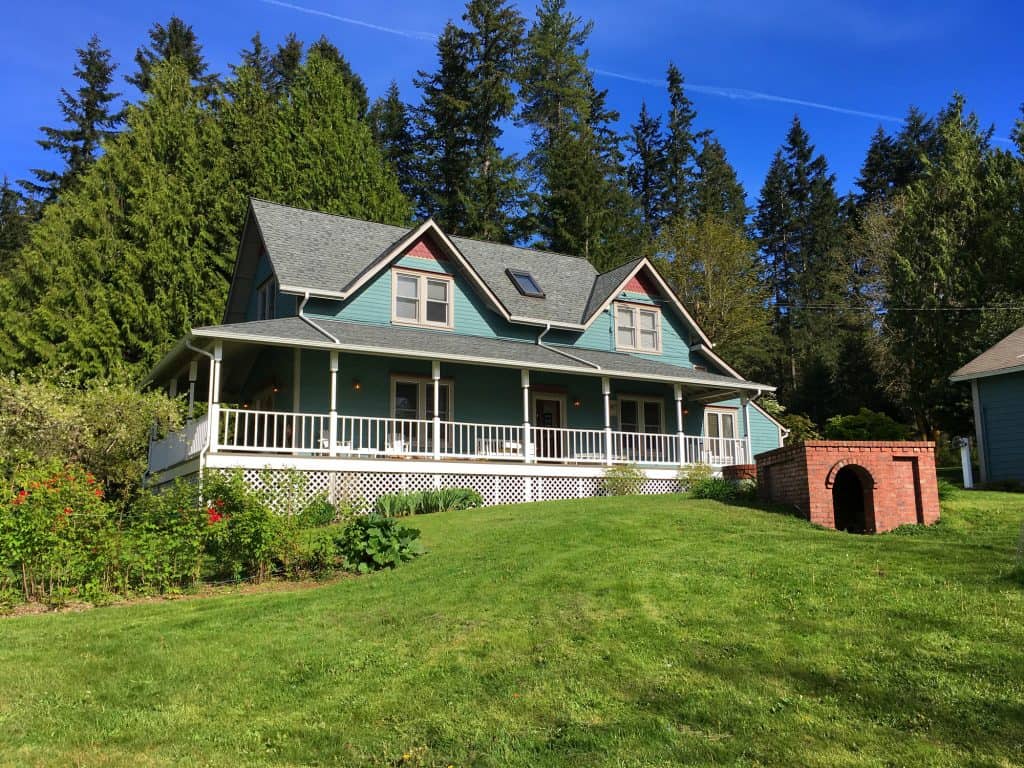
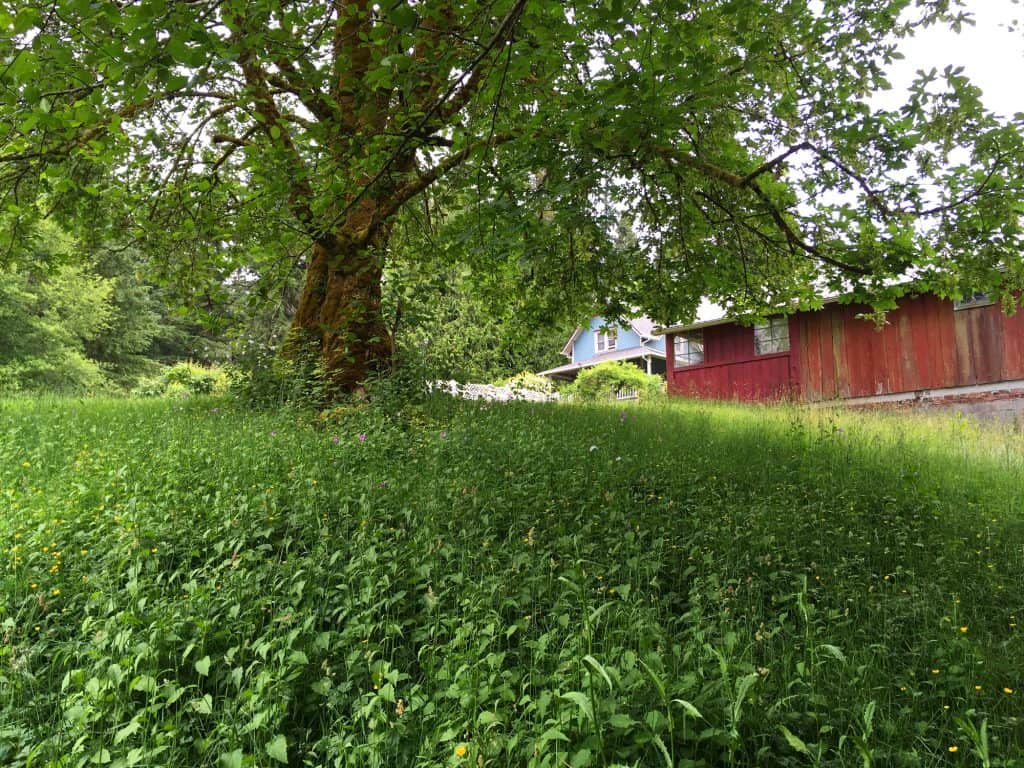
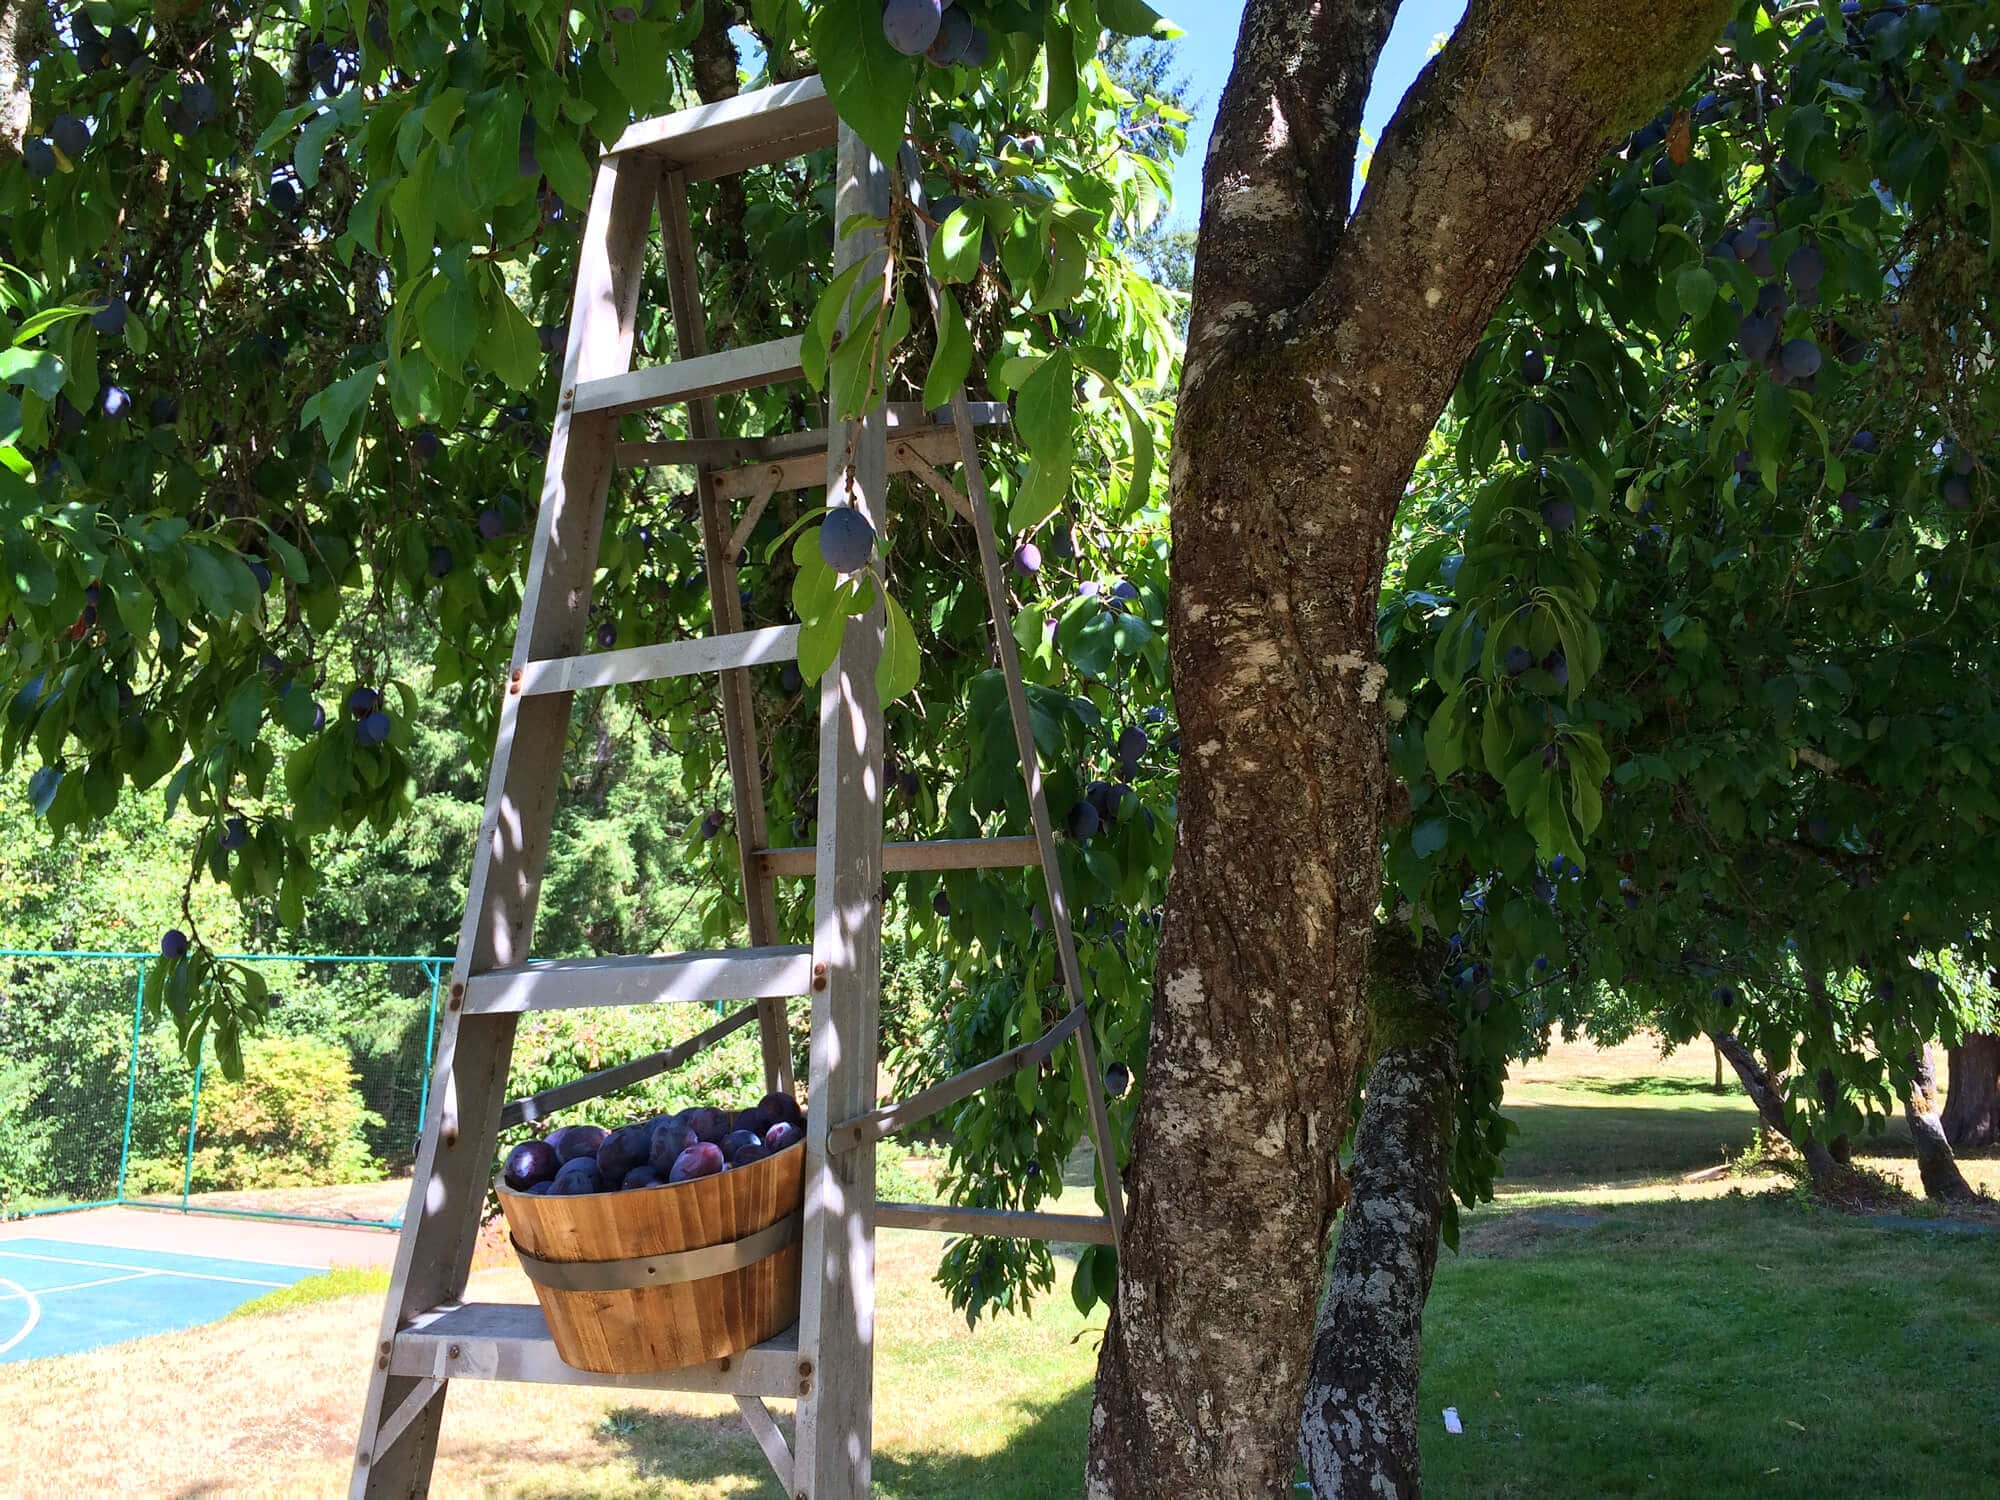
It’s been two years since we moved into our 106-year-old home. Since then we’ve been working hard and playing hard, enjoying our 13 acres (we recently bought the neighboring parcel) through all four seasons – hiking, basketball, pickleball, badminton, skiing, sledding, building snowmen, having snowball fights, raking leaves, picking apples, pears, berries, rhubarb and plums, making fresh apple cider, working in the greenhouse, growing vegetable gardens, and remodeling our outbuildings (the first project was a complete DIY remodel of our guesthouse).
We’ve also been keeping busy with the addition of some animals: So far we’ve added chickens, a coonhound puppy and just bought our beehive to start beekeeping this Spring. It’s something we know absolutely nothing about but are looking forward to tackling it!
Below are a few pics to refresh your memory. You can also check out my original post and virtual home tour.
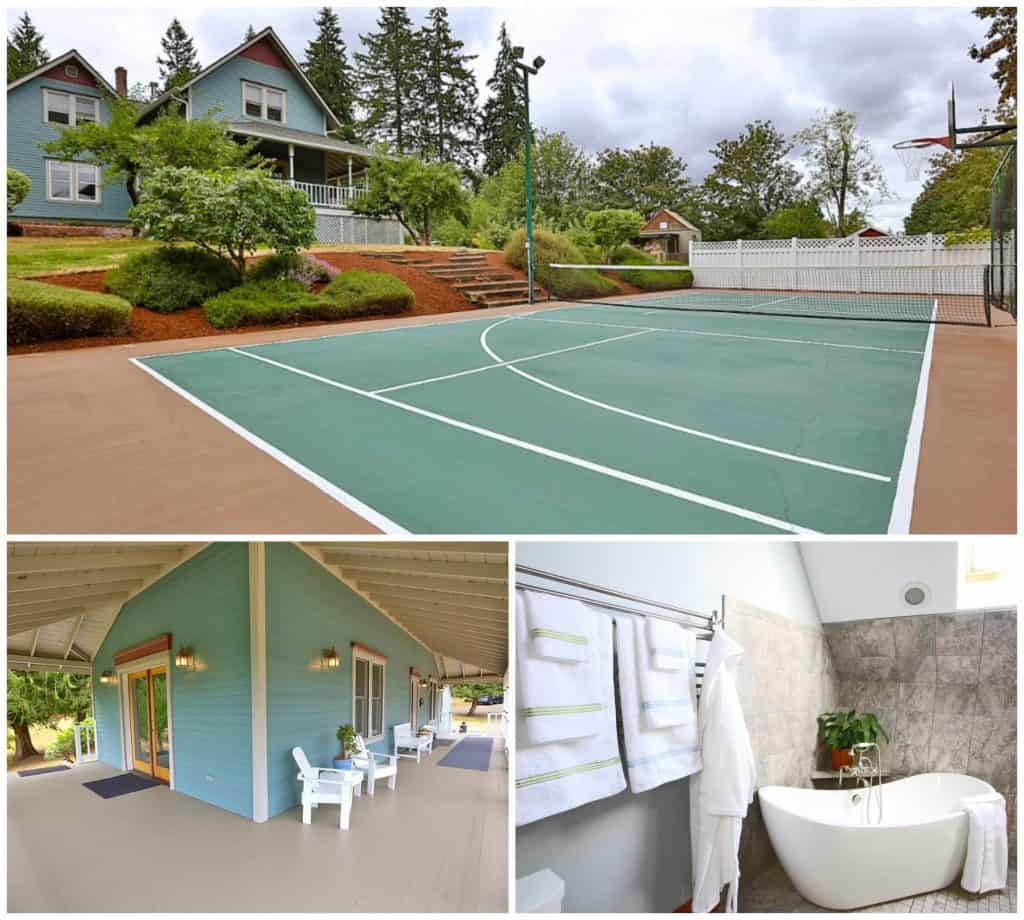


One of the things we really love about the home is that many of the original historic elements are still in place and they’re also in excellent condition (original fir flooring throughout the house, leaded glass, original window trims and doors, bead board ceilings, etc). The bathrooms are updated (the master bath is especially amazing, see pic above) and a newer addition was added to the home in the 90’s which includes an incredible master bedroom (take the tour of our home and property).
The only thing about the house that needed work was the kitchen. And that was our next project after remodeling our guesthouse.
We said we weren’t going to do it ourselves. After having spent an entire year of our free time on the complete remodel of our guesthouse (see the AMAZING Micro-Dwelling Project!), we were dead set on hiring it out this time. But once we finished the demolition and installed the flooring ourselves, we stood in the kitchen looking at each other, shrugged our shoulders and said, “Well, I guess we might as well install the cabinets ourselves, too.” Once those were done: “Well, I guess we might as well do the backsplash…and the crown moldings…and the countertops and the…..” You get the drift. We did it again. All by ourselves. And may this truly be the LAST time we have to tackle anything this large again!! (That is until we tackle the three outbuildings, ha!)
And so, dear friends, welcome to our 106-Year-Old Kitchen Remodel!

Let me show you around the the kitchen.
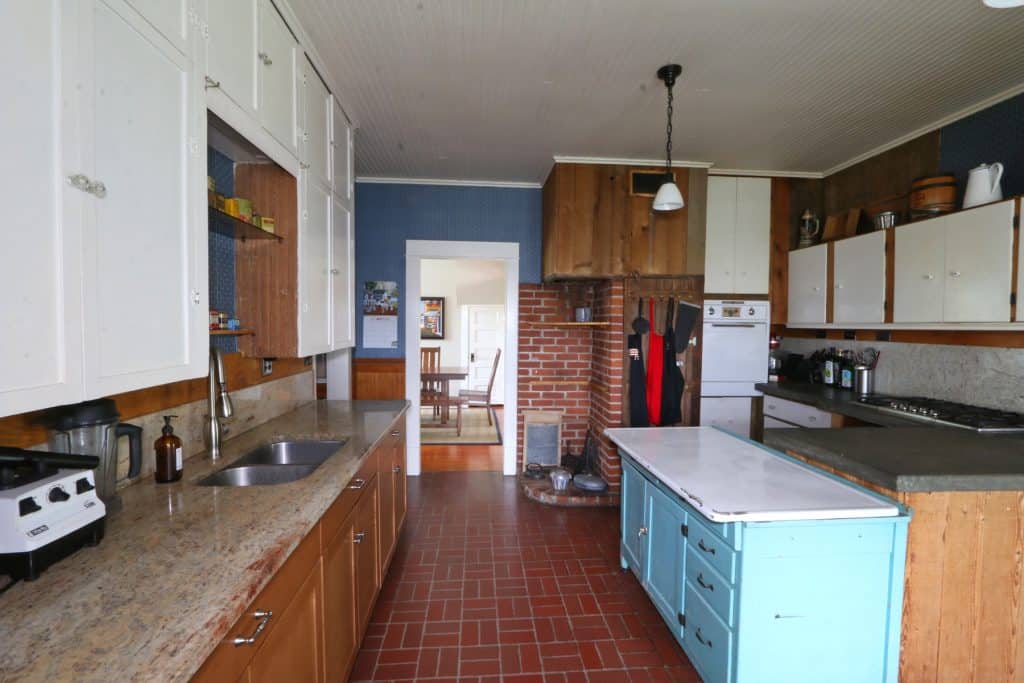
The kitchen was a combination of poured concrete countertops on one side and granite countertops on the other and a hodgepodge of cabinets, one set of them purportedly original to the home. The kitchen has the original bead board ceiling and one of the original doorways and vinyl flooring from the 1970’s.
It even had a General Electric oven from the 1940’s! That’s what I’ve been using the past two years since we moved in and it worked like a charm.
You’ll notice there’s no dishwasher or fridge in the kitchen. The fridge was in the pantry/laundry room off of the kitchen. I wanted to get one of those portable dishwashers until we remodeled the kitchen but my husband was adamant about not having one of those in the way. He said, “I’d rather do all the dishes myself than get one of those.” He got his wish. He’s been the primary dishwasher the past two years and I think he’d agree that he’s even more excited about our new dishwasher than I am ;)
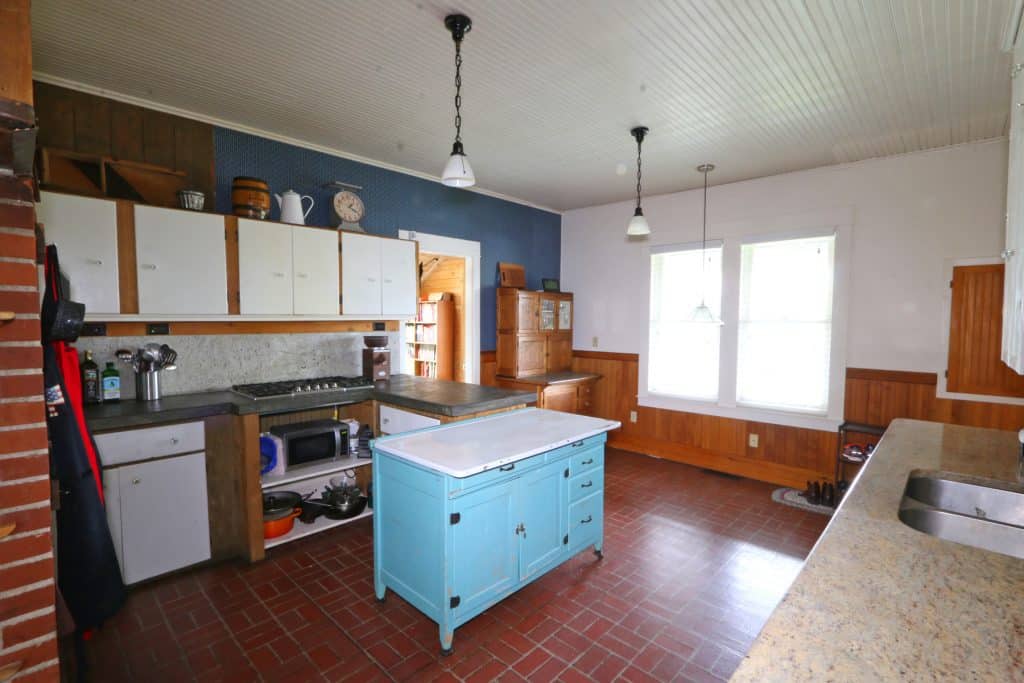
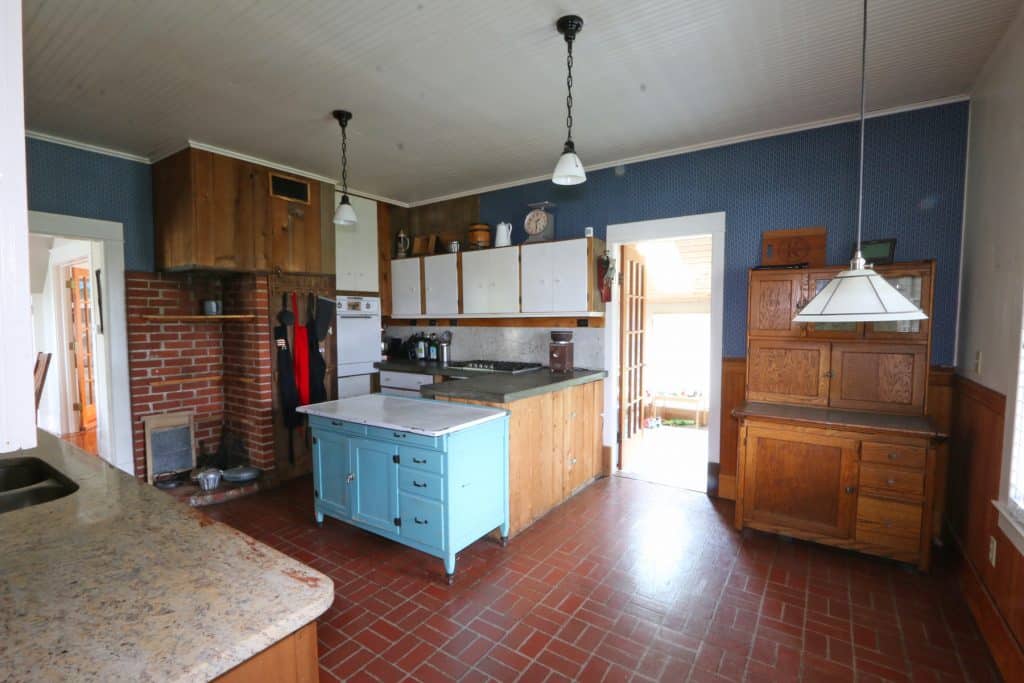

The base of the hearth and chimney are 1912 original but the hearth would have been much bigger at the time it was built. We wanted to leave this original element in our kitchen to provide that historic and rustic authenticity.
Our original intention was to put a small, sleek, contemporary wood stove in there. Something that would continue the theme of blending contemporary with historic as well as something that was functional and could provide an alternative source of heat. We had a chimney expert come out who told us that because of the infrastructure of that old chimney it would be a major fire hazard to install a wood stove. He said the only option would be a gas stove. That defeated our purpose of having a heat source we could rely on in emergency situations where no gas or electricity were available. But that aside, an even larger issue arose.
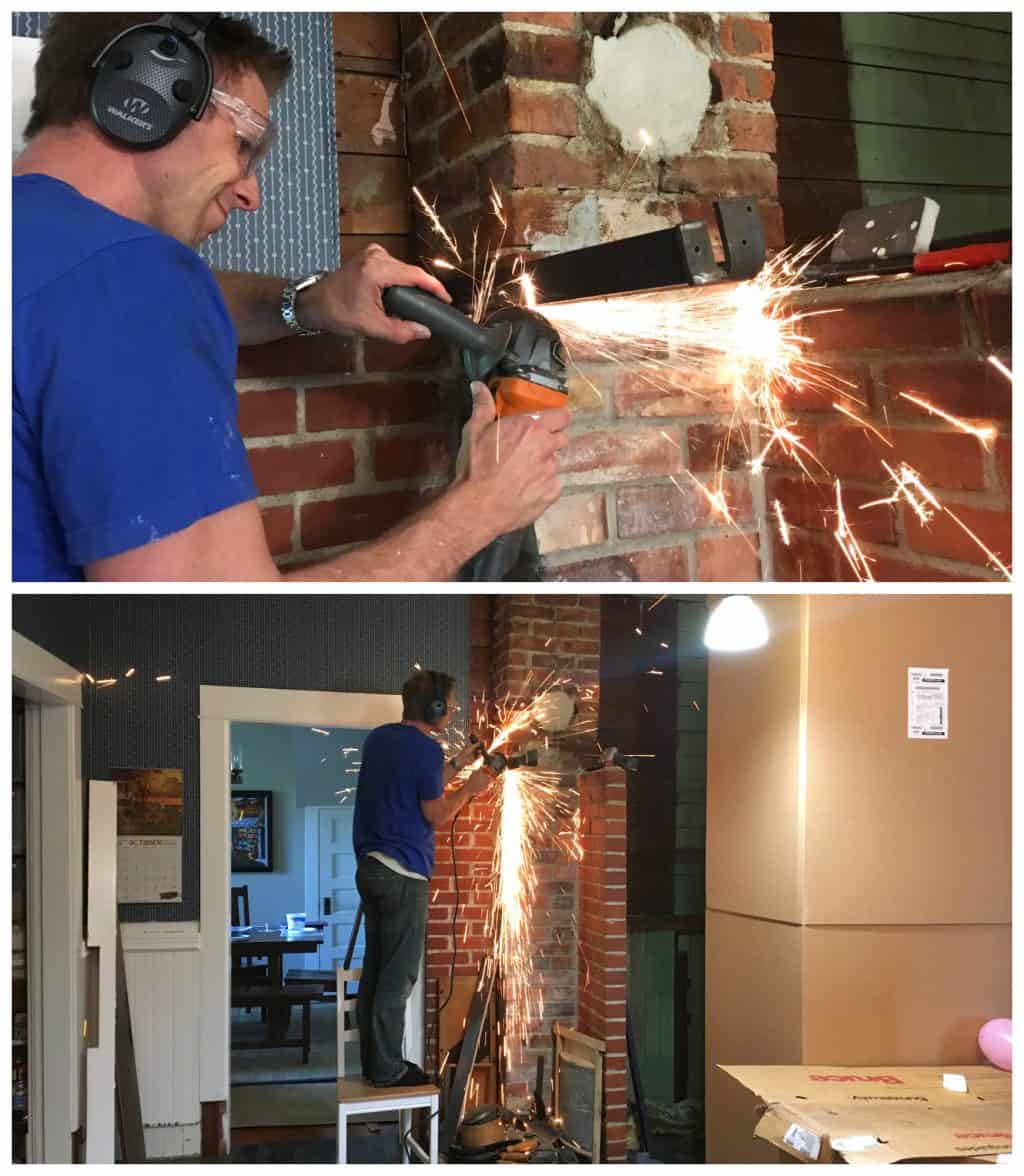
Above the converging brick walls is the chimney that runs up through the second floor and through the roof. It’s a very long, very heavy chimney and it was partially resting on the brick walls and two angle irons. Two experts told us that any slight earthquake could cause that whole chimney to come crashing down through the house. They told us we had two options: Remove the entire chimney which would not only costs several thousands of dollars, but would also take away the awesome-looking chimney on the top of our roof. No way! That’s part of what gives our home its visual character on the outside.
So we went with the second option: Extend the brick column all the way down to the ground so the chimney had something stable to rest on. We brainstormed options for this and decided it could actually be an attractive nook for shelves where we could place some cookbooks and nick nacks.
We were able to source some original old bricks from Seattle that were from the same time period of our home, over 100 hundred years old. We figured it would be easier to age the current brick wall to look older to match these 100-year-old bricks than try to make brand new red bricks look decent against the current brick wall. It was the right way to go. Far right picture: We still need to wash the previous brick walls with a bit of mortar to age them.

The angle irons were something else! Todd used his RIGID angle grinder and his Milwaukee Sawzall to saw right through that thick metal.
The kids and I stood further back in the kitchen to watch the show – it was pretty cool!

It was with something of a heavy heart that we began tearing into the kitchen. I’m really sentimental and don’t like destroying old things. It almost felt like a betrayal. But my desire for a modern, efficient, fully-functioning kitchen overrode my sentiment along with knowing that our kitchen design would keep many of the original/traditional elements intact.
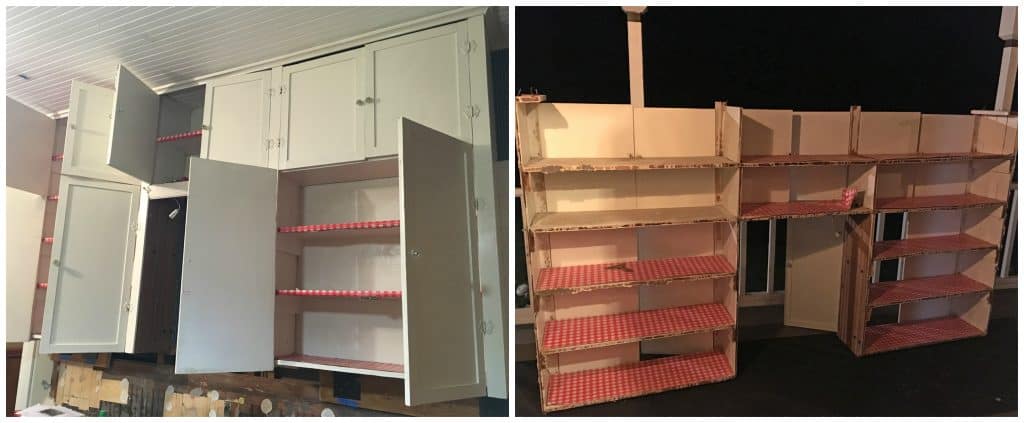
The previous owners had thought that the cabinets on one of walls were 1912 original. That made it especially hard to tear them out. But once we got a look behind them we saw that the backing on the wall was much more recent than the supposed age of the cabinets, so we’re not so sure they’re really that old after all. Possibly an owner before them had found some salvaged cabinets and installed them. In any case, out they came and we may end up installing them in workshop both for the sake of sentiment and some extra storage space.
The poured concrete countertops were a BEAST to break up and tear out, but we finally got them out.
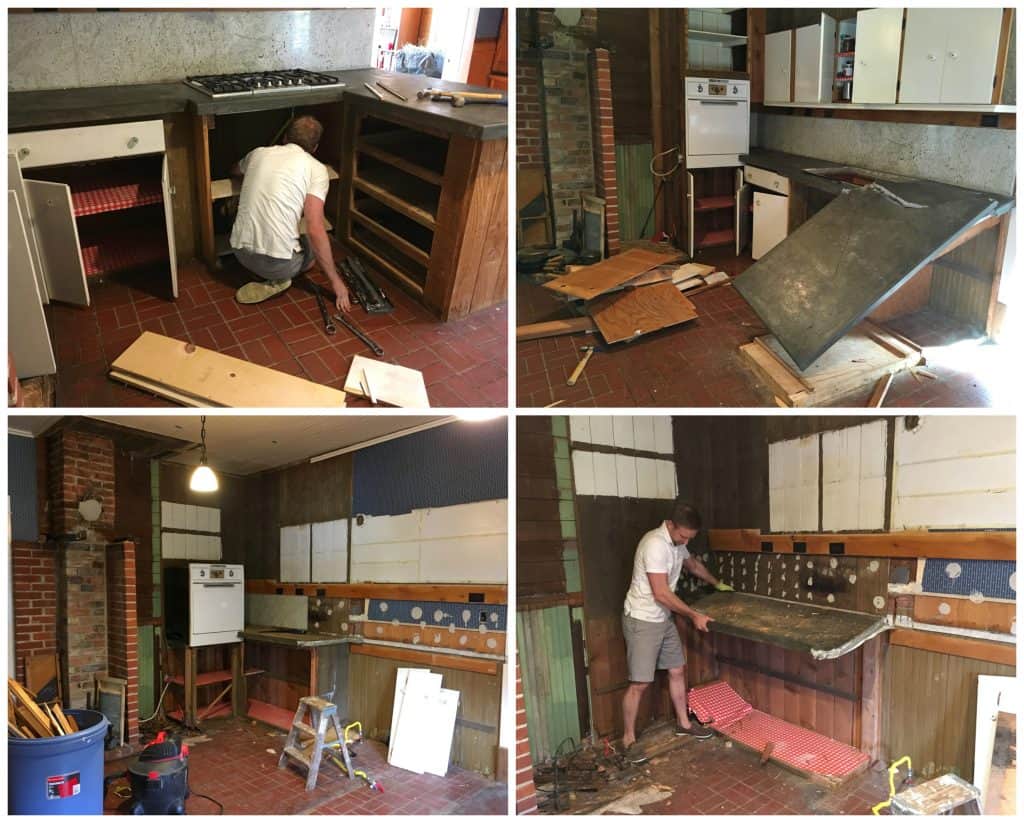
Because of the kitchen window being next to the porch that has a roof over it, the kitchen is really dark. For that reason two decisions were very clear: We needed white trim and white cabinets and we needed lots of great lighting. The pendants in the photos below came out and we put in new pendants and recessed lights.
For the kitchen cabinets we already knew exactly who we wanted to go with: Belmont Cabinet Co. We used them for our guesthouse kitchen and loved them so much we wanted to use them again for our main kitchen, this time upgrading to their highest line, the 1900 series.

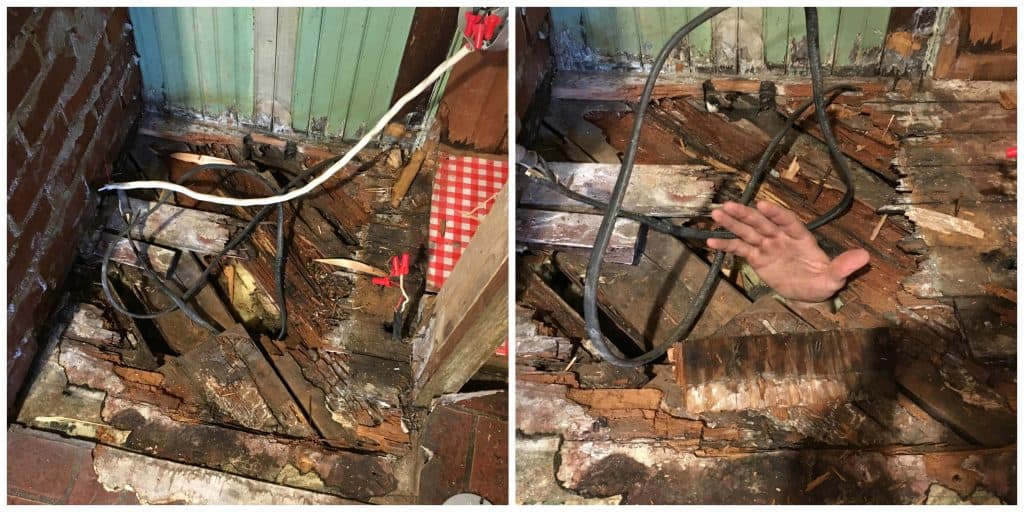
When we took out the old wooden door next to the oven (affectionately know as the “chicken coop door” because it was salvaged from an old chicken coop on the property) and removed the flooring we discovered something no one ever wants to find: Dry rot from water damage. Fortunately the leak that caused it (probably from the chimney) had already been fixed before we moved in. But we needed to get that spot fixed.
And we were all the more anxious to fix it once we realized it was haunted by The Human Hand (below right).
Okay, that’s Todd’s hand. He went down into the crawl space below and thought he’d give me a scare. (He did. And he’s lucky I didn’t step on it.)
I’ve praised this particular tool several times during our previous remodel project of our guesthouse and it has continued to be INDISPENSABLE for so many projects. We can’t recommend it highly enough: The Bosch Oscillating Multi-Tool.
My husband will tell you that no one who does any kind of handyman work should be without it. It’s his favorite tool and it truly lives up to its name as a “multi-tool” because it can be used for so many different applications.

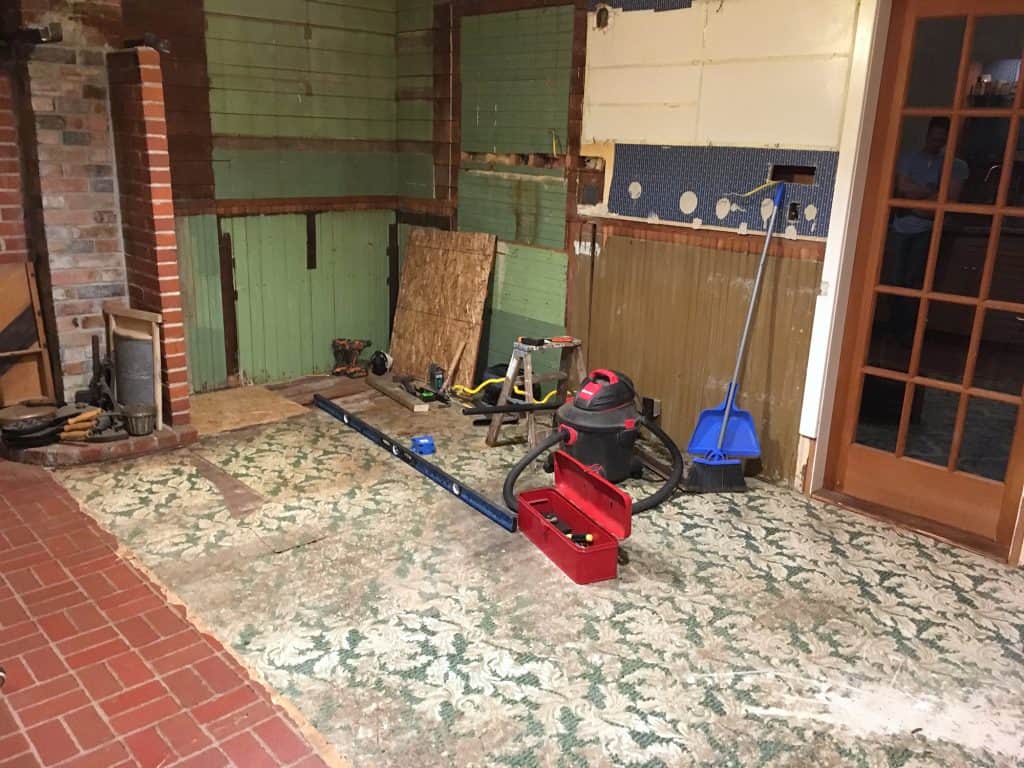
When we moved in the vinyl flooring was brick-patterned and, considering its age and the high traffic area, was still in excellent shape. It was clearly very high quality vinyl and we were able to find the exact flooring in a 1970’s Armstrong Flooring catalog. That was fascinating to find out considering we chose Armstrong for our guesthouse remodel and went with Armstrong for this kitchen remodel.
The layer of flooring underneath the Armstrong brick vinyl was some kind of 1930’s green sheet flooring with a floral pattern. The green paint on the wood walls now made sense – it was to match the flooring. Do you think we should have kept this flooring in place? ;)
Given the time period of the flooring we were concerned that it may have contained asbestos but after some research and talking to an environmental rehab expert we were fortunately able to conclude that it did not.


The vision for our kitchen design was a blending of modern and historic. We wanted a modern, contemporary, efficient kitchen that incorporated the kitchen’s original historic elements and used a blend of traditional, natural materials that were true to the time period of the house. These included materials like soapstone, copper, hardwood, marble, butcher block and brick.
READY TO SEE THE TRANSFORMATION??
Stayed tuned for the next installment of The 1912 Kitchen Remodel!

Hi, I’m Kimberly Killebrew and welcome to Daring Gourmet where you'll find delicious originals, revitalized classics, and simply downright good eats from around the world! Originally from Germany, later raised in England, world-traveled, and now living in the U.S., from my globally-influenced kitchen I invite you to tour the world through your taste buds!


How exciting. I love sharing your dream. I will never be able to do this so I love to keep up with what you are doing. You live in such a beautiful part of the world and your house is really lovely. I wish you all the best with the kitchen.
Love the kitchen!!! Please show pictures of the puppy, I would love to see him/her.
You have a beautiful house and I am sure you did a great job with your kitchen!
OMG! A lot of work! I am so curious to see the final result!
Can’t wait to see the finished product!
I’m so excited to see the finished makeover! It looks like it was definitely a huge project!
Looks like you’ve put in a lot of hard work! Can’t wait to see the transformation!!
Lots of hard work, but I am sure it will be stunning.