BEST Dill Pickle Relish
This post may contain affiliate links. See my disclosure policy.
An easy, wonderfully versatile and utterly deeeeelicious homemade dill pickle relish recipe! Canning instructions are included so you can enjoy this relish all year long!
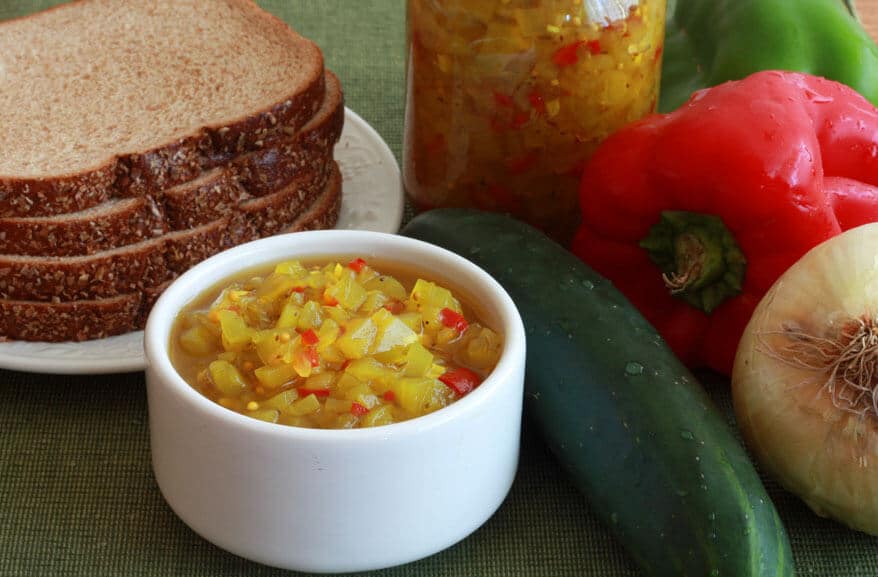
It’s relish like this that makes eating a sandwich or hot dog just that much better. It also adds a wonderful dimension to your pasta and potato salads. Last Summer I posted my recipe for Sweet Pickle Relish and here is the more savory version with a more pronounced dill flavor. It’s so easy to make and comes with instructions for canning so you can enjoy it all the year long.
Pickle Relish Recipe
Let’s get started!
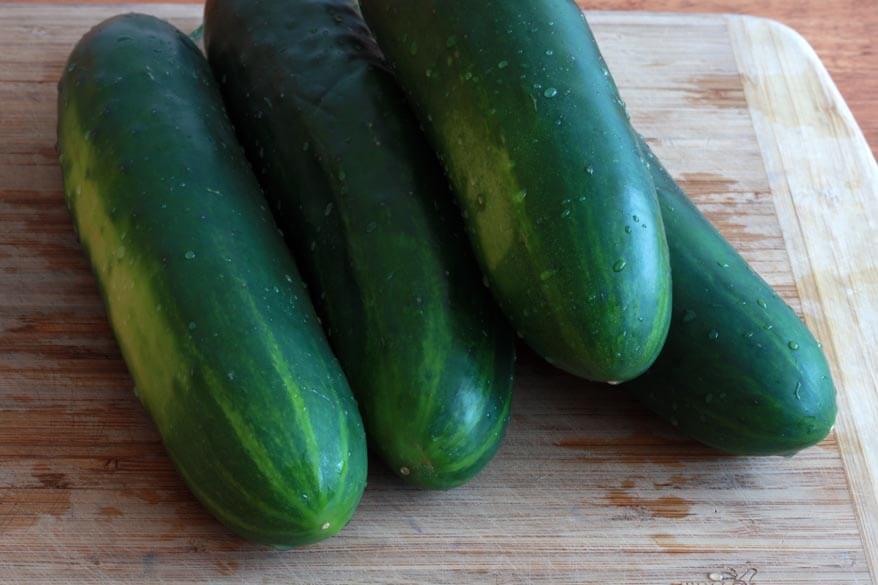
We’re going to use regular cucumbers. They’re much cheaper than English cucumbers (the ones that come shrink-wrapped) or pickling cucumbers and taste exactly the same. I prefer to peel them since the peel is fairly tough. We’re also going to remove the seeds.
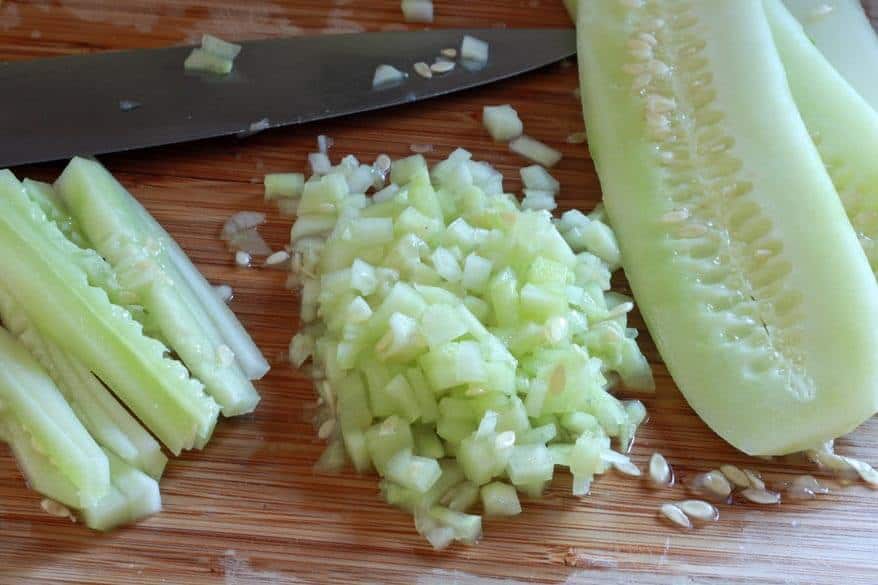
So peel the cucumbers and thinly slice them lengthwise. Slice them into strips, discarding the inner strip of seeds. Then very finely dice the cucumbers.
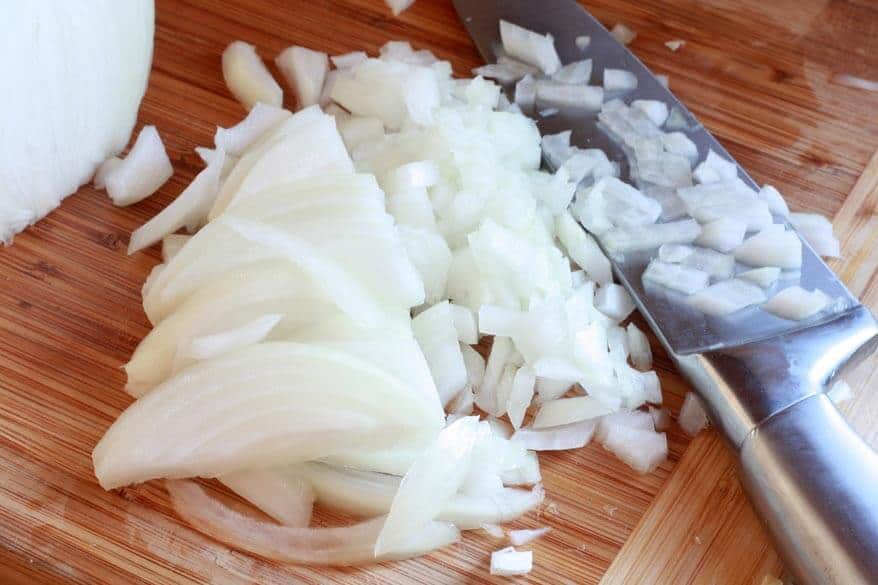
Very finely dice the onions, garlic and red bell pepper. You can use a food processor, just don’t let the onions and bell pepper get mushy. I prefer to just do it by hand.
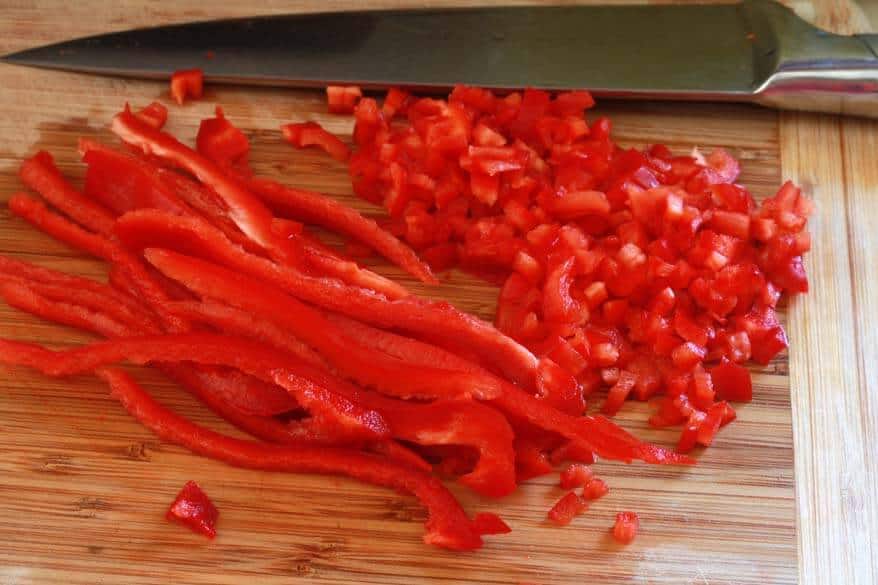
Note: There are no green bell peppers shown in the pictures and they weren’t added to this particular batch, but they belong in it. Okay, now that that’s clear, let’s move on.
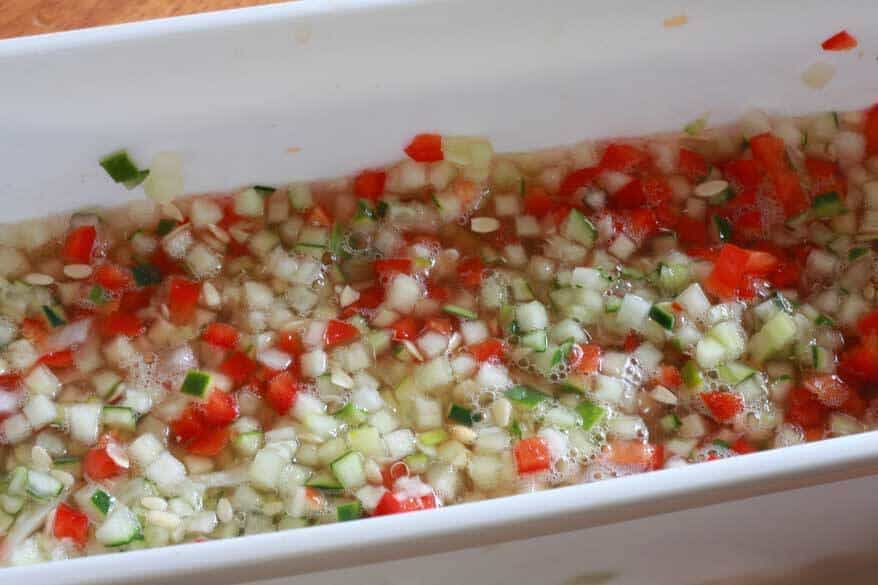
Place the diced vegetables in a large bowl along with the salt. Cover with water and let it sit for at least 6 hours or overnight.
(Ignore the fact that some of the cucumber peels are on. The second batch I made I peeled the cucumbers and the result was better.)
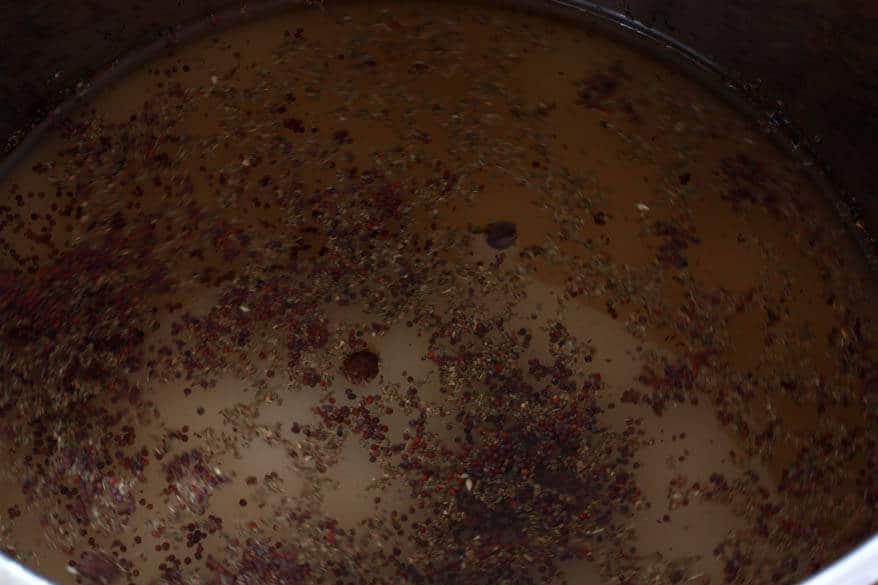
Put the sugar, vinegar and spices in a large stock pot and bring it to a boil. Reduce the heat to a low boil and simmer for 5 minutes.
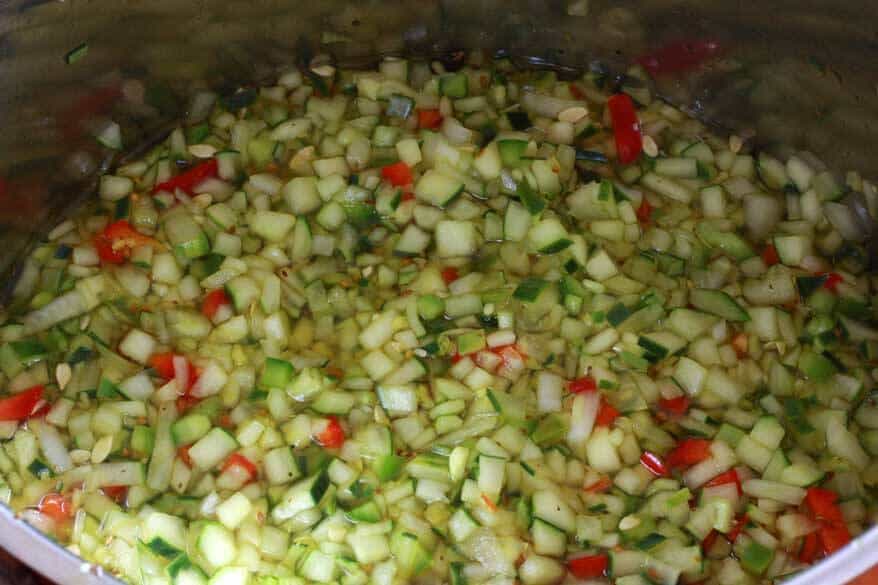
Drain the cucumber mixture in a colander, thoroughly rinse, and drain again.
Add the mixture to the stock pot. Return to a boil, reduce the heat to medium-low, and simmer, uncovered, for 10 minutes. Discard the bay leaves.
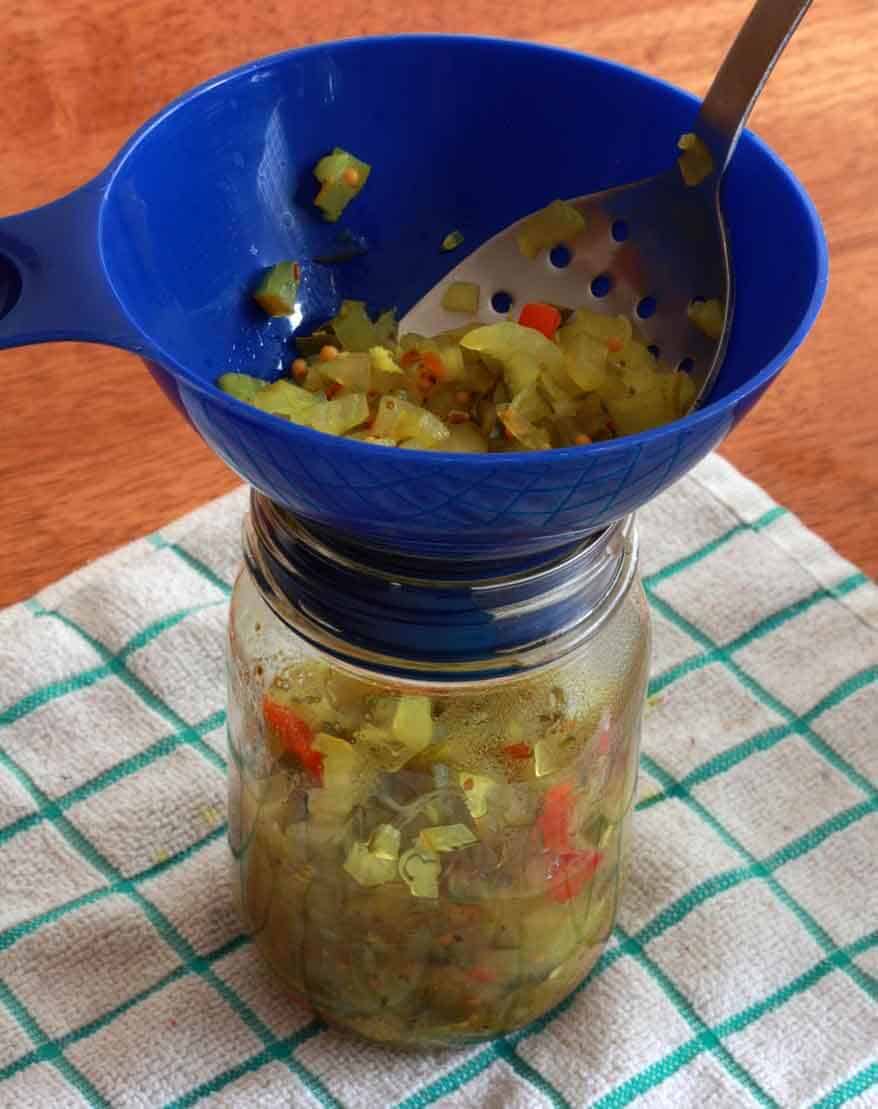
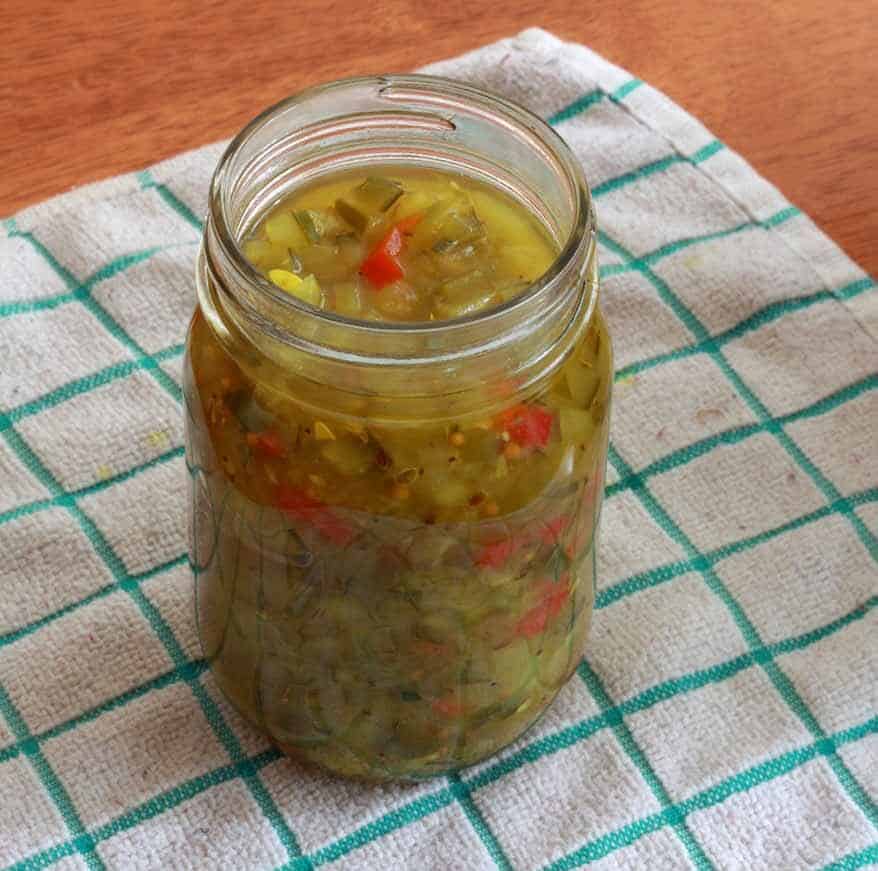
Ladle the hot relish into the hot sterilized jars, leaving 1/4 inch of headspace. Wipe the rims of the jars clean and seal tightly with the lids. Process the jars in a boiling water bath for 10 minutes.
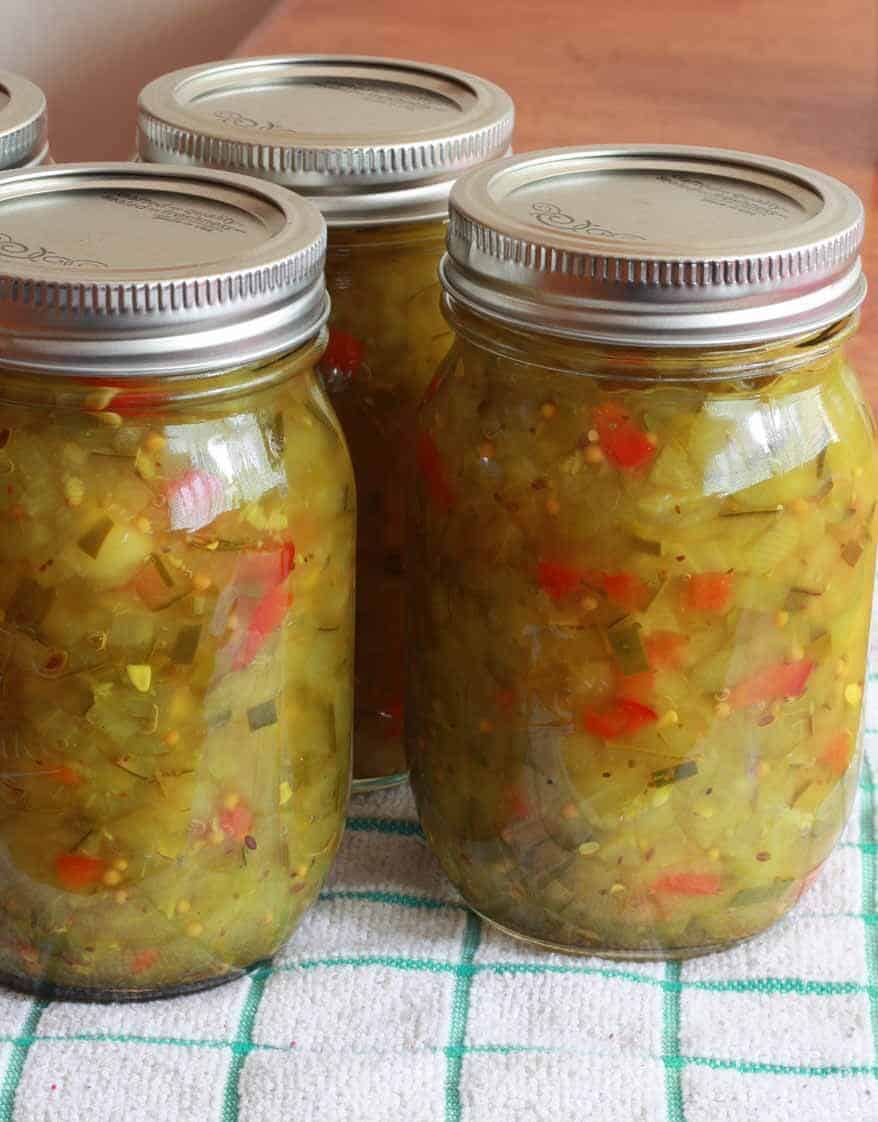
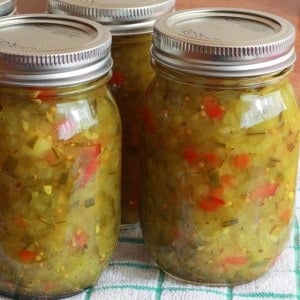
Ah, the masterpiece is done!
Best eaten at least a week later after the flavors have had time to meld and the vinegar mellows out a bit. In addition, the relish needs to sit to give it time to absorb some of the liquid and to thicken.
It’s so satisfying to see the end result of your labors – and you can enjoy this relish all the year long!
For more pickled vegetable recipes be sure to try my:
- Giardiniera
- Corn Relish
- Sweet Pickle Relish
- Branston Pickle
- Pickled Red Onions
- Pickled Pepperoncini Peppers
- Sweet Pepper and Onion Relish
- English Pickled Onions
- Pickled Banana Peppers
- Pickled Okra
- Pickled Green Beans
- Pickled Asparagus
- Pickled Turnips
- Pickled Peppers
- Pickled Beets
Save This Recipe
BEST Dill Pickle Relish
Equipment
Ingredients
- 2½ lbs cucumbers (weighed prior to peeling and seeding),peeled, center row of seeds removed, and finely diced
- 1 large yellow onion ,finely diced
- 1 small red bell pepper ,finely diced
- 1 small green bell pepper ,finely diced
- 3 cloves garlic ,finely minced
- ¼ cup kosher or pickling salt (neither of these have additives which is important to avoid when canning)
- 3 cups white vinegar
- 1/2 cup sugar (optional or use less according to taste)
- 2 teaspoons dill seeds
- 1 tablespoon yellow mustard seeds
- 2 teaspoons celery seeds
- 1/2 teaspoon turmeric
- 2 bay leaves
Instructions
- Place the diced cucumbers, onion, bell pepper, and garlic in a large mixing bowl. Combine with the salt and pour water over the mixture until covered. Let sit for at least 6 hours or overnight.Drain the cucumber mixture in a colander, rinse thoroughly with water, and drain again.
- In a large stock pot, add the sugar, vinegar, and spices and bring to a boil. Reduce the heat to medium-low and simmer for 5 minutes. Add the drained cucumber mixture and return to a boil. Reduce the heat to medium-low and simmer, uncovered, for 10 minutes. Discard the bay leaves.
- Ladle the hot relish into hot sterile jars, leaving ¼ inch of headspace. Wipe the rims of the jars clean and seal tightly with the lids.Process the jars in a boiling water bath for 10 minutes.
- Sealed jars will store in a cool, dark place for a year. If the seal is broken, the relish will keep in the fridge for at least a month. Makes roughly 4 pints (you can use pint-sized or half pint jars). Best eaten at least a week later after the flavors have had time to meld and the vinegar mellows out a bit. In addition, the relish needs to sit to give it time to absorb some of the liquid and to thicken.
Nutrition
Originally published on The Daring Gourmet February 15, 2014

Hi, I’m Kimberly Killebrew and welcome to Daring Gourmet where you'll find delicious originals, revitalized classics, and simply downright good eats from around the world! Originally from Germany, later raised in England, world-traveled, and now living in the U.S., from my globally-influenced kitchen I invite you to tour the world through your taste buds!


Could you provide a measurement in cups for the veggies? I’m trying to halve the recipe but I’m unsure if I have the proper veggie to vinegar ratio.
I made a batch of this relish, and tasted it right after making it and didn’t like the taste; however, after 2 weeks I opened a jar and wow, I love it! It definitely makes a difference when you wait a couple weeks for the flavors to mellow out. I found that this is true also of my hot salsa. I put some of this relish in some mayonnaise to make Tartar Sauce for some fish and OH-My-Goodness! Delicious! I ate the dill Tartar Sauce with a spoon. Now I’m going to put the dill relish in my deviled eggs for dinner tomorrow. Thanks Kimberly, for sharing this recipe!!
Fantastic, Bernie! YES, letting it sit for a while is key. Thanks so much for your feedback!
Giving this a try! Why do the veggies need to sit for 6 hours or overnight in the salt water? What is the purpose? Can that time be shortened? Thank you
Hi Jasmine, sitting in salt water will draw additional liquid out of the vegetables which is important for canning – if too much liquid is still in the vegetables it will dilute the vinegar solution and lower the pH level making it unsafe for canning. They need to sit for at least 6 hours.
Thank you ❤
I made this recipe using zucchini, followed the same instructions. Turns out great… and uses up all that extra zucchini.
Fantastic, Michele! My mom used to make zucchini relish a lot, it’s a perfect substitute for the pickles.
Teo more question/ comment: I consider myself still a novice canner so forgive me… there was a lot of the spices left in the brine after canning. As I asked a bit ago, I’m going to reheat the brine after soaking cucumber chips tonight and make hamburger pickles, how will the PH be affected? Should I have kept stirring the brine while putting the mixture in the jars with the slotted spoon? Thanks for your patience.
Hi Sue, no, you should never re-use the brine because it will become too watered down and yes, that will impact the pH so that it’s no longer safe for canning. You’ll need to make a new batch of pickling brine.
I have a question, earlier in the comments sectio- feb. 2029 you replied that it doesn’t matter if you use a slotted spoon, as pictured, but in 2018 you replied: “Hi Jennifer, no slotted spoon, ladle it in with the juices. The relish will thicken over time and the acidity of the juices is what acts as the preservative. Happy canning!”
I used a slotted spoon and canned 5 pints this morning, 07.19.19. Are they ok for shelf life?
Hi Sue, to clarify, I didn’t say it doesn’t matter if you use a slotted spoon, I said how much liquid you add to the jars is largely personal preference. But yes, you’ll need to add some of the brine to the jars so that the relish isn’t dry. Looking at your jars now, are the relish pieces submerged in liquid, a similar consistency to the store-bought relish?
I came to this fro a google link where I searched for REFRIGERATOR – meaning no boiling water baths) homemade dill pickle relish. I am very disappointed to find yet another boiling water bath recipe. Can this be made as refrigerator pickling? I am 71 with arthritic hands/wrists and don’t feel safe working with hot glass and boiling water of that capacity.Thanks
This is wonderful! It taste so much better than the store bought kind. It has so many layers and depth of flavor. I’m reminded of bread and butter pickles by the spices. I love it! The recipe made 4 pints and I’ll give one to my mom along with an Indian apple chutney I made 3 pints of. I used Boston pickling cukes from this year’s garden which had a beautiful yellow and green skin that was thinner and more tender than the dark green ones in the store, so I opted to leave the skins. Thanks so much for this recipe. Relish is one of those thing we use rarely and always forget to purchase. This is my first year canning and I’ve made salsa verde from garden tomitillo, tomato sauce, paste, and red salsa from garden tomatoes as well as the relish and chutney. I have 6 pint jars left and plan on more salsa but I’ve been down with the flu, so hopefully the tomatoes can wait….
Fantastic, Tara, thanks so much for the feedback! You’ve been on a canning roll, that is so exciting! I hope you feel better soon. Best, Kimberly