Roasted Tomato Bread
This post may contain affiliate links. See my disclosure policy.
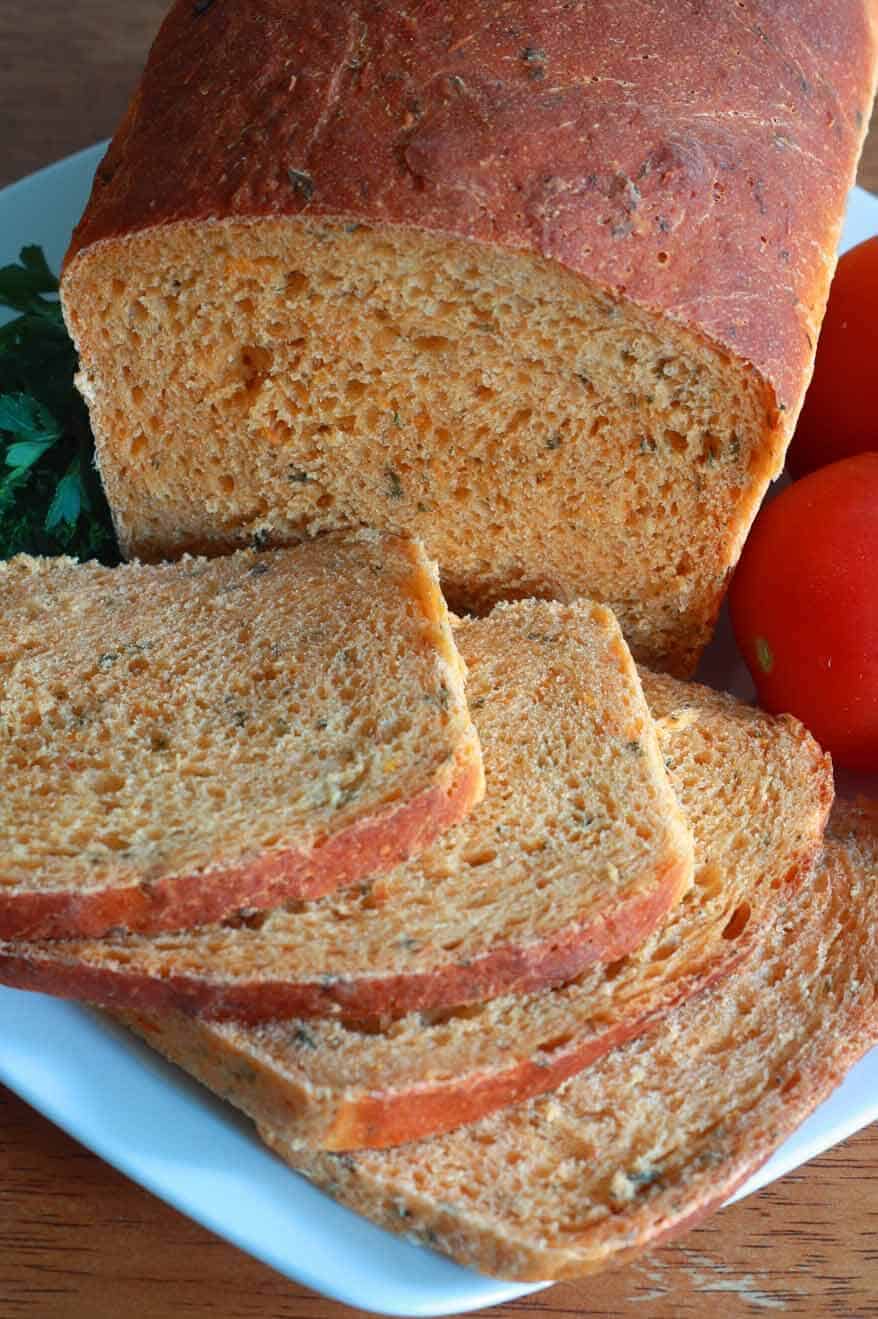
Tomatoes are roasted to coax out maximum flavor and sweetness and baked into a loaf of yeast bread with fresh herbs. This incredible Roasted Tomato Bread recipe is guaranteed to be a hit!
Homemade Roasted Tomato Herb Bread
Fresh tomatoes. Roasted until sweet. Fresh garden herbs. Combined and kneaded into yeast dough. Fresh from the oven. Fragrant and flavorful. Soft, tender, and delicately chewy. Perfectly sliceable for your deli-quality sandwiches.
Youd’ better make two loaves while you’re at it because I promise you’ll be so happy you did!

This is a “Make a Request!” fulfillment for Carmen Sanchez back in 2013. She wrote, “I have looked all over the internet to no avail…for a recipe I used to have back in the late 70′s…Herbed Tomato Bread. It was the best!” Carmen, I don’t know what that particular bread tasted like, but I know what this one tastes like – and you are going to l.o.v.e. it! I had a lot of fun developing this recipe and am so happy you put in the request! This is now one of my favorite breads and one that I will make again and again.
The timing was perfect. My husband I were leaving for our anniversary trip to Astoria Oregon the day after I made this and so I used the leftover bread to make some sandwiches for the drive down. The fragrance of the bread filled the car within minutes – those freshly roasted tomatoes and garden herbs. Were weren’t on the road very long before I caved and gobbled that sandwich right up. This bread is amazing. I think you could almost slap a piece of cardboard on this bread and it would still taste incredible! I’m confident you won’t find a better tomato & herb bread anywhere.

Roasted Tomato Bread Recipe
Let’s get started!
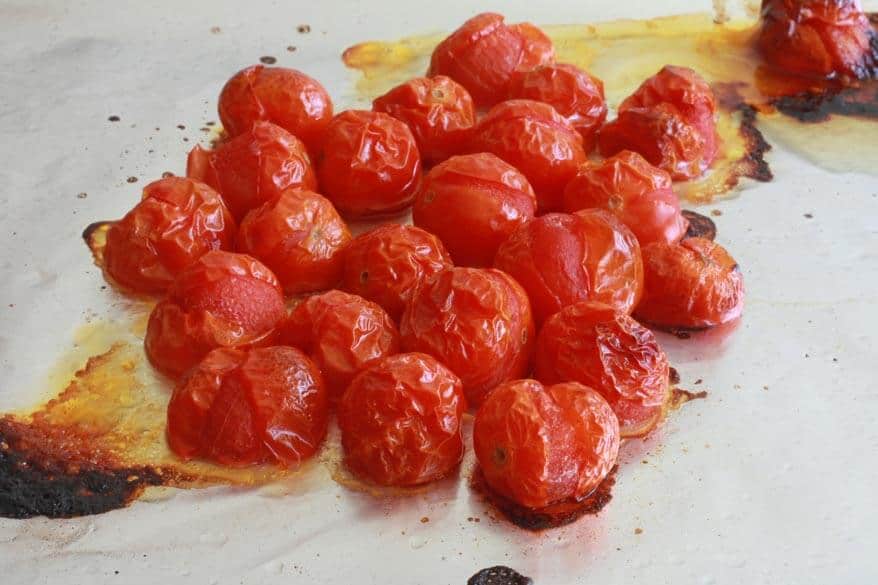
You can use regular tomatoes for this recipe, but I happened to have some cherry tomatoes on hand that needed to be used, and I actually prefer using them for this bread – they’re ideal for roasting.
Roast the tomatoes, drizzled with 1 tablespoon olive oil, in an oven preheated to 400 degrees F for 10-15 minutes or until they start to blister.
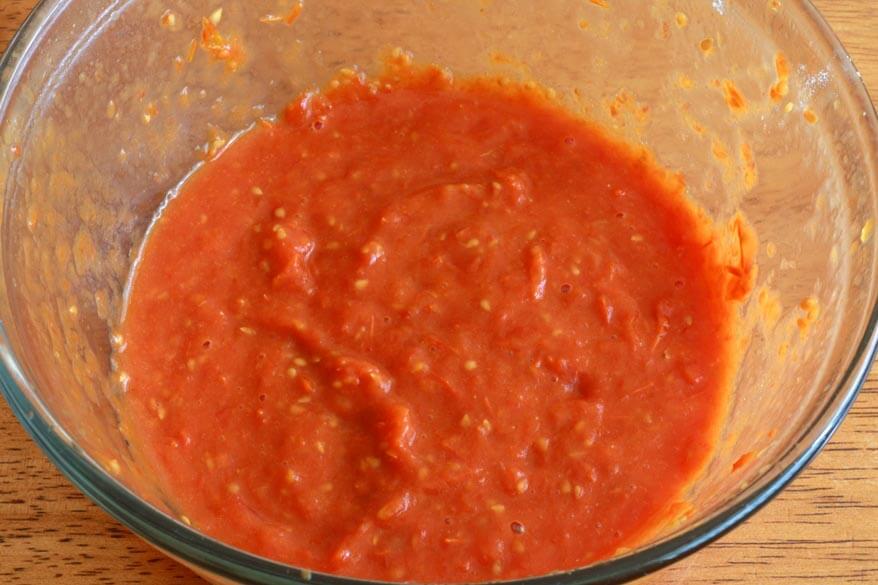
Puree the tomatoes.
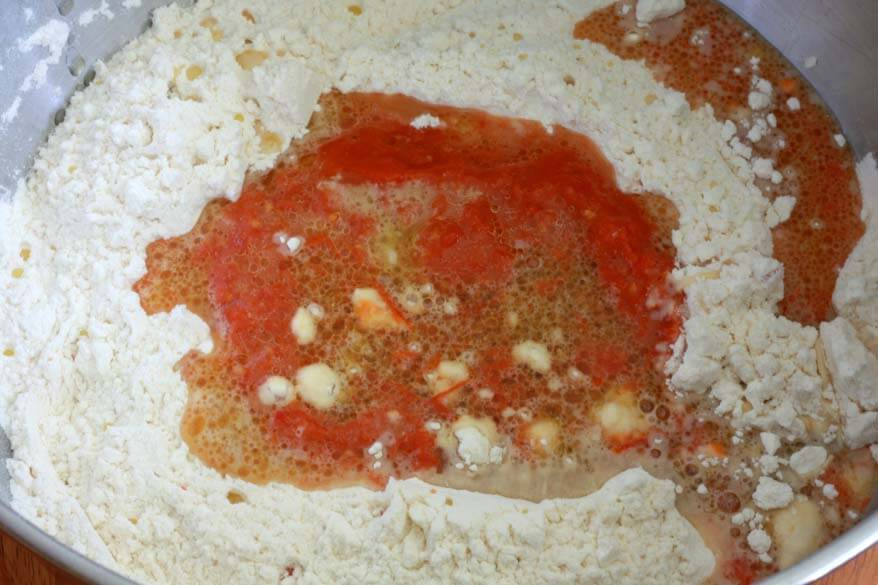
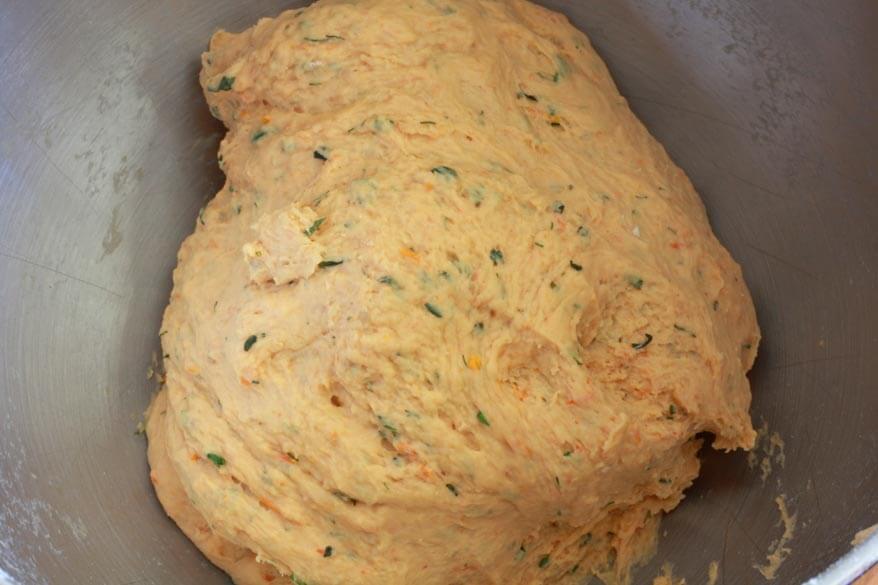
Combine the flour and salt in the bowl of a stand mixer.

Combine the water, honey and olive oil in a bowl.
Add the yeast and stir to combine.

Make a well in the flour and add the pureed roasted tomatoes.
Add the water/yeast mixture.
Get a generous amount of herbs. You’ll need about 1/4 cup chopped. I used a variety: Oregano, basil, marjoram, thyme, dill, sage, rosemary.

Add the chopped herbs.

Attach a dough hook to the stand mixer and knead on the bread setting/medium for about 8 minutes. If too sticky, add some flour, a little bit at a time, and continue kneading. If too stiff and dry, add a little bit of water and continue to knead.
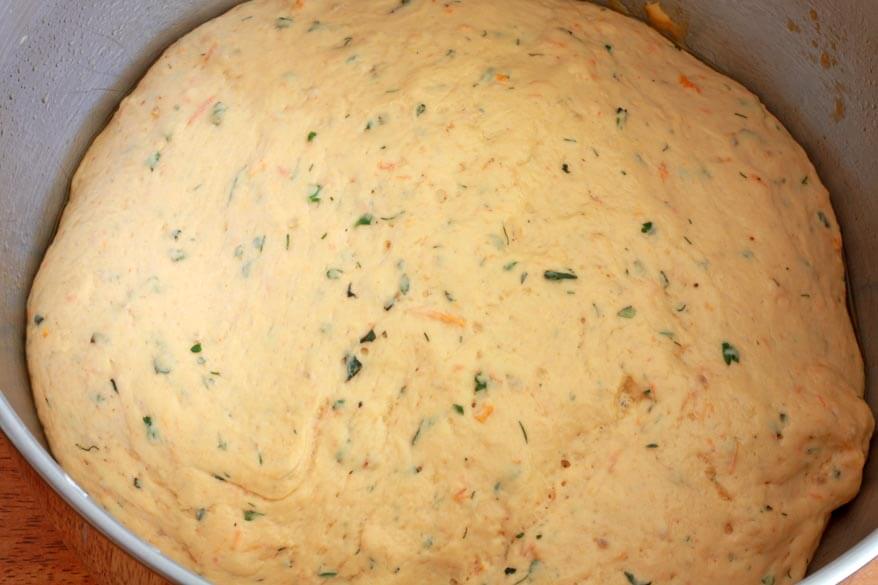
Remove the dough and form into a ball. Lightly spray the bowl with olive oil and roll the dough ball around in it. Loosely cover the bowl with plastic wrap and let it sit in a warm place.
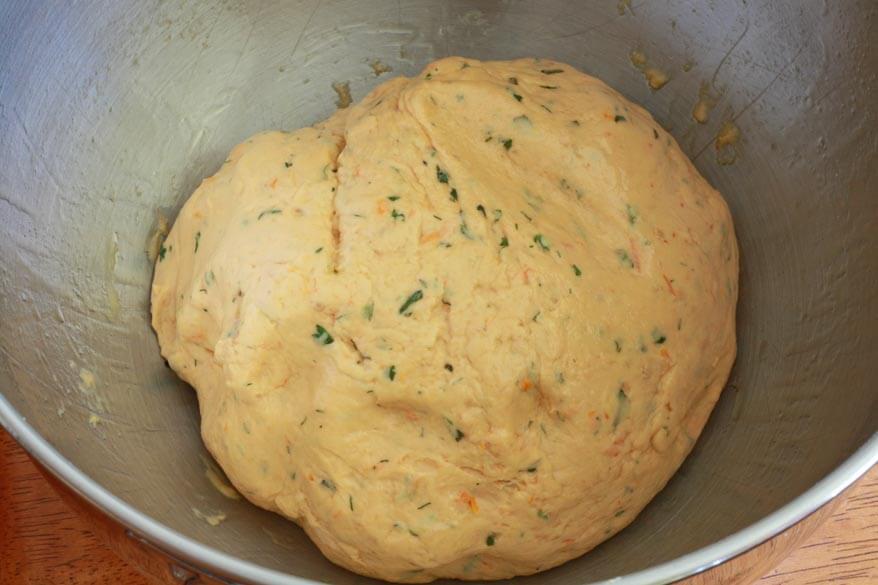
Let it rise for about an hour or until it is nearly doubled in size.
Remove the dough and place it on a flat surface. Divide it in half.
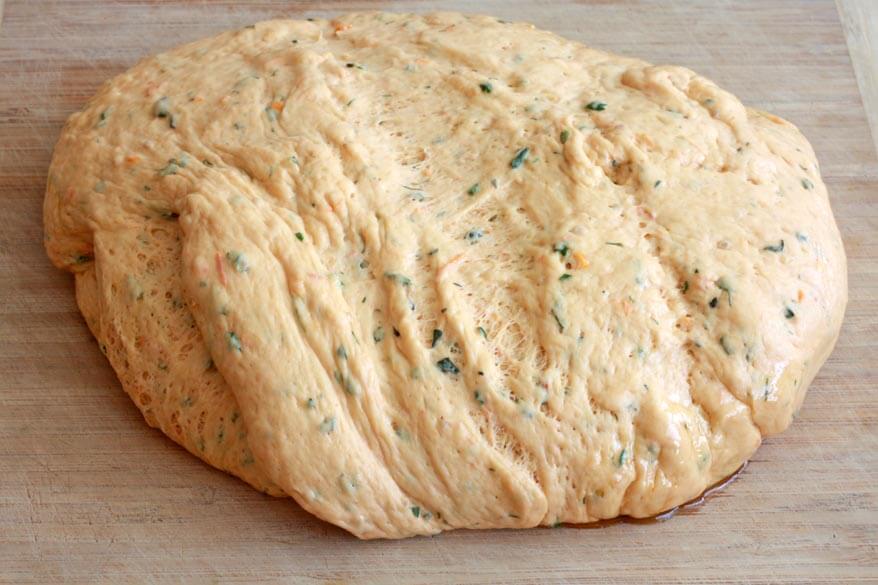
Form each half into a 8 inch square, about the length of the bread pan.
Starting at the furthest end, roll the dough towards you, tucking it in as you roll it so it’s tight.
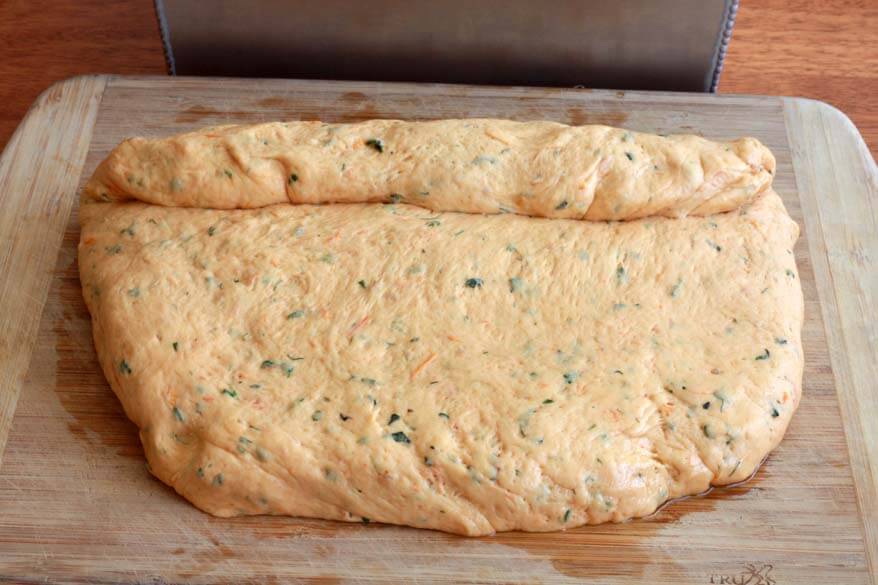
Pinch the seam together.
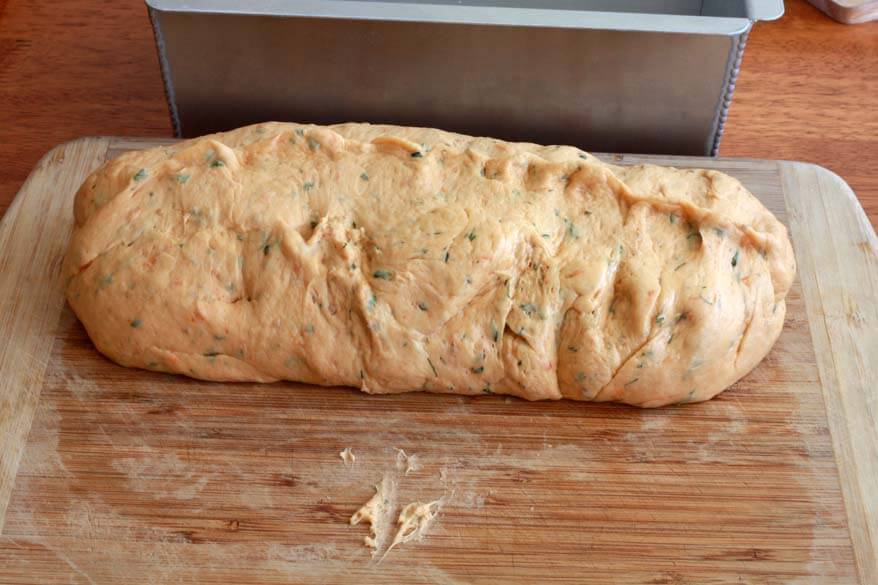
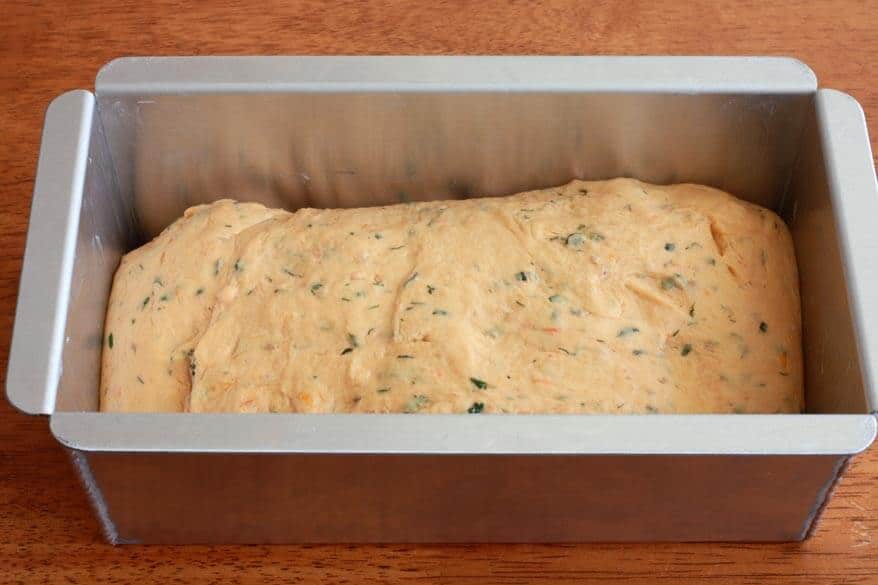
Lay the dough seam side down in a greased 9×5 loaf pan. Make sure the dough is evenly spread in the pan and is touching all sides.
Repeat for the second loaf.
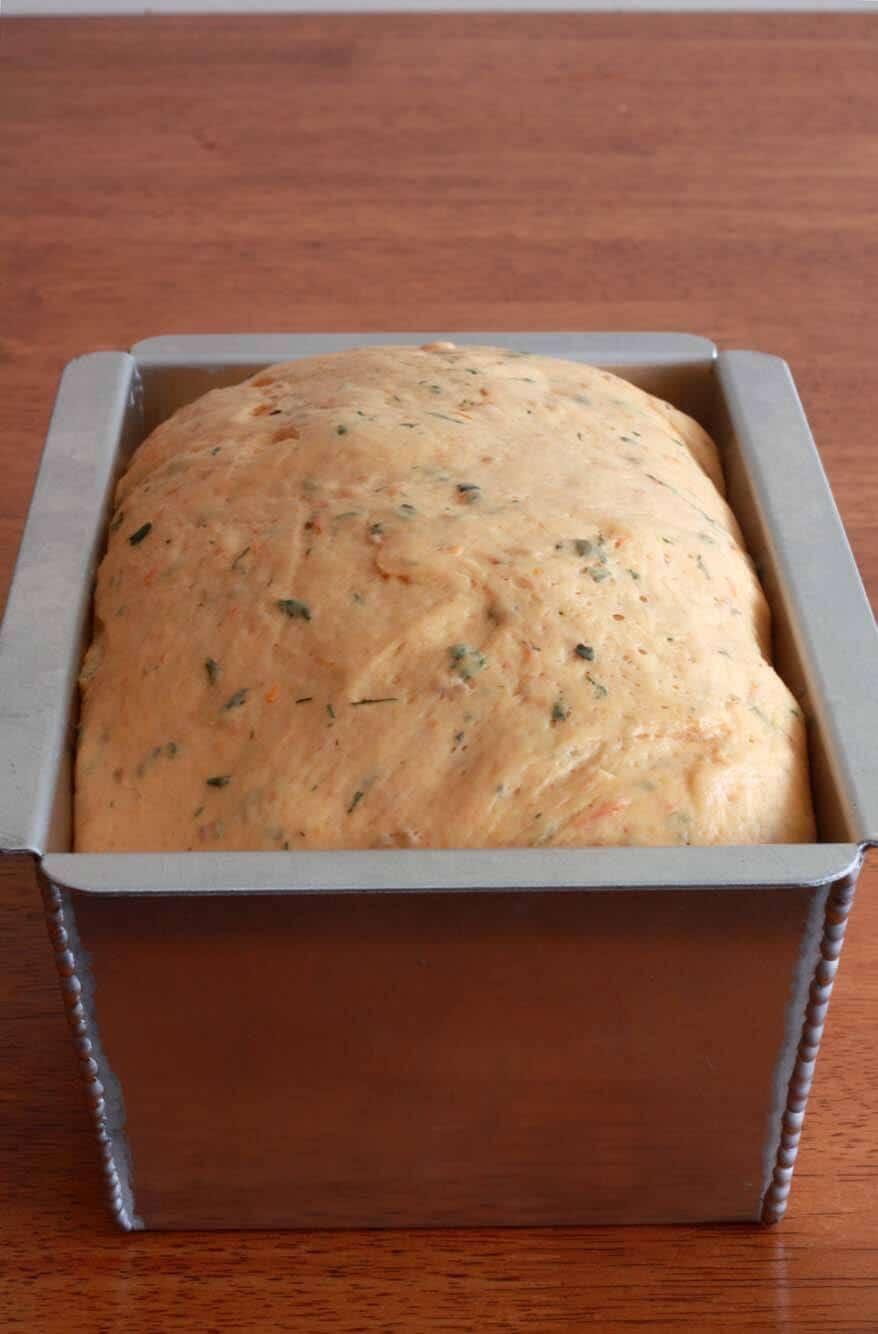
Cover loosely with plastic wrap and set it in a warm place to rise.
Let it rise for another 20-30 minutes or until the dough has risen a ways above the bread pan.
Preheat the oven to 350 degrees F. Place a baking sheet on the bottom rack in the oven and pour two cups of boiling water in it (this will create a nice steam bath for the bread while its baking for optimal rise and texture.) Place the loaf pans on the rack just above it and bake for it for 40-50 minutes or until the top of the bread is browned and the loaf sounds hollow when you tap on it with your knuckles.
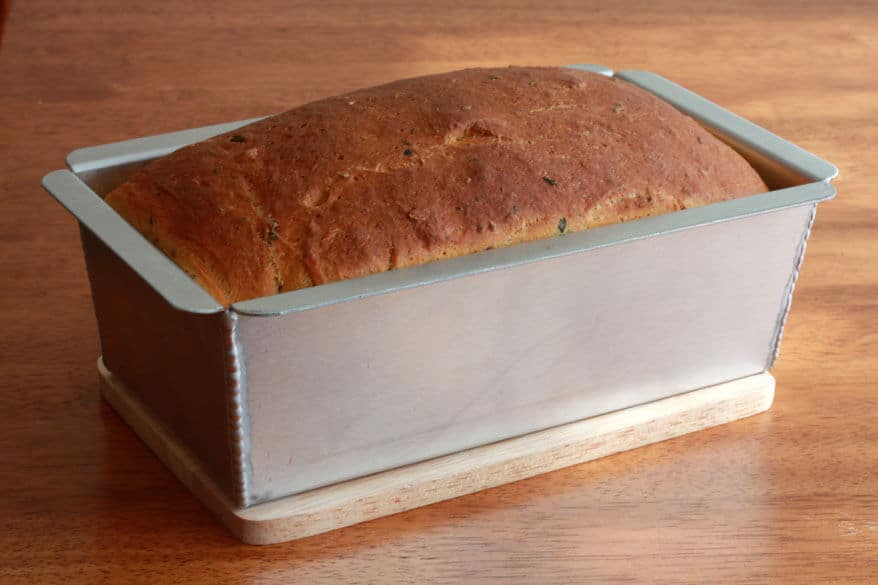
Remove the bread from the oven and transfer to a wire rack to cool before slicing.
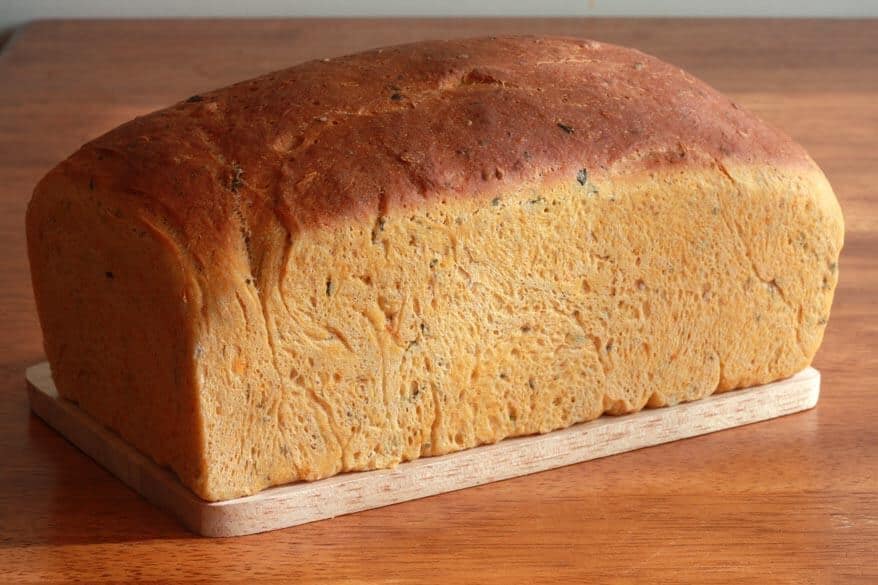
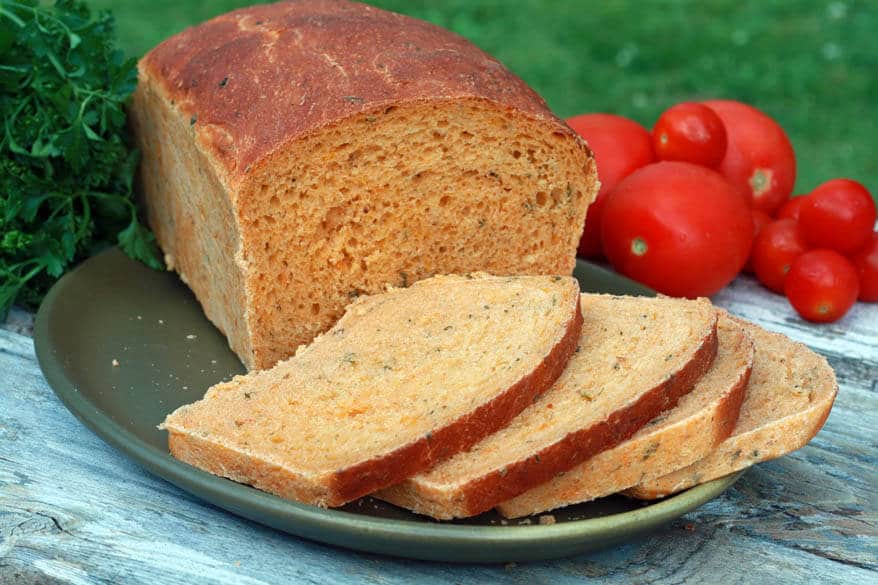
Slice your bread and enjoy!
I promise you will!
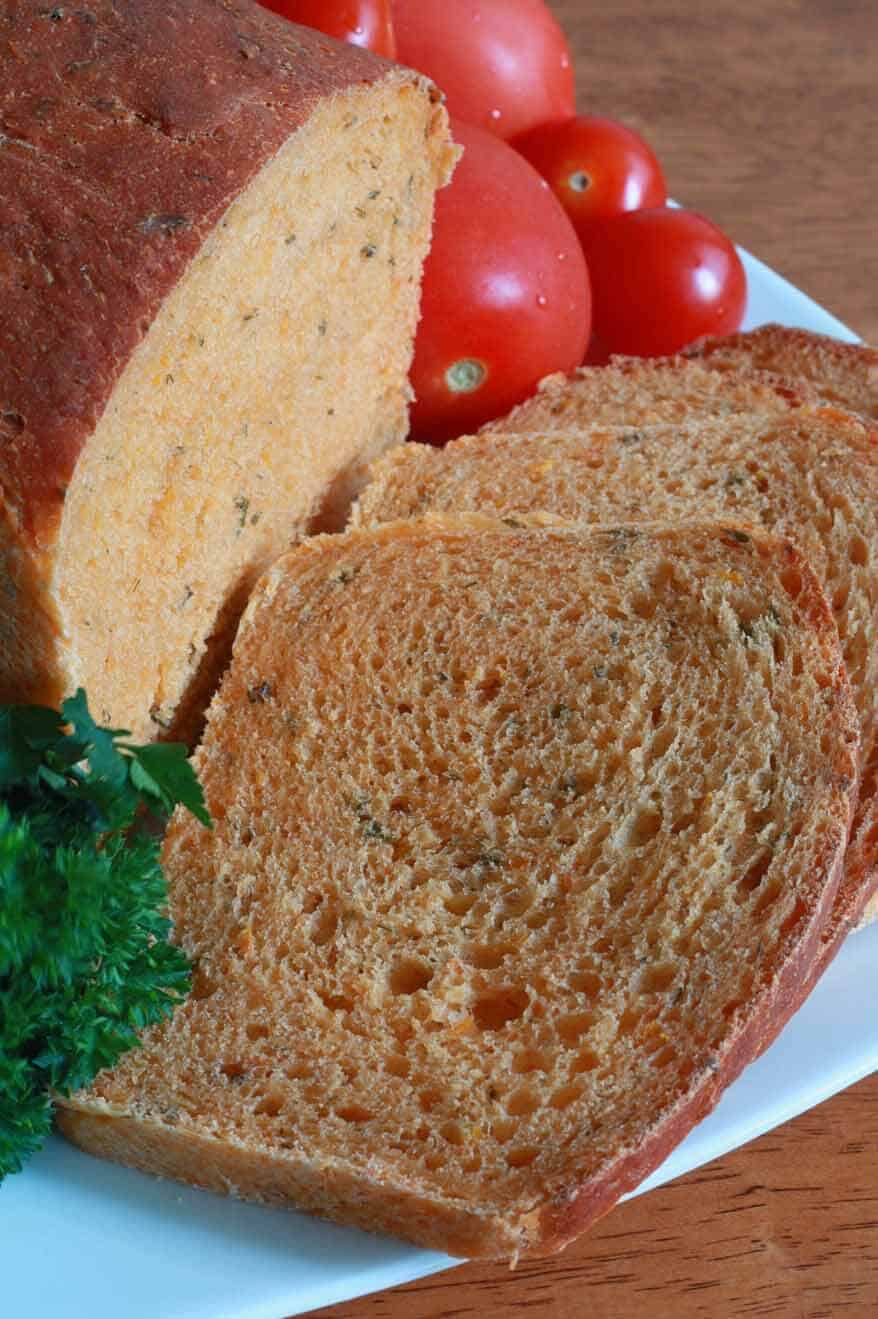
Another great way to use this bread: Cube and toast the bread to make delicious salad croutons!
For more homemade bread recipes try my:
- German Bread (Vollkornbrot)
- Danish Rye Bread
- Lavash
- Injera
- Dosa
- Naan Bread
- Sourdough Naan
- Sourdough English Muffins
- Crumpets
- Olive Rosemary Focaccia
- Skillet Cornbread
Save This Recipe

Roasted Tomato Bread
Ingredients
- 2 cups cherry tomatoes or quartered Roma tomatoes
- Optional: For enhanced tomato flavor add 1/4 cup sun-dried tomatoes in oil , drained and chopped
- 1 tablespoon extra virgin olive oil
- 2 1/4 teaspoons instant yeast (e.g. SAF Instant)
- 3/4 cup lukewarm water (be sure it's not too warm)
- 2 tablespoons honey
- 1 tablespoon extra virgin olive oil
- 6 cups all-purpose flour , or more or less as needed (the amount will depend on how much liquid remains in the tomatoes after roasting and blending them)
- 2 teaspoons salt
- 1/4 cup chopped mixed fresh Italian herbs (e.g., rosemary, basil, marjoram, thyme, sage, dill, oregano, parsley)
Instructions
- To roast the tomatoes, spread them out on an aluminum foil-covered baking sheet and toss with 1 tablespoon olive oil. Preheat the oven to 400 degrees F and roast for 10-15 minutes or until the skins of the tomatoes are collapsed and just barely beginning to brown. Puree the tomatoes in a blender and set aside.Combine the water, yeast, honey and 1 tablespoon of olive oil. Set aside.
- Combine the flour and salt in the bowl of a standing mixer. Make a well in the middle of the flour and pour in the tomatoes, the water/yeast mixture and the herbs. Stir with a wooden spoon or wooden spatula just until the ingredients are starting to come together, then attach a dough hook to the standing mixer and knead the dough for about 8 minutes on medium ("2" on a stand mixer). The dough will still be a little sticky and tacky. If it's too wet, add a little more flour until you get a workable consistency. Remove the dough from the bowl and roll into a ball.Lightly oil a clean bowl with oil and roll the dough ball around in it. Cover loosely with plastic wrap and place in a lightly warmed oven (not too hot) for about an hour, until doubled in size.
- Remove the dough and place it on a flat surface. Divide it in half. Form each half into an 8-inch square about 1 inch thick. Starting at one end, roll the dough firmly into a cylinder, making sure the dough sticks to itself. Turn the dough seam-side up and pinch the seam closed. Place the dough seam-side down in a greased 9×5 inch loaf pan and gently shake the dough until all four sides touch the edges of the pan. Repeat with the other half. Cover loosely with plastic wrap and returned to a warm place until it is almost doubled in size, about 30 minutes.
- Preheat the oven to 350 degrees F. Boil 2 cups of water and pour it into a baking pan and place it on the bottom rack. If possible, place the loaf pans above the rack with the pan of boiling water. If not, place the boiling water in two smaller pans on either side of the loaf pans. Bake for 40-50 minutes or until the top of the bread is browned and the loaf sounds hollow when you tap on it with your knuckles.Transfer the bread to a wire rack and cool completely before slicing.Makes two 9×5 inch loaves.
Nutrition
Originally published on The Daring Gourmet July 29, 2013

Hi, I’m Kimberly Killebrew and welcome to Daring Gourmet where you'll find delicious originals, revitalized classics, and simply downright good eats from around the world! Originally from Germany, later raised in England, world-traveled, and now living in the U.S., from my globally-influenced kitchen I invite you to tour the world through your taste buds!


It’s the second day in a row with just the right amount of drizzle, gray skies, and a cold front coming. Just the kind of day I was waiting for to make the wonderful tomato bread I requested. I made it yesterday and I was very pleased with the results!!!! The hardest part was waiting for it to cool off enough to slice. I didn’t! :) Today, I’m making it again. Just checking to see if it is possible that it comes out better the second time. Thruthfullly, I’m sharing this one with my daugher-in-law…
Hubby is out of town…. don’t have to cook, I know what I’m having for dinner!
Thank you. The bread is wonderf!!!!!!!
So happy to hear that, Carmen! Yes, I can relate to the lack of patience problem :) As hard as it is to wait, you definitely need to let it cool completely. Let me know how it turns out the second time!
OHHHHHH! It was better the second time!!!! The texture looks just like in your pictures. I guess I´ll have to keep making it until it looks just like yours! :)
Awesome!! Thanks again for making this (twice!), Carmen, and for your feedback!
thank you for this great recipe. I grow a herb garden and I had a nice time selecting the best herbs from it this year.to use in your delicious recipe. My daughter loves herb breads and she said this is the best I have made to date…….
Hi Amy! I am so happy to hear that! Fresh herbs really make all the difference in this bread. It was a hit in my family as well. The aroma and flavor was so wonderful! Thank you so much for making this and for taking the time to leave some feedback!
Hi Kimberly, just letting you know that you are in my Featured Food Blog sidebar for August on Carole’s Chatter. Have a great week.
PS loved the pics in your post
Carole, you are the BEST! Thanks so much! :)
You ARE the best!!!!! Thank you, thank you, thank you! I can hardly wait to try this!!!
Thank YOU, Carmen! If it hadn’t been for your request I would probably have never developed this recipe – it’s now one of my favorite breads! :)
love it !!!!!!!!!!
Thanks, Coco, and I love your enthusiasm!!
This recipe sounds great. I don’t bake much bread any more, but I just might do this one. Loved the photos from Oregon. I think my sister got married on Cannon Beach (don’t remember for sure because I didn’t get to go to her wedding) so it’s nice to see what it looks like.
Thank you, jesusan! I don’t bake bread very often either, but every time I do I wonder why I don’t! It’s not like the “time-consuming” aspect gets in the way of anything – you just throw the ingredients in the stand mixer, let it knead, and then let the bread do its rising while you go about your business. And there’s just nothing like homemade bread fresh out of the oven. So glad you liked the pictures from Oregon! It’s such a lovely area.
I love your web pages, everything is great. Thank you thank you!
Thank you so very much, Linda! So happy to be able to share it with you! :)
Lovely, lovely pictures! Thanks for sharing! And the bread. . .omg. . .you’ve done it again. Yummm!!!
Thanks, Tori! :) I had a lot of fun creating this recipe – and visiting Astoria/Cannon Beach. I’ll be harvesting some more herbs very soon to make another batch of this!