Mongolian Chicken
This post may contain affiliate links. See my disclosure policy.
This BEST Mongolian Chicken recipe is ready to serve in 15 minutes and rivals your favorite takeout or restaurant for freshness and flavor! Tender chicken is drenched in a sweet and savory sauce with crisp green onions and served over steamed rice or egg noodles. It’s quick, easy and thoroughly delicious! And if you’re looking for a vegetarian Mongolian chicken, I’ve got you covered too!
What is Mongolian Chicken?
Mongolian Chicken is a variation of Mongolian Beef. Of Chinese-American origin, both of these dishes are two of the most popular Chinese dishes in the United States and can be found in practically every Chinese restaurant. It’s one of my favorite dishes to order when we go for takeout and it’s also a family favorite when I make it at home.
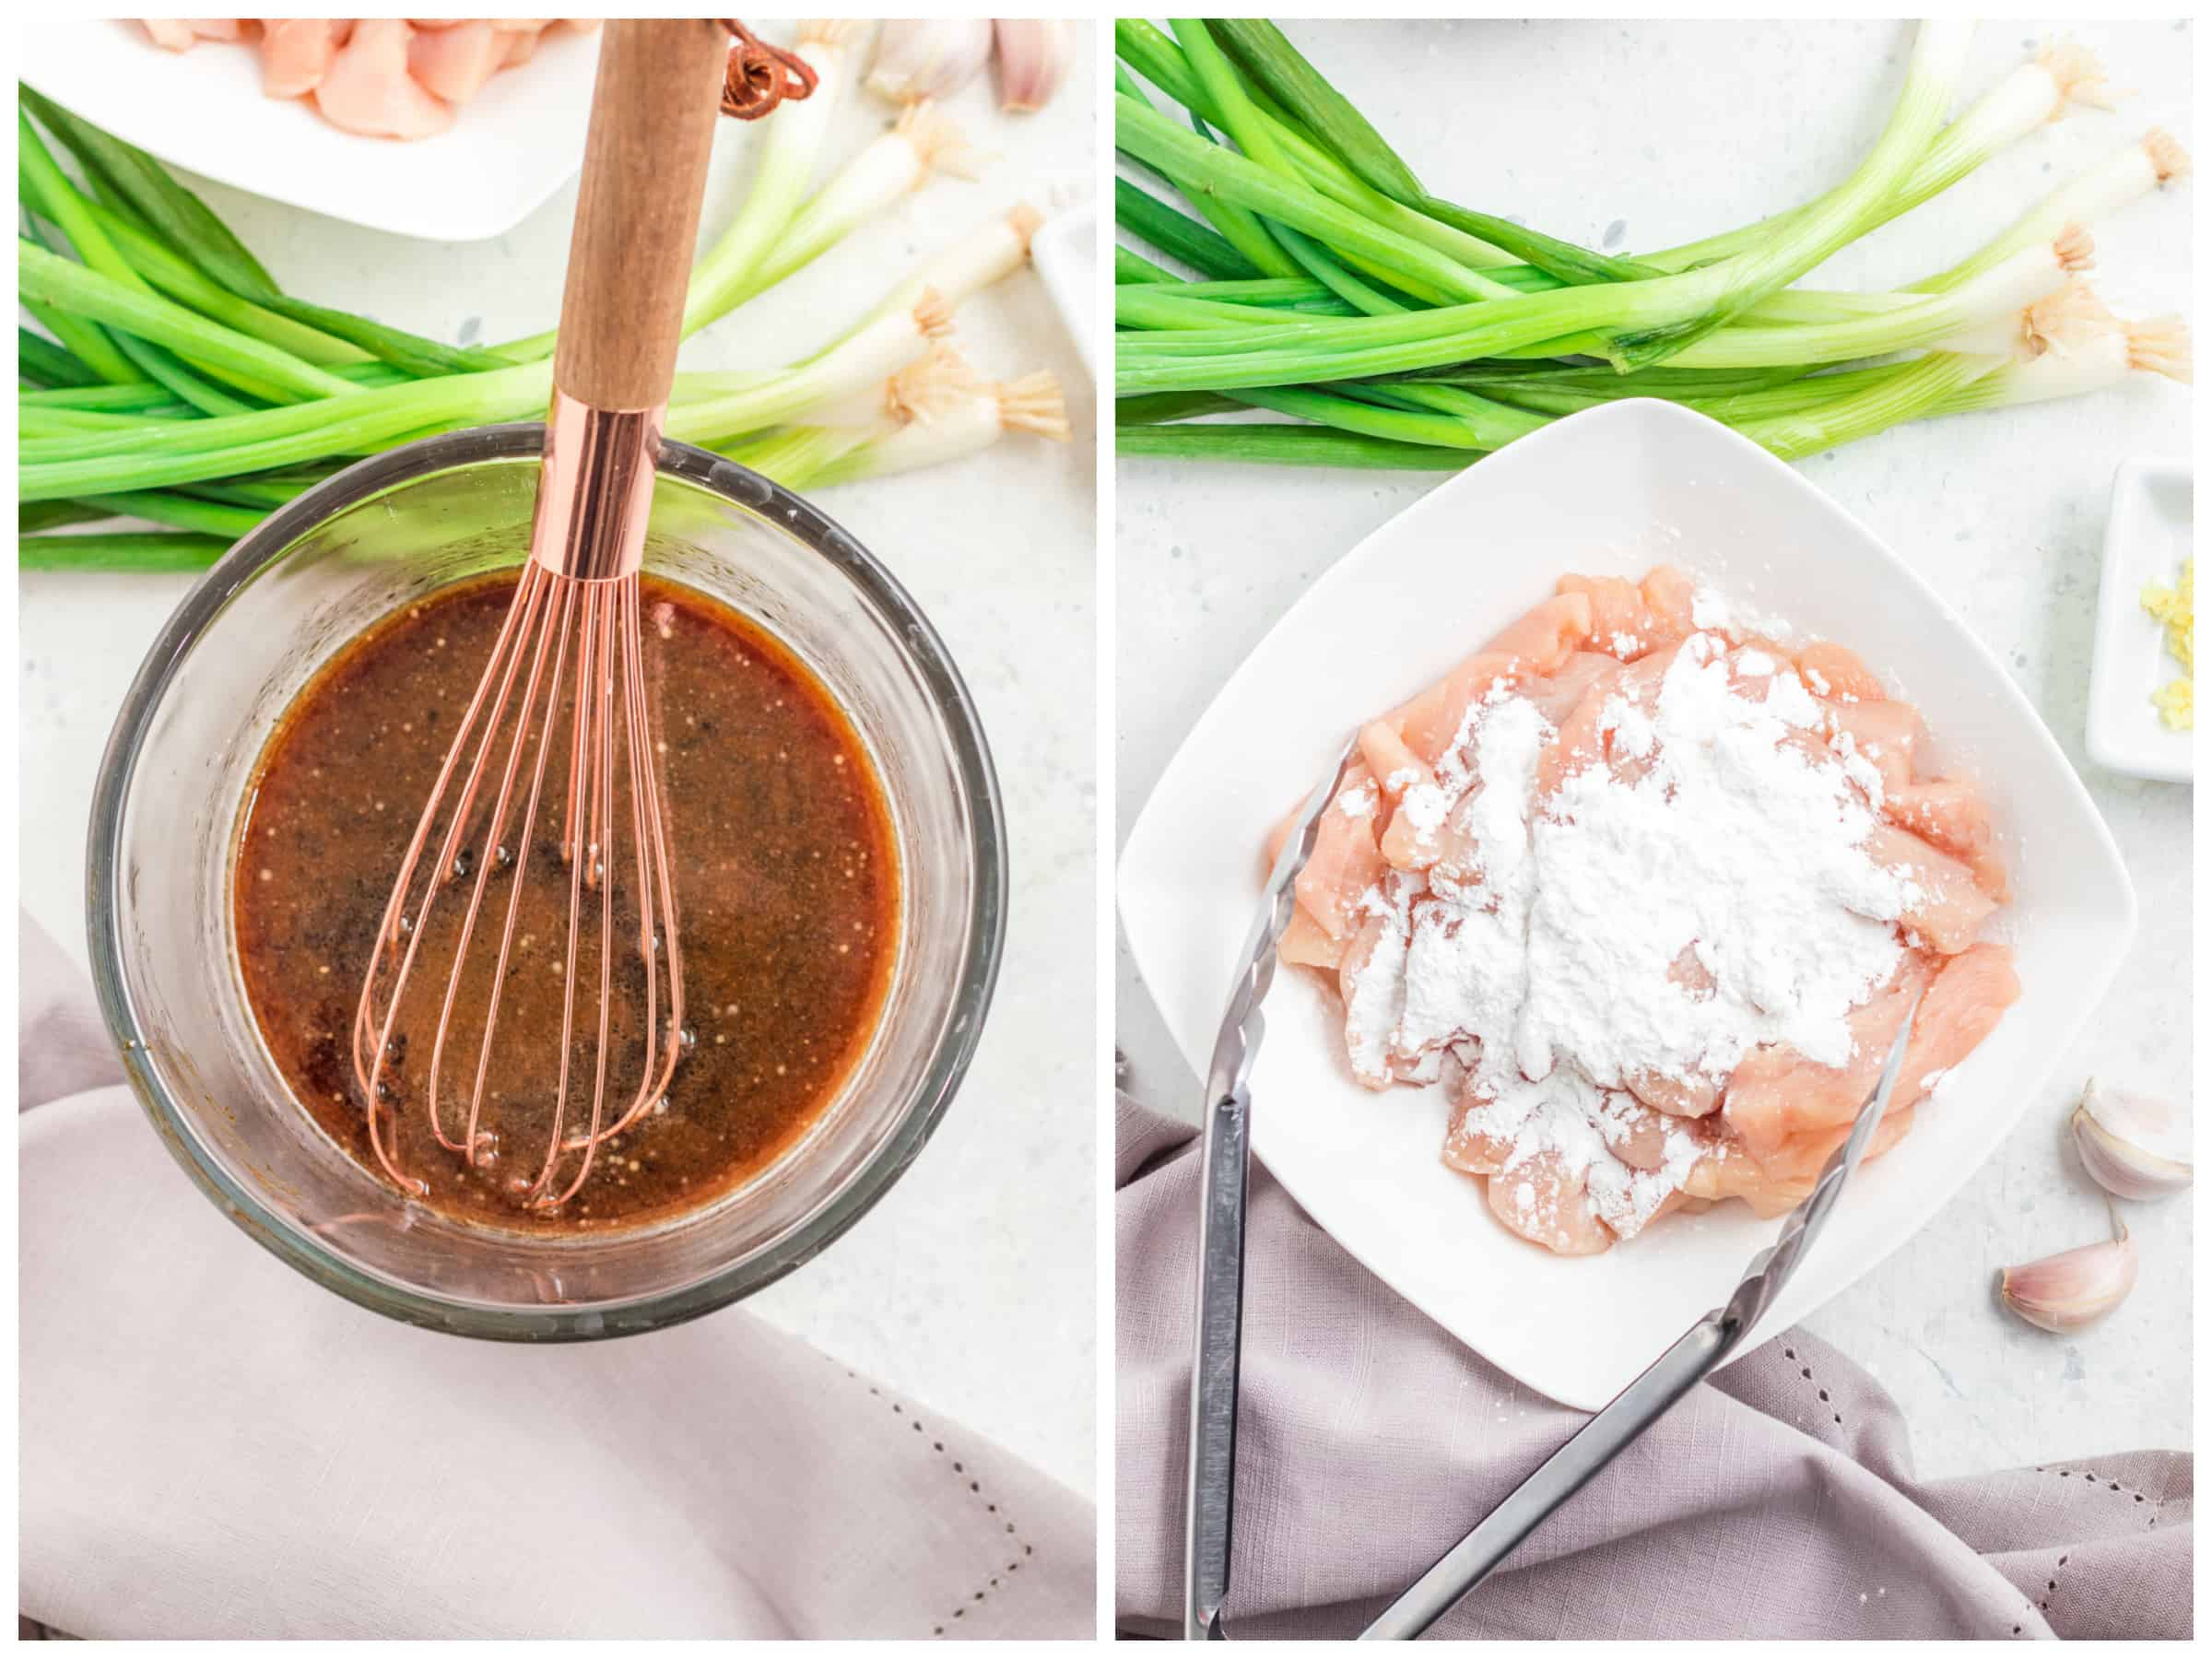
The sauce for Mongolian chicken is made with soy sauce, water, brown sugar, toasted sesame oil, hoisin sauce, pepper, garlic, ginger, and thickened with cornstarch. Typically the only vegetable added to Mongolian chicken is green onion but feel free to improvise and add any other veggies of your choice. Some other tasty additions can include broccoli, mushrooms, bean sprouts, red bell peppers, carrots and zucchini.
I’m using chicken breast for this but you can also use boneless thigh meat. For a vegetarian Mongolian chicken you can use tofu following our recipe for Baked Tofu.
Serve Mongolian chicken with steamed rice or egg noodles or chow mein. For a low carb alternative you can serve it with cauliflower rice or spiralized zucchini noodles.
Mongolian Chicken definitely isn’t a low-sugar meal, but it’s an indulgence we really enjoy from time to time. And if you’d like to reduce the caloric intake you can substitute all or part of the brown sugar with our favorite brown sugar alternative, Sukrin Gold.
If you’re a fan of this popular Chinese dish then you’ll have to give this Mongolian chicken recipe a try – we’re confident you’re going to love it as much or more than your favorite takeout!
Mongolian Chicken Recipe
Let’s get started!
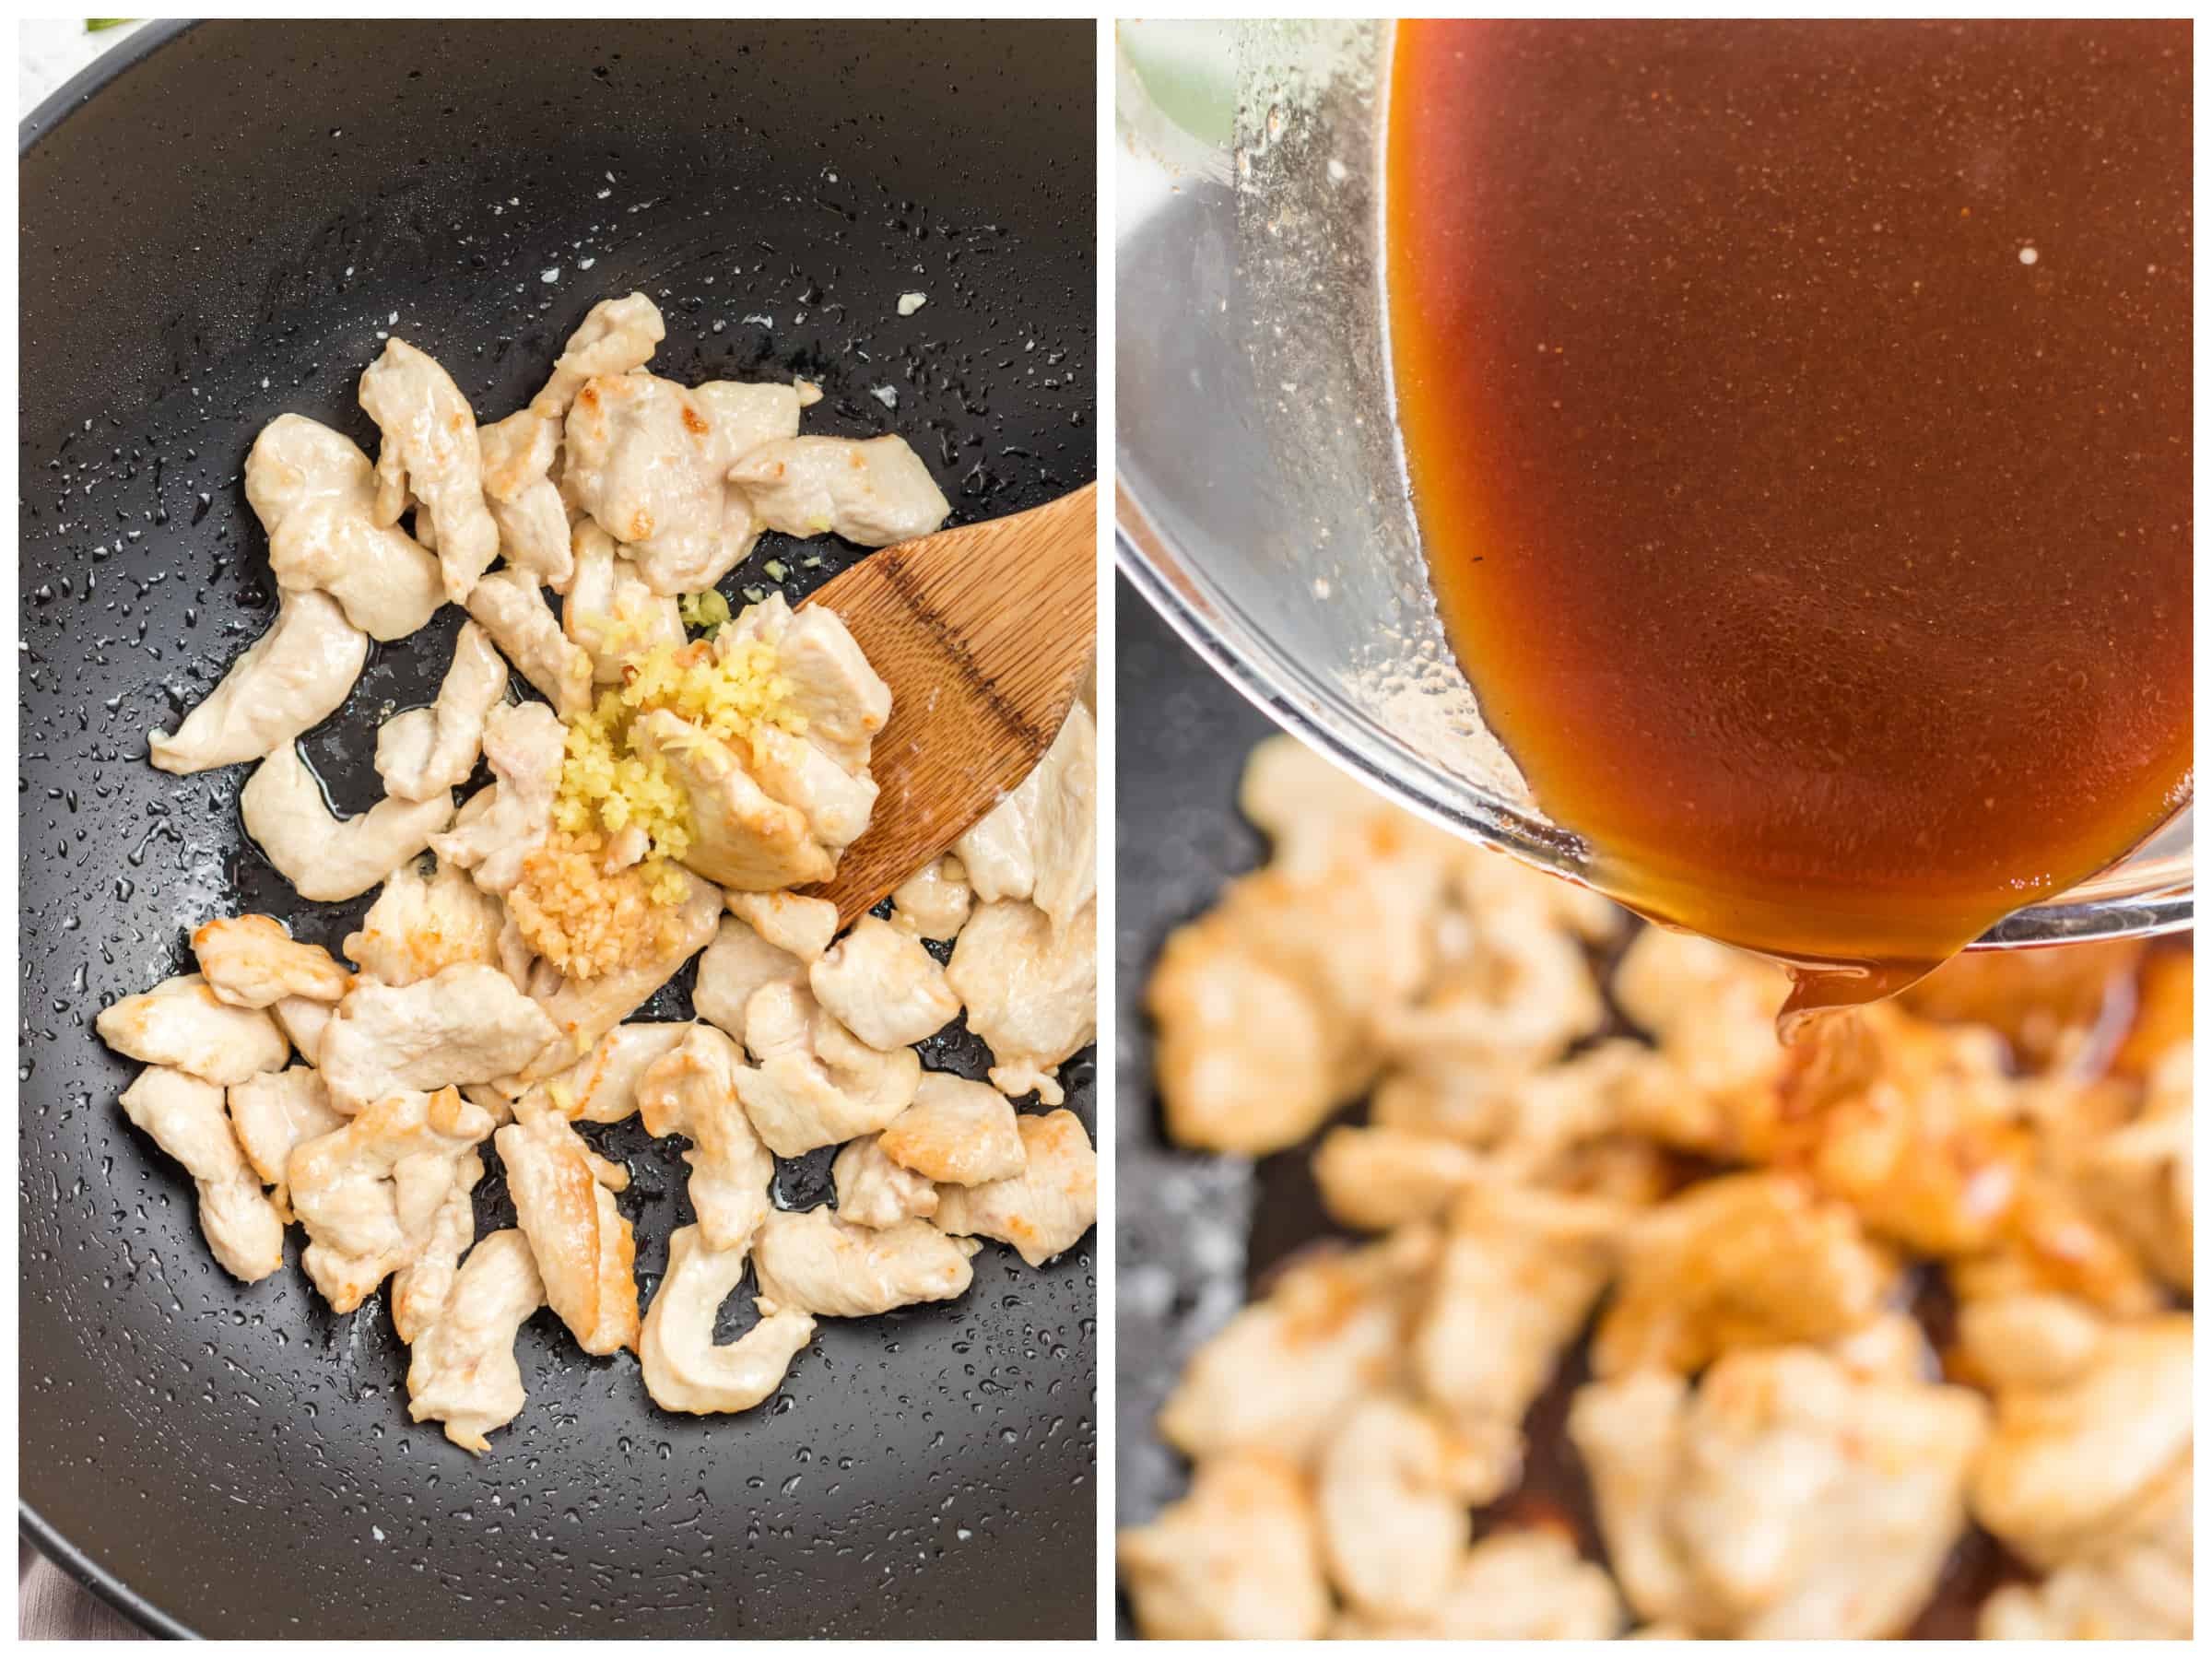
Cooking Chinese food over high heat is a quick process so have all you ingredients prepped and measured in advance. Cut up the chicken and chop the green onions, keeping the white parts separate (they take longer to cook). Mince the garlic and ginger.
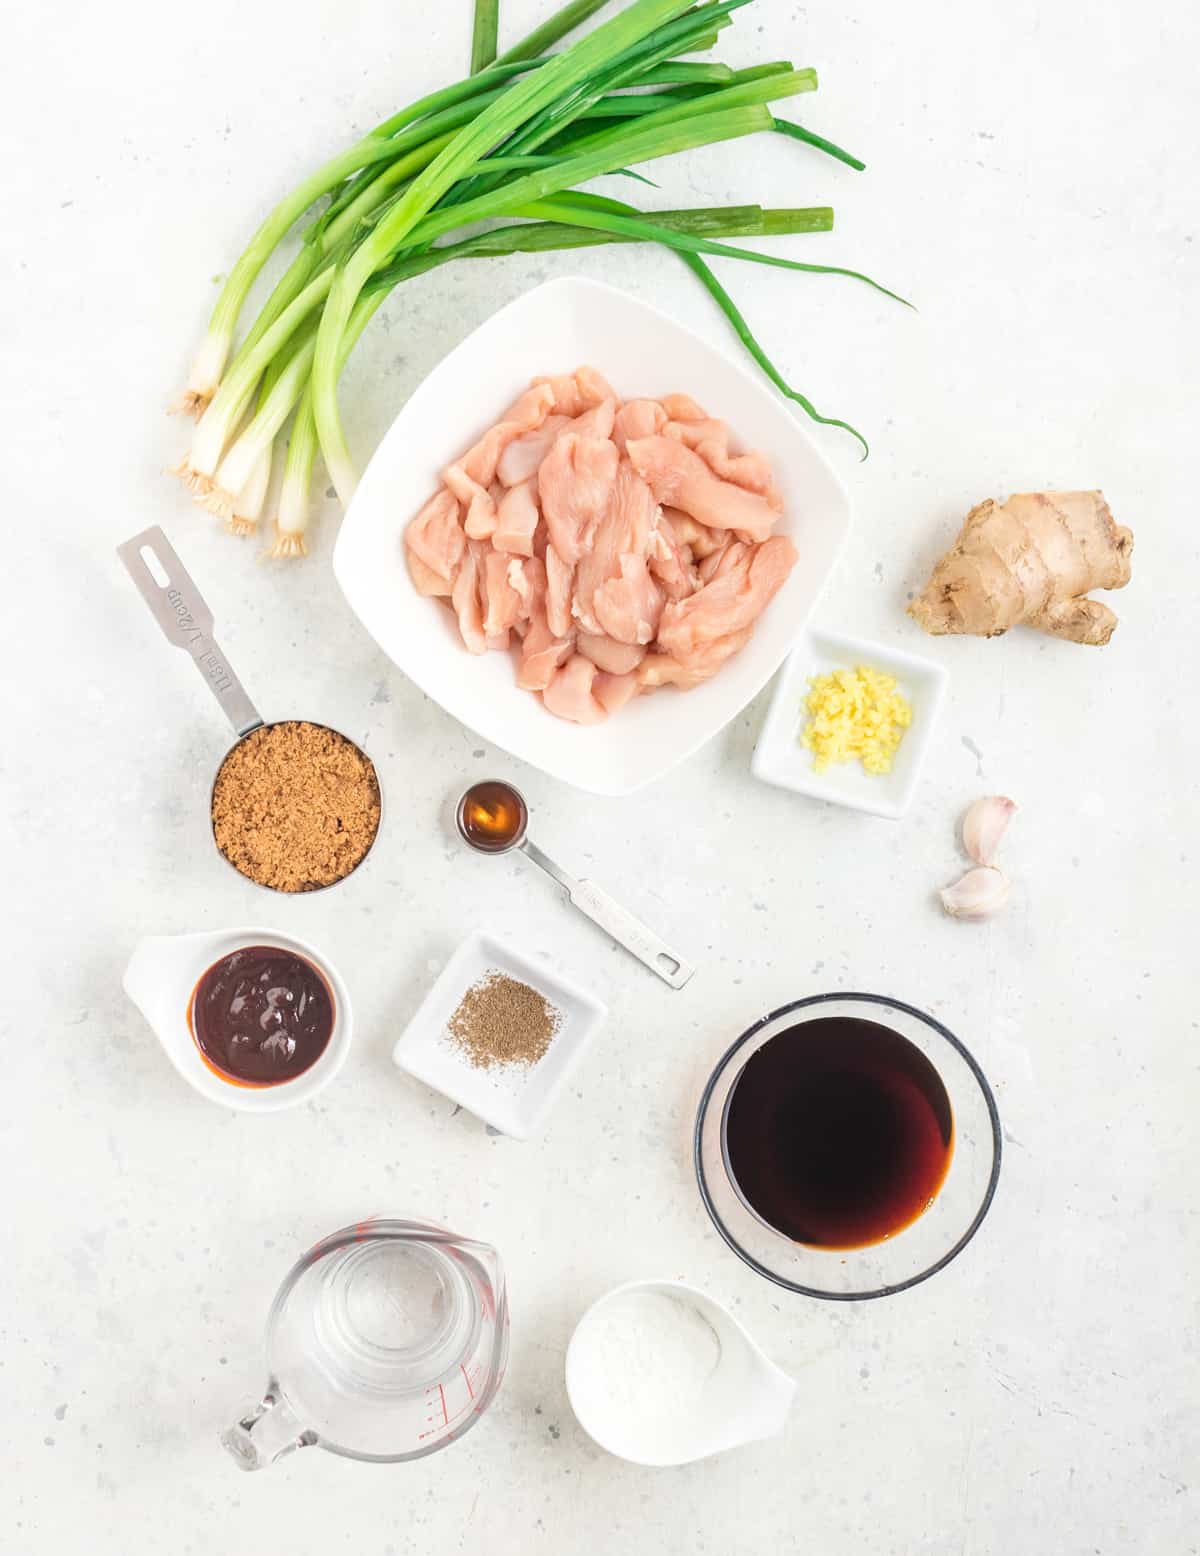
Combine the sauce ingredients in a bowl.
Sprinkle the chicken with the cornstarch and toss to coat.
Heat the wok (or regular skillet if you don’t have a wok) over high heat. Once the wok is good and hot pour in the oil. I use avocado oil because it’s a healthy oil with a high smoke point.
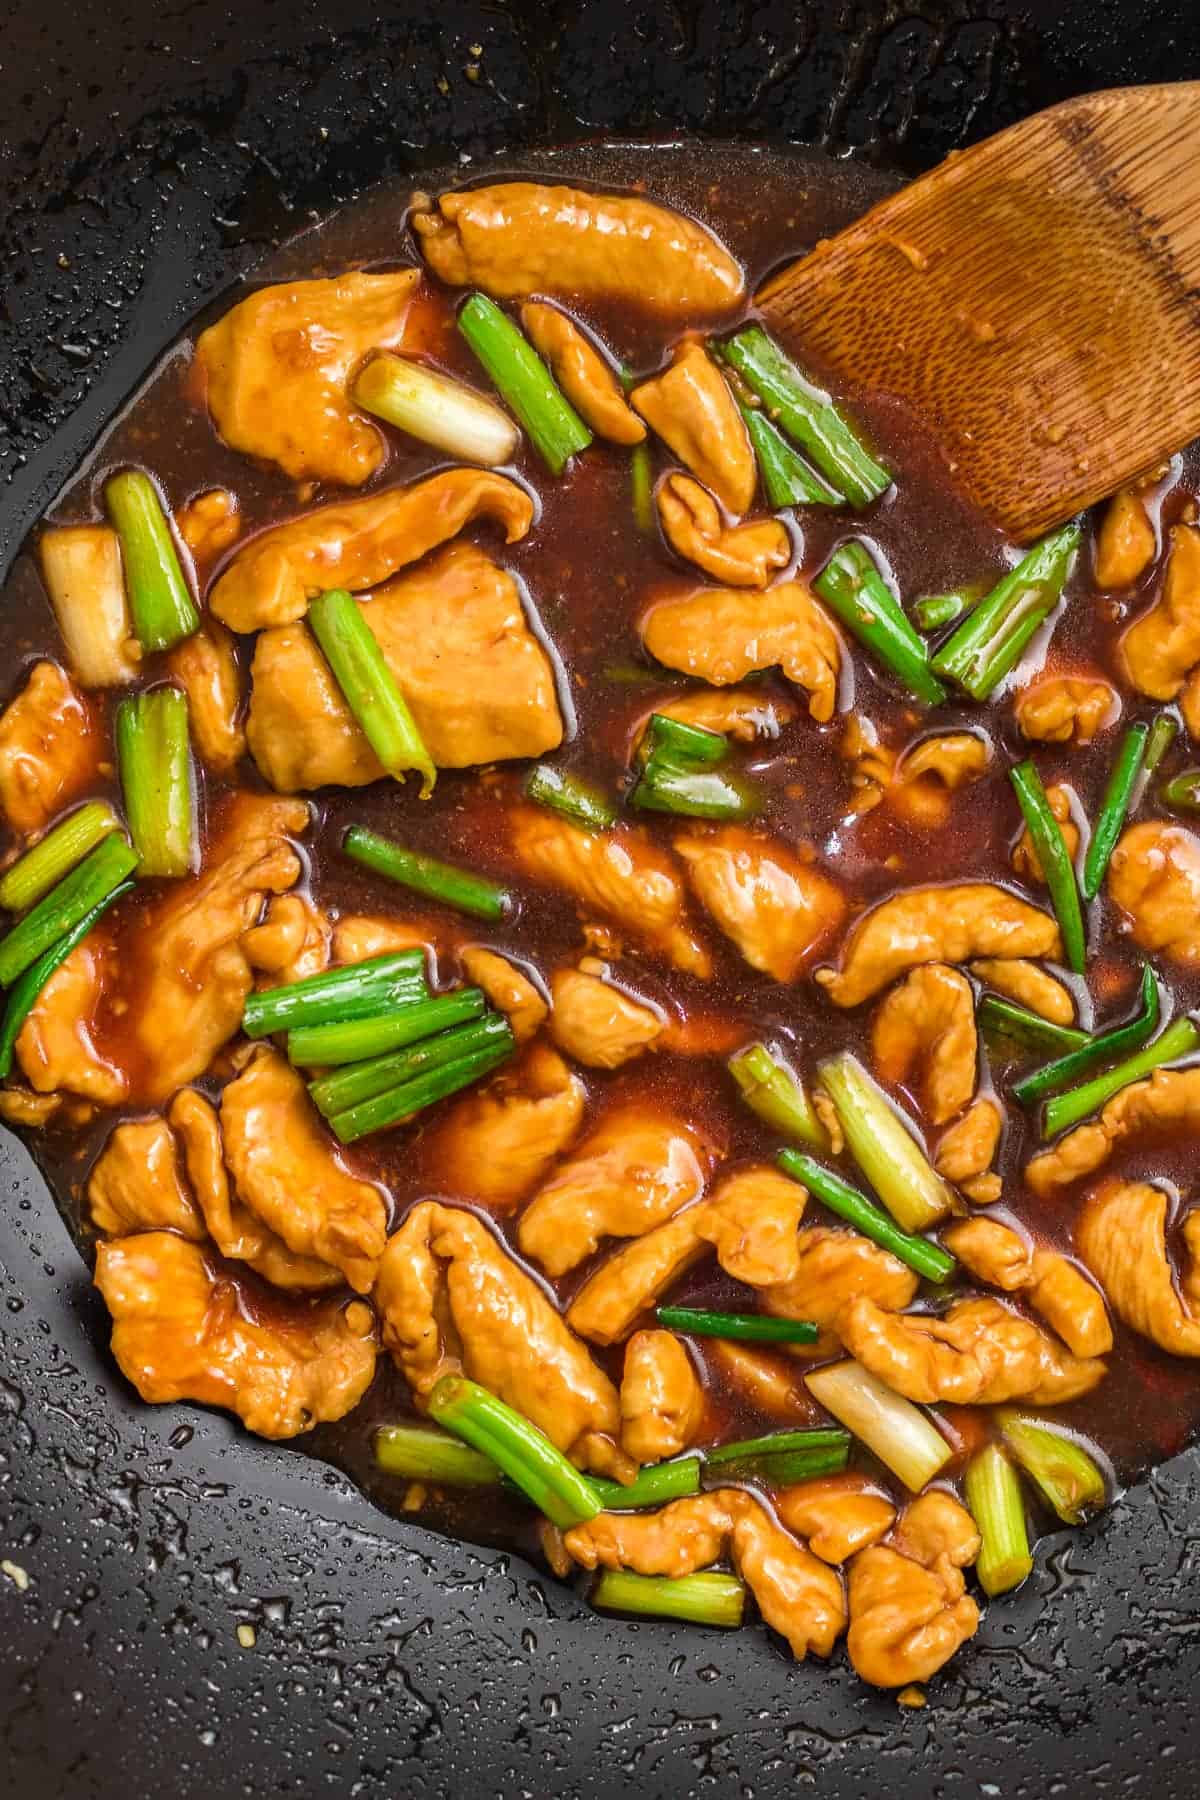
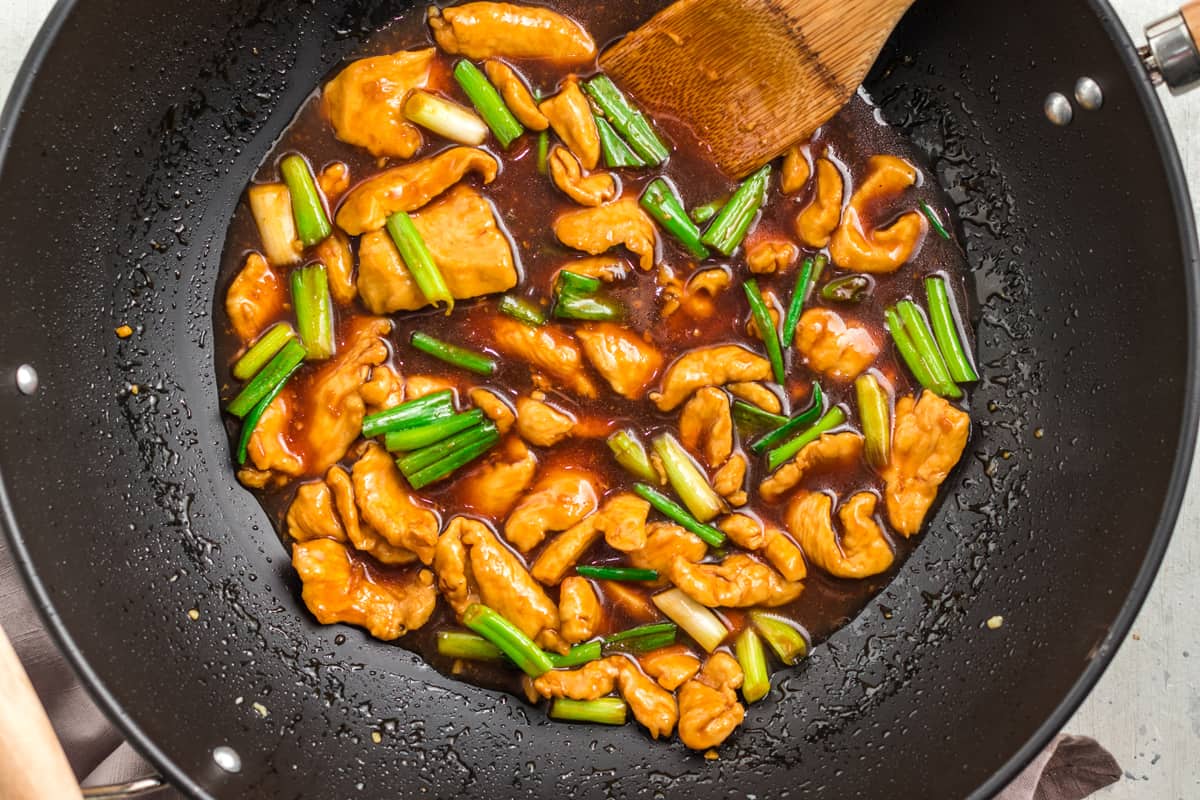
Add the chicken and fry until cooked through. It will only take about a minute. Add the garlic and ginger and fry for another 30 seconds. Pour in the sauce.
Stir in the white parts of the green onions.
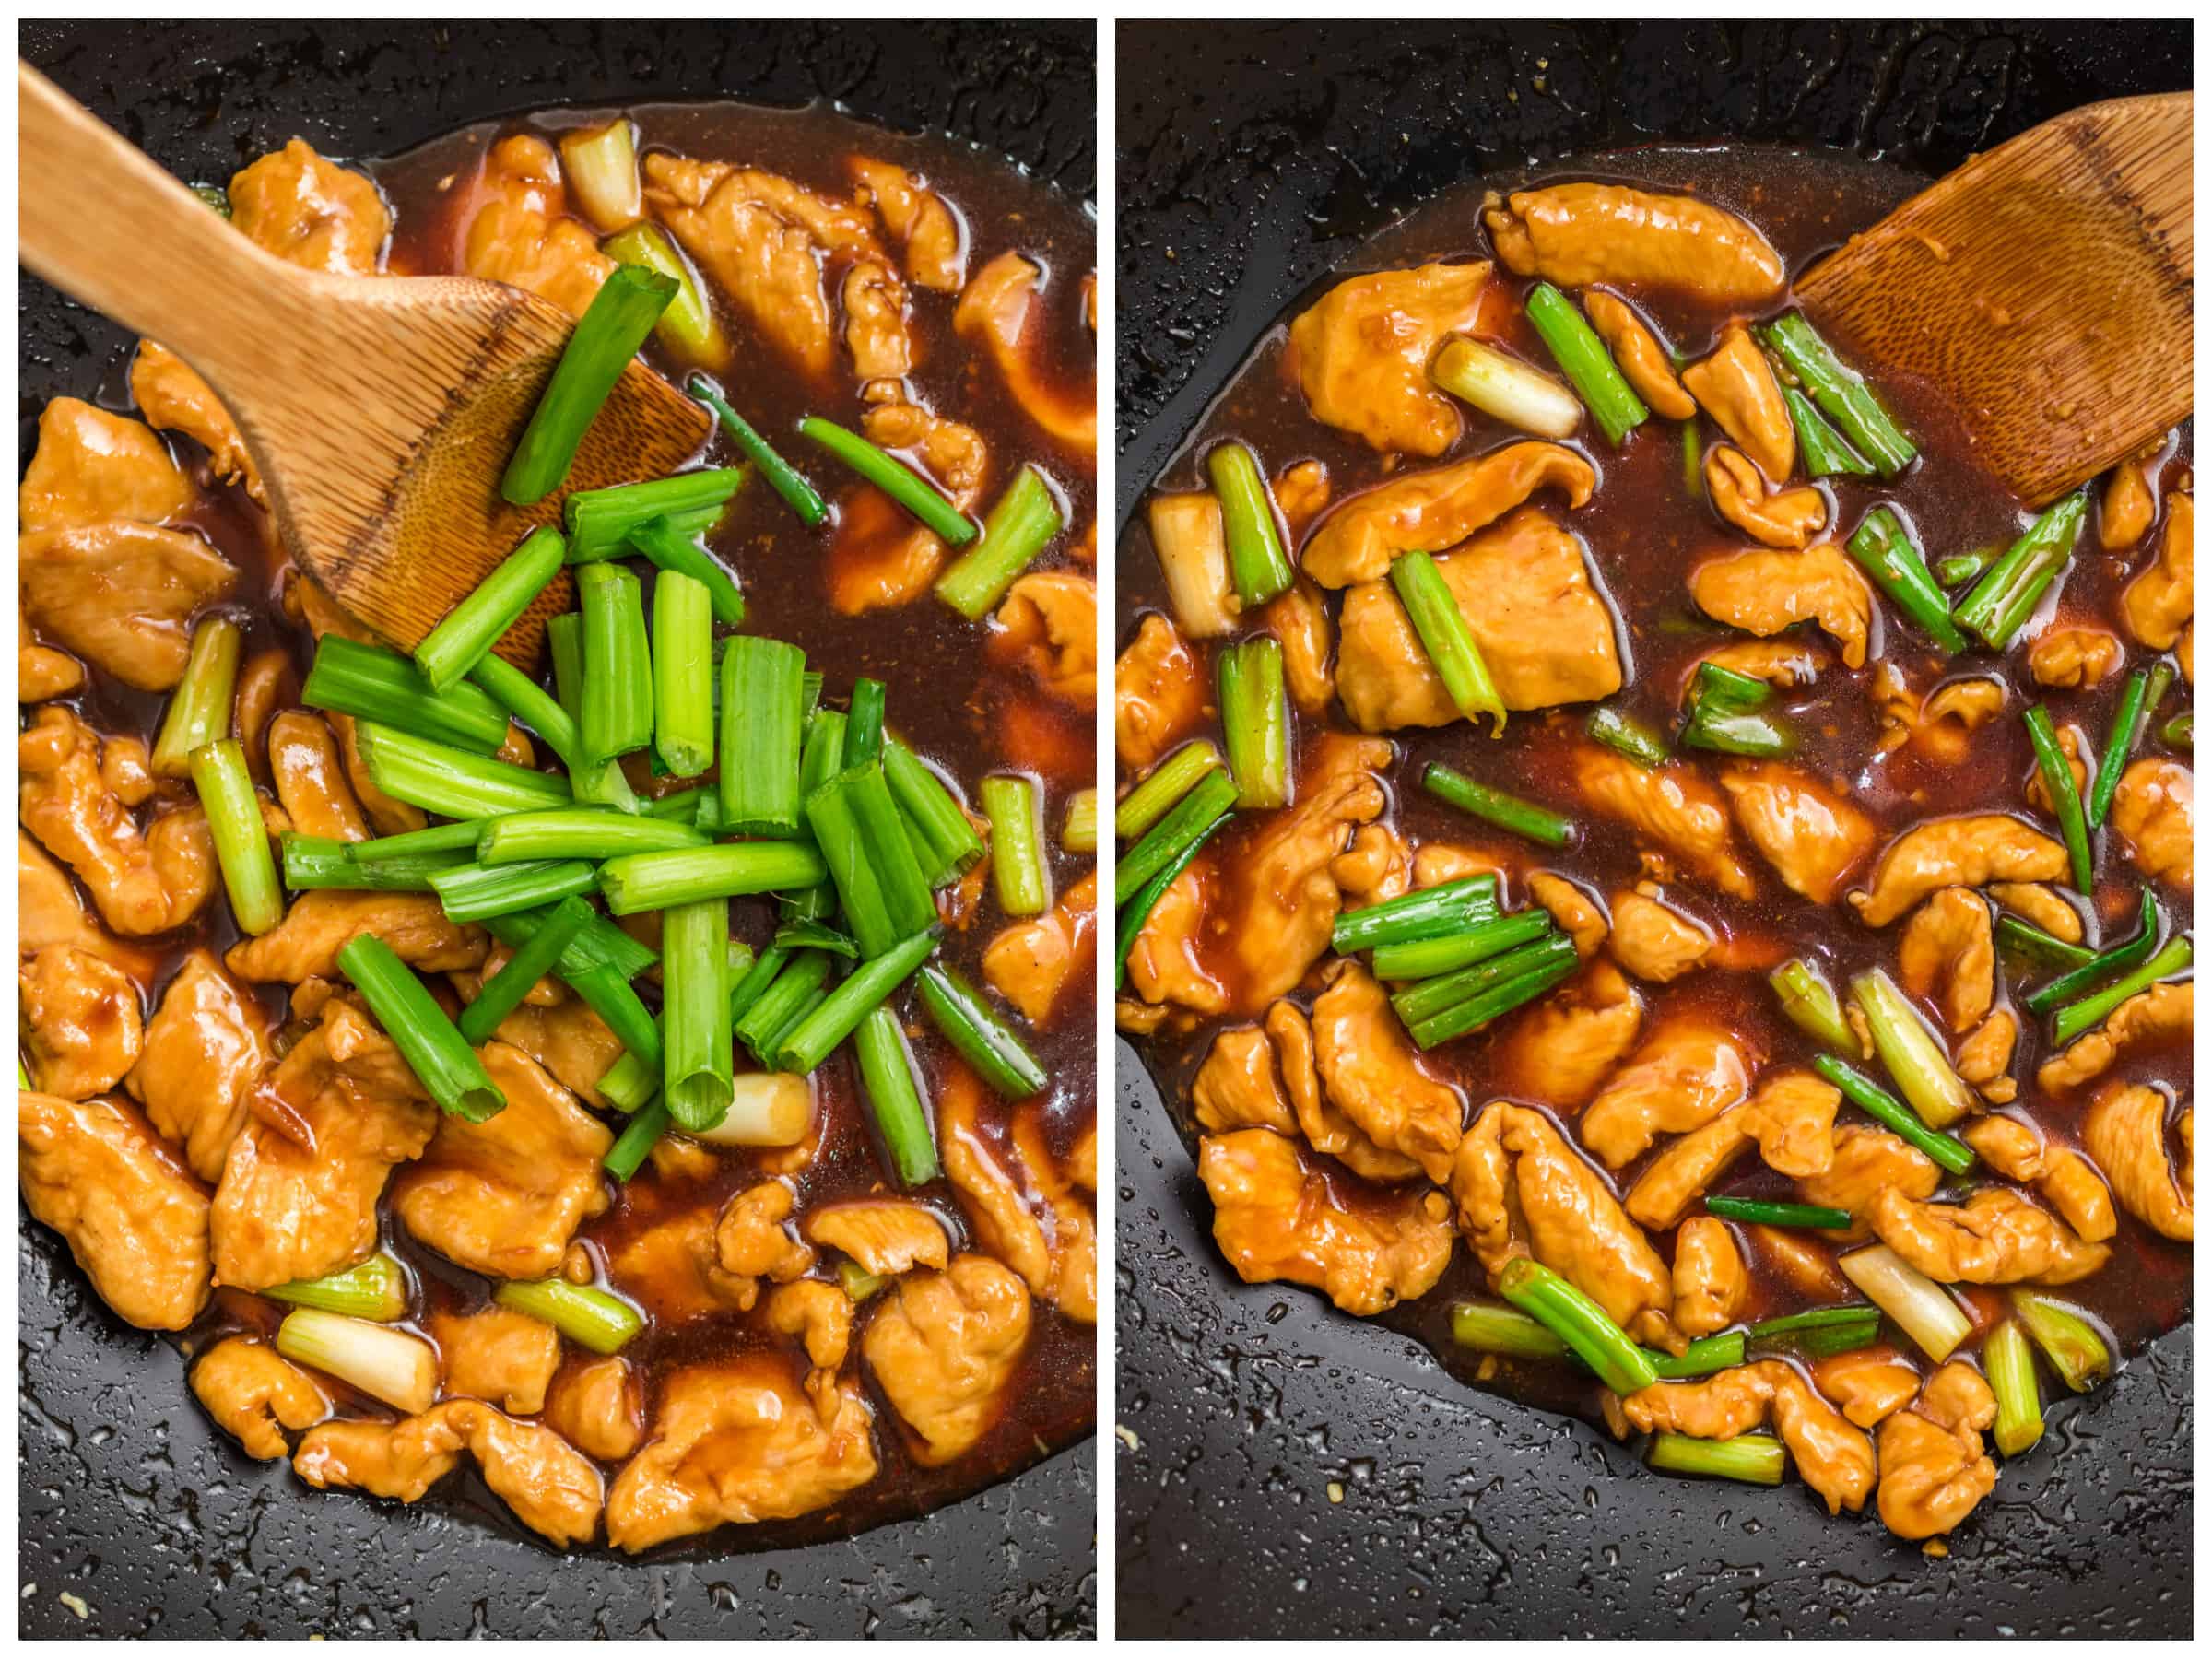
Cook for a minute or so until the sauce is thickened.
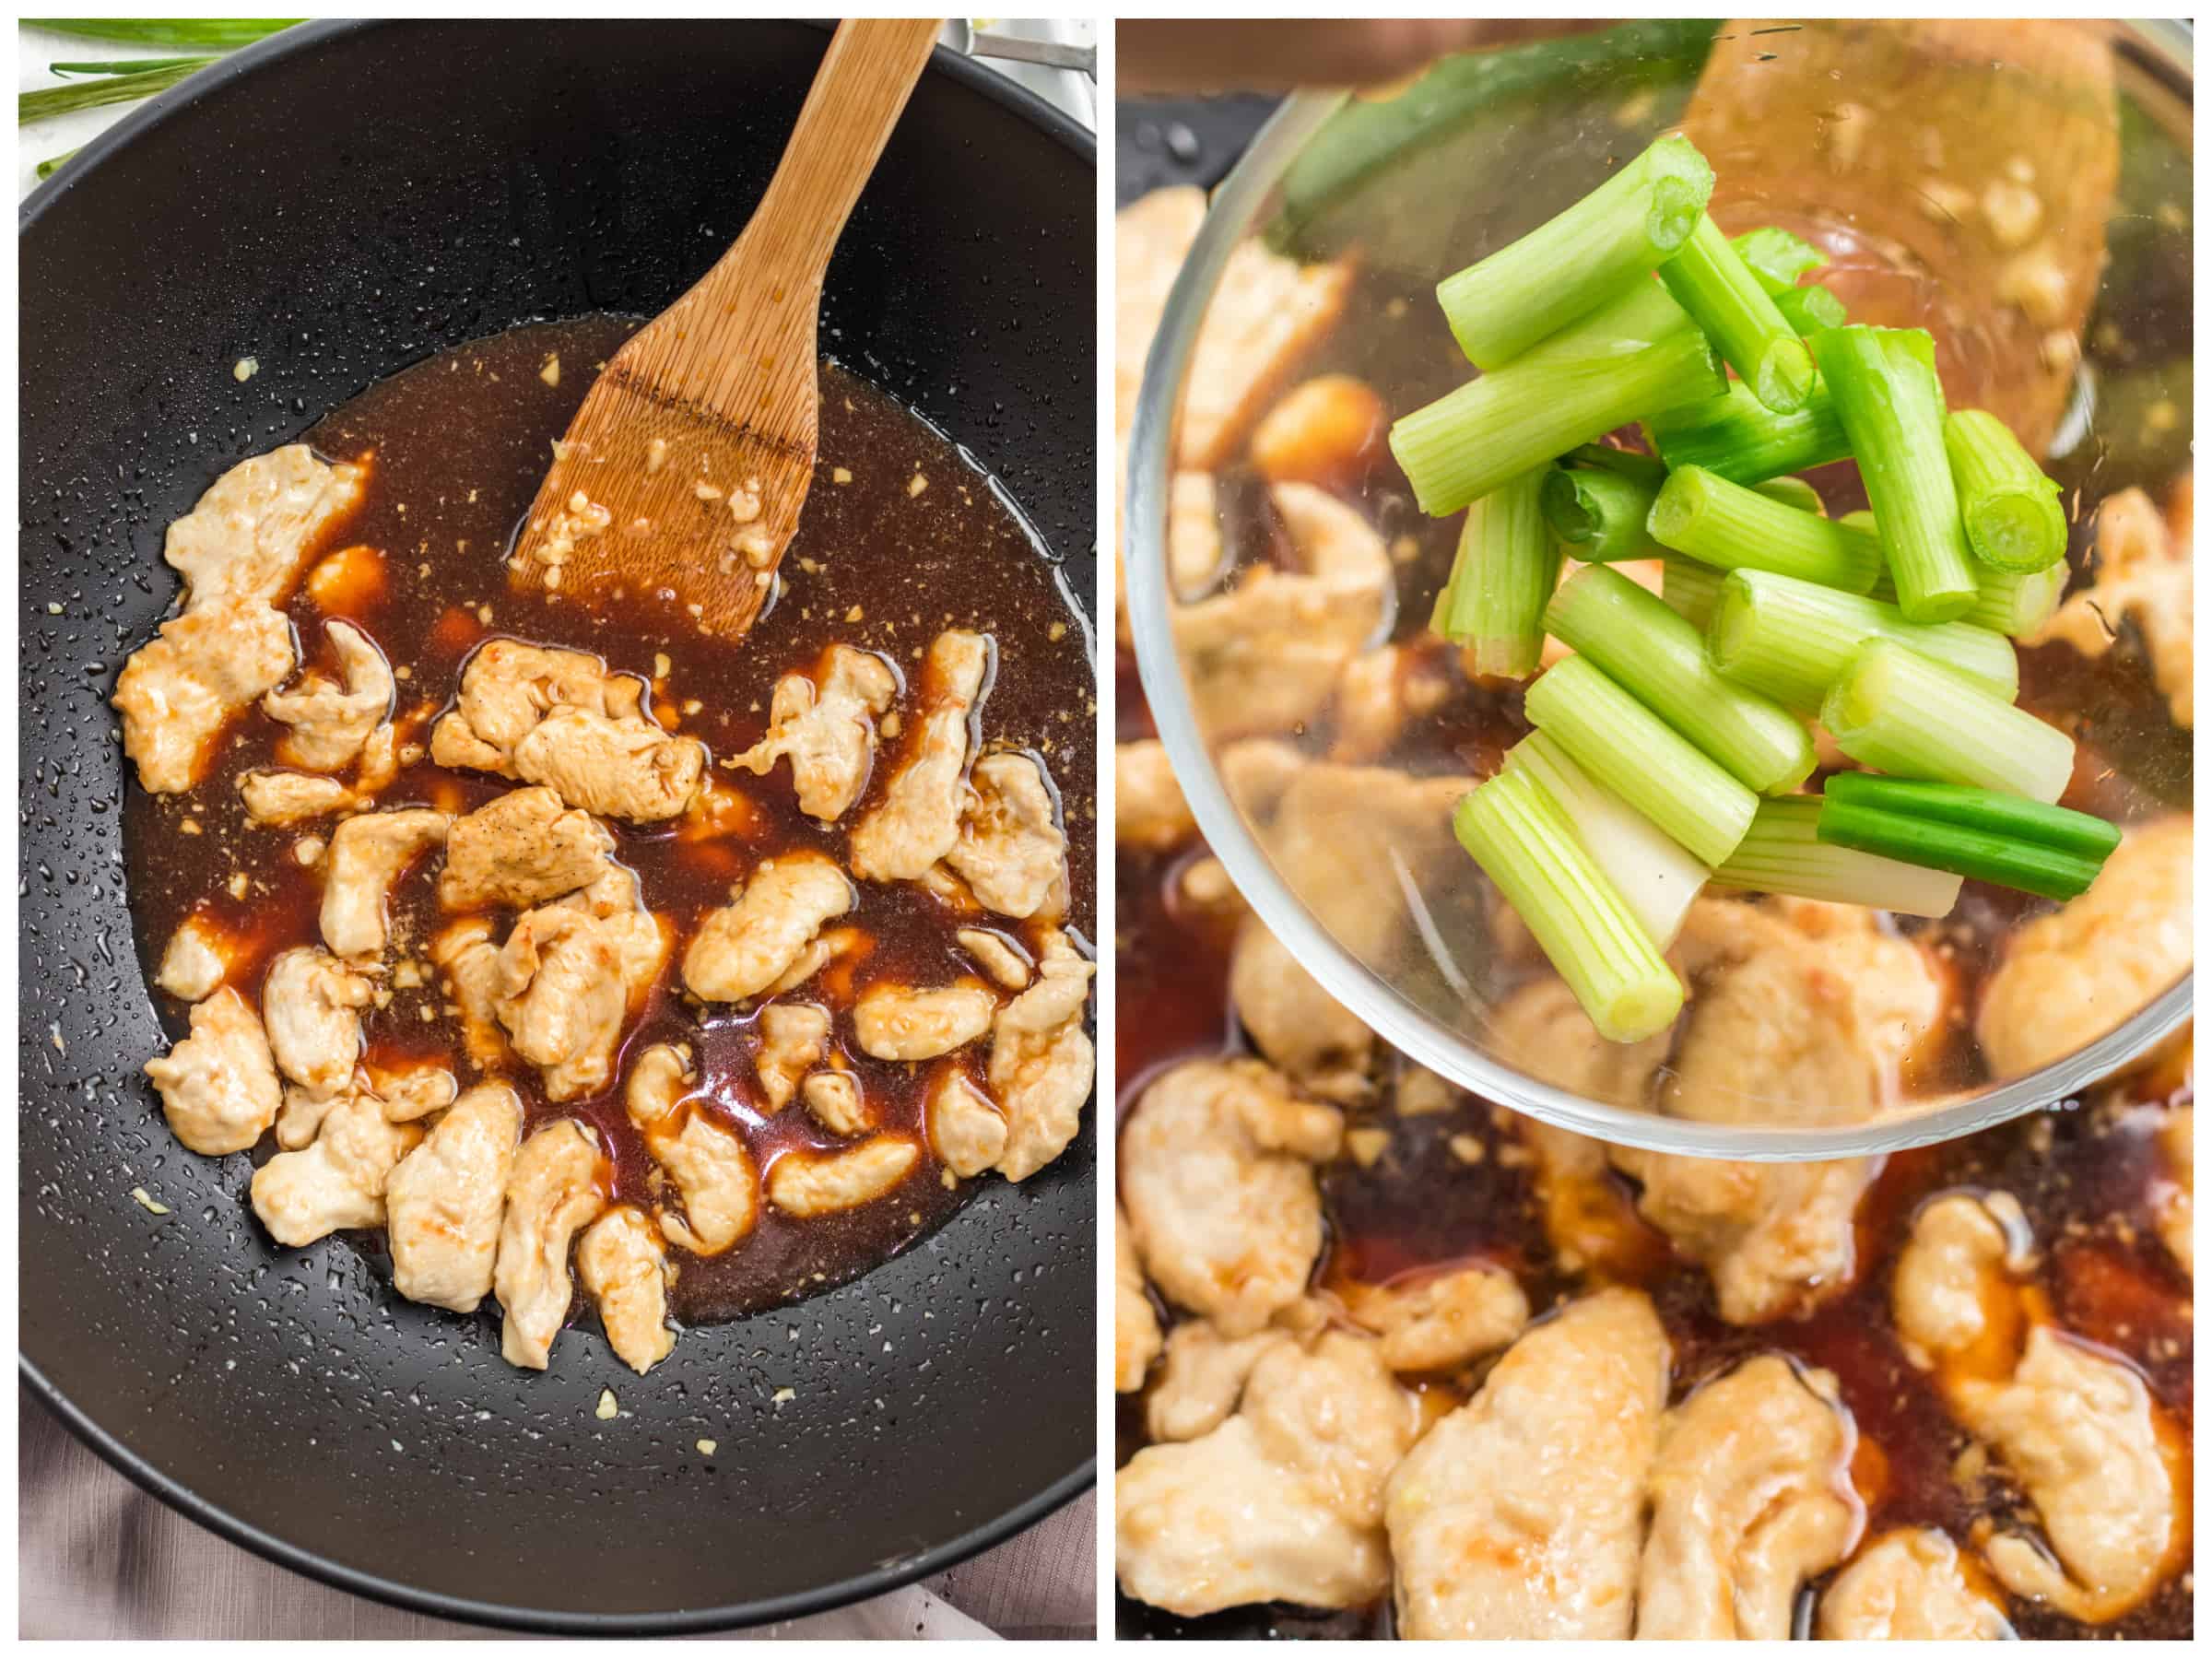
Add the remaining green onions and stir to coat and to just heat through. You don’t want to cook the soft green onions for long because you want them to remain a little crispy. Remove from the heat and serve immediately.
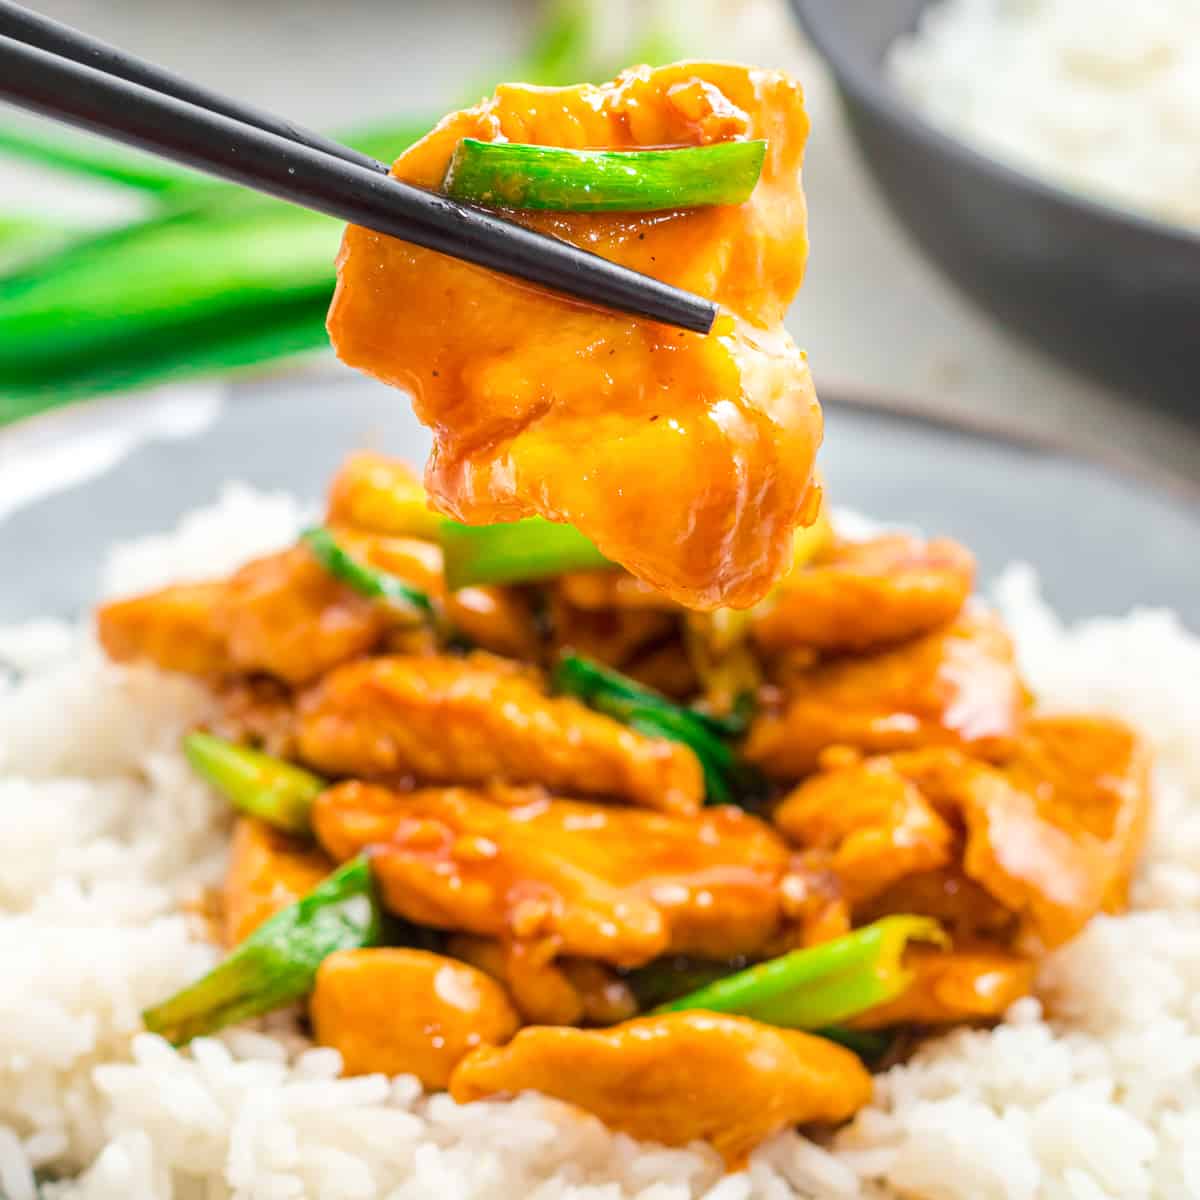
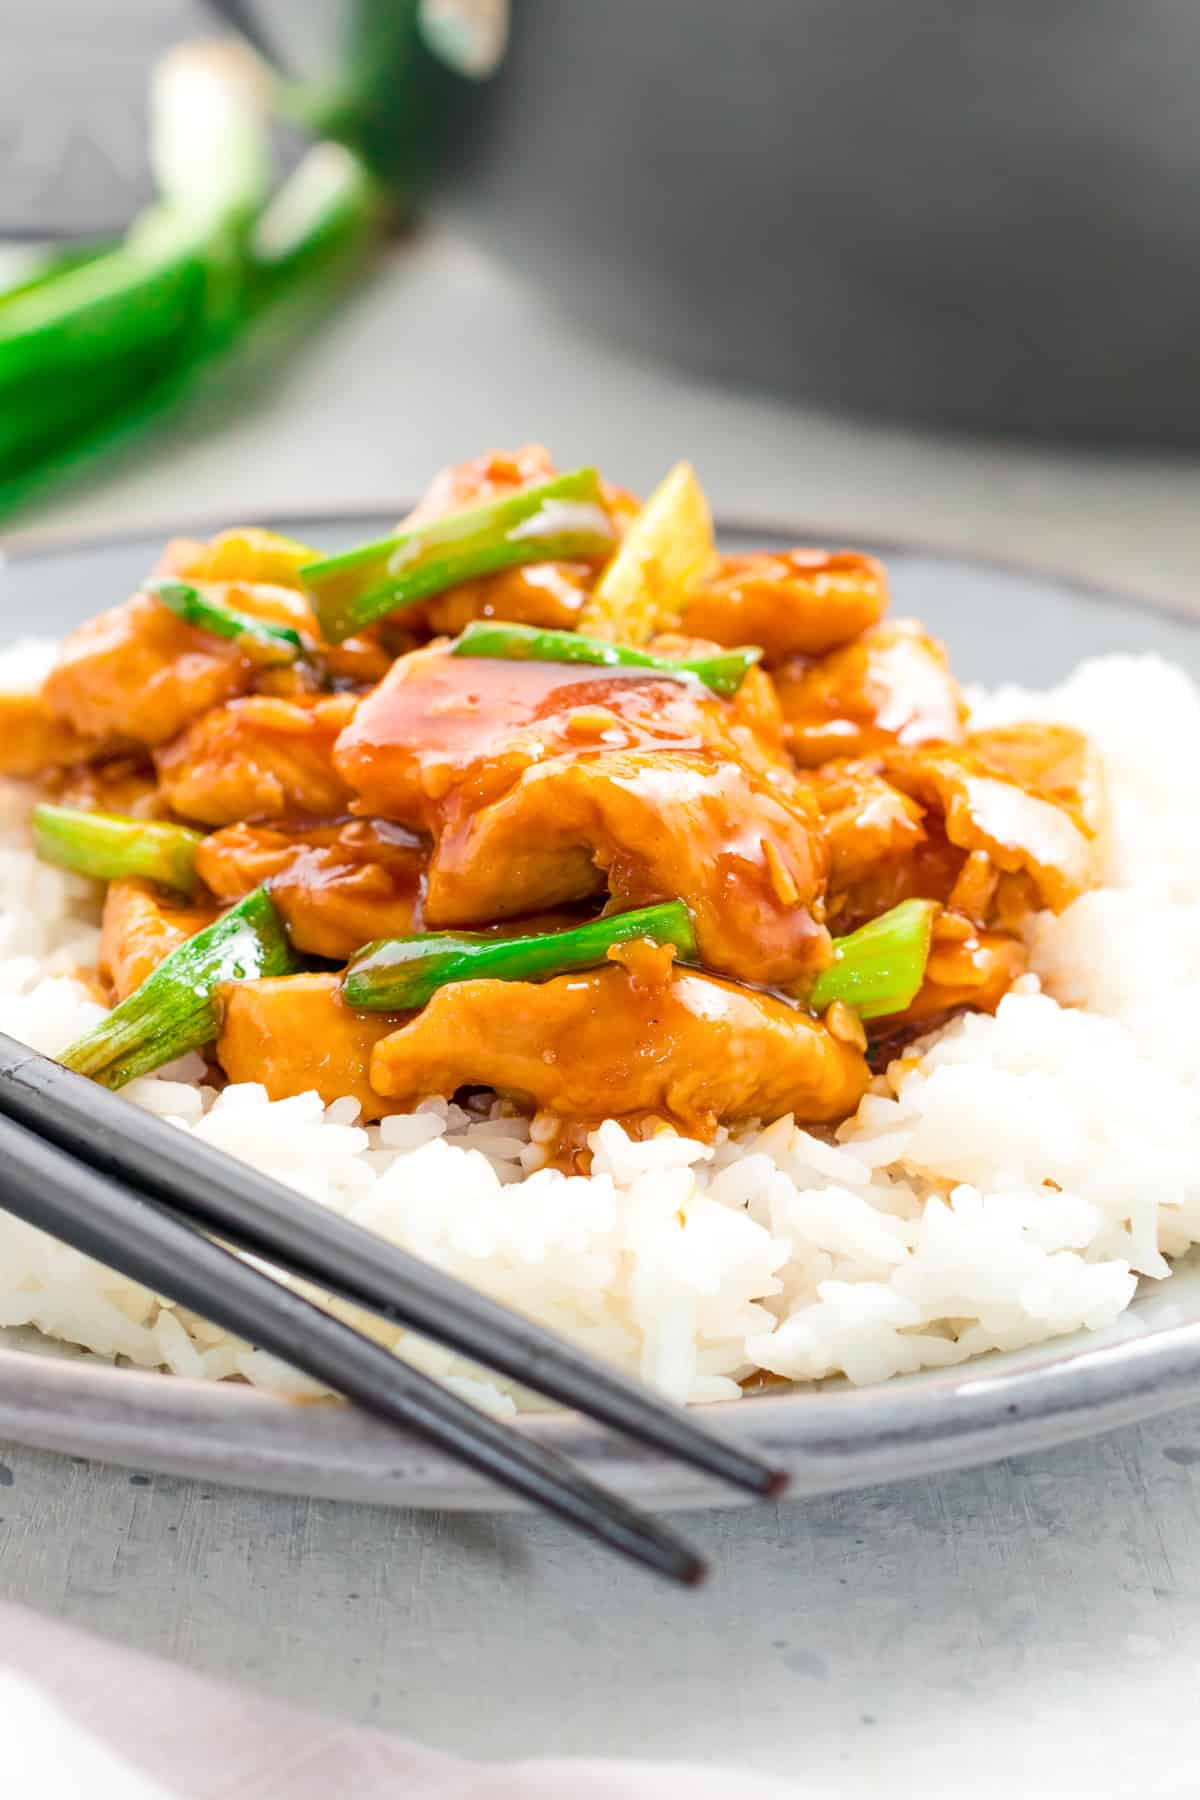
Your Mongolian Chicken is ready!
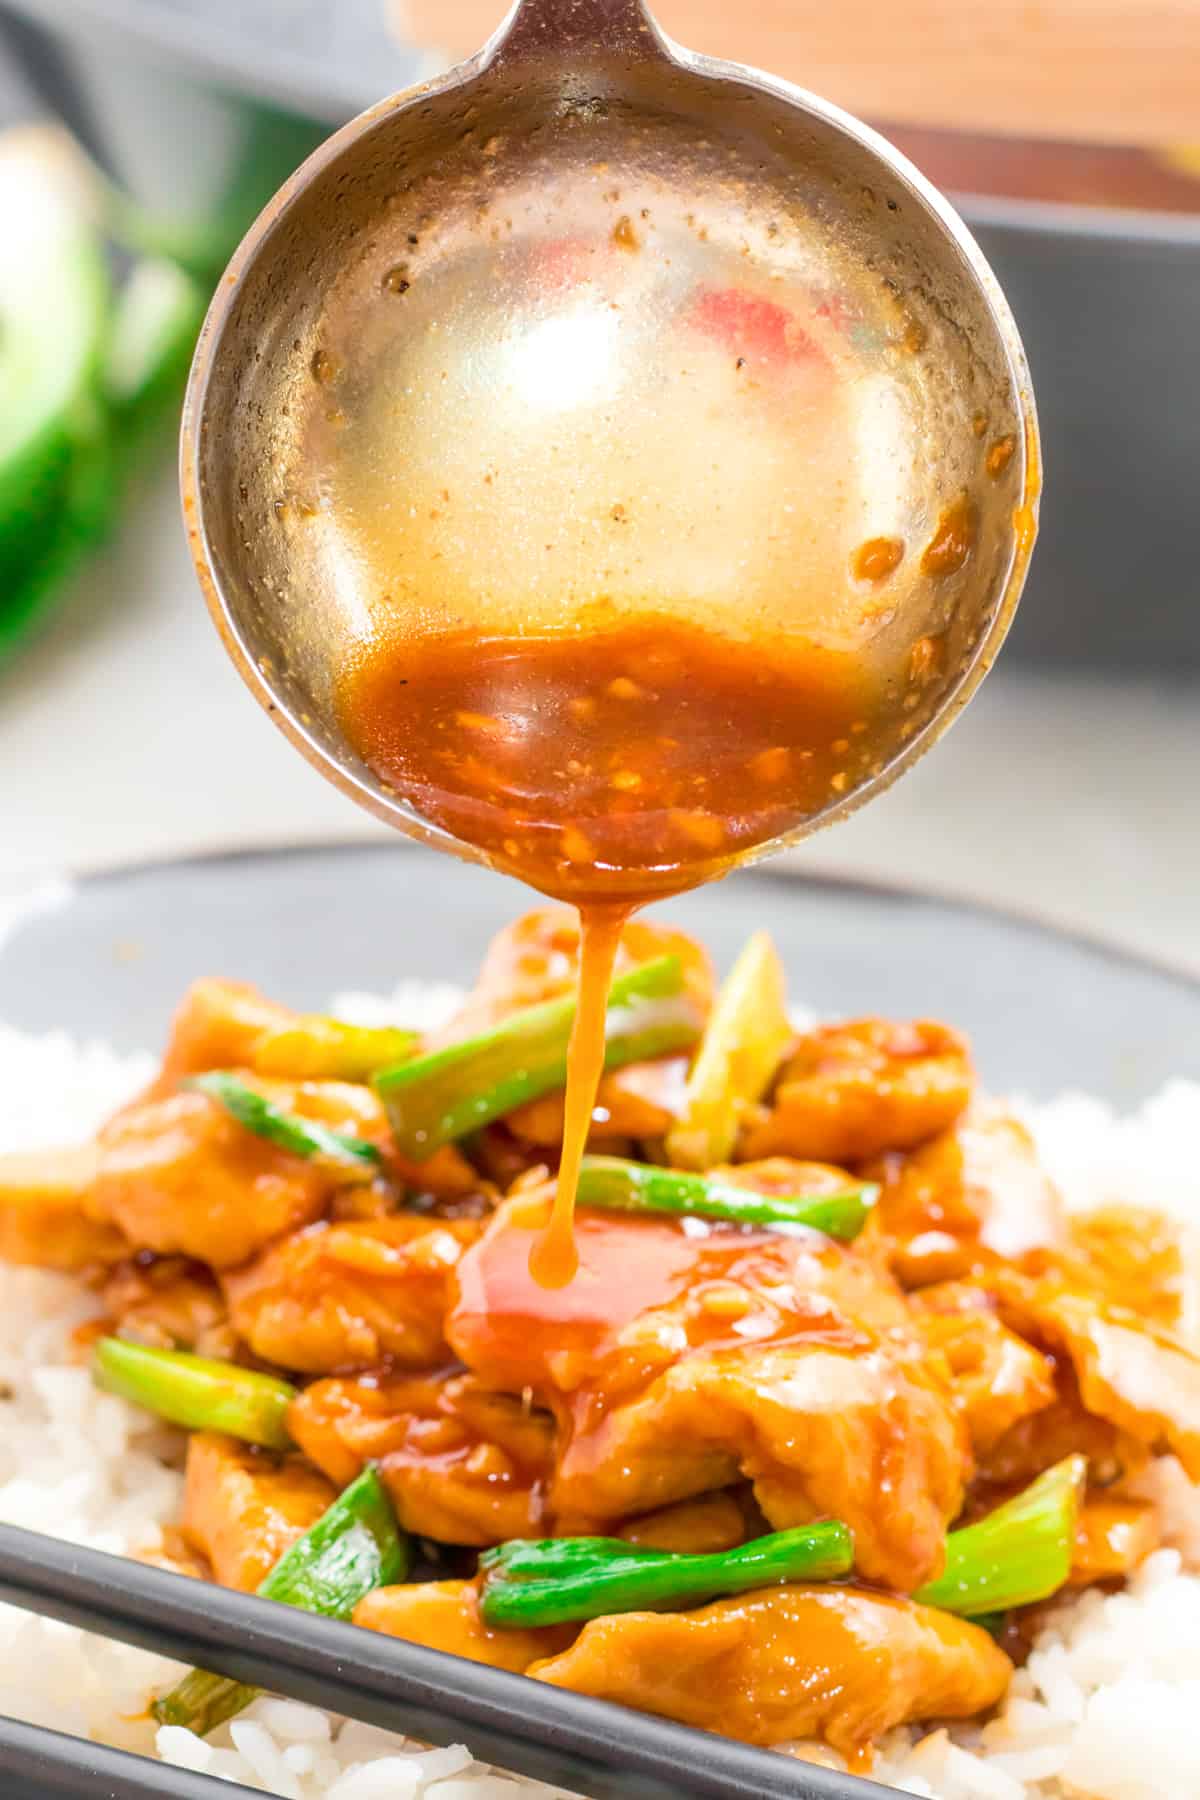
Serve with steamed rice, egg noodles, or chow mein. For a refreshing side, serve it with Smashed Cucumber Salad!
Enjoy!
Want to bulk up this dish with more healthy veggies? Simply add some steamed broccoli and/or fry some bell peppers along with the chicken. You can also toss in some bean sprouts at the very end.
For more delicious Chinese takeout recipes, be sure to try my:
- Mongolian Beef
- Orange Chicken
- Egg Foo Young
- Biang Biang Noodles
- Kung Pao Chicken
- Chinese Beef and Broccoli
- General Tso’s Chicken
- Beef Stir Fry
- Sweet and Sour Chicken
- Orange Beef
- Sesame Chicken
Save This Recipe

Mongolian Chicken
Ingredients
- 1 lb chicken breast or thighs , cut into thin strips (*Vegetarian/Vegan: use diced tofu tossed in oil and baked in oven until crispy)
- 1 tablespoon cornstarch , for coating
- 2 tablespoons high heat cooking oil (I use and recommend avocado oil as a healthy oil with a high smoke point)
- 1 tablespoon fresh garlic , minced
- 2 teaspoons fresh ginger , minced
- 2 bunches green onions , cut into 2 inch pieces, white parts kept separate
- For the Sauce:
- 3 tablespoons hoisin sauce
- OR Best Homemade Hoisin Sauce
- 1 teaspoon sesame oil
- ¼ teaspoon black pepper
- ½ cup tamari (can substitute light soy sauce)
- ½ cup water
- 2 teaspoons cornstarch
- ½ cup brown sugar
- or brown sugar alternative
Instructions
- Combine the sauce ingredients in a bowl, stirring until the cornstarch and brown sugar are dissolved, and set aside.
- Sprinkle the cut up chicken with the cornstarch and toss to coat.Heat a wok or heavy frying pan over high heat. Once hot, add the oil. Add the chicken and fry until cooked through, about one minute. Add the garlic and ginger and fry for another 30 seconds. Add the sauce and white parts of the green onions and simmer until thickened, about a minute. Add the remaining green onions, stir to coat and remove from heat (the green onions should remain a little crispy).
- Serve immediately with steamed rice, egg noodles or chow mein.
Notes
Nutrition
First published on The Daring Gourmet February 22, 2015

Hi, I’m Kimberly Killebrew and welcome to Daring Gourmet where you'll find delicious originals, revitalized classics, and simply downright good eats from around the world! Originally from Germany, later raised in England, world-traveled, and now living in the U.S., from my globally-influenced kitchen I invite you to tour the world through your taste buds!


I love making take out meals from home! I’ve never tried this w/ chicken. Sounds great!
I do, too, Lauren! I have both a beef and a chicken version. Both are really popular and I’m not really sure which I prefer – they’re both great!
You had me 15 minutes! This was quick and absolutely amazing!
I know, Michelle, with a 3 and a 5 year old I always welcome fast dishes, too! :)
Wow……made this last night and it was delish! The kids loved it. I turned it into a nourish bowl without the rice. Shredded lettuce, julienne carrot/cucumber, black beans, shredded red cabbage etc. It will be a favourite from here on in!
What a great idea, Joyce! And I’m so happy this was a family hit, thanks so much for the feedback!
What a delicious, FAST, meal! Start to finish in 20 minutes! A new stable at my dinner table!
YES!! So glad you liked it, Sara, thanks for the feedback!
Just made this for the family. I could not find Hoisin in the local shops, so i used a homemade substitute which i found online. Fair to say all plates are now empty. Fantastic recipe, and i am sure it wont be the last time its made in this house. Many thanks.
I’m thrilled to hear that, Darron, thanks so much for your feedback!
Amazing! Thank You! What a success!!
Fantastic, thanks so much for the feedback!
I made this tonight for my kids and I. We love Asian inspired food, and this hit the mark!! Instead of plain white rice, which we rarely eat, i made a coconut ginger jasmine rice. It was a hit even for my pickiest little eater!
Fantastic, Joy, I’m thrilled to hear that and really appreciate the feedback!
I am eating this now, and it’s really delicious. I modified it by adding carrots and broccoli for a one-pot meal. I also added some dried chiles (about 10-12) with the ginger and garlic for a little heat. Question, though, my sauce never thickened, so I pulled it off the heat when everything was close to being overcooked. Maybe 3 teaspoons of corn starch for so much liquid?
This is a keeper with amazing flavor.
Hi Valerie, so glad you enjoyed it and thanks for the feedback! This sauce isn’t supposed to be really thick, more like a thin gravy. But if it didn’t thicken at all there are two likely reasons: 1) The addition of the carrots and broccoli will have added extra liquid and watered it down or 2) If a sauce with cornstarch is boiled too long it will liquify again. In other words, you only want to boil it for a minute or so just until thickened and then turn off the heat.
Oh, that’s good to know, Kimberly, thank you. I will keep this in mind when I make again, and I will! You have a wonderful blog and I am only beginning to explore your recipes. Beautiful pictures and very direct instructions. I found you through your preserved lemons post, and I have two jars preserving in the fridge right now. :)
Thank you so much, Valerie, I really appreciate that. And I’m excited that you’ve got those lemons in the fridge – you’re going to love what they do to your food!