Oven Baked French Fries
This post may contain affiliate links. See my disclosure policy.
Say goodbye to limp and gummy oven fries! This Oven Baked French Fries recipe is the only one you’ll need to achieve crispy fries with fluffy interiors and the best flavor! These are less fussy and easier and than deep-fried, use vastly less oil, and you’ll be thrilled with the results!

Oven Baked French Fries
The past several years I’ve grown potatoes in our garden. Our record harvest was two years ago with a whopping 1000 pounds of them! 12 varieties. But there are two varieties and one method of cooking that I consistently come back to for making homemade French fries. And today I’m going to share my method with you for getting the crispiest, most flavorful fries without having to go through the ordeal of deep-frying them.
5 Tips for Getting the Crispiest Oven Baked Fries
True or False: The only way to get crispy fries is by deep-frying them. False! And while it’s true that most oven-baked fries leave much to be desired when it comes to texture, THIS recipe avoids all the common pitfalls to ensure you get those wonderfully crispy morsels that we all love biting into. Here are my Top 5 Tips:
- 1) Choose the Right Potatoes: That means a high starch/low moisture variety like Russets. While more moderate starchy potatoes like Yukon Golds will give you a nice buttery texture and flavor, they will never be crispy like fries made with Russets. Another potato variety that I grow every year in my garden is called Kennebec, which is my favorite variety to use for French fries. It’s prized by chefs and restaurants for its frying qualities, producing a perfectly crispy exterior and fluffy interior.
- 2) Don’t Slice Them Too Thickly: For the crispiest results you want to slice the potatoes on the thinner side. Aim for between 1/4 to 3/8 inch.
- 3) Parboil the Potatoes Before Baking Them: This is key and comes with several benefits. Parboiling means to boil the sliced potatoes for a just a few minutes, then submerge them in a bowl of ice water to prevent them from continuing to cook, and finally draining them. Some people add vinegar to the water; I haven’t noticed a difference either way. Parboiling the potatoes before baking them has several advantages. For one, it deactivates the enzymes that cause discoloration. That means that you can parboil the potatoes in advance and keep them in the fridge until you’re ready to bake them. A common problem with oven baked fries is that the insides are still raw when the outsides are starting to burn. Parboiling cuts down on the baking time which means the interior will be done at the same time the exterior is nice and crispy. Parboiling also helps ensure even cooking. But the biggest advantage of parboiling is that you will get far crispier results along with fluffier (instead of gummy) interiors than if you were to skip that step and going straight to baking. Why? Because parboiling eliminates a lot of the sugars (which helps prevent over-browning) and starches in the potatoes while gelatinizing the outer surface. That gelatinized outer layer, when moved to the hot oven, dehydrates nicely and evenly as it cooks, creating the perfectly crispy exterior.
- 4) Bake them at a high temperature. You’ve already parboiled the potatoes which means reduced baking time, which means you can crank up the heat so that the outside will become crispy without burning before the inside is done. Every oven is different – some heat hotter, some cooler – but for me 435-450 F is perfect.
- 5) Use the right oil. Hands down either lard or beef tallow will give you the crispiest results. I discuss these and other oil options in greater detail below.

Best Oil For French Fries
What’s the best oil for making fries? It depends on what your objective is and the end result that you’re looking for. Here are a few options:
- For the Crispiest Fries: Use pork lard. (See my tutorial on How to Make Lard. It’s so easy!) Many sources say that beef tallow will give you crispiest results but I have consistently gotten crispier fries and oven roasted potatoes using lard.
- For the Most Flavorful Fries: Use beef tallow. The fries are still crispy but not as crispy as with lard. But for flavor, there’s no comparison. That’s why beef tallow (called beef drippings in the UK) is the traditional choice for things like Yorkshire Pudding. Beef tallow is also what made Julia Child praise the old McDonald’s fries…and lament it when they stopped using it. Here’s what she said: “The french fries were very good. And then the nutritionists got at them…and they’ve been limp ever since. I’m always very strong about criticizing them, hoping maybe they’ll change.” Sadly, Julia, they still haven’t and likely never will. But that doesn’t have to stop us from enjoying the best fries, which means homemade anyway! Check out my tutorial on How to Make Beef Tallow. It’s super easy!
- For Crispy AND Flavorful Fries: Use a combination of lard and beef tallow.
- For Neutral-Flavored Vegetarian Fries: Canola, avocado and peanut oil have high smoke points and don’t leave a residual aftertaste.
- For More Flavorful Vegetarian Fries: Use olive oil. I recommend that with some hesitation because, depending on the type of olive oil it is, the smoke point can range from anywhere between 325 to 410 F (unless it’s ultra processed and go higher), so bear that in mind and check the bottle.
Oven Baked Fries Recipe
Let’s get started!
Preheat the oven to 450 F.
Place the sliced potatoes in a pot of water, covered by about an inch of water. Depending on the thickness of your fries, you’ll want to boil them for just 3-5 minutes. Start the timer once the potatoes start boiling. Be careful not to boil them for too long. It’s better to under-boil than to over-boil. You don’t want them to be really limp, but just barely starting to become tender.

Immediately drain the potatoes and place them in a bowl of ice water. Let them cool for 2-3 minutes, then pour them into a colander to thoroughly drain.
Blot them with a clean dish towel or paper towels and transfer them to a large bowl.

Pour the oil over the sliced potatoes and toss to thoroughly coat the potatoes.
For the best results I recommend using either beef tallow (below left) or pork lard (below right). Whichever one you’re using, heat it up in the microwave to melt it before pouring it onto the potatoes. Making your own is super easy and rewarding. Check out my tutorials on How to Make Beef Tallow and How to Make Lard.

Line a baking sheet and place the potatoes on it in a single layer.
Bake on the middle rack for 15 minutes, then use a spatula to carefully turn over the fries. Continue baking for another 10-15 minutes or until the fries are golden and crispy. The length of time will vary depending the size of your fries and how long they were parboiled.
Remove the fries from the oven and immediately, while they’re still hot (so the salt adheres), sprinkle them with salt and give them a shake to evenly coat. Serve them immediately.

Storing and Reheating Oven Fries
It goes without saying that French fries are best eaten straight from the oven. The longer they sit the more limp they become. But if you have leftover fries, store them in the fridge in a covered container. To reheat them you can get some of their crispiness back by reheating them in a preheated oven around the same temperature, 450 F.
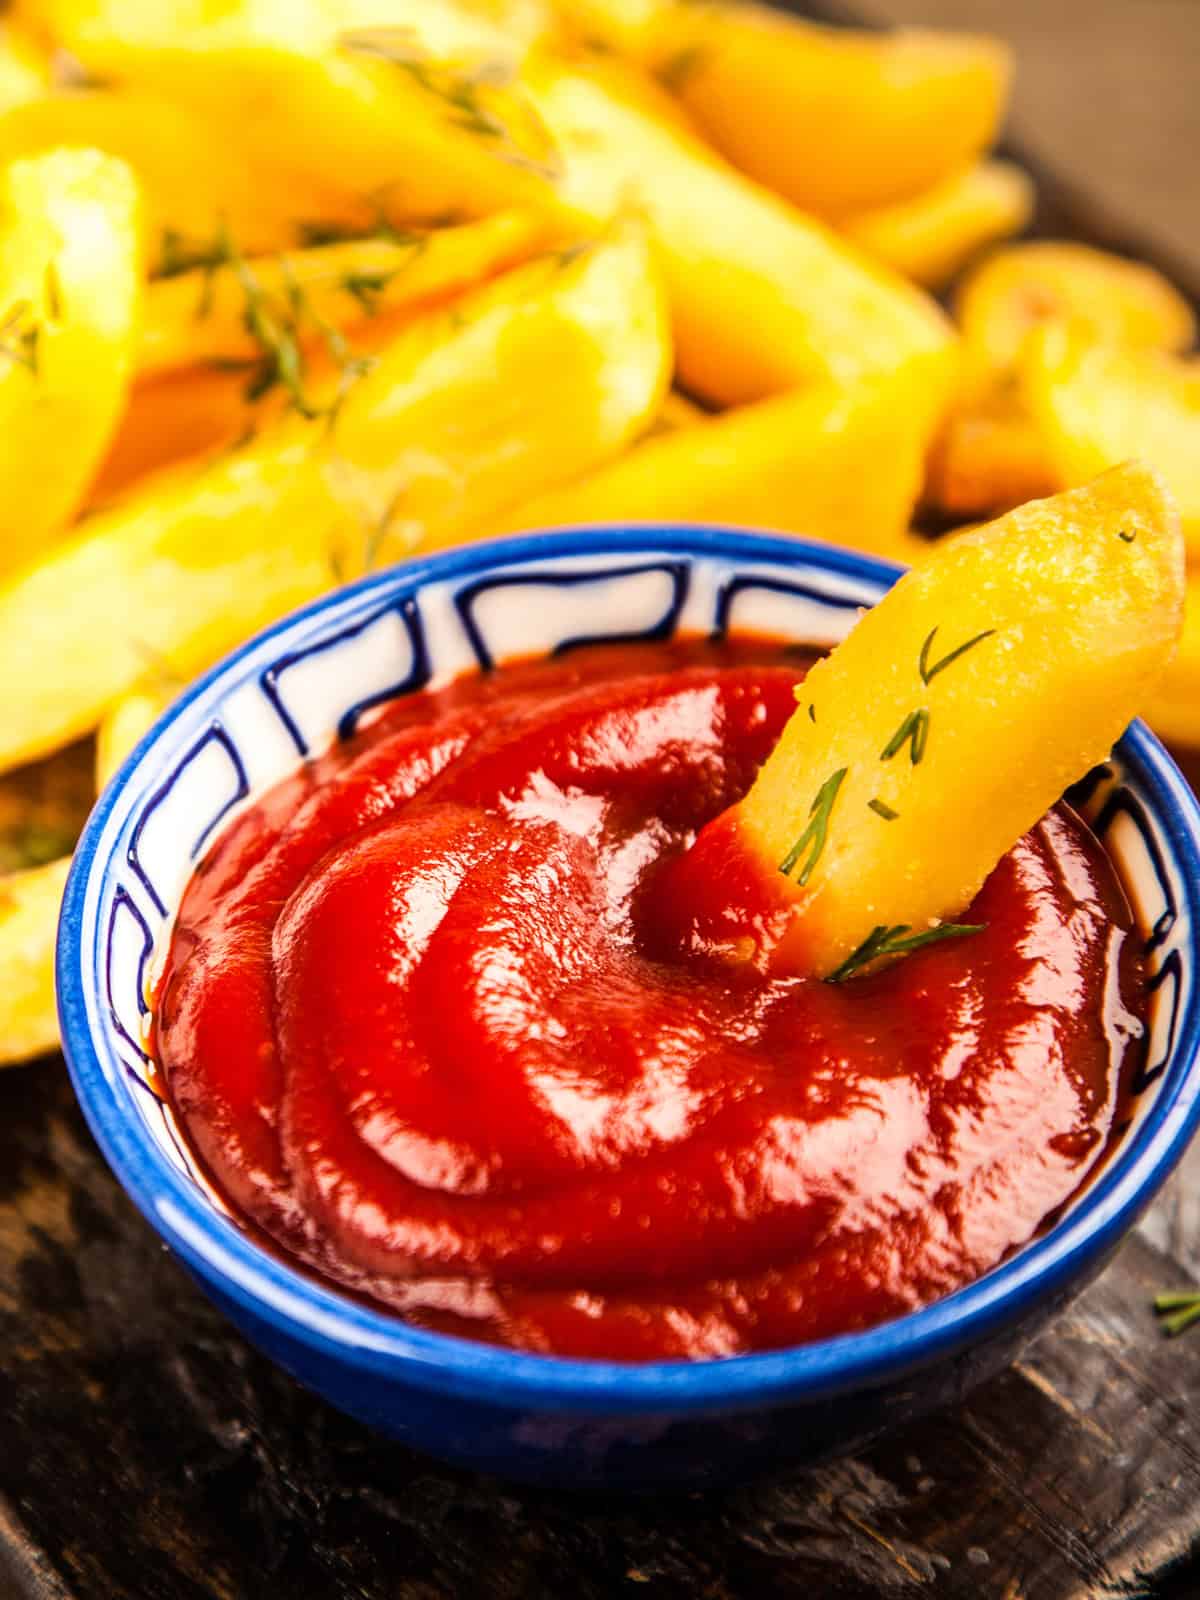
Dipping Sauces for French Fries
My husband prefers his fries plain but if you’re like me, good fries are only made better with a good sauce for dipping. (Or you can really dress them up by making something like Animal Style Fries!). I’ve got a number of delicious homemade sauces for you to serve with your fries! Here are a few ideas along with links to some recipes:
- Homemade ketchup
- Fry sauce
- Ranch dressing
- Sriracha mayo
- Big Mac sauce
- Cheddar cheese sauce
- Yum Yum sauce
- Creamy cilantro dressing
- BBQ Sauce
- Cherry barbecue sauce
- Thousand Island dressing
- Russian dressing
- Honey mustard sauce
- Chipotle mayo
Save This Recipe

Oven Baked French Fries
Equipment
- Mandolin , or a sharp knife
Ingredients
- 4 large Russet or Kennebec potatoes (about 1 1/2 pounds) , or other high starch/low moisture variety, scrubbed and cut into 1/4 to 3/8 wide batons
- 3 tablespoons beef tallow (melted), lard or oil of choice , (see blog post for info on options)
- How to Make Beef Tallow , highly recommended for best flavor – it's super easy!
- 1-2 teaspoons kosher salt
Instructions
- Preheat the oven to 450 F.Place the sliced potatoes in a pot of water, covered by about an inch of water. Depending on the thickness of your fries, you'll want to boil them for just 3-5 minutes. Start the timer once the potatoes start boiling. Be careful not to boil them for too long. It's better to under-boil than to over-boil. You don't want them to be really limp, but just barely starting to become tender.Immediately drain the potatoes and place them in a bowl of ice water. Let them cool for 2-3 minutes, then pour them into a colander to thoroughly drain.
- Blot the potatoes with a clean dish towel or paper towels and transfer them to a large bowl. Pour the tallow or oil over the sliced potatoes and toss to thoroughly coat the potatoes. Line a baking sheet and place the potatoes on it in a single layer.Bake on the middle rack for 15 minutes, then use a spatula to carefully turn over the fries. Continue baking for another 10-15 minutes or until the fries are golden and crispy. The length of time will vary depending the size of your fries and how long they were parboiled.Remove the fries from the oven and immediately, while they're still hot (so the salt adheres), sprinkle them with salt and give them a shake to evenly coat. Serve them immediately.
Nutrition

Hi, I’m Kimberly Killebrew and welcome to Daring Gourmet where you'll find delicious originals, revitalized classics, and simply downright good eats from around the world! Originally from Germany, later raised in England, world-traveled, and now living in the U.S., from my globally-influenced kitchen I invite you to tour the world through your taste buds!


I got excellent results with this recipe, highly recommend for great fries!
I’m so glad, thank you Sam!
These made some terrific fries. To be honest not even sure I’d notice the difference between these and deep fried. I used beef tallow and the flavor was just awesome.
Thank you, Julia, I’m so glad you enjoyed them!
These turned out beautifully. I’ve been making my own tallow for a while (thanks to your recipe) and used it to make these fries. I will never go back. So flavorful. Now on to your fabulous Animal Style Fries!
That’s fantastic, Roy, thanks so much for the feedback and enjoy the animal style fries! :)