Plum Jam
This post may contain affiliate links. See my disclosure policy.
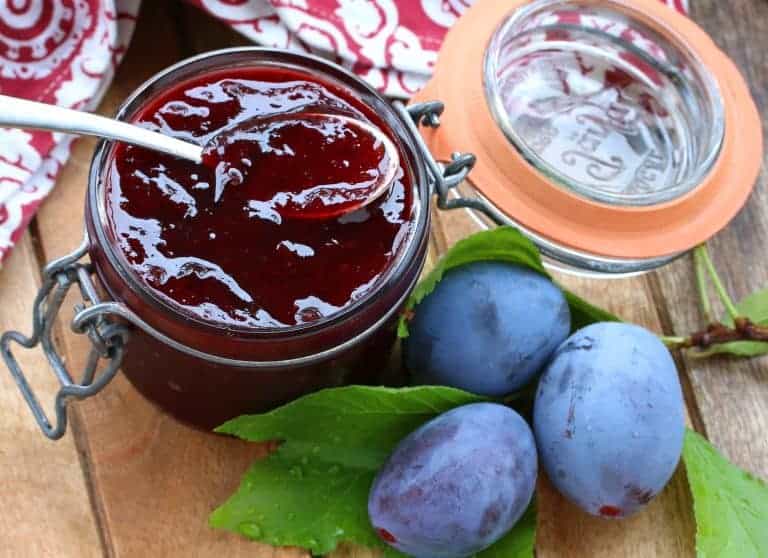
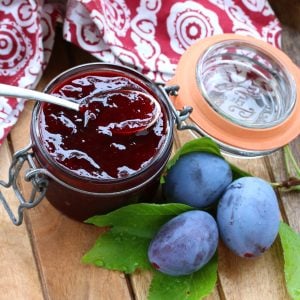
This plum jam recipe is easy to make and is delicious not only spread on bread and toast but added to cakes, in muffins, on pancakes, ice cream and any other way your heart desires! You can make it either with or without pectin.
Homemade Plum Jam Without Pectin
With four Italian plum trees in our yard I get busy the end of every Summer processing loads of plums every which way possible: Dried, canned, frozen, dehydrated, turned into Fruit Leather, cakes (including this German Plum Cake), cobblers, Plum Butter, Plum Sauce (aka duck sauce) and anything else I’m able to think of.
Plum jam is another great way to turn those wonderfully plump, flavorful and juicy plums into something delicious that you can enjoy all year long. And you have the option whether to use pectin or make it without. Whether you’re spreading it on toast, drizzling it over waffles or ice cream or any other way your heart desires, you’re going to love the fresh and vibrant flavor of this homemade plum jam!
Plum Jam Recipe
Let’s get started!
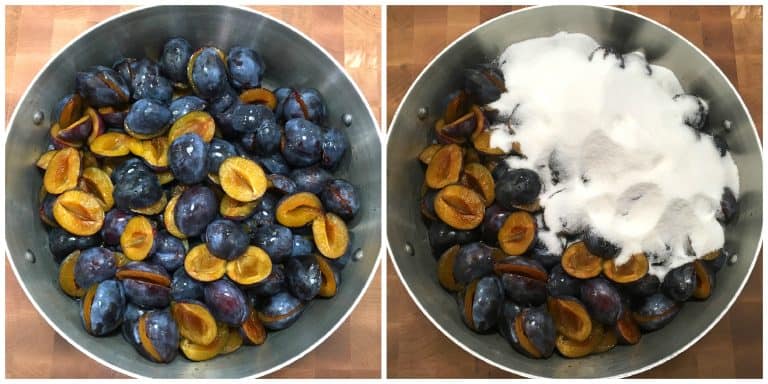
Wash the plums, cut them in half, discard the pits and place the plums in a large pot.
To chop or not to chop the plums:
- If you’re NOT using pectin and are letting the jam simmer for a long time, there’s no need to chop them because they’ll break down by themselves and you can always give the jam a mash or use a hand blender to puree part of it later on if you don’t want as many chunks.
- If you ARE using pectin that means the jam will only boil for a few minutes and the plums will not break down, so go ahead and chop the plums up.
Add the sugar and lemon juice heat the pot, initially over medium heat so the plums or sugar don’t scorch. Once the plums juices start to run you can increase the heat.
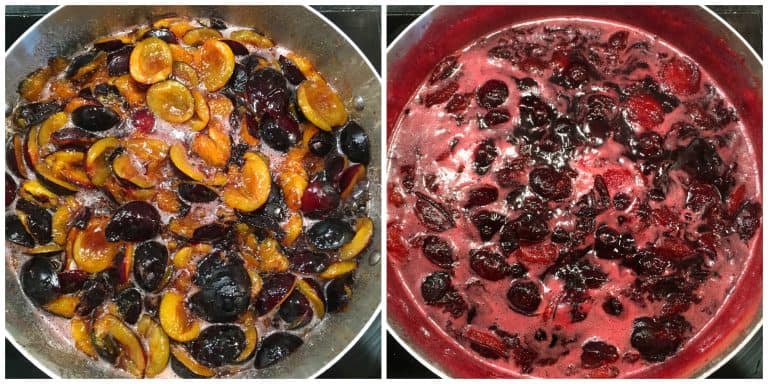
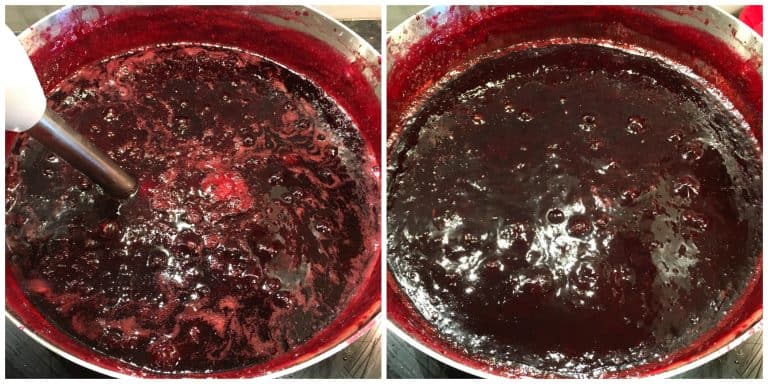
If you’re NOT using pectin: Simmer the plum uncovered until an instant read thermometer reads 220 degrees F. That’s important in order for the jam to set and not be too runny. Alternatively, freeze a couple of spoons and drop some jam onto them: If the jam sets and is spreadable, but not runny, it is done.
Don’t bother skimming off the foam because that will all dissolve by itself towards the end.
If you ARE using pectin: Follow the package instructions of whatever pectin you are using. Skim off the foam.
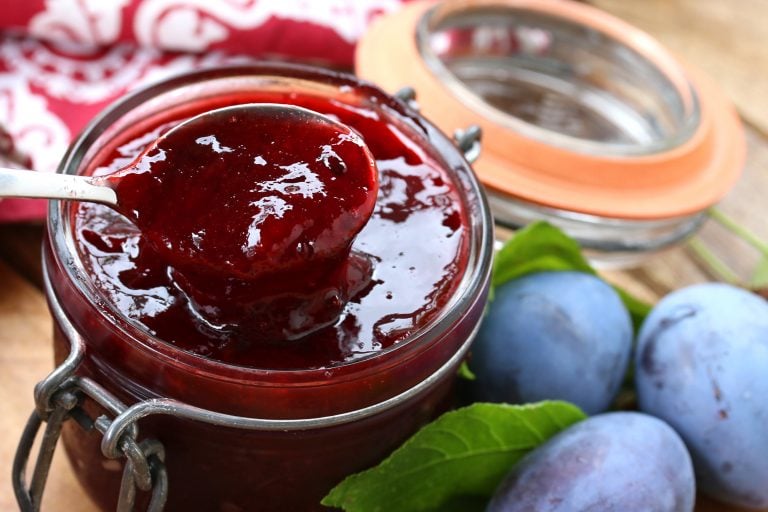
If you like you can use a potato masher or a hand-held immersion blender to mash/blend part of the jam until the desired amount of chunkiness is reached.
How to Can Plum Jam
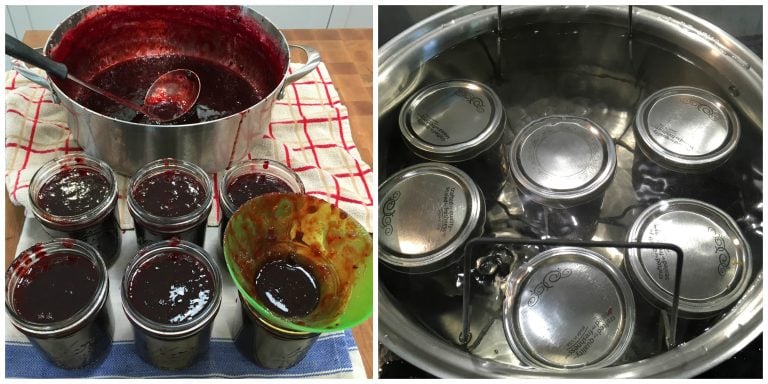
Using sterilized jars, ladle the hot jam into the jars and wipe off the rims with a moist towel to make sure no jam is on the rims. Fill each jar leaving 1/4 inch headspace. Wash the lids with soapy water and, place them on the jars and screw on the sterilized rings. Boil them in a water bath canner for 10 minutes.
Carefully remove the jars and let them sit undisturbed for 24 hours before removing the rings (optional) and storing them in a cool place. They will keep for up to a year. Once opened, store in the fridge, will keep for at least a month.
Ways to Enjoy It
There are lots of ways you can enjoy your delicious homemade plum jam. Here are just a few ideas:
- Spread on bread, toast, scones, sourdough English muffins or crumpets
- Filling for layered cakes, muffins, cupcakes, pastries, jelly rolls, pop tarts, Berliner, Victoria Sponge Cakes, and fruit squares
- Use in British trifles
- Topping for cheesecake, like our German Cheesecake
- For dipping Danish Aebleskiver
- Ice cream topping
- Mixed in Greek yogurt
- Filling for crepes
- Flavor cake frostings
- Use in thumbprint cookies like Engelsaugen, Spitzbuben or Linzer Kekse
Enjoy!

For more delicious homemade jam recipes try my:
- Gooseberry Jam
- Strawberry Rhubarb Jam
- Blackberry Jam
- Huckleberry Jam
- Black Currant Jam
- Plum Jam
- Red Currant Jelly
- Lemon Lime Marmalade
- Blueberry Lemon Apricot Jam
- Caramel Pear Butter
- Toasted Hazelnut & Date Spread
- Peach Bacon Jam
Save This Recipe
Plum Jam
Ingredients
- 4 pounds Italian plums , washed, cut in half and pits removed
- 4 cups granulated sugar
- 2 tablespoons lemon juice
Instructions
- Wash the plums, cut them in half, discard the pits and place the plums in a large pot.To chop or not to chop the plums:If you're NOT using pectin and are letting the jam simmer for a long time, there's no need to chop them because they'll break down by themselves and you can always give the jam a mash or use a hand blender to puree part of it later on if you don't want as many chunks.If you ARE using pectin the jam will only need boil for a few minutes and the plums will not break down, so go ahead and chop the plums up.Add the sugar and lemon juice and heat the pot, initially over medium heat so the plums or sugar don't scorch. Once the plums juices start to run you can increase the heat.
- If you’re NOT using pectin: Simmer the plum uncovered until an instant read thermometer reads 220 degrees F. That’s important in order for the jam to set and not be too runny. (Alternatively, freeze a couple of spoons and drop some jam onto them: If the jam sets and is spreadable, but not runny, it is done.) Don’t bother skimming off the foam because that will all dissolve by itself towards the end.If you ARE using pectin: Follow the package instructions of whatever pectin you are using. Skim off the foam.If you like you can use a potato masher or a hand-held immersion blender to mash/blend part of the jam until the desired amount of chunkiness is reached.
- Using sterilized jars, ladle the hot jam into the jars and wipe off the rims with a moist towel to make sure no jam is on the rims. Fill each jar leaving 1/4 inch headspace. Wash the lids with soapy water and, place them on the jars and screw on the sterilized rings. Boil them in a water bath canner for 10 minutes.Carefully remove the jars and let them sit undisturbed for 24 hours before removing the rings (optional) and storing them in a cool place. They will keep for up to a year. Once opened, store in the fridge, will keep for at least a month.Makes about 3 1/2 pints or 7 half pints.
Nutrition
Originally published on The Daring Gourmet September 28, 2018

Hi, I’m Kimberly Killebrew and welcome to Daring Gourmet where you'll find delicious originals, revitalized classics, and simply downright good eats from around the world! Originally from Germany, later raised in England, world-traveled, and now living in the U.S., from my globally-influenced kitchen I invite you to tour the world through your taste buds!


Wow first time making Jam! I have tons of Italian Plums and I usually shared them with my sisters and save some for Plum pies for the upcoming Holidays! But I have so much this year, so thought I try to make Jam! This Plum Jam is so easy and came out so good and delicious! I cut a 1/2 sugar but still very sweet for me! Maybe because my Plums are so sweet! I will try to cut down a little bit more sugar next time! I ended up with a bit more than 2 cups of Jam! Thank you so much for this easy and delicious recipe! ❤️
That’s wonderful FS, I’m so glad you’ve found a new use for your plums and that it was a success, thank you!