Authentic Cornish Pasty Recipe
This post may contain affiliate links. See my disclosure policy.
The national dish of Cornwall, England, this authentic Cornish Pasty recipe features savory flaky pastry pockets filled with beef and vegetables. Cornish pasties have a long and fascinating history and are the very essence of comfort food. Learn how to make a Cornish pasty the authentic and traditional way.

I love Great Britain. I lived in Cambridgeshire, England for nearly 7 years and my husband spent 2 years in Liverpool and north Wales. We’re both Anglophiles through and through and go back at least once a year for a visit with our kids. We love every area of Great Britain and it’s hard to pinpoint a favorite area. But Cornwall holds a very special place in our hearts and no matter where else in England we’re visiting, we always make time for a visit to Cornwall.
A Brief Cornish Family History
We love Cornwall not only because of its striking natural beauty, rustic charm and rich culture, but also because it’s home to my husband’s namesake ancestors, the Killigrew family (later changed to Killebrew when his great+ grandfather immigrated to the U.S.). The Killigrews were landed gentry and one of the most prominent families in Cornwall. They founded the port town of Falmouth, built and lived in Arwenack Manor, and were the royally appointed de facto captains of Pendennis Castle. We always look forward to a return visit to these family sites including St. Budock church where the Killigrew family held front row seats, are buried beneath the floor in front of the altar, and where a well-known painted wall edifice stands depicting Todd’s great+ grandparents kneeling in prayer towards each other.
I can’t claim as close (or as impressive) of an association to Cornwall as Todd, unfortunately. But I do have a great+ grandmother from Scotland (wife to an admiral who regularly sailed down to Cornwall on business) who died and is buried in Cornwall. And it’s like I always say, if you’re going to die (as most people tend to do), there’s no better place to do it than in Cornwall.
With our close connection with and love for Cornwall, we also feel a close kinship with its traditional foods, the most famous of which is the Cornish pasty, considered the national dish of Cornwall.
What is a Cornish Pasty?
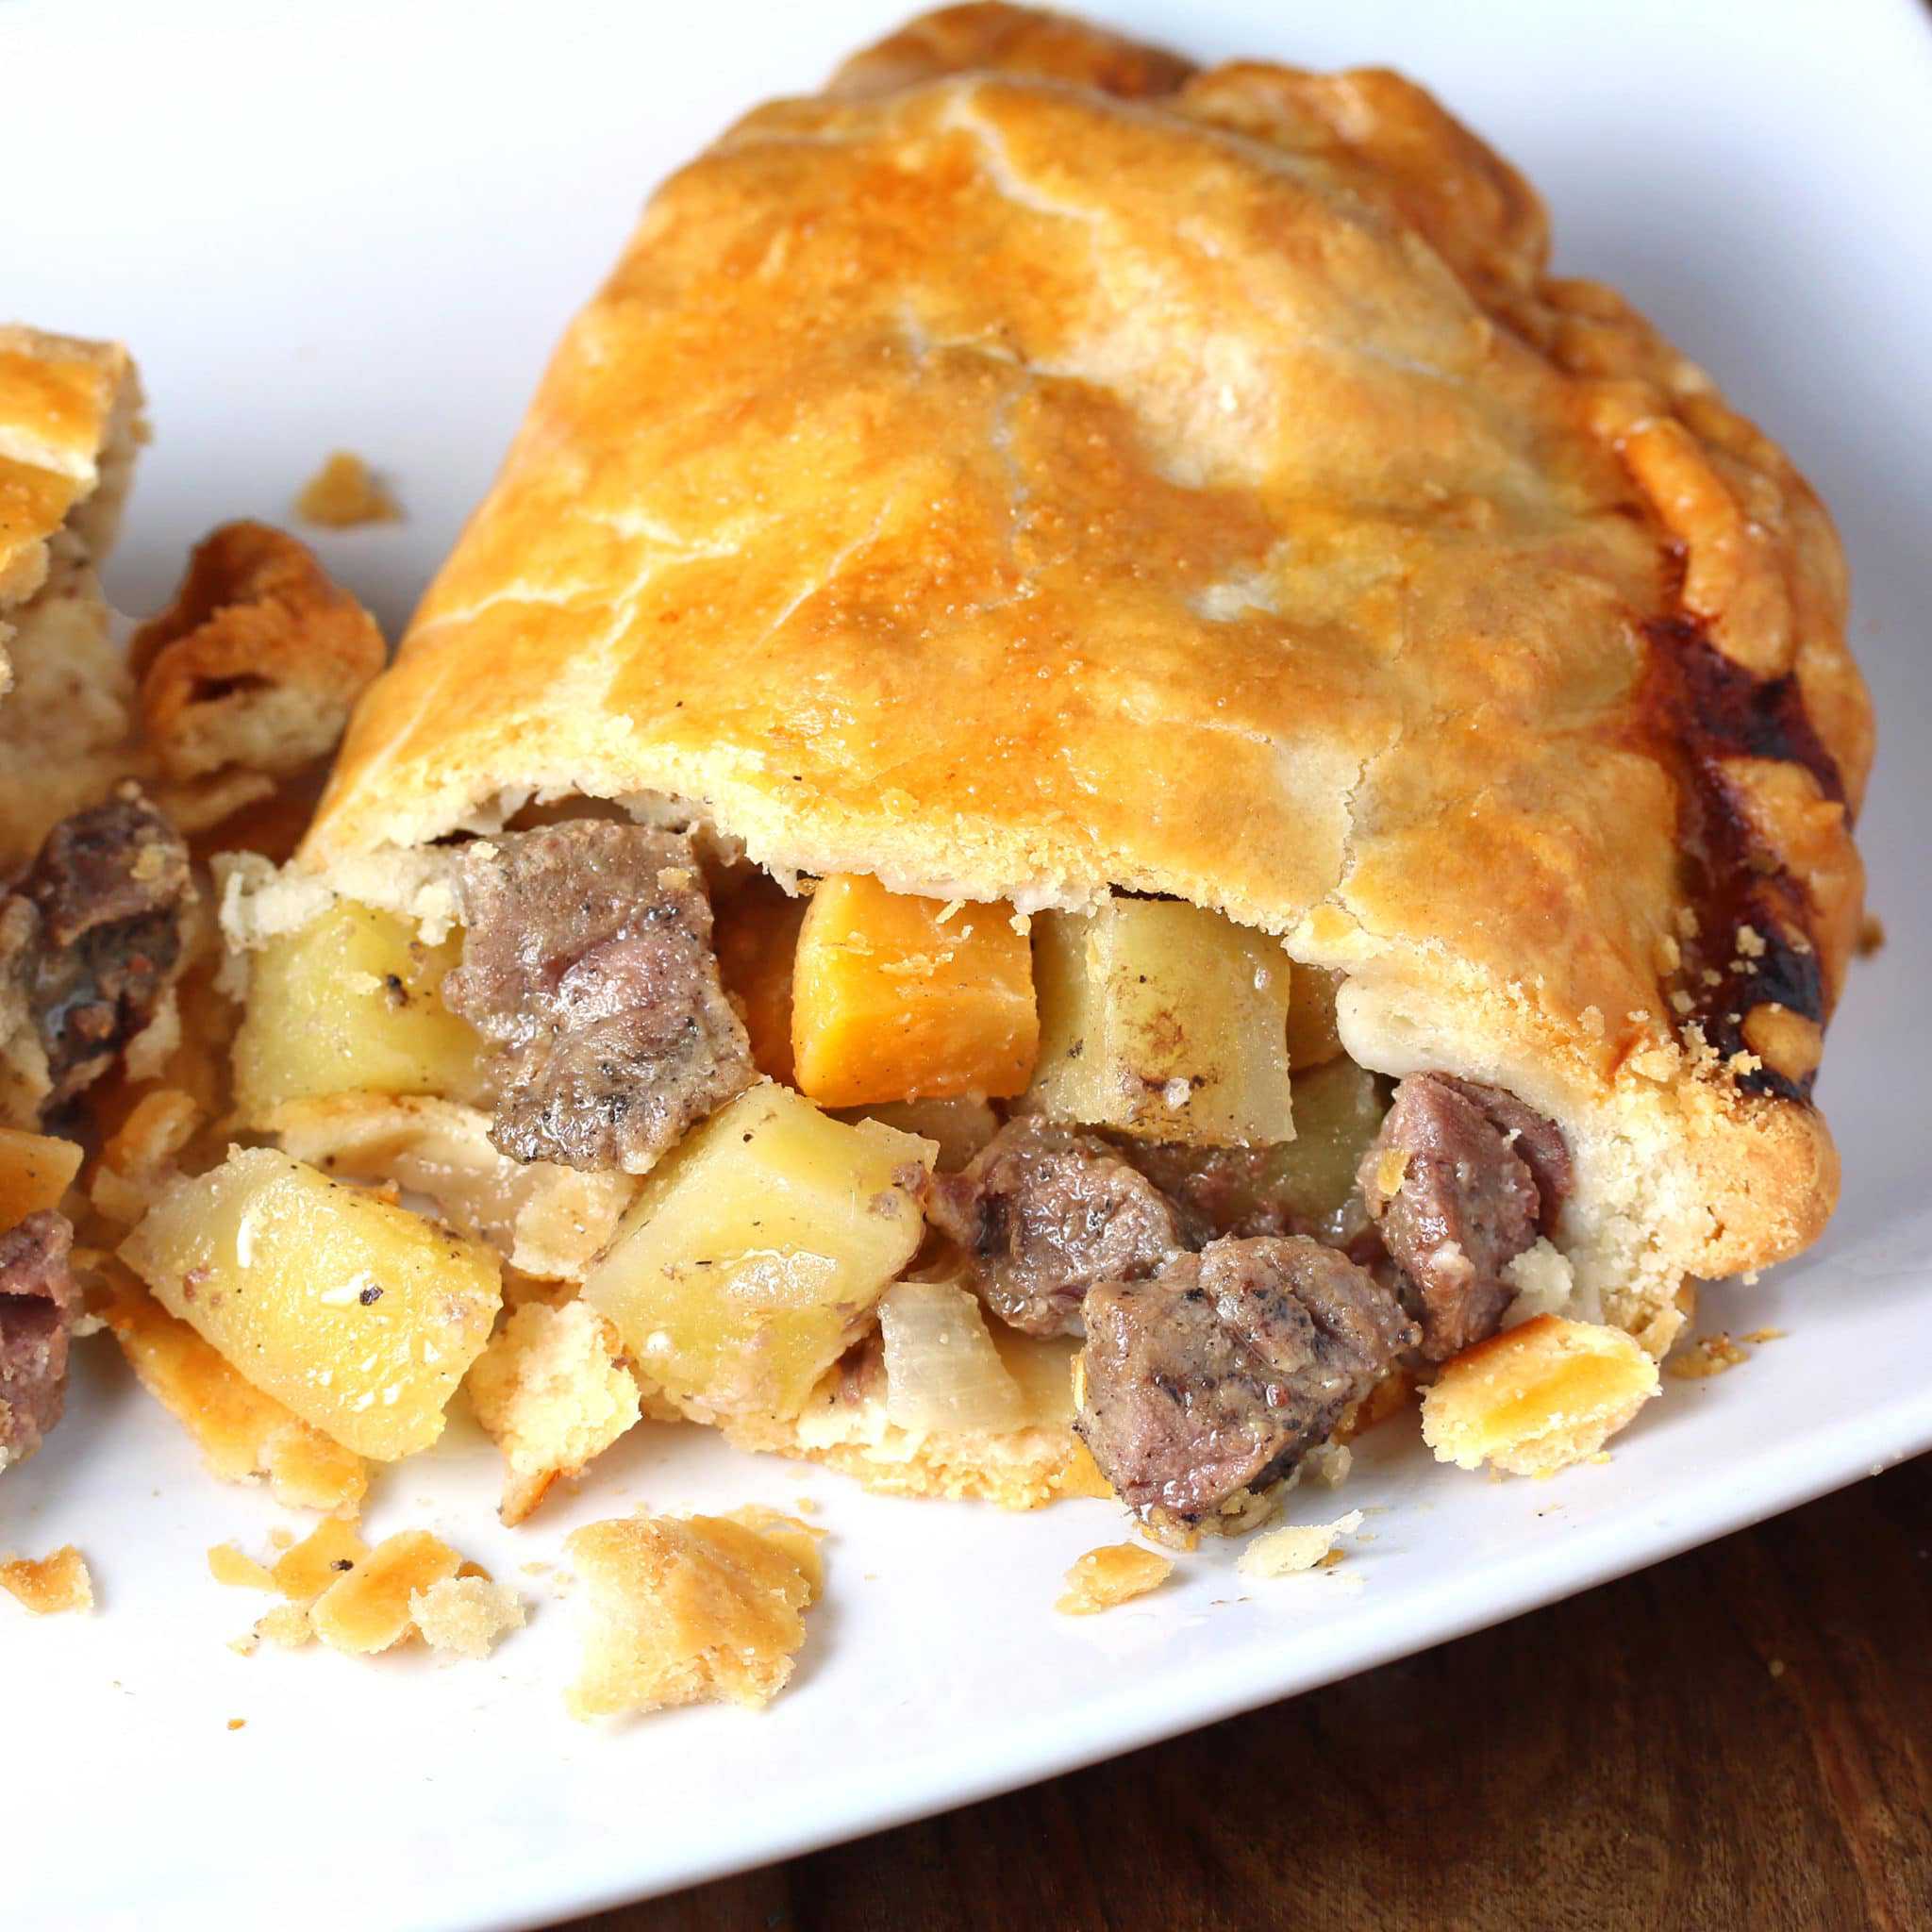
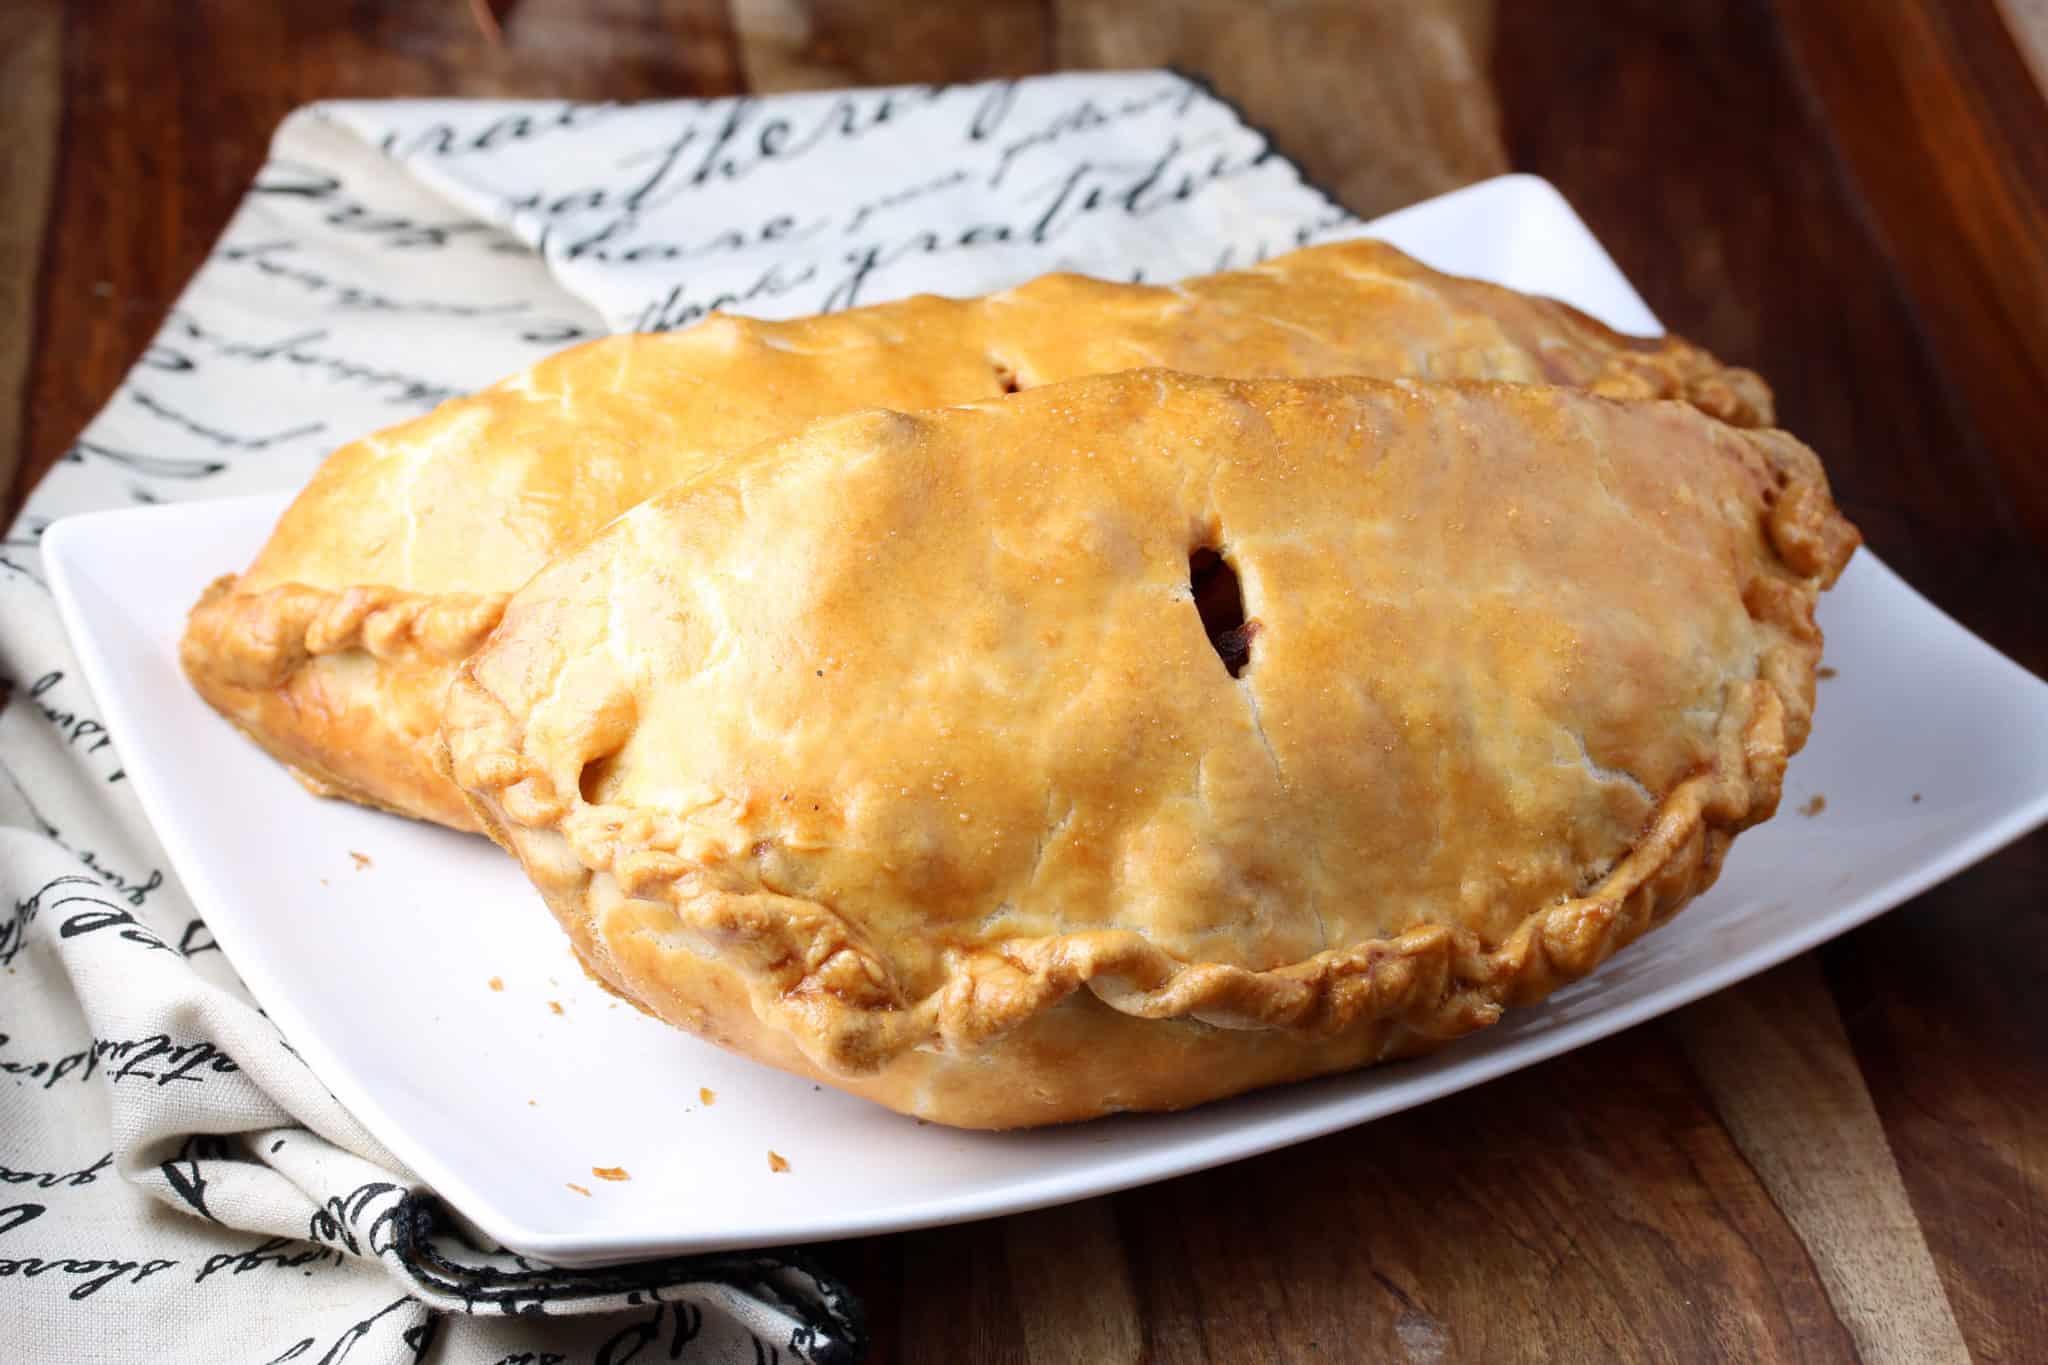
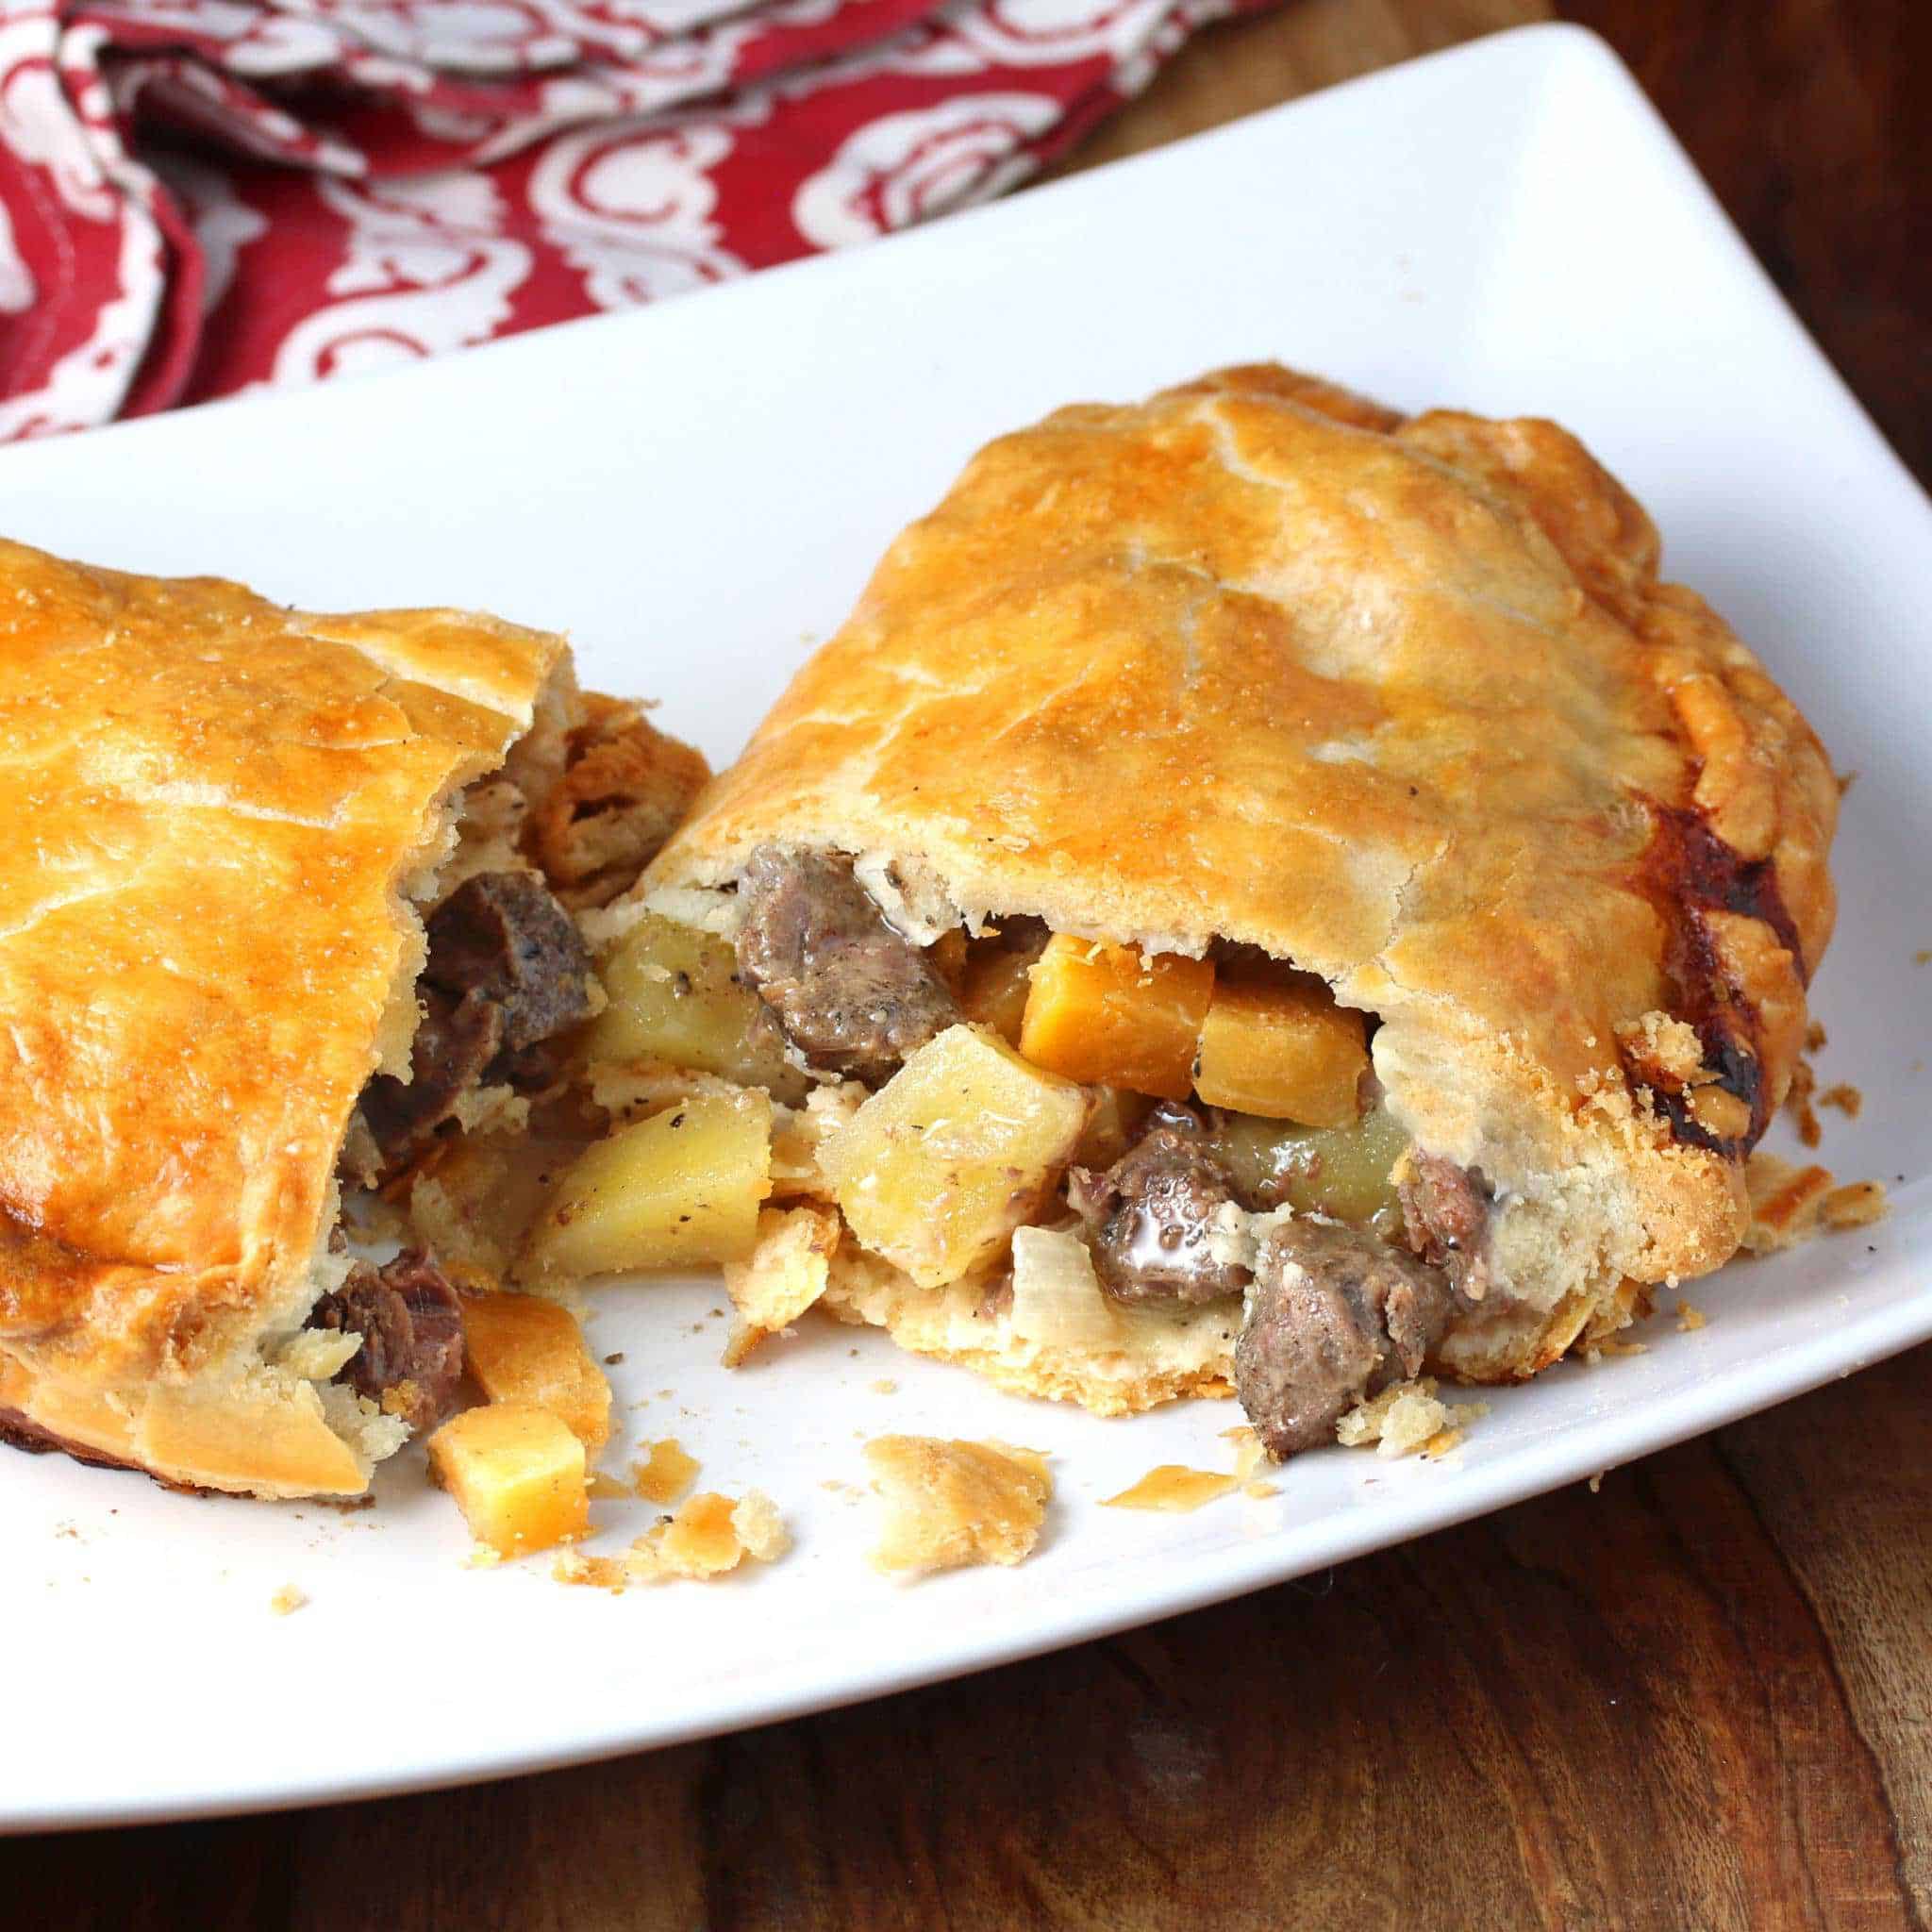
A Cornish pasty is a turnover-shaped baked shortcrust pastry filled with beef and vegetables. The edges are sealed by crimping them in characteristic Cornish fashion.
In 2011, Cornish pasties were given both a Protected Designation of Origin (PDO) and Protected Geographical Indication (PGI) status, which means that in order for these pasties to be made commercially and bear the name “Cornish pasty”, they have to meet very specific requirements. These requirements are as follows:
- They have to be made in Cornwall.
- They can only contain beef, potato, Swede (rutabaga), onion, salt and pepper. No other meat, no other vegetables, no other seasonings allowed.
- The ingredients must be raw when the pasties are assembled and then slowly baked to produce the traditional Cornish pasty flavor and texture.
- The edges of the pasties must be sealed by crimping them in traditional Cornish fashion.
No culinary license allowed here and any deviations from these parameters will land you in stocks at the market square for public shaming. Well, that may be a stretch. But you will incur a fine.
The Origin of the Cornish Pasty
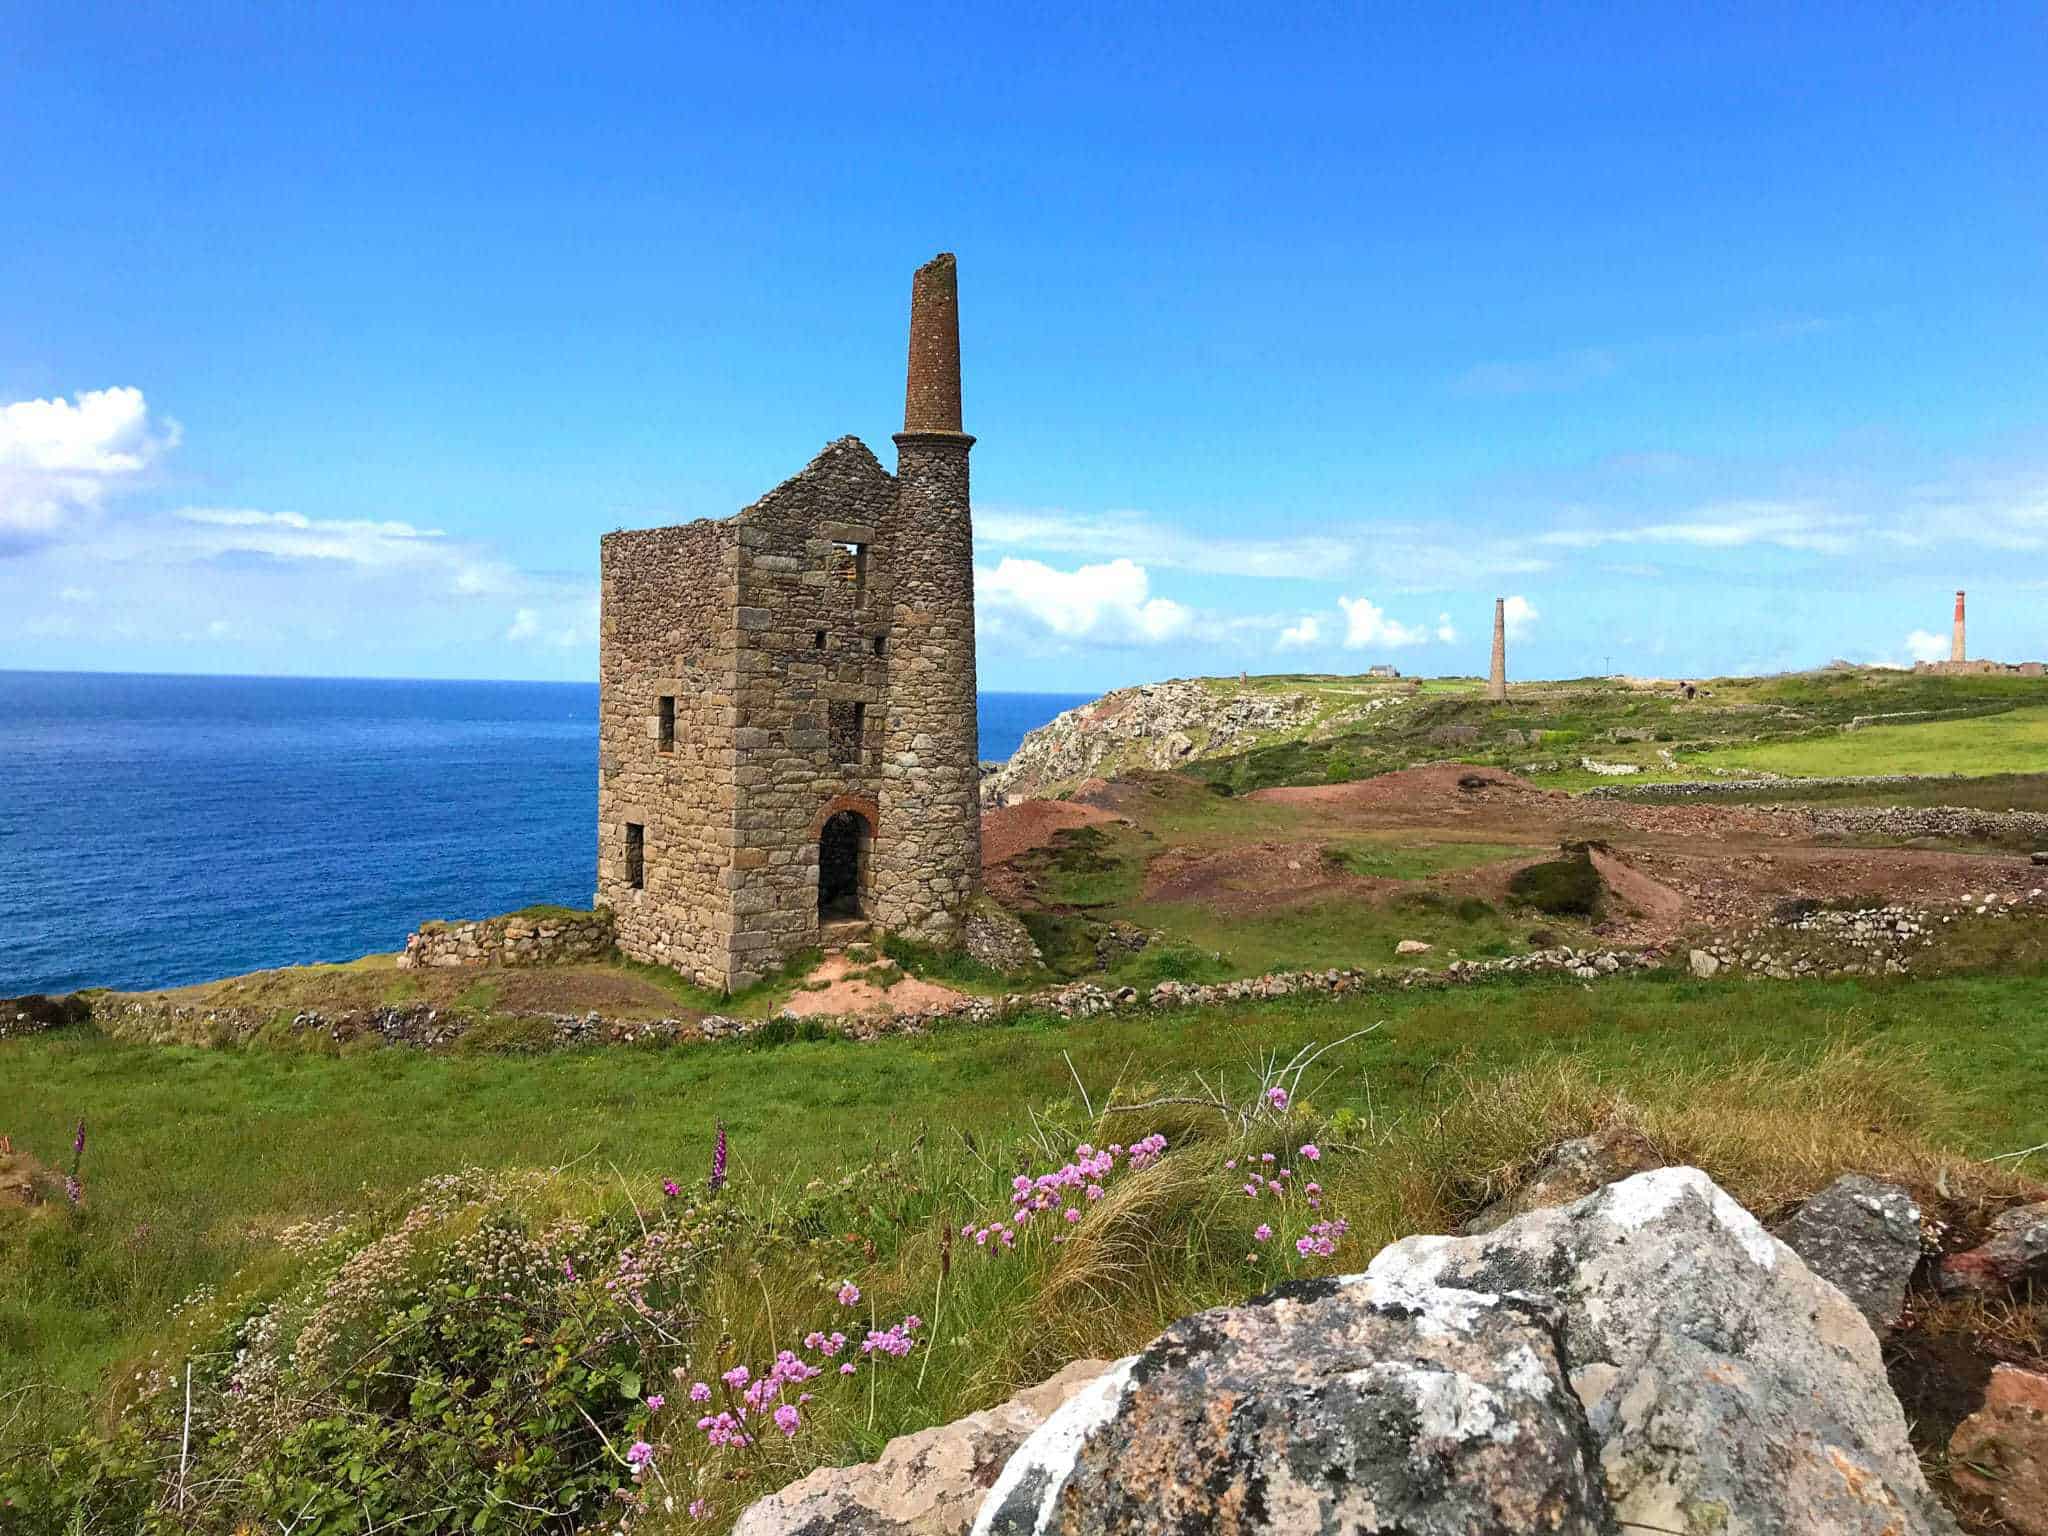
The Cornish pasty has a unique and interesting history that goes back centuries. Cornwall had the biggest tin mining and one of the biggest copper mining industries in the world and the pasties were originally developed for Cornish miners. These men worked deep underground and needed a lunch that would meet the demands of their work environment. The thick shortcrust dough and dense filling would stay warm for several hours until lunchtime or could be easily reheated over the flame of an oil lamp.
The pasties were sealed with a thick crimp to hold in the contents and to provide something the miner’s could hold onto while eating the pasty. In this way their dirtied fingers, which could often contain traces of arsenic, wouldn’t contaminate the rest of the pasty. The crimped edge was sometimes extended out to form a little dough handle they could hold onto and then discard when they were done eating.
The filling was a hearty one that provided needed sustenance and the pasty was compact enough that it could easily be carried in a small lunchbox down the mine and eaten without utensils. Some historians also believe that the miner’s initials would sometimes be engraved in the dough at one end of the pasty so that if the miner didn’t finish it in one sitting they could easily identify it as their own.
Thoughtful wives would even take their ingenuity a step further and make pasties that were divided in two sections: One half would contain the savory filling and the other half a sweet filling for dessert. In this way the ingenious Cornish pasty was a complete meal for Cornwall’s hard-working miners.
A Few Pictures of Cornwall’s Historic Mines


Tips for Making the Best Cornish Pasties
- A good, flaky shortcrust pastry is imperative, and I’m sharing my shortcrust recipe with you below that will ensure excellent results.
- Depending on how thin you roll out your shortcrust pastry you risk having the “hard” ingredients (the potatoes and rutabagas) pierce through the dough. If you prefer a thinner crust and you want to avoid that you can place the softer ingredients on the top and bottom with the harder ingredients sandwiched in the middle: Place the onions on the bottom followed by the potatoes and rutabagas and then the meat on top.
- Use firm, waxy potatoes so they hold their shape. Starchy potatoes will disintegrate during baking and turn mushy.
- Use a lean cut of beef. Traditional Cornish pasties use skirt steak from the underside belly of the cow because it’s lean and free of gristle.
- Add a couple of pats of butter on top of the filling ingredients followed by a light sprinkling of flour. This will both form the gravy as well as absorb the liquids from the vegetables as their cooking to avoid a soggy pastry crust.
Cornish Pasty Recipe
Let’s get started!
First make your shortcrust pastry:
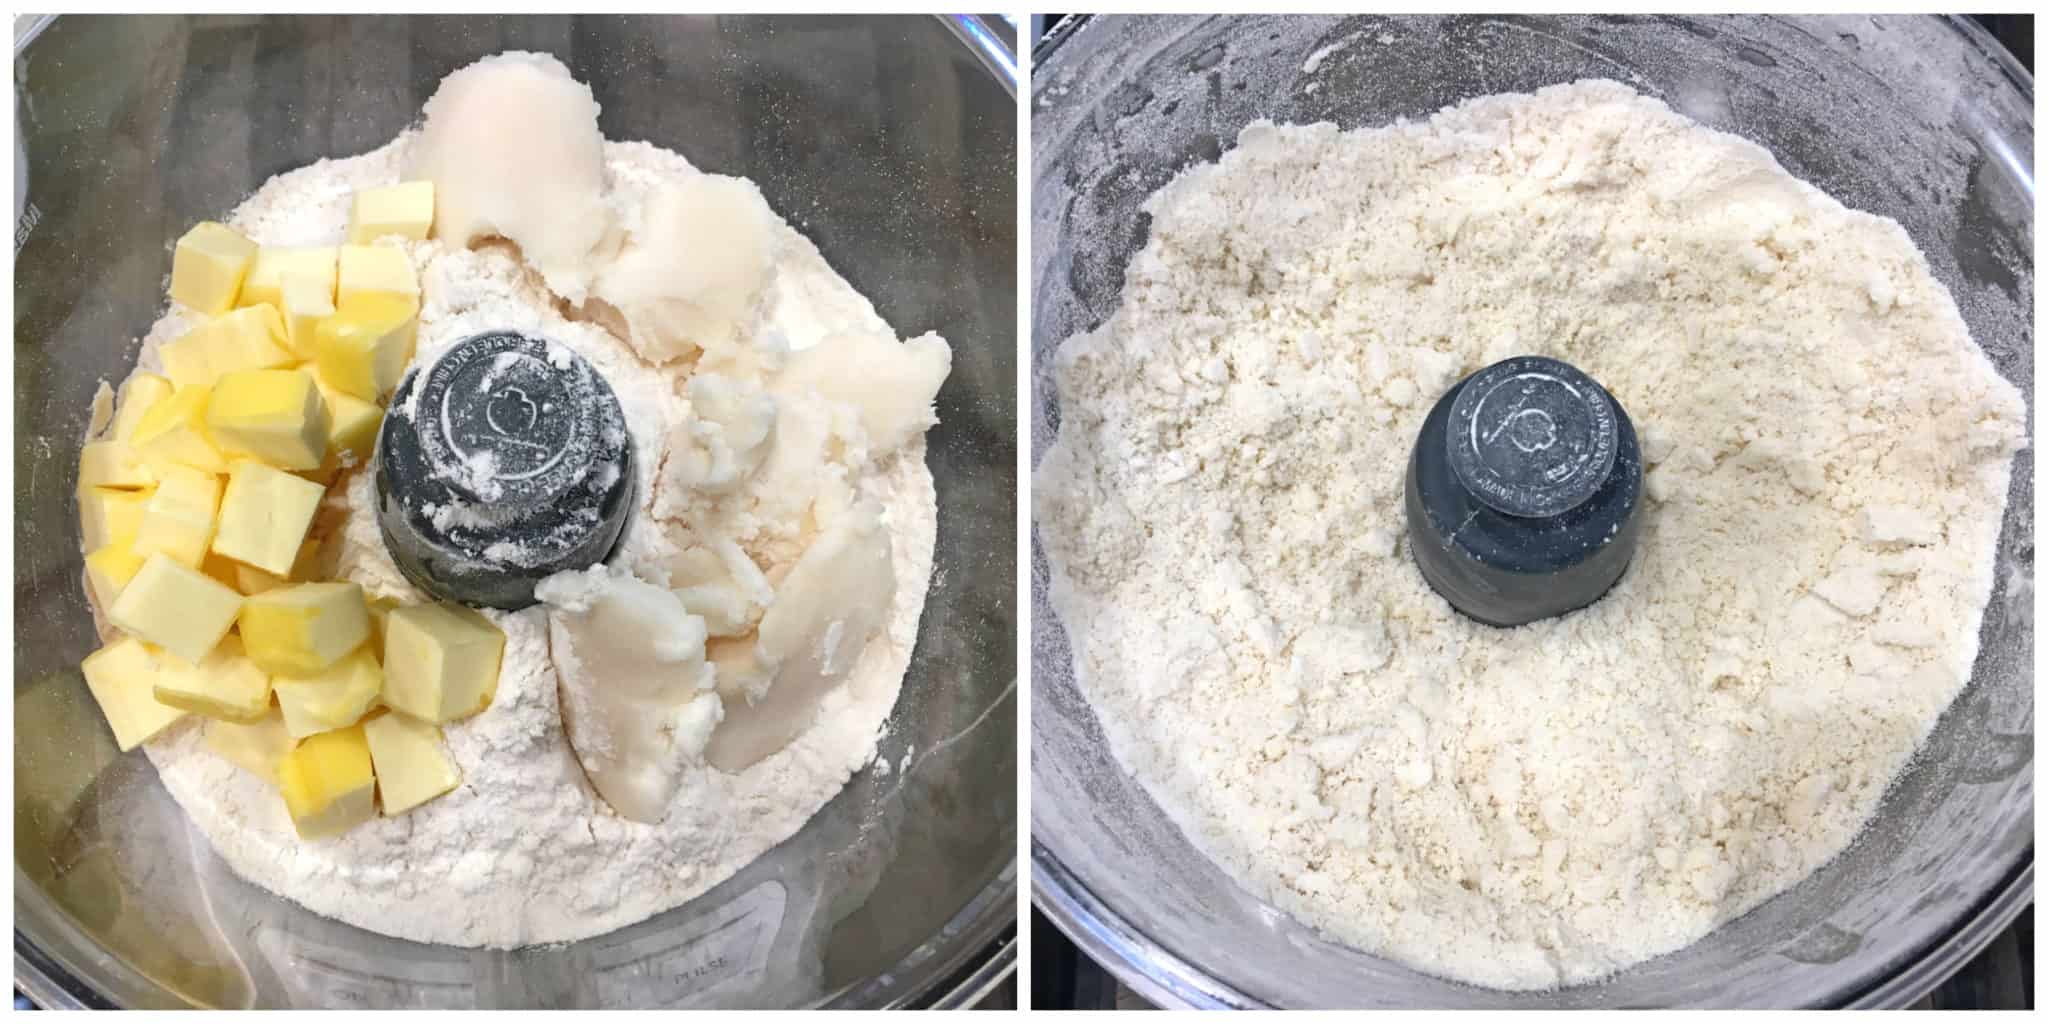
Place the flour and salt in a food processor and pulse a few times until combined. Add the cold butter and lard and pulse a few more times until the mixture resembles coarse crumbs.
Add the water a little at a time, pulsing between additions, until the mixture begins to come together. DO NOT over-mix the dough or the pastry crust will be tough and won’t be flaky.
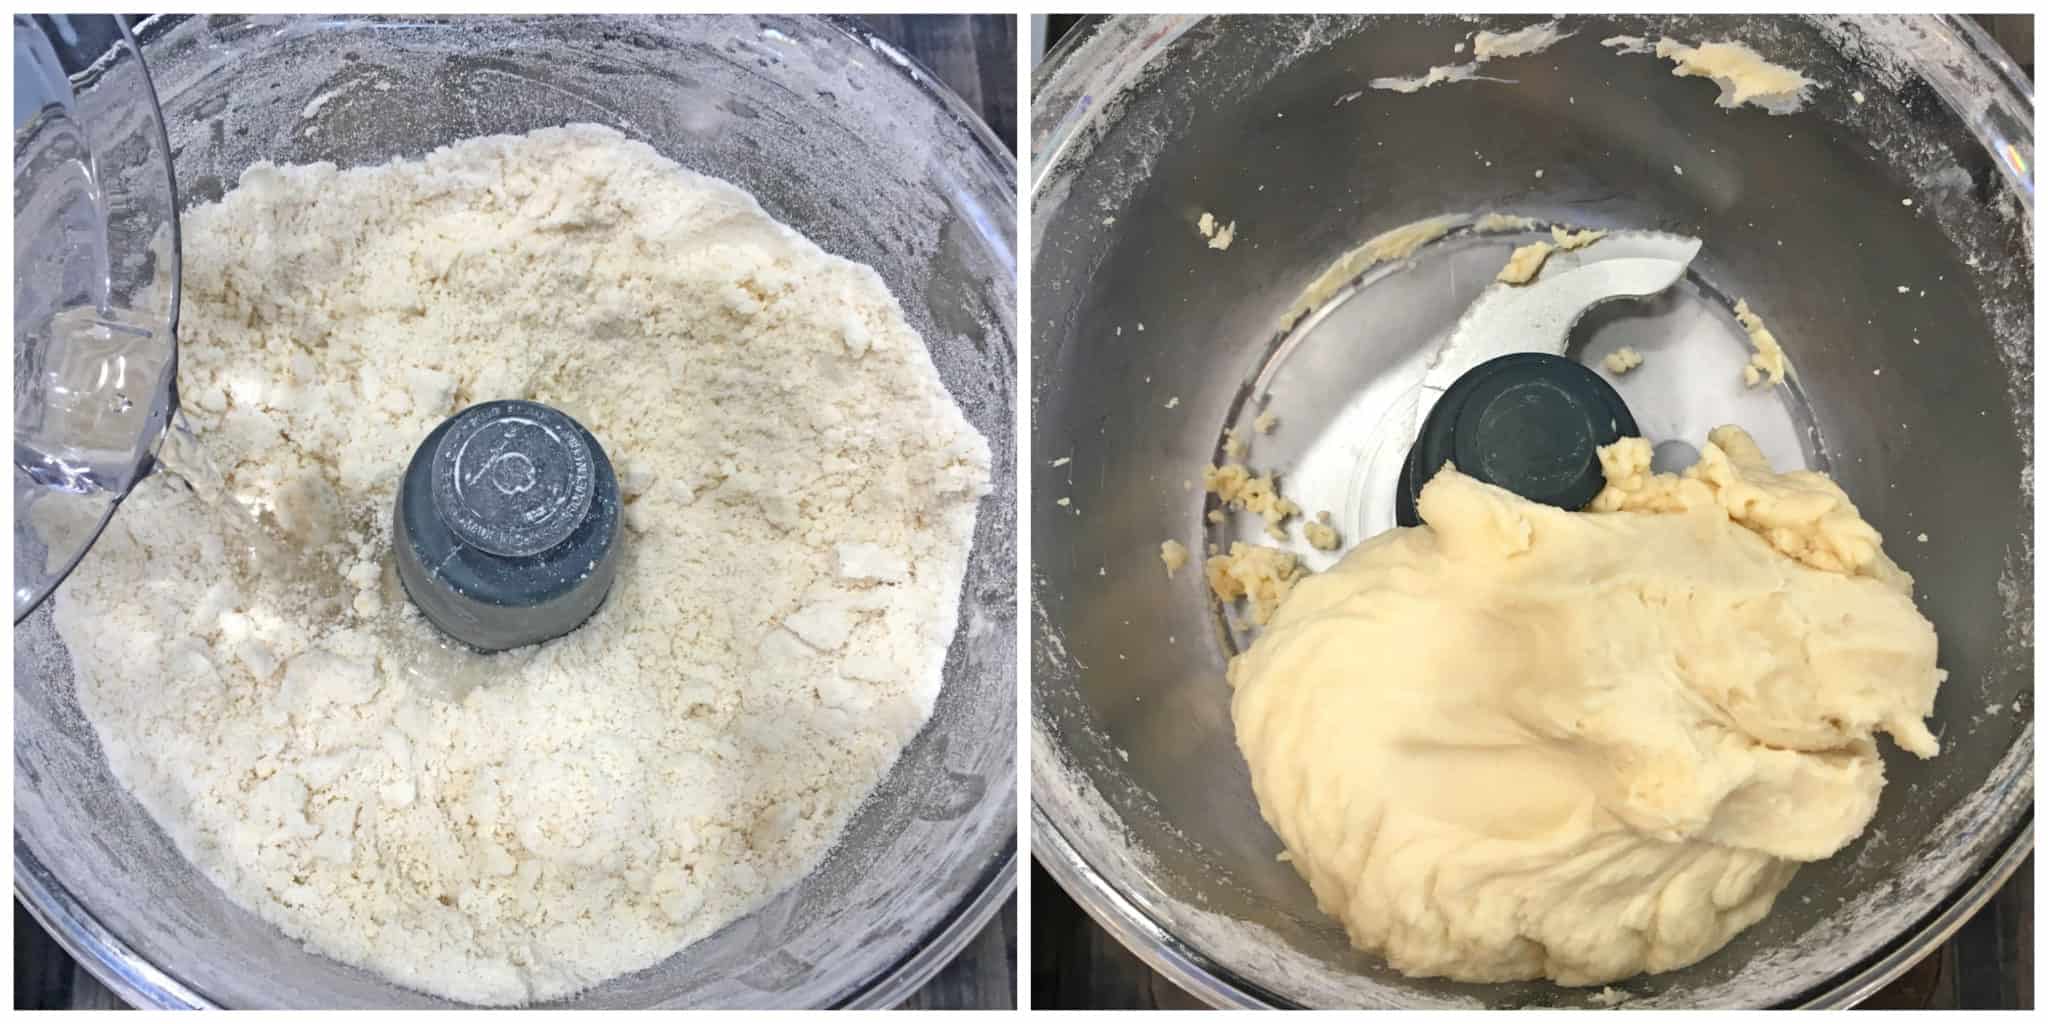
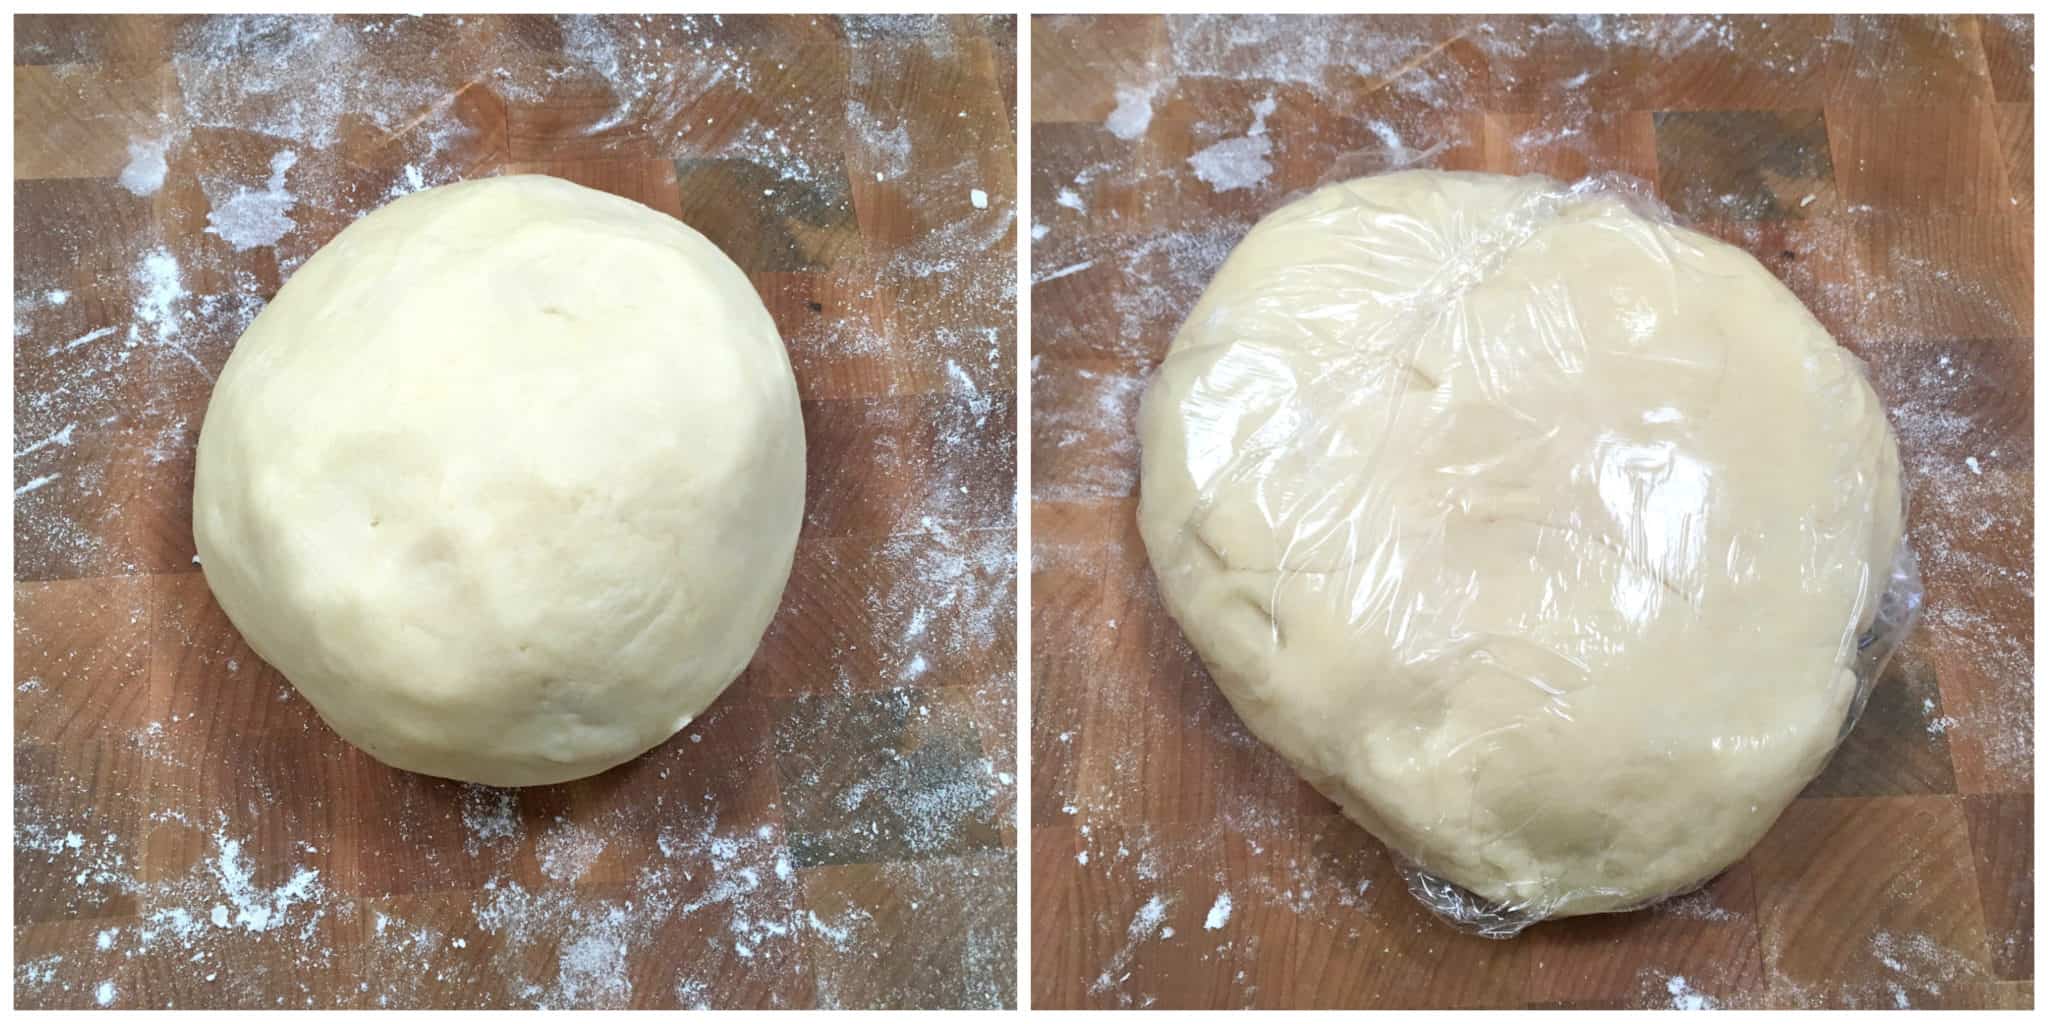
Form the dough into a ball, flatten into a 1-inch thick disk, wrap in plastic wrap and refrigerate for at least 3 hours before using (this is crucial). (Can be refrigerated for a few days or frozen for up to 3 months.)
Roll the pastry dough into a log and cut it into 6 equal pieces.
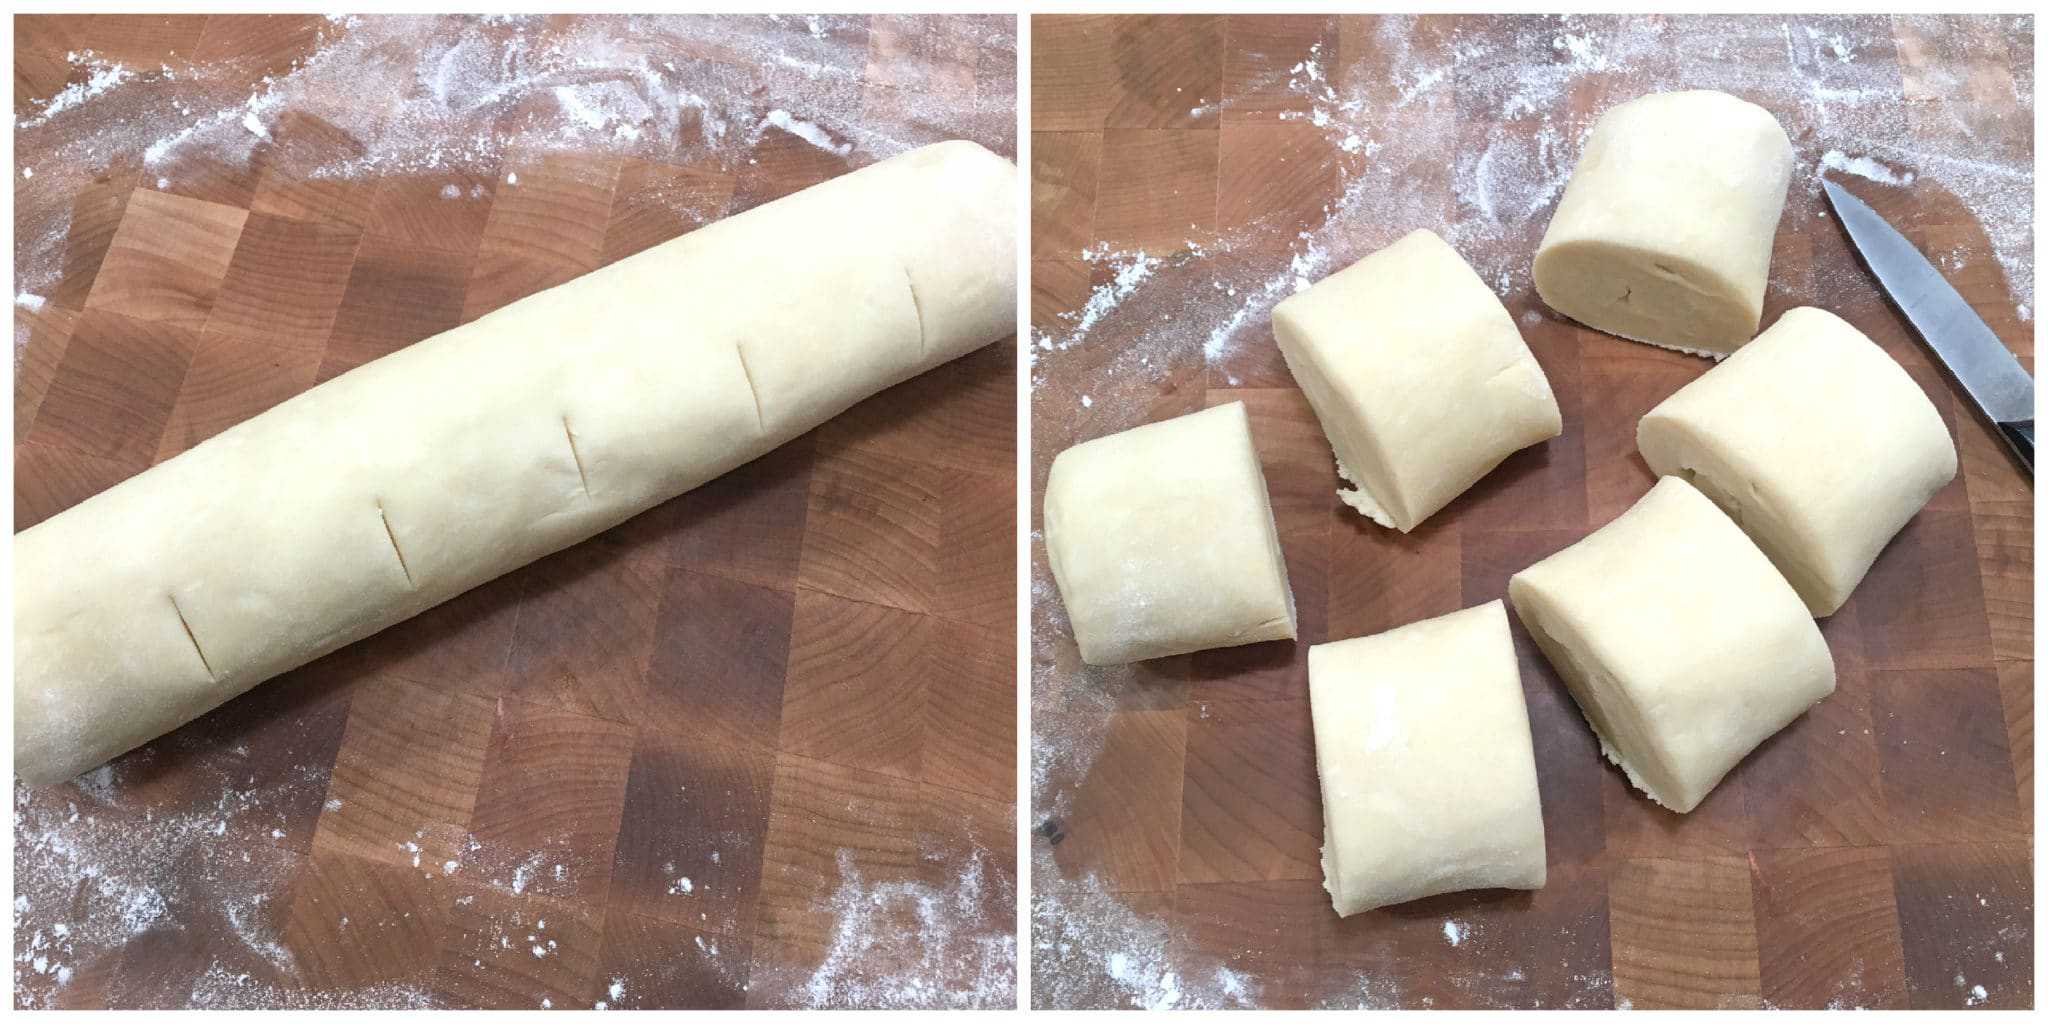
Wrap and keep the other 5 pieces chilled in the fridge while you’re working on one at a time. Roll the dough out on a lightly floured work surface to a 8 inch circle that’s about 1/8 inch thick. You can use an 8-inch plate as your guide and cut the dough around it to form your circle.

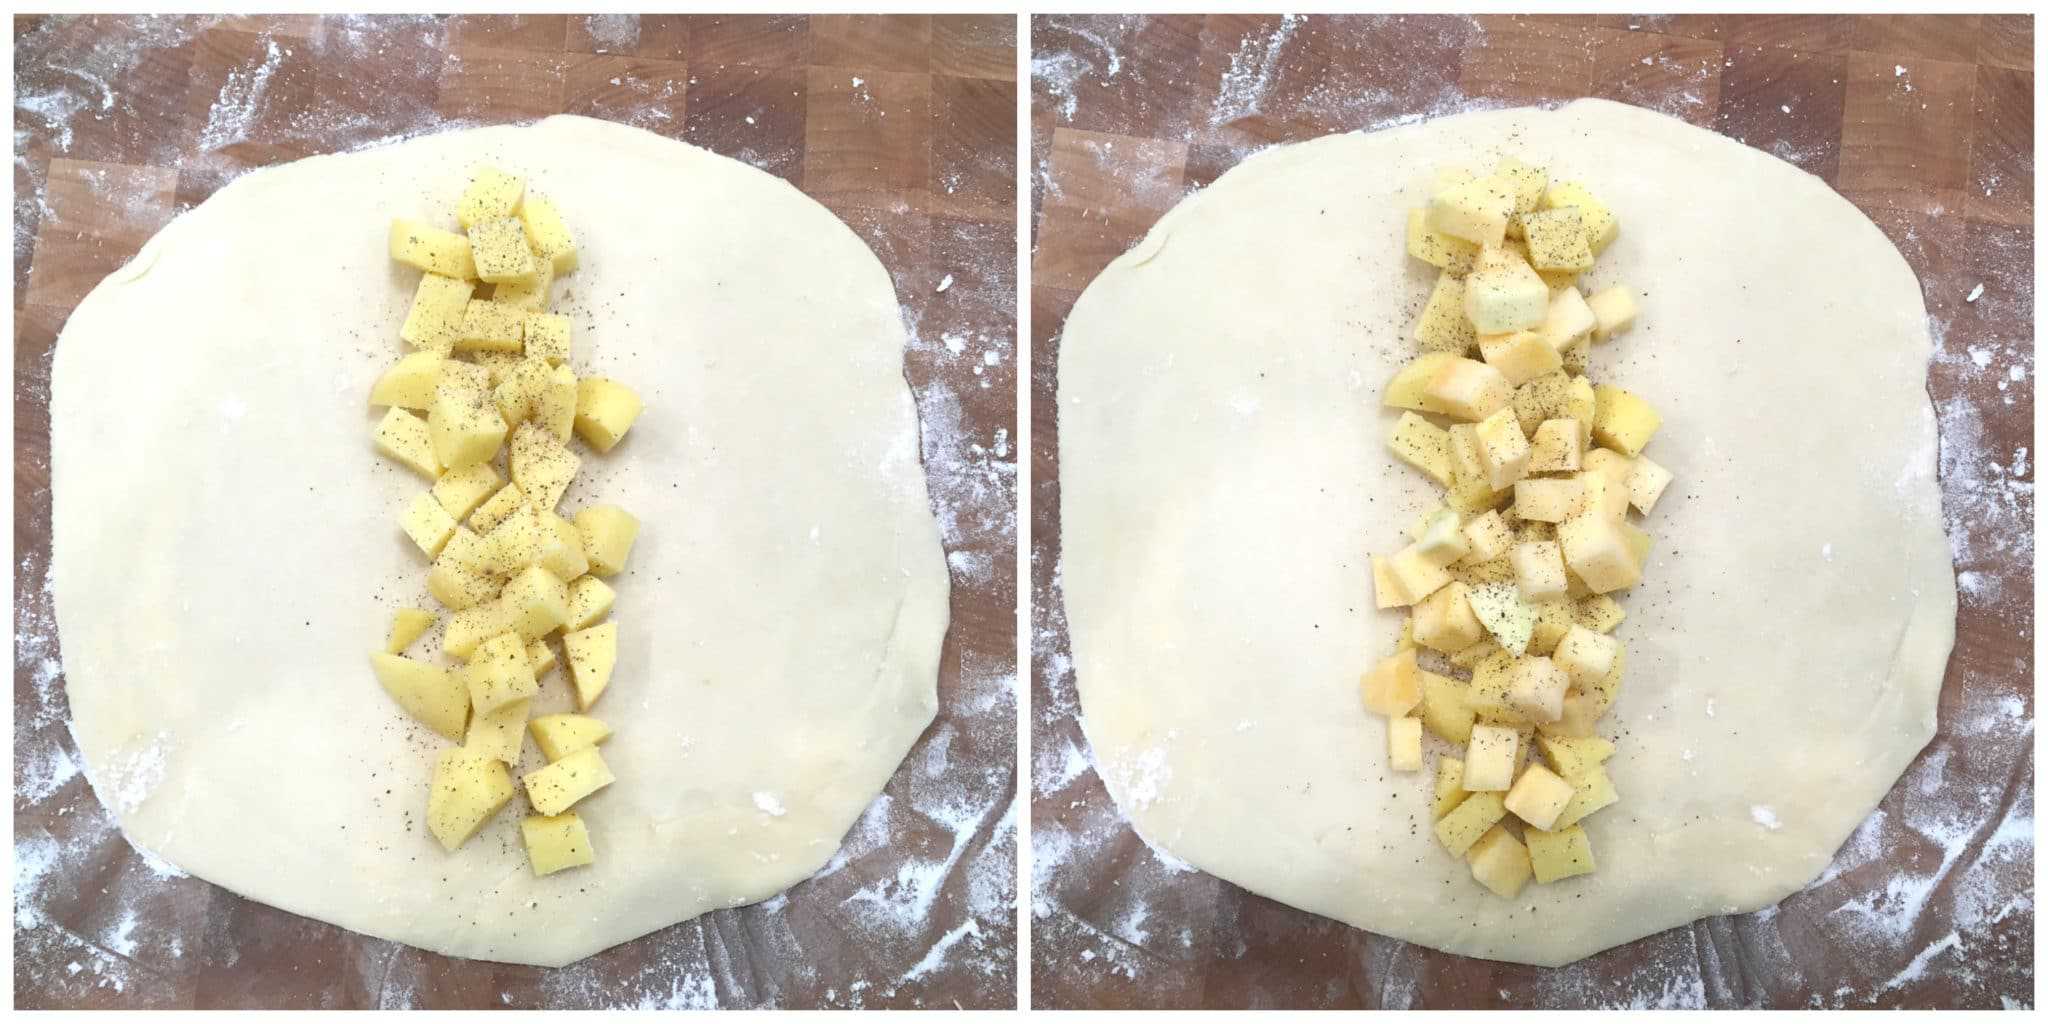
Layer the filling (each ingredient to be divided out between 6 pasties, there may be some excess remaining): Put layer of potatoes down the center of the pastry circle, leaving about 3/4 inch space on the top and bottom edges of the pastry dough. Lightly sprinkle with salt and pepper.
Next add a layer of rutabagas and sprinkle with salt and pepper.
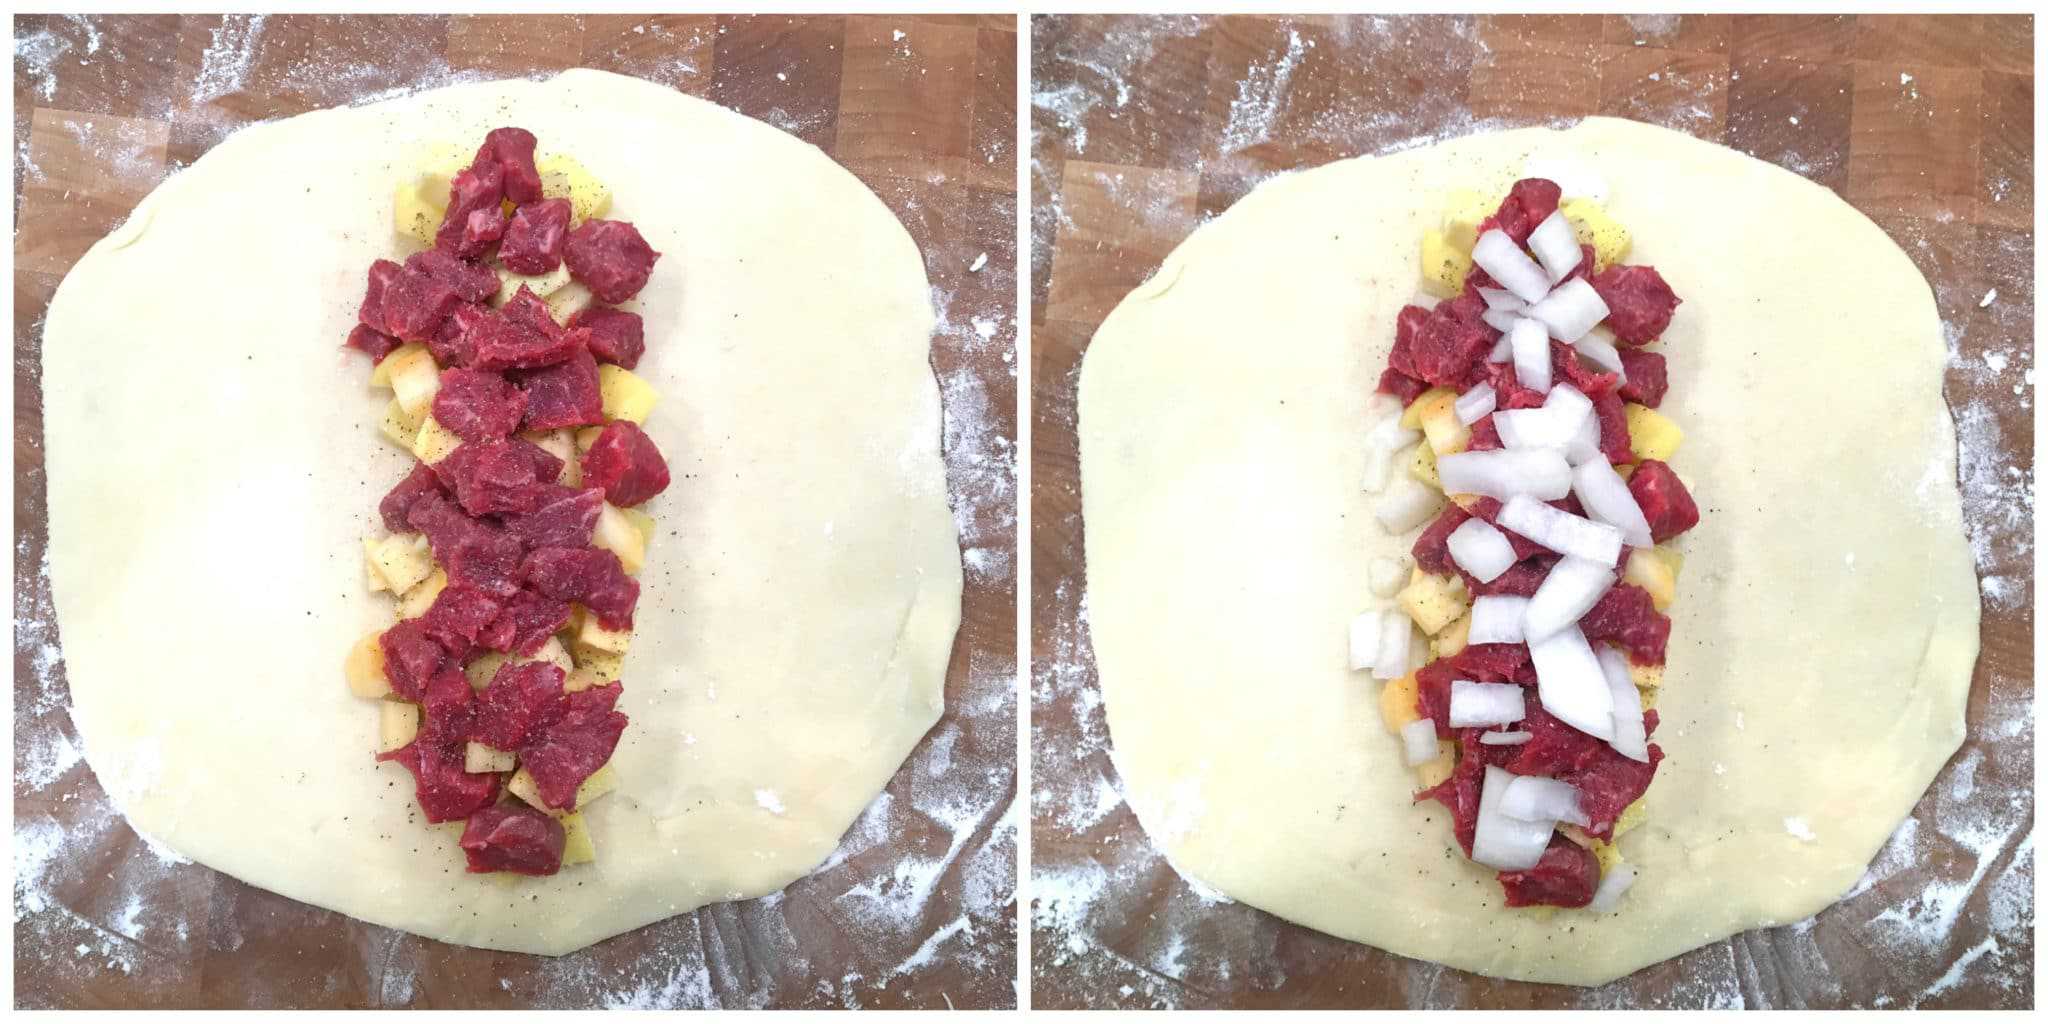
Add a layer of beef followed by the onions and sprinkle with salt and pepper.
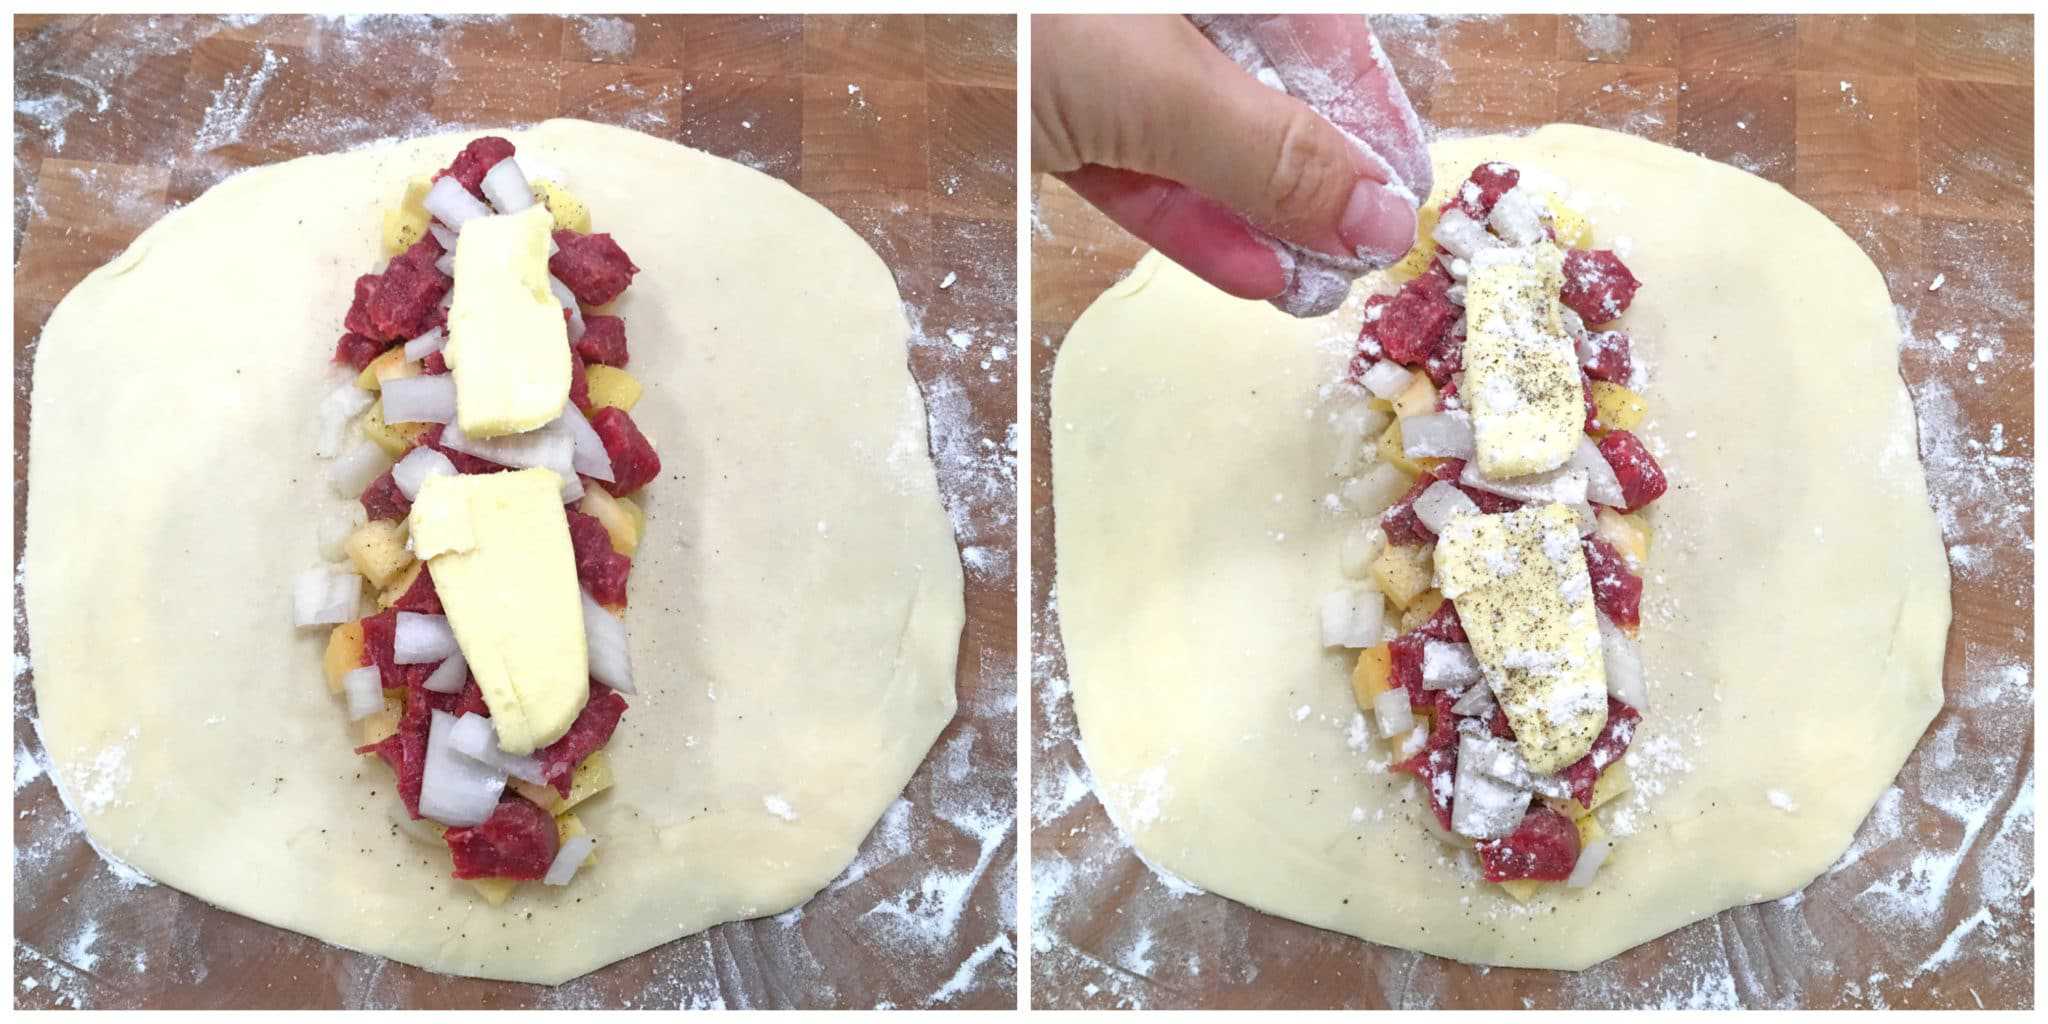
Lay a couple of pats of butter on top of the beef and sprinkle a little flour over the filling.
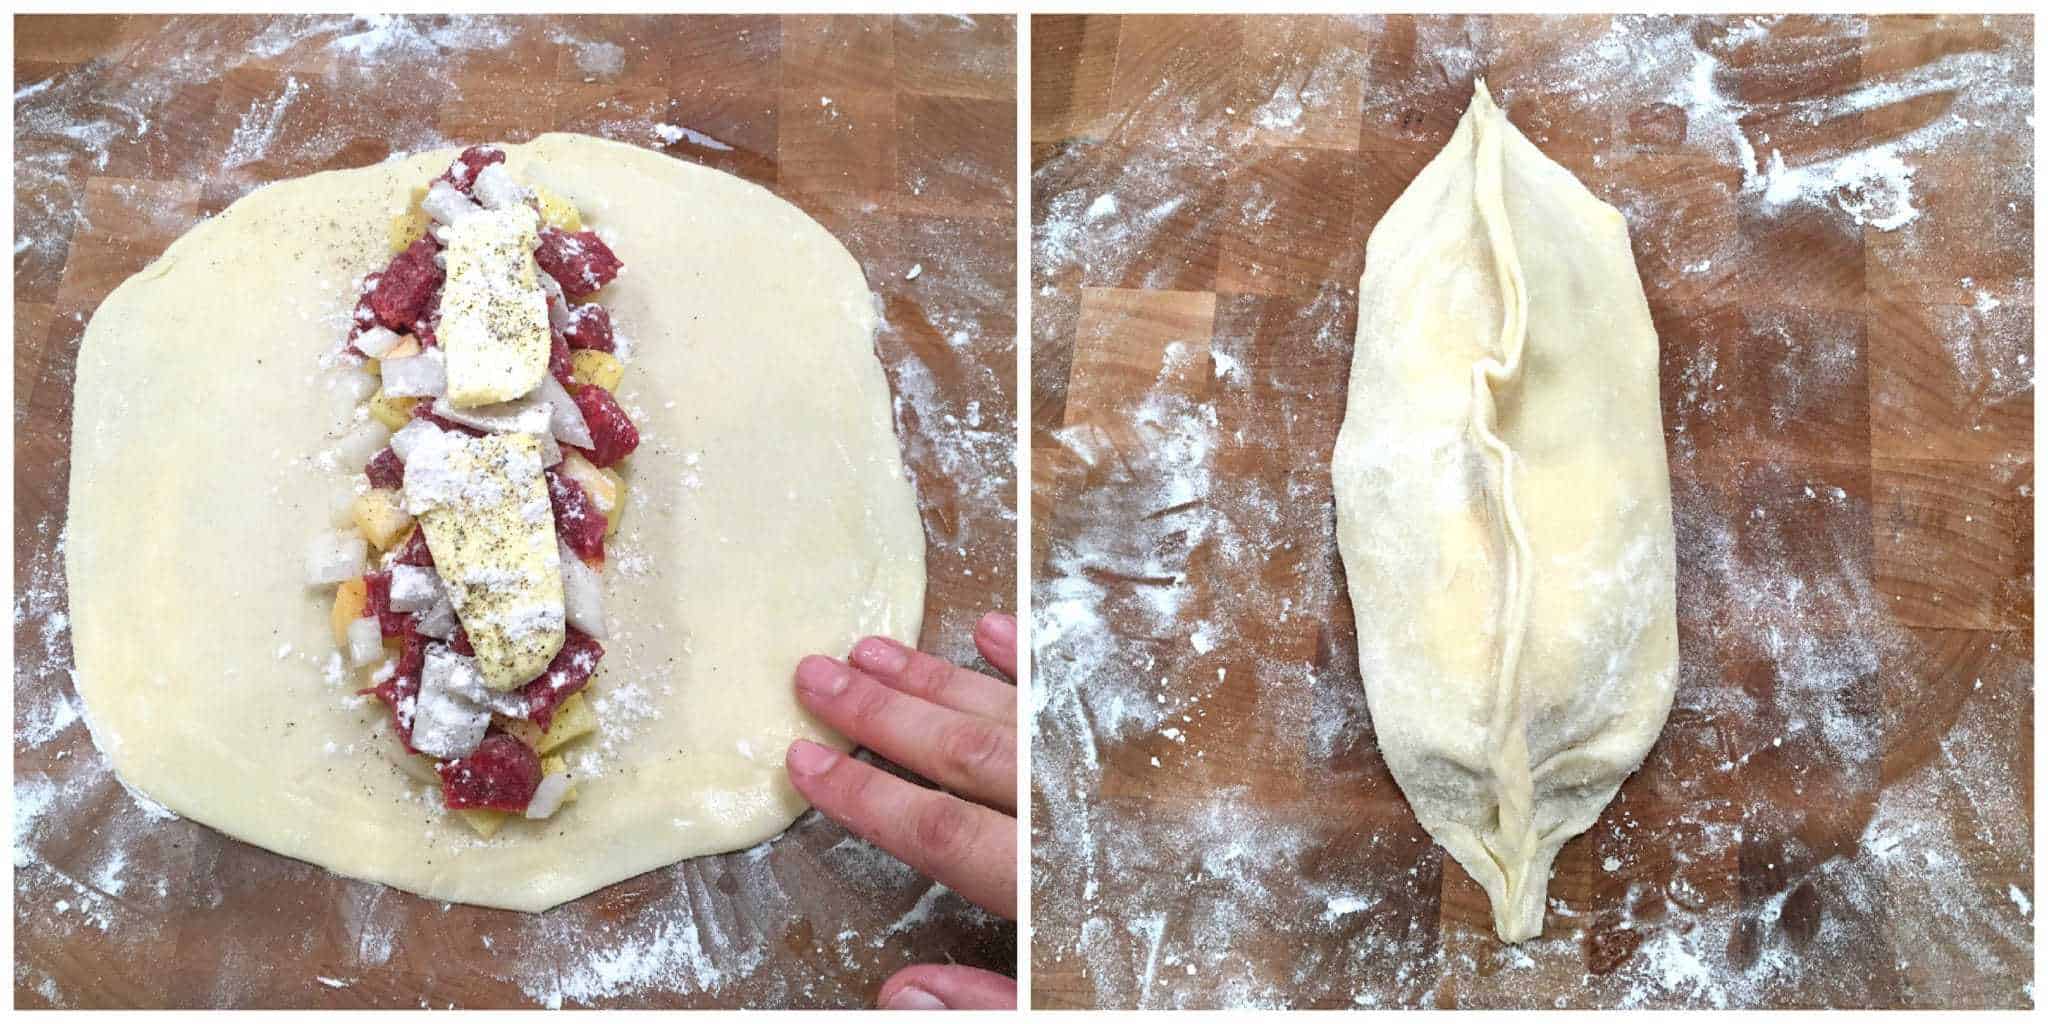
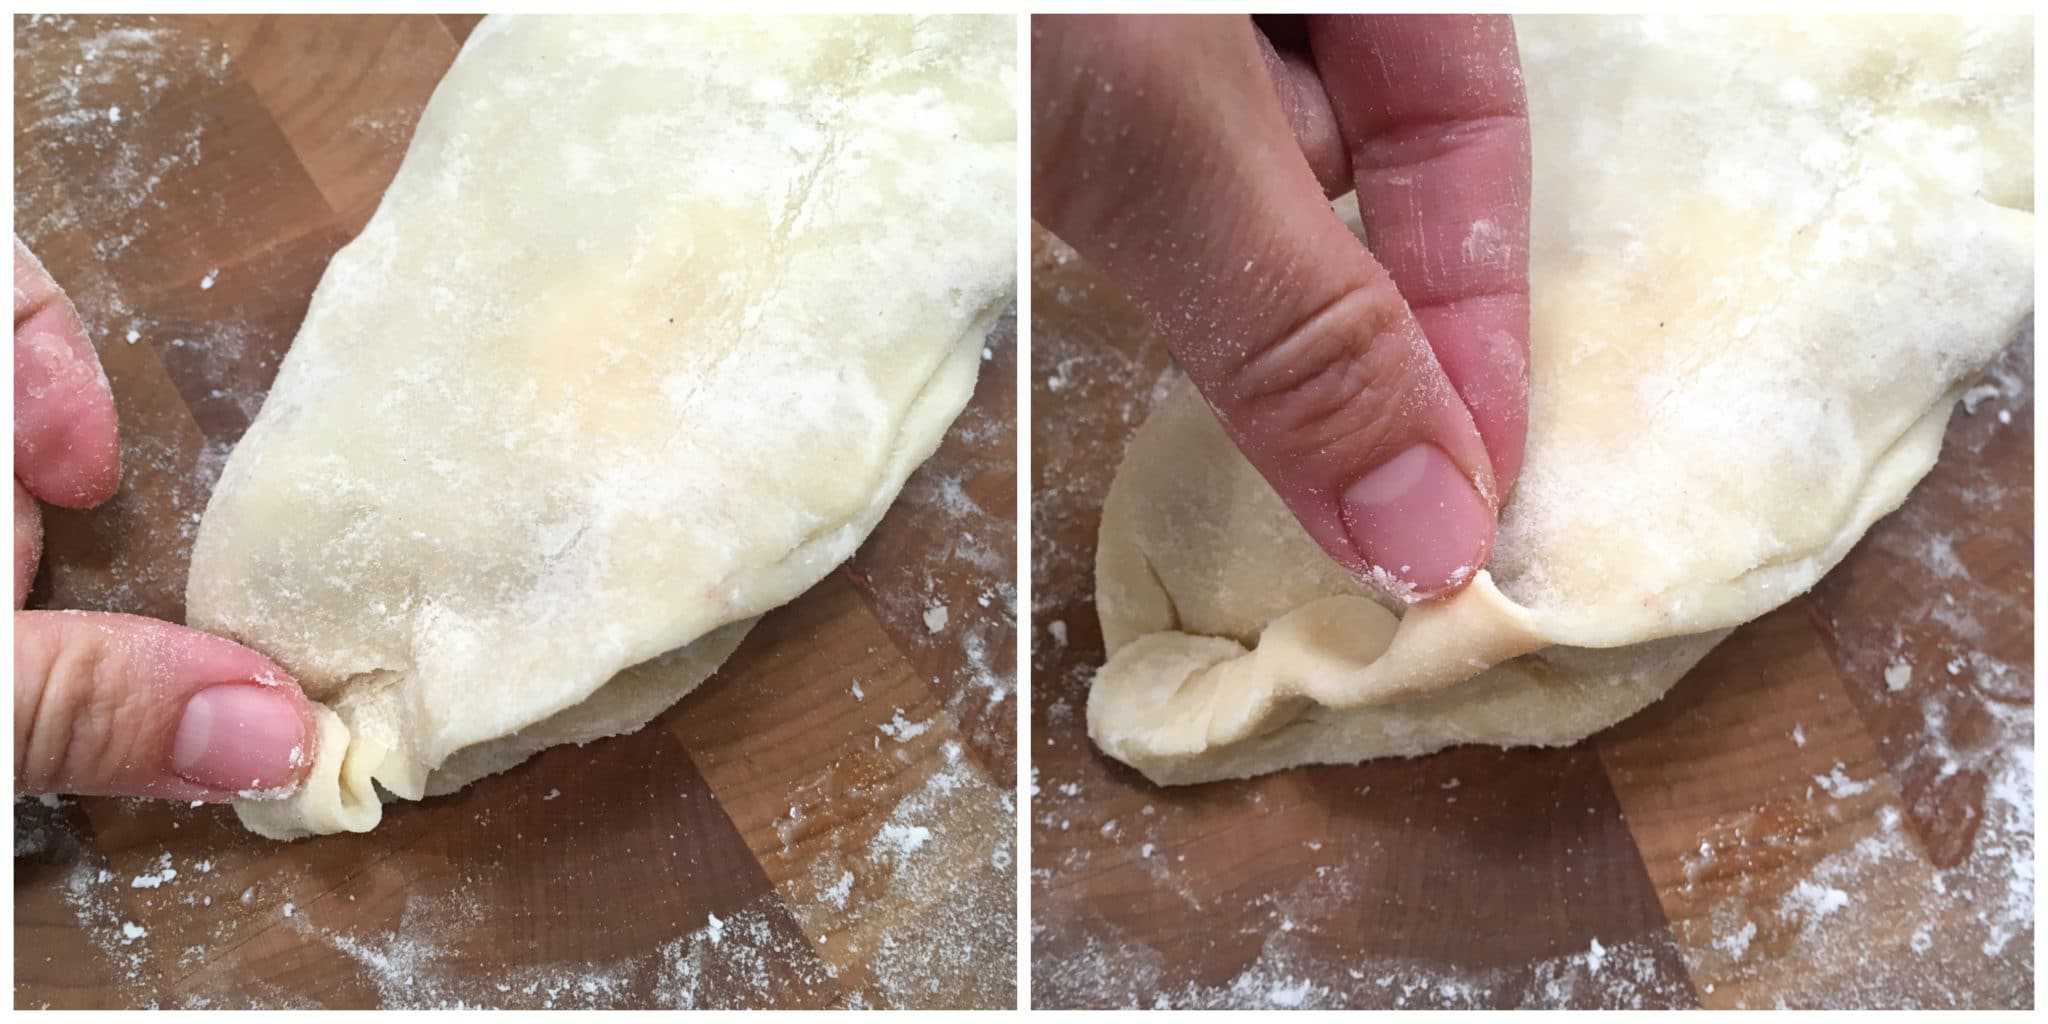
Wet the tips of your fingers and lightly moisten the edges of the pastry dough.
For the remaining steps work gently so that the filling doesn’t puncture through the dough. If this happens, patch up the hole with some of the scrap pieces of pastry dough. Bring the sides up and seal the pasty down the middle.
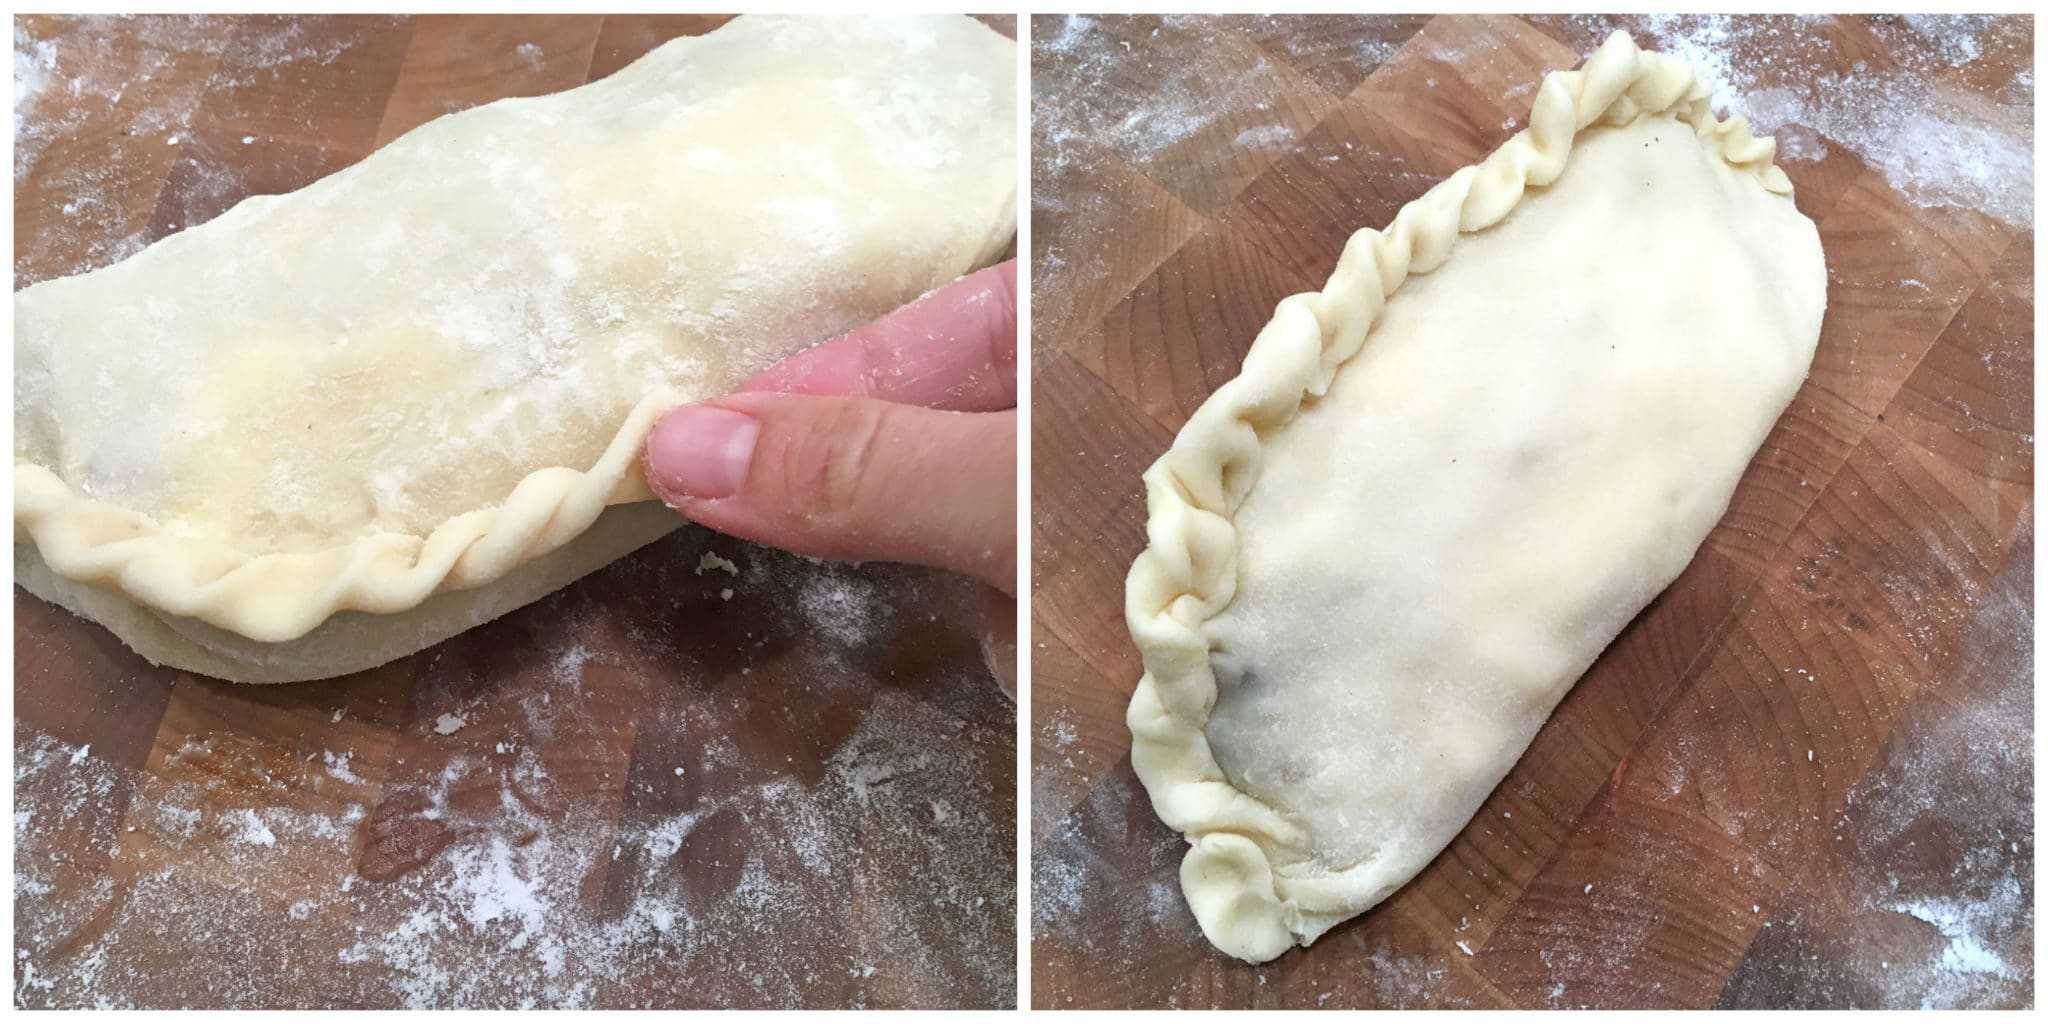
Turn the pasty onto its side and crimp/braid the edges in traditional Cornish fashion. This is the challenging part of making traditional Cornish pasties and takes some practice. There are some YouTube videos you can look up that show how to do this.
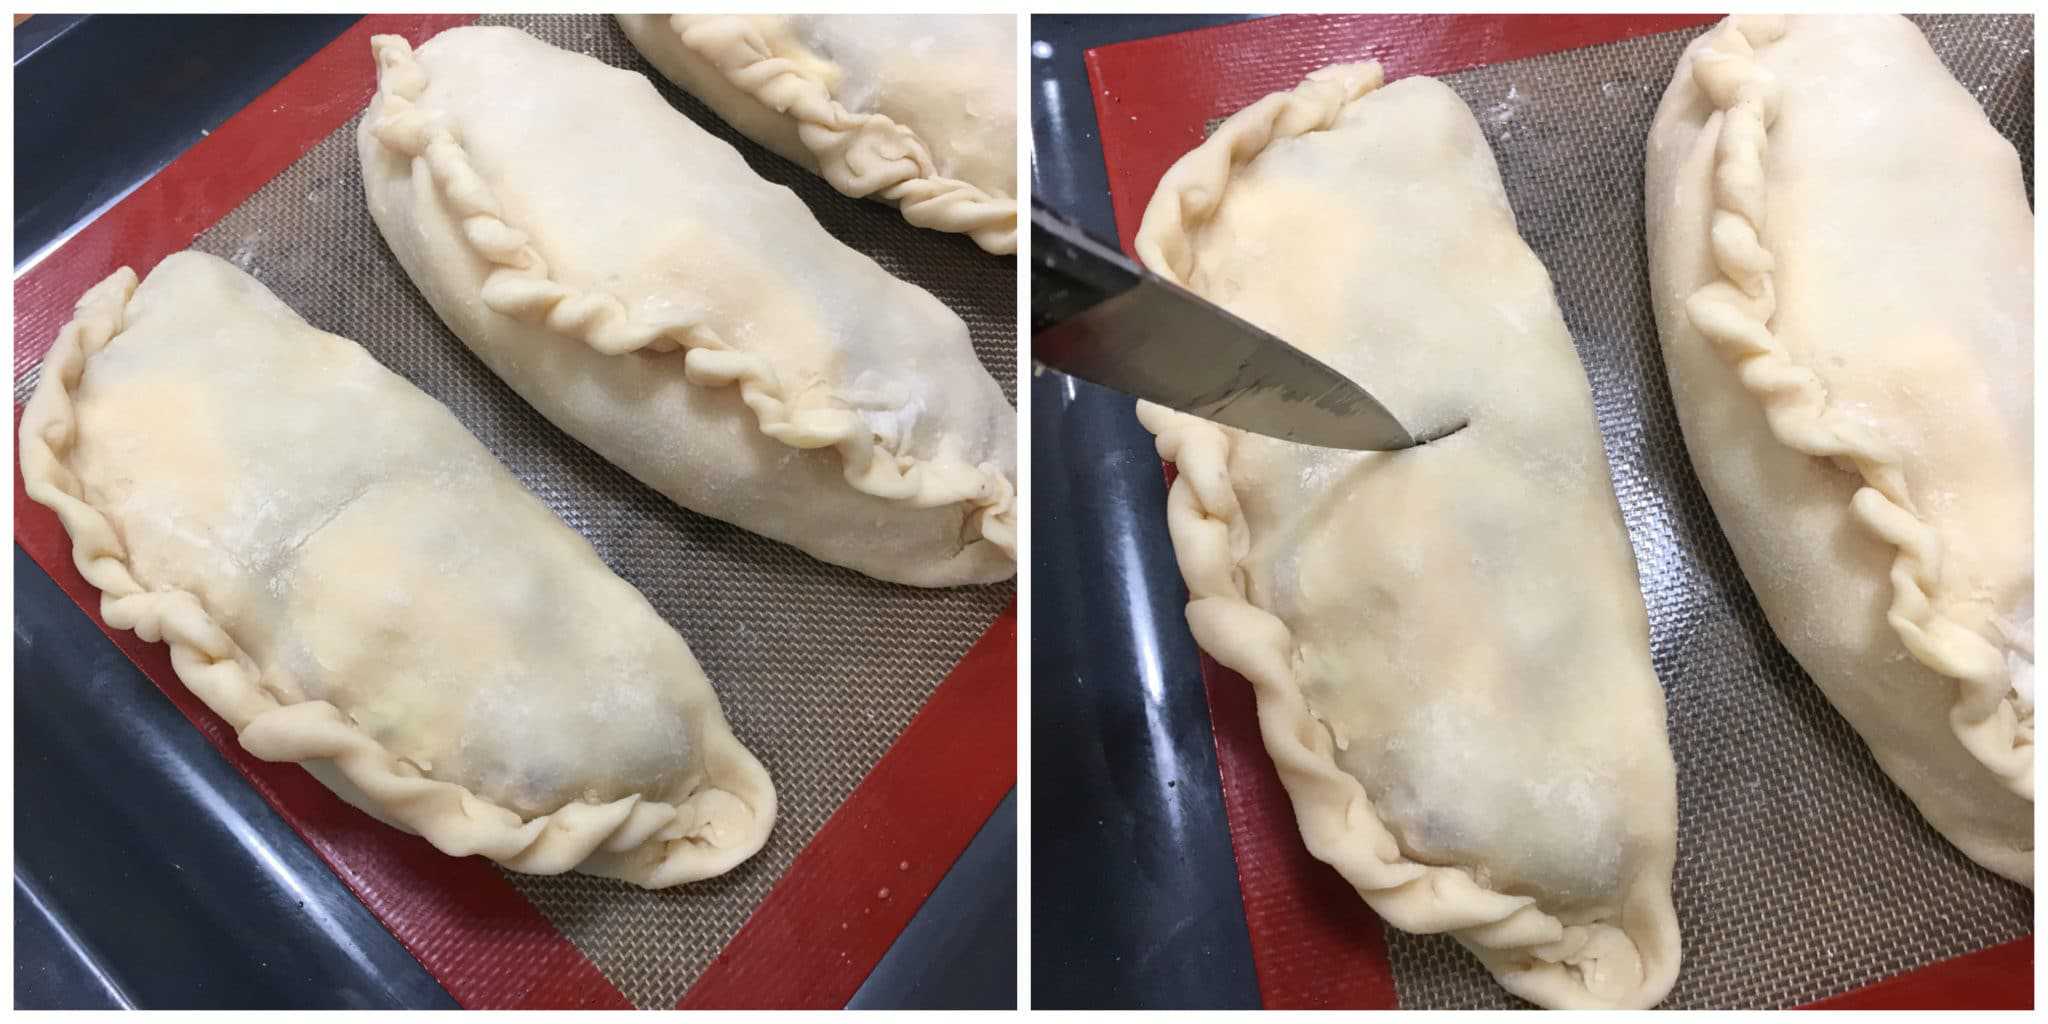
Assemble the remaining pasties and lay them on a lined baking sheet.
Use a sharp knife to cut a slit in the center of each pasty.
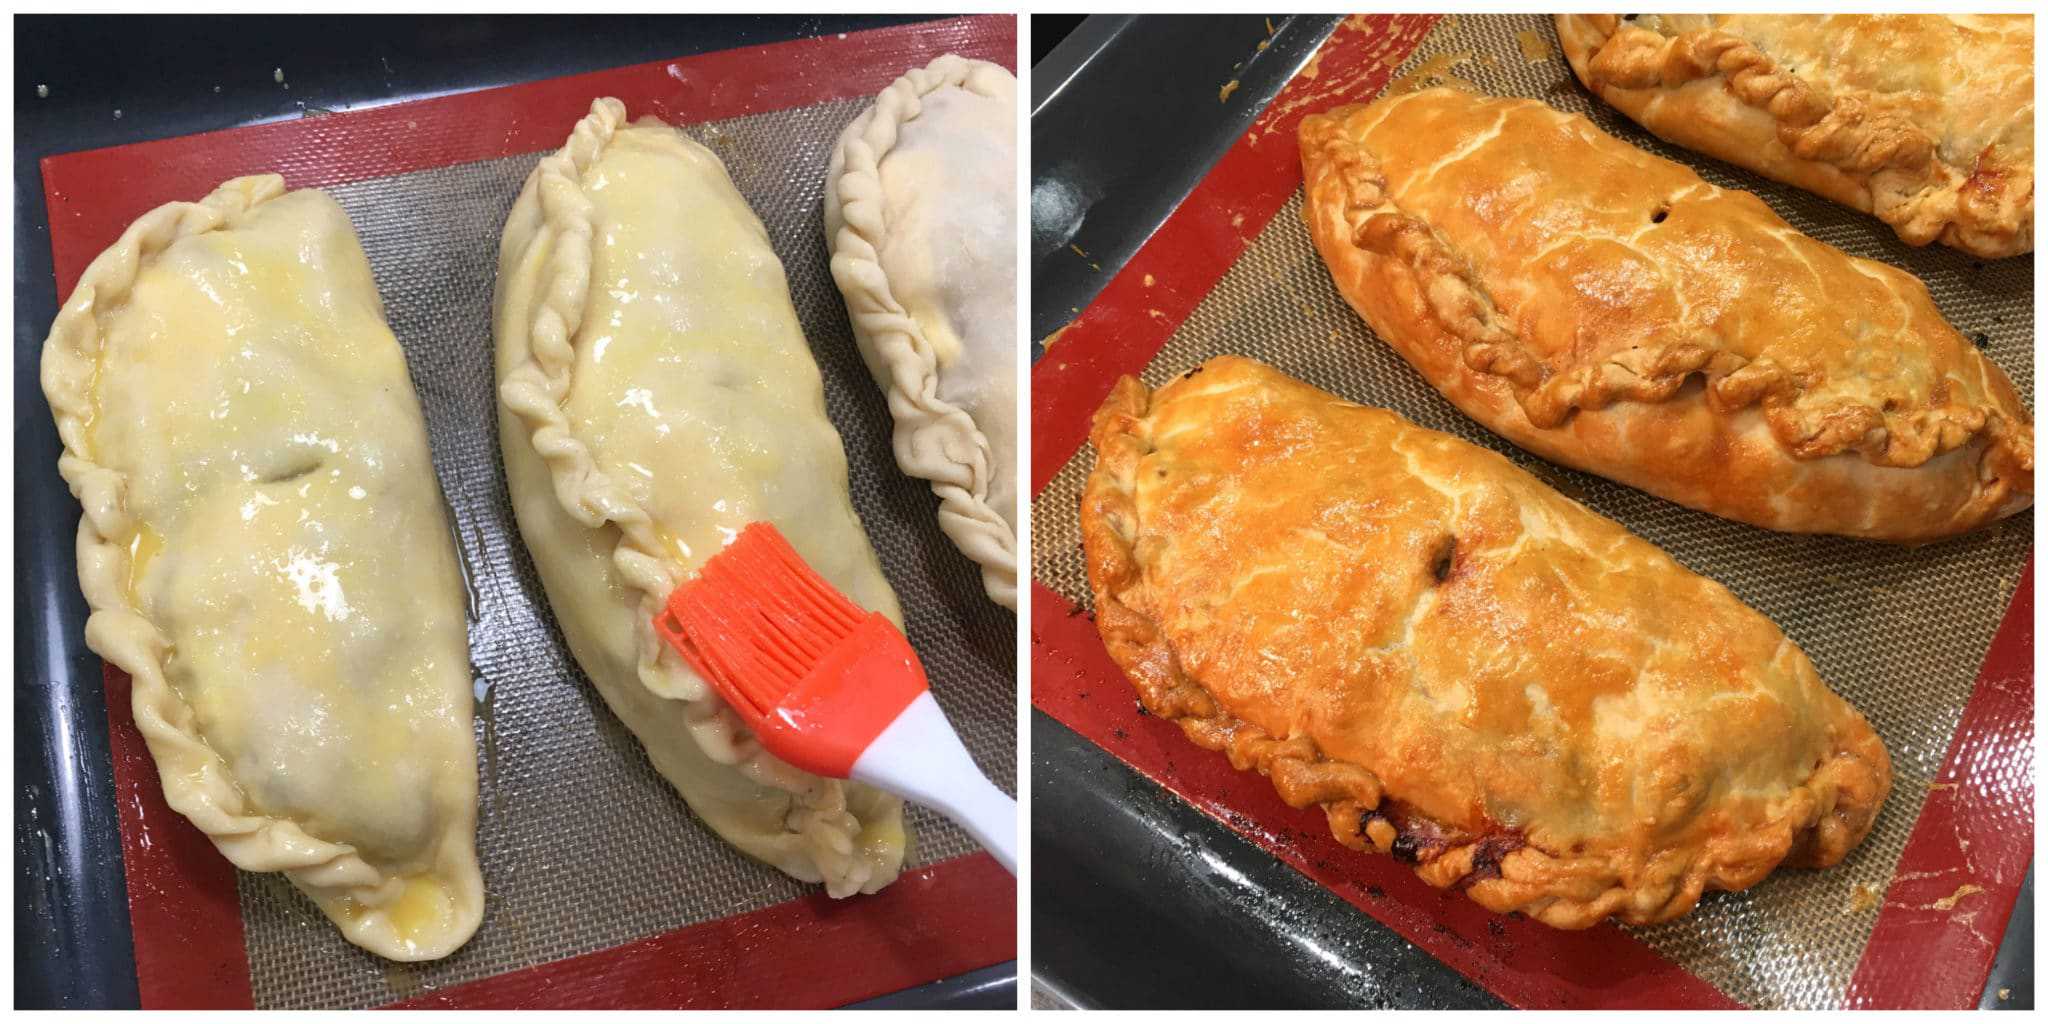
Lightly brush each pasty with the beaten egg mixture.
Bake the Cornish pasties on the middle rack for 40-50 minutes until golden in color. Remove from the oven and let them sit for about 10 minutes (they will be very hot inside) before eating.
The homemade Cornish pasties can be reheated in the oven or in microwave, but for a crispy crust I highly recommend reheating them in the oven.
Can Cornish Pasties Be Frozen?
Yes. The shortcrust pastry holds up well to freezing and thawing and the filling has little liquid which means the pasties won’t get soggy. You can freeze them either baked or unbaked, whichever you prefer. Wrap each pasty individually in plastic wrap and then store the wrapped pasties in a heavy-duty freezer bag.
If you’re freezing them unbaked it’s best to cook them while frozen – don’t thaw them first. Baking time will take roughly 15-20 minutes longer.
If you’re freezing them already fully baked and cooled then you can simply reheat them in the oven (for a crispier crust) or in the microwave and you have a quick, ready-to-go meal.
Serving Recommendations
Cornish pasties are typically eaten on their own as a complete and filling meal, but if you’d like to round out the meal or are making smaller pasties you can serve them with a side salad, mushy peas, baked beans and your choice of condiments like ketchup or Branston pickle (click links for my homemade recipes!).
Enjoy!

For more favorite British recipes try my:
- Fish and Chips
- Yorkshire Pudding
- Mushy Peas
- Bangers and Mash
- Scotch Eggs
- Crumpets
- Cornish Fairings
- Sticky Toffee Pudding
- Mince Pie
- Beef and Guinness Stew
- Spotted Dick
- Chelsea Buns
- Toad in the Hole
- Eccles Cakes
- Scottish hortbread
- Treacle Tart
Save This Recipe

Authentic Cornish Pasty Recipe
Ingredients
For the Shortcrust Pastry:
- 3 1/2 cups all-purpose flour or bread flour (I make mine with all-purpose flour)
- 1 teaspoon salt
- 5 ounces unsalted butter , very cold, diced
- 5 ounces lard , very cold (can substitute butter but lard makes the flakiest crust)
- How to Render Lard (click link to learn how to make it yourself. It's super easy and much cheaper than store-bought!)
- 2/3 cup ice cold water
For the Cornish Pasties:
- 1 pound beef skirt steak or sirloin , cut into small cubes
- 1 pound firm, waxy potato (e.g. Yukon Gold) , peeled and diced in 1/4 inch cubes, or thinly sliced according to preference (**starchy potatoes will disintegrate and turn mushy so be sure to use a firm, waxy potato that will hold its shape)
- 8 ounces rutabaga , peeled and diced in 1/4 inch cubes, or thinly sliced according to preference
- 7 ounces yellow onion , chopped
- salt and pepper to taste
- unsalted butter (for cutting in slices to lay inside the pasties)
- all-purpose flour (for sprinkling inside the pasties)
- 1 large egg , lightly beaten
Instructions
- To Make the Shortcrust Pastry: Place the flour and salt in a food processor and pulse a few times until combined. Add the cold butter and lard and pulse a few more times until the mixture resembles coarse crumbs. Add the water a little at a time, pulsing between additions, until the mixture begins to come together. DO NOT over-mix the dough or the pastry crust will be tough and won't be flaky. Form the dough into a ball, wrap in plastic wrap, and refrigerate for at least 3 hours before using (this is crucial). (Can be refrigerated for a few days or frozen for up to 3 months.)
- To Make the Cornish Pasties: Preheat the oven to 350 degrees F.Cut it into 6 equal pieces (rolling the dough into a log and then cutting makes this easier). Wrap and keep the other 5 pieces chilled in the fridge while you're working on one at a time. Roll the dough out on a lightly floured work surface to a 8 inch circle that's about 1/8 inch thick. You can use an 8-inch plate as your guide and cut the dough around it to form your circle.
- Layer the filling (see note at end): Put layer of potatoes down the center of the pastry circle, leaving about 3/4 inch space on the top and bottom edges of the pastry dough. Lightly sprinkle with salt and pepper. Next add a layer of rutabagas, onions and finally the beef, adding a light sprinkling of salt and pepper between each layer. Lay a couple pats of butter on top of the beef and sprinkle a little flour over the filling.
- Wet the tips of your fingers and lightly moisten the edges of the pastry dough. For this next part work gently so that the filling doesn't puncture through the dough. If this happens, patch up the hole with some of the scrap pieces of pastry dough. Bring the sides up and seal the pasty down the middle. Turn the pasty onto its side and crimp the edges in traditional Cornish fashion (see blog post pictures as a visual).
- Assemble the remaining pasties and lay them on a lined baking sheet. Use a sharp knife to cut a slit in the center of each pasty. Lightly brush each pasty with the beaten egg mixture.
- Bake the Cornish pasties on the middle rack for 40-50 minutes until golden in color. Remove from the oven and let them sit for about 10 minutes (they will be very hot inside) before eating. They can be reheated in the oven (recommended for a crispier crust) or microwave. NOTE: Depending on how full you stuff the pasties you may have leftover filling. No worries, just fry it up together or add it to soup and enjoy it as a separate meal.
Nutrition
Originally published on The Daring Gourmet January 22, 2020

Hi, I’m Kimberly Killebrew and welcome to Daring Gourmet where you'll find delicious originals, revitalized classics, and simply downright good eats from around the world! Originally from Germany, later raised in England, world-traveled, and now living in the U.S., from my globally-influenced kitchen I invite you to tour the world through your taste buds!


If you have crimped them down the centre of the top of the pasty, as illistrated in your recipe, you have in fact made a Devon pasty NOT a Cornish pasty.
Grahame, not sure which photos you’re referring to but mine are crimped down the side, not the top. Look at the photos of the finished pasties.
Thank you very much for this recipe! They turned out fantastic, much nicer than shop bought. I thought they might not have enough flavour, but they were wonderfully tasty. Great Sunday afternoon – really enjoyed myself making these…
Thank you, Katie, I’m so glad you enjoyed them!
My mom and Dad were born and raised in the U.P of Michigan. I member my mom said that during the depression her mother would crack an egg inside because they could not afford the meat. It is the substitute for protein. My family of ancestors came from Cornwall England and my mothers side is French Canadian from Quebec. My mom made the best pasty’s. However you want to spell it or say it you know what I mean. I just want to say one other thing my mom did when making her best pasty.If she knew that you had a big appiette, she would make a larger one because she knew how much you were looking forward to seeing it on your plate. In closing my mom had a extra trick to a moist pasty.When you take them out of the oven, cover them with a towel for 1/2 hr.Simply perfection. Thanks mom.
I LOVE the informative bit about what makes this recipe authentic. As our cooking and baking becomes more international we are beginning to mix flavours, spices and ingredients. Sometimes what starts off as an ethnic dish from a certain area often does not taste the way it should and is only identifiable due to its name. And I’m totally guilty of this. My curries rarely taste Indian, my Ghormeh Sabzi hardly passes as Persian. And I hate it when my best friend gives me a vegan brownie made from chick peas! I am so glad to hear that certain foods must stand up to strict requirements before they can bear their name. I’ll be making REAL pasties tomorrow, but the problem is I won’t even know if they taste Cornish :)
I have been wanting to try making a traditional Cornish Pasty as most of the ones I have bought in Australia have been a disappointment, especially the pastry. Your recipe was perfect and turned out better than I expected. We eat a lot of highly spiced food and I was so worried that given the few ingredients and nothing but salt and pepper it might end up being bland. Was I wrong! Super tasty and will now become a family favourite. We had ours with a crisp side salad and home made tomato chutney. Thanks
That’s wonderful, Sonia, I’m so glad everyone enjoyed them, thank you!
your metric measures do NOT increase when you double or triple the quantity you want to make
Used butter and shortening and a heaping tsp of kosher salt for the pastry. After chilling, an easy pastry dough to handle. I found that a flat iron steak was the perfect cut for pasties. A delicious recipe, especially the rich flaky crust. Question: I froze 3 fully cooked pasties. Should I reheat them fully frozen at 350? Or defrost first? Thank you!
Fantastic, Diana, thanks for the feedback! I would thaw it first, overnight or up to 24 hours in the fridge, and then bake at 350F until heated through. You’ll probably need to tent the pasties with foil to prevent them from over-browning.
Scrumptious! I made 1 ½ times the shortcrust which yielded 9 pasties with the perfect amount of filling. I used shortening instead of lard and got flaky, easy to handle pastry which I rolled out, stacked and chilled several hours in advance. Later everyone made their own pasty after watching a short YT video of a Cornish gran doing it. Great fun and great food.
Wonderful, MarySC, thanks so much for the feedback!